When I left off, I had the case members cut, box joints cut and the case dry fit. Next up was the plywood back. I cut it the first piece to length then set the fence to cut it to width. Then forgot to turn the sheet and cut the length down to width. Stupidest thing I've done in a long while... So I got on HD's site and spent another $50 on another 1/4 sheet. That one went better but I forgot to add the rabbets to my length when I cut it (look at the plans dumbass!). No major issue, I just won't rabbet it into the sides. It wasn't necessary anyway. It'll be rabbeted into the top and bottom and I'll put some corner trim on the back to hide any possible gaps in the sides.
So I cut the rabbets on the plywood and grooves in the horizontal case members. All dry fit, everything is peachy.
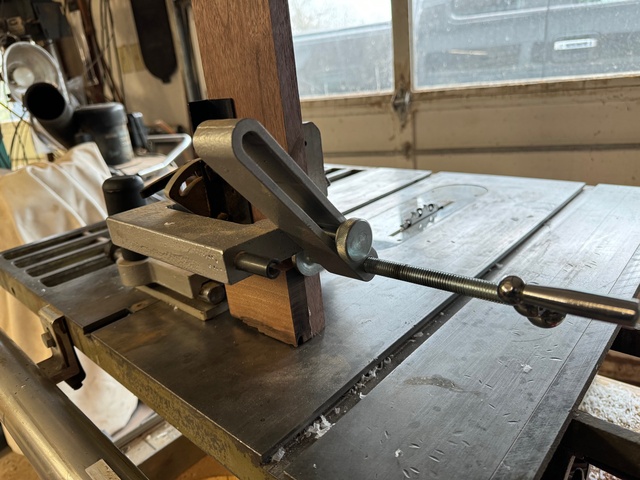
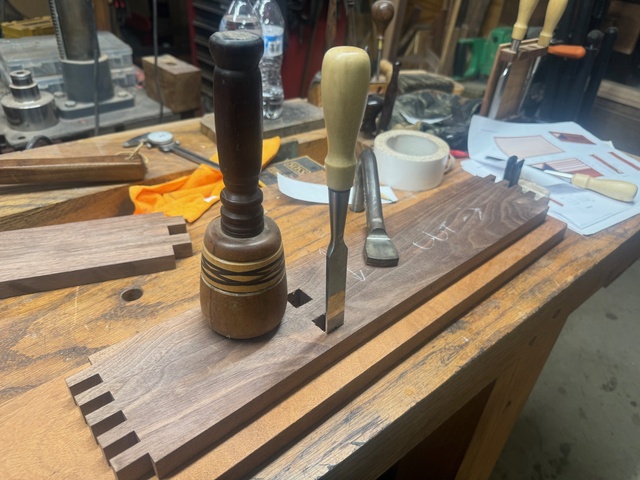
Now onto the last structural member, the horizontal center member. It will be through mortised into the sides and dadoed into the back. I started by cutting the tenons on the piece. I find it better to cut the tenons and then use them to layout the mortises so I know they fit tight. I can always cut the mortises larger but I can't add material back to the tenons.
I cut the tenons using my tenon jig and my box joint stack on the table saw. I prefer the box joint stack to a dado stack because it leaves clean corners and flat bottoms.
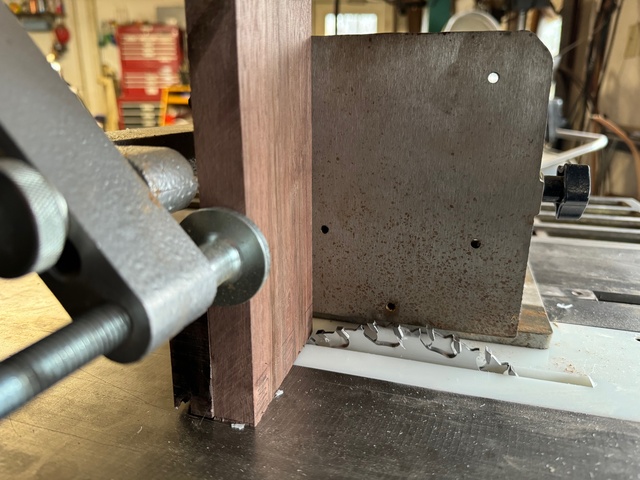
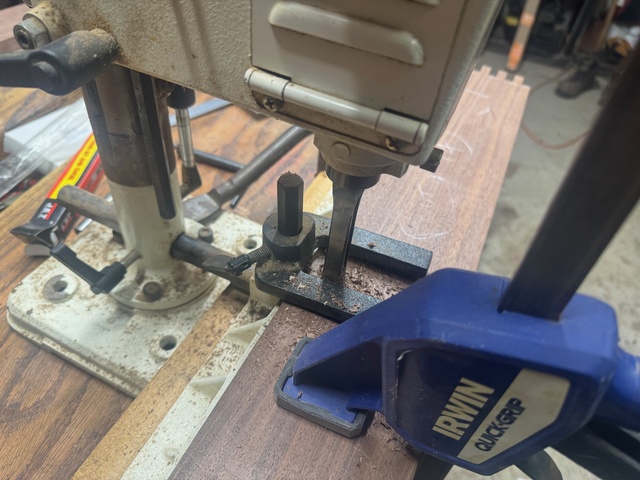
If you look closely, you'll see a piece stuck to the back where the joints will go with double sided tape. That prevents tearout from the blade on the keeper piece. Once my tenons were cut, I used them to mark the mortise locations on the side pieces and wasted the bulk out on my hollow chisel mortiser. The tenons are 3/4" but the largest bit my mortiser will take is 1/2" so I didn't trust it to make good clean mortises since I had to make overlapping cuts. So I made sure to leave my lines then followed up with chisels to clean the edges up and get a good fit.
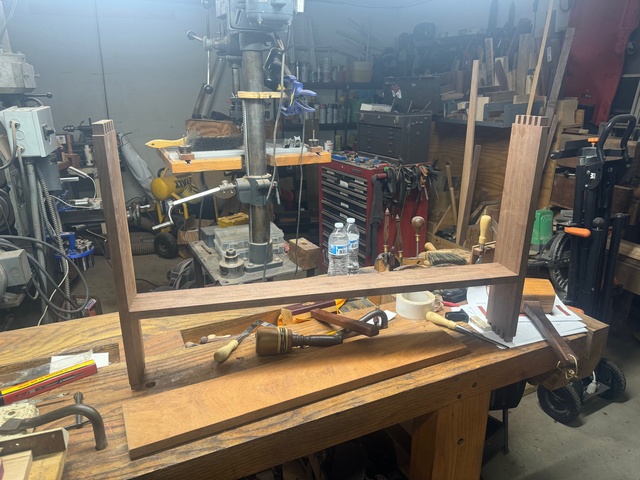
All went well with the dry fit.
I did learn to keep my show side up on the mortiser. Even though I had a backer, I got some tearout on the first side that will show on the outside. I should be able to sand out what I didn't pare off with the chisel though. I also have a problem with my table saw height not locking down and the blade has a tendency to slowly drop a bit. So I still ended up evening up the floors of the tenons with a chisel on one piece.
Now that the piece was mortised into the sides, I laid it on the plywood backer and marked the location of the dado. I didn't trust it to measuring. Then I cut the dado on my router table and did another dry fit.
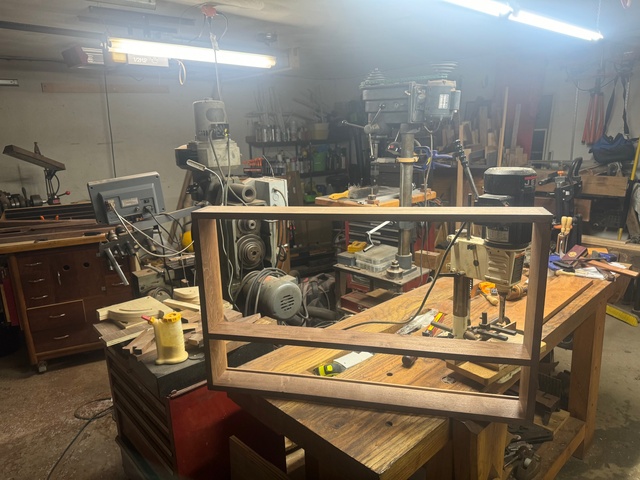
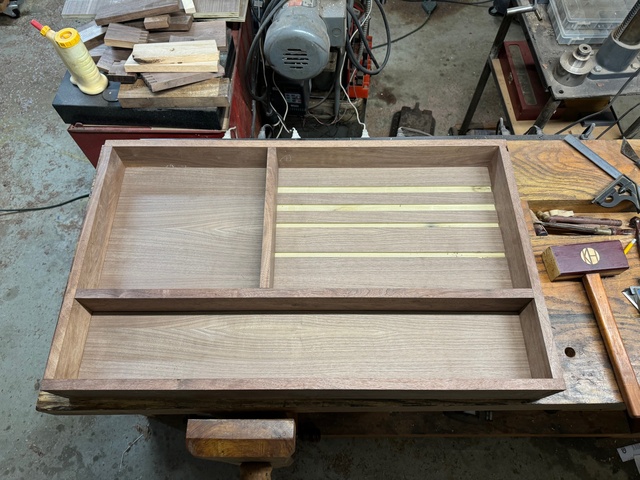
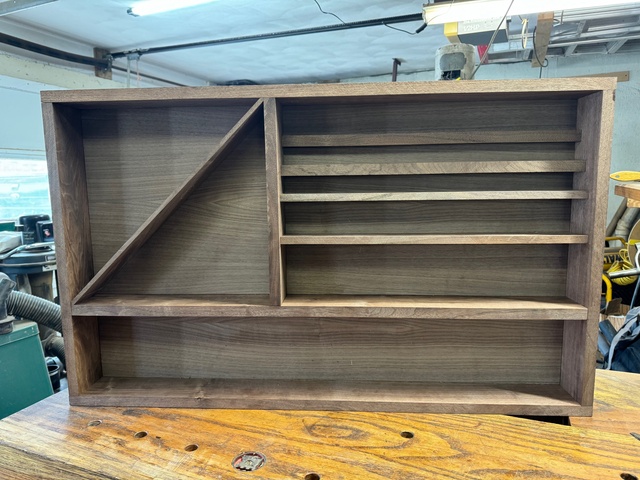
Whew! Everything is tight and clean. Next was the vertical piece that will separate the flag/medals section from the coin shelves. On my plans I had drawn it up so it was dadoed into the plywood and the back side was mortised into the horizontal members. I couldn't recall what made me think the mortises into the horizontal pieces was needed when it wouldn't show and just gluing it into the dado in the plywood would be plenty sufficient. But I figured I had a good reason when I designed it so I just followed my plans.
Here is the vertical divider and the grooves cut into the horizontal pieces to accept the tenon (or whatever it should be called since it only has one shoulder?) and the dado cut into the plywood. Another dry fit leaves me smiling.
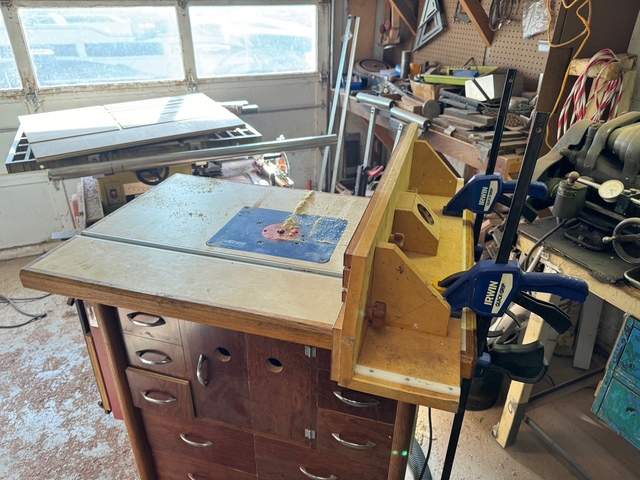
When I cut the dado for the divider piece, I went ahead and laid out the dados for the coin shelves and cut them at the same time. For the last one, my router table wasn't deep enough so I had to swing my fence to the side and clamp it down. Time for another boo-boo 😫 I got one of the clamps cockeyed and a few inches into the cut, it decided to right itself and the fence slipped.
So I had a very calm internal dialogue reassuring myself that it wasn't in a highly visible spot and could be repaired with filler and no one else would ever know. Evidently my inner-voice sounded like cursing and throwing things though because my wife sent me a text to calm down because the grandkids were still asleep. But I convinced myself I was right, fixed the fence and finished the dado.
Next were the coin shelves. I re-assembled everything so I could measure and cut them to fit good and tight instead of hoping the plans were right. I had already ripped them all to size so I set up my Incra miter gauge and went to crosscutting. Fortunately, I found all my case pieces were good and square to the plywood so 90 degree crosscuts were all that was needed to avoid any gaps at the edges. I was even lucky enough that they were all the same length so I didn't even have to tweek my miter gauge stop once I got the first one dialed in 😊
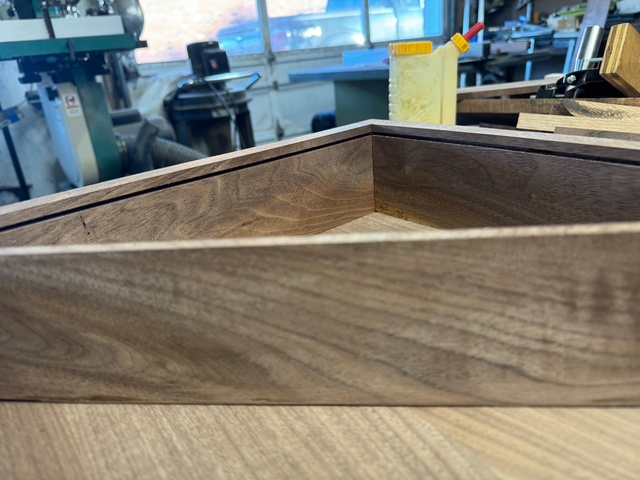
Next up was the divider that separates the flag from the medals. I cut it so it was a little longer than it needed to be then scribed a centerline on both ends. I turned my table saw blade to a 45 degree bevel and and started to nibble away on one corner until I found the the stop position that cut a 45 that just touched the centerline. Then flipped the part and ran it at the same setting and got a clean 90 on the end of the board. Next I flipped to the other end and did the same. Then I started moving the stop on the miter gauge 1/64" at a time until I got a perfect fit.
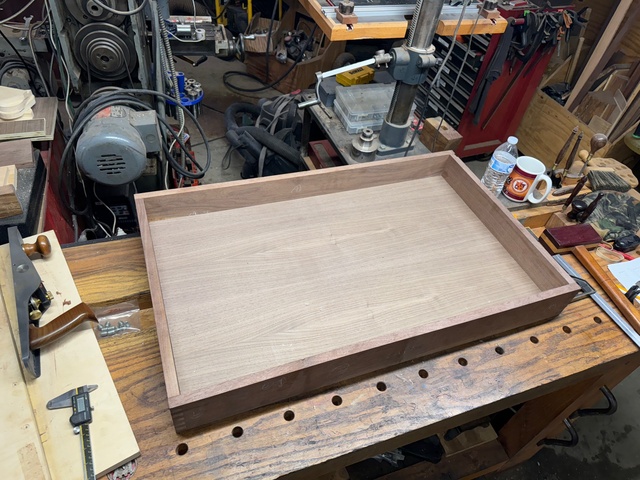
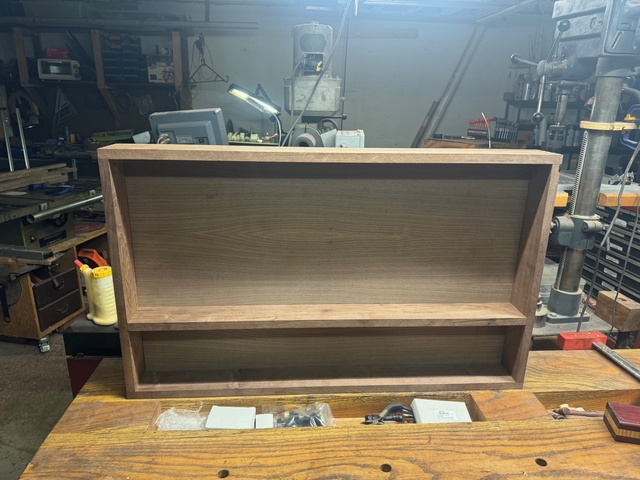
Feeling pretty good with the final dry fit.
Until I noticed that the 45 degree divider was about 1/32 too short and didn't set flush with the rest of the case pieces. WTH?!?! That's what I get for ripping pieces to final width before measuring the ACTUAL final width of the mating pieces. Then it dawned on me that when I did the design, I did it with a 3/4" backer but the plywood I bought actually measures .703" not .750". That hadn't been an issue so far because I just adjusted my dado depths in the plywood. But this piece just slides in and isn't dadoed into the back so that .047" showed up.
No biggie. I just ripped a thin strip off some scrap and glued it to the back side of the divider and when it dried, sanded it until I got a flush fit. It'll be completely hidden back there by the medals and the flag so this internal dialogue was a little quieter and my wife didn't hear it this time.
My weekend was just about over at this time so I decided to go ahead and work on the trim pieces that will go over the flag to hide any gaps at the edges between the flag and the case pieces. That would allow me to put the router table to bed for this project and turn it into an assembly table and free up my workbench for more work space. The trim pieces will be 3/4" wide and 1/4" thick and have a 1/8" rabbet on one edge that will fit in grooves in the case members and the divider piece. So I put a 1/8" bit in the collet and cut my grooves.
Then I ripped a couple of long strips down and cut them to 1/4" tall and cut the rabbets on the back. Then I set my miter gauge to 45 degrees and cut two pieces that would meet at the top corner. Fortunately my case came out uncharacteristically square and the corner was a dead 90. So then I set my miter gauge to cut the 22.5 degree joints. And ruined both pieces...😡 The long shallow angle leaves a really sharp corner. So when I was nibbling it down a little at a time to sneak up on a perfect fit, the blade snapped the sharp corners off. Grrrrr. So now I have to rip some more pieces down and set up the router table again to cut the rabbets. Then I'll make a sacrificial fence for my miter gauge to back up the cuts and try again. At that point I was getting hungry and it was getting late so I decided to call it a day.
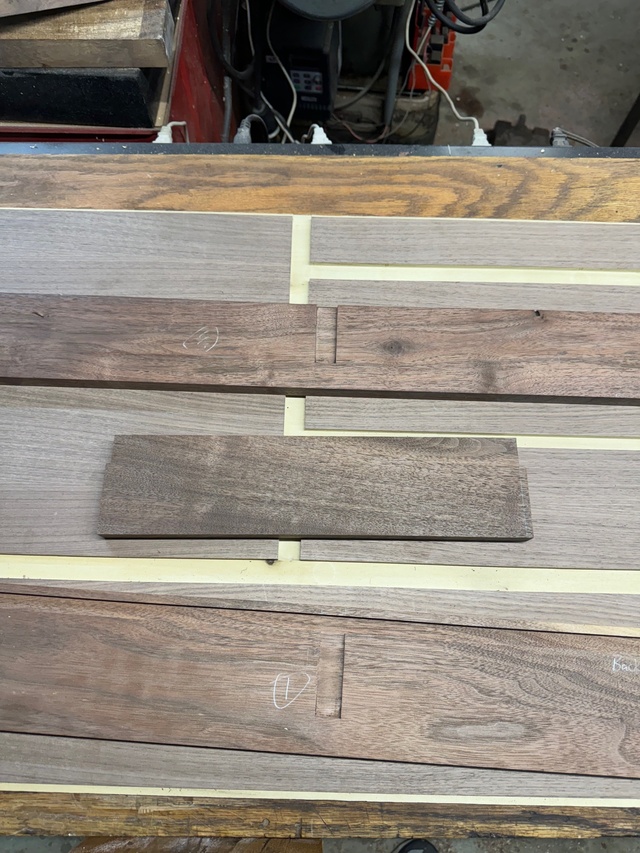
When I get back to it, I'll finish up the trim pieces and move on to cutting the pieces that will set in the bottom for coins. Those pieces aren't particularly challenging but I'm running out of Walnut pieces that don't have any checks or sapwood in them so I have to be methodical about how I slice up what I do have and make sure I can get what I need. Then I will have to cut grooves into all the coin shelves, some 1/4" wide and some 3/16" wide. The trick is they all have to be flat bottomed and they all have to be angled at 10 degrees and they are all pretty close to an edge so I have to be certain not to screw up and break any corners off. Once I knock all that out, I'll start working on the door. Crap. Just remembered I'll have to use the router table to cut the joinery for the rail and stile joints...
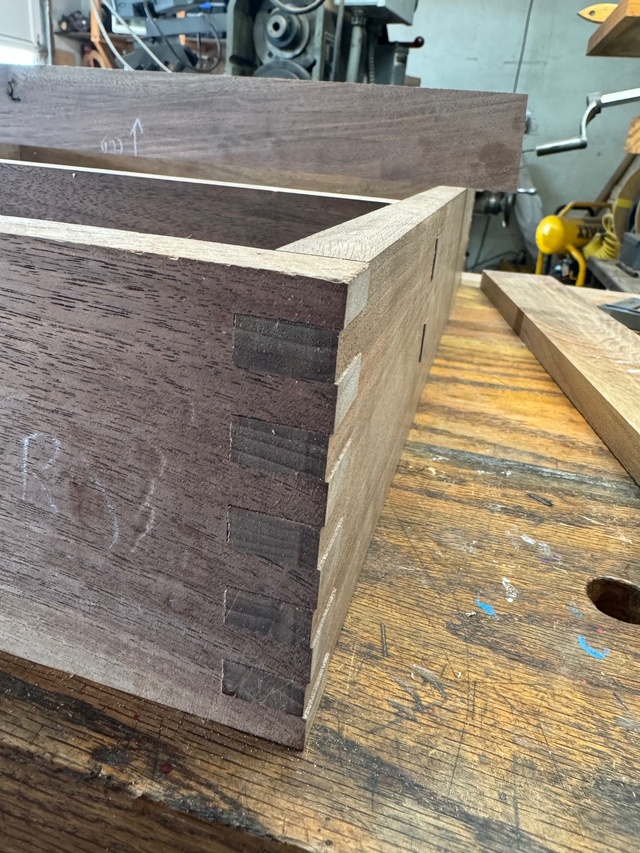
Thanks for reading and I'll throw out a poll question for the brain trust to close. I was pondering yesterday how best to flush up all of my box joints and the thru-mortises. I'm always apprehensive about flushing up box joint fingers with a plane or a flush trim bit on a router because it's so easy to tearout some of the endgrain. But as I was pondering, I almost convinced myself to leave them proud. They are all clean and all equally proud about 1/32". When I did my design I started with 1/8" proud box joints because I'm a big fan of the look. But then when I put the door on, I didn't like the fingers sticking out past it. But only 1/32 isn't really significant enough to make the door look weird and with them all being clean and the protrusion being uniform, it looks like an intentional design feature rather than just sloppy work. So what say you? Leave them proud or suck it up and pare them down?
BTW, It looks like you have some slight dents (from clamping?) in that one picture showing the proud box joints. Have you (or anyone else for that matter) ever tried the wet cloth with and hot iron trick to raise dents like that?
--Nathan, TX. Hire the lazy man. He may not do as much work but that's because he will find a better way.
You've made great progress. When I was working on my dad's flag case I had several of those "miscut situations" like you experienced. You rebounded and it is looking awesome. I too like the idea of proud joints (was going to suggest recessing them...haha...).
BTW, It looks like you have some slight dents (from clamping?) in that one picture showing the proud box joints. Have you (or anyone else for that matter) ever tried the wet cloth with and hot iron trick to raise dents like that?
Yeah, I noticed that when I posted that pic Nathan. It must have been the way the light was hitting it because it wasn't bad enough that I noticed it in person. Only thing I can figure is I did it when clamping on the jig while cutting the box joints but that seems odd since I used a quick clamp with rubber pads on it. I don't see how my parallel clamps could have done it and I have probably tapped it with my assembly mallet but it's got a big leather-padded face. I don't see similar marks anywhere else that I don't expect them.
In any case, it's not really a concern. All of the case members are still just like they came out of my thickness planer. I don't handplane pieces that will get clamped on or coerced with a whacker until I'm ready to start finishing and gluing just because I expect some spots such as those to rear their ugly head. So after the final dry fit, I'll hit all those external faces with a smoother and either sand or scrape them as well as filling in any knots or bug holes. So it's not a concern but good eye 😉
You could leave them proud and lightly sand the edges kinda like Greene & Greene style.
Good call Duck! I was looking at the joints this morning and think this is the answer. Having the protruding ends eased will eliminate any concern that it will look unintentional. I think I'll use a sanding block and knock the sharp edges off with a chamfer to the same depth as the protrusion. It's a lot of fingers to sand but I think it's worth the time. Should only take about 2 beers 😉
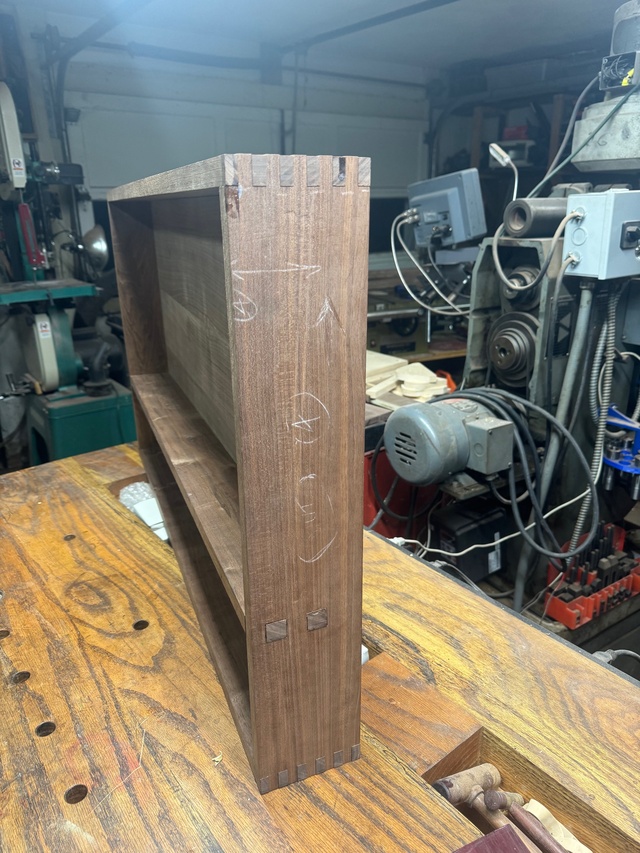
Here's another asthetic question since I liked y'all's answers to the first one so well.
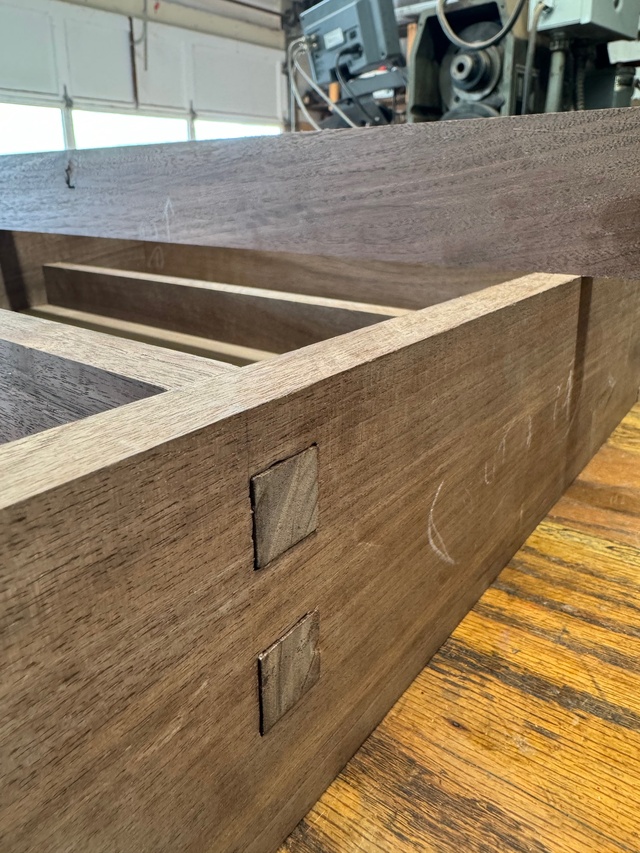
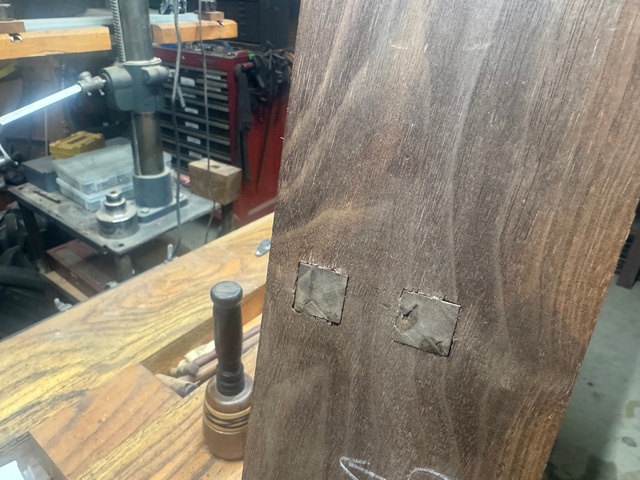
I'm not pleased with the thru-tenon appearance on the left side of the case.
Like I said in the post, even though I used a backer board, my mortiser bit left some tearout. I expect most of it will clean up when I smooth the board with a handplane. But if not (and even if it does remove it all) I'm thinking about easing the edges of the mortises on both sides as well as the corners of the tenons.
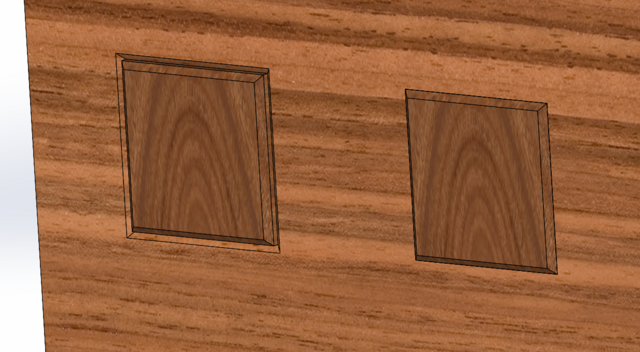
The one on the right below is just with the tenon edge eased and the left has both eased. I can't decide if I like both eased. What say you?
And the tenons on this end had some funky grain going on. I don't hate it, it gives it some character. But the little spot in the right one where a limb shoot or something formed has a small void. Fill it or leave it?
I'm leaning that way too Ryan. Just hoping all the tearout can be removed with a smoother. The eased mortise is very G&G-ish but since the box isn't in the G&G style it may look weird just to do that on the mortises and not on the box joints. And I like my box joints like I like my yoga pants. Tight and completely filled 😆
I think those kinds of details give a really nice, albeit intangible, finish to a project. Most people will never notice it, but they’ll appreciate it even if they don’t know why. It’s kinda like cayenne in hollandaise: you don’t notice it’s there, but there’s something lackluster about it if it’s not.
Ryan/// ~sigh~ I blew up another bowl. Moke told me "I made the inside bigger than the outside".
Thanks Dave. I agree about it looking like a gap the more I look at it. I think leaving the mortises sharp is the way to go. I'll just handplane until the tearout disappears.
Kenny, How is the one vertical divider attached? Doesn't look like you had through tenons on the original drawing and I don't see a rabbet there to house it.
--Nathan, TX. Hire the lazy man. He may not do as much work but that's because he will find a better way.