


Share your craft projects
Make new craft buddies
Ask craft questions
Blog your craft journey
MontyJ
226 posts
and
11 followers
in over 12 years
in over 12 years
First project, a sewing box #2: Abandoning failure for progress
This is
part 2
in a
5 part
series:
First project, a sewing box
My attempt at learning to make hand-cut dovetails has ended in miserable failure. I don’t fault myself entirely, I also blame the crappy saw. I’m not done with learning that skill, but I have to move on.
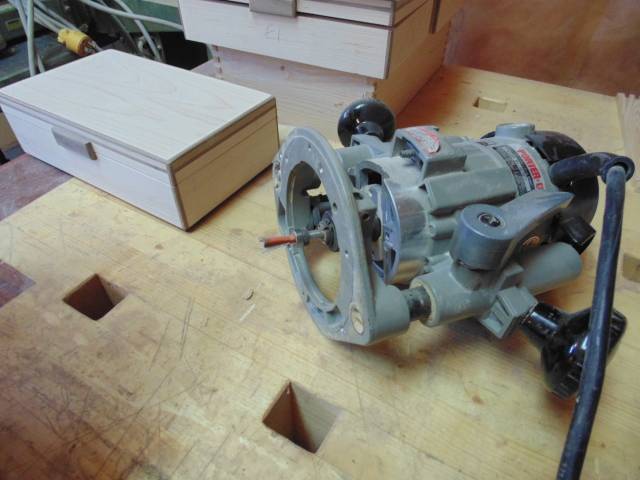
I made the decision to change to mitered corners, but discovered that I could still have a dovetail look with keys. That’s so much easier than actual dovetails. I know it’s cheating, but what the hell, it’s my first ever woodworking project. I’ll cut myself some slack there. I finished bottom box today:
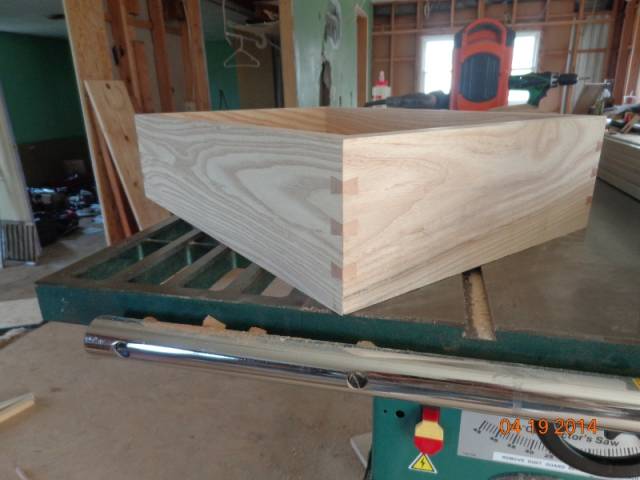
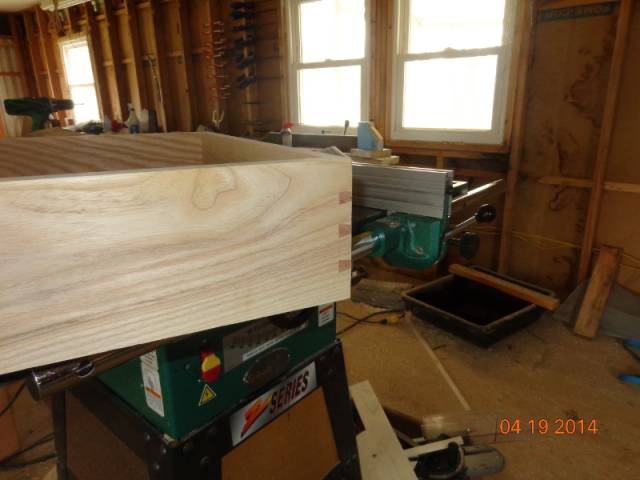
I love the grain look of this ash. It has that rustic look to it. I also got my first taste of cherry today when I made the keys. I’m wondering if I should have made the whole thing from cherry, it’s so much softer and easier to work than ash.
Materials so far…box: ash, keys: cherry, bottom: 1/2"birch plywood
Where are the band-aids?---Pro Libertate!
7 Comments
That is looking good Monty .
The alternative for making this box is cutting rabbeted corner joints
which are easy and the blade on the saw can stay at 90 DEG. to do this and a dovetail spline will work just as well .
Now lets see more PIC"S
Looks good, MontyJ. I’ve tried dovetails by hand once. They are definitely a challenge. Your drawers look top notch.
-- Chris ** If there must be trouble, let it be in my day, that my child may have peace. — Tom Paine **

This is not cheating, this is using a different technique.
Nothing wrong with them and they look beautiful.
Frenchy
I would like to know how you made these joints.
Frenchy
Thanks for the tip kiefer. After battling 45°s for two days I wish I would have went with rabbeted corners and keys. I’m committed to all 45’s now. On the bright side all of the boxes have been cut and I only have two left to assemble. If anyone has a tip on how to keep the dang things square during glue up I would love to hear it.
I’m giving up on hand cut dovetails until I get a better saw Chris. I’m certain that is holding me back some.
Frenchy, for the keys I used this:
http://www.woodsmithshop.com/download/409/dovetail-keys.pdf
They have plans for a bigger, more fancy one, but this did the trick for me. The hardest part was getting the keys to exactly the right size. I crept up on it, then sanded them when I was very close. I wish I would have put four in the lower box.
Update time…
As I mentioned earlier, all of the boxes are now cut. I have two left to assemble. Once they are done, I have some ideas to “liven” it up some. I am going to glue a strip of cherry, maybe 1/4-3/8 thick to the bottoms of the upper boxes. I’m hoping it will break up the solid ash wall. I also decided to cut in some cherry handles in the top most boxes. Finally, I’m going to try to make two cherry frames for the lids. My idea is to use some kind of cushion on the lids that the wife can use as a pin cushion. It will make more sense when I get it done and post pics.
If I have time to finish the boxes tomorrow I’ll post another entry with more pics.
Happy Easter everyone!
Where are the band-aids?---Pro Libertate!
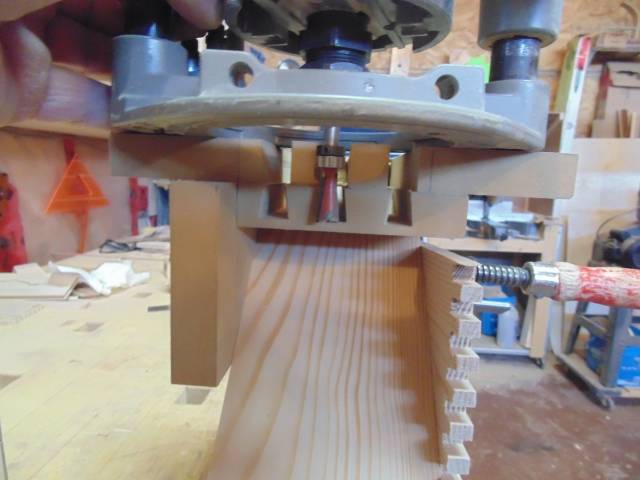
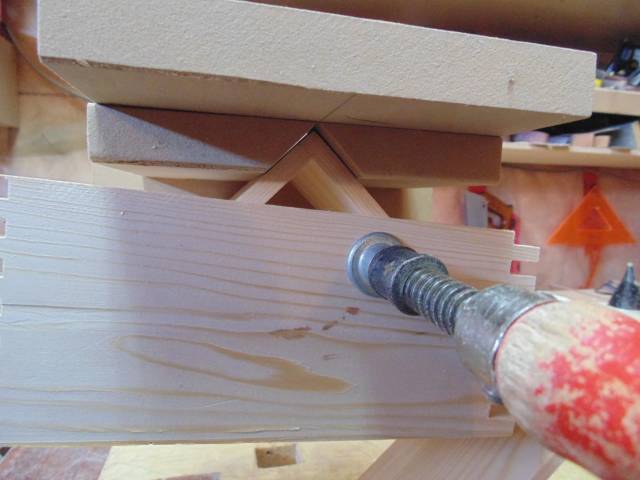
Here is a jig that I made for a recent box .
It worked well but is more or less dedicated to a certain height of box .
The dovetail splines are spaced so a cut for separating the lid is included .( see pic ) The keys I cut on the table saw a little snug and sanded the backside for a good sliding fit and trimmed the excess of with the band saw then sanded flush .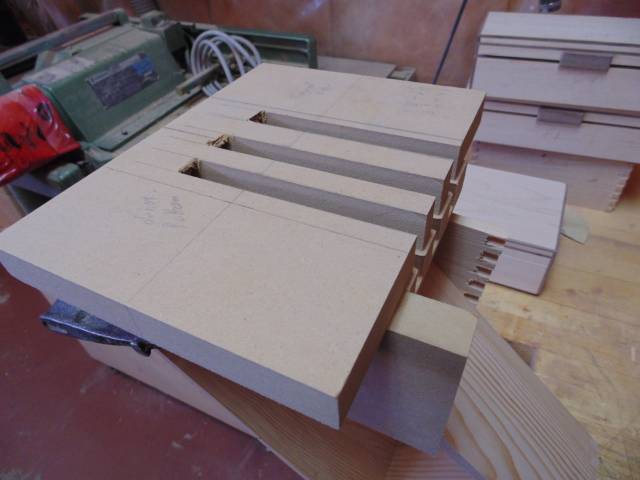
"":
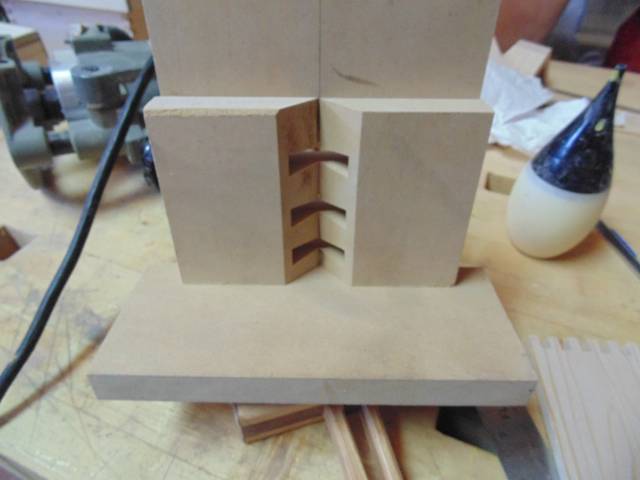
The jig is made from 1" MDF and the slots are cut on the table saw to fit the guide bearing on the dovetail bit .
Nice jig. I don’t have a bit that long, nor a guide bearing. This sewing box has been a “live and learn” project. I’ve started a list of “lessons learned” that I can review from time to time to help me improve. Lesson number one is never have your hand down stream from the chisel. Lesson number two is always have plenty of band-aids on hand…see lesson number one. Lesson number three is blood sands off after it dries…again, see lesson number one. I should post my entire list. I’m sure it would give the more experienced members a good chuckle. I would bet a few could probably relate, from their early days in woodworking.
All kidding aside, I don’t have many tools, and no experience. You wouldn’t happen to have a tip for gluing up those boxes would you?
Where are the band-aids?---Pro Libertate!