


Share your craft projects
Make new craft buddies
Ask craft questions
Blog your craft journey

Renners
179 posts
and
19 followers
in about 12 years
in about 12 years
More from Renners
Sash Windows - journey into the unknown #11: Why didn't I think of that before #738 & #739
Sash Windows - journey into the unknown #10: Glazing Part 1
Sash Windows - journey into the unknown #9: I knew I should have used oil based paint
Sash Windows - journey into the unknown #8: The finish line is in sight....
Sash Windows - journey into the unknown #7: Falling behind but that's ok
A silk purse from a sow's ear... #5: Say hello to my leetle friend...
This is
part 5
in a
6 part
series:
A silk purse from a sow's ear...
Long day in the workshop today, trying to catch up on yesterday, May Day – a Bank Holiday here.
Didn’t get as much done as I wanted, I’m at a point where all these little things seem to need attention, cutting the top for the tall boy into the faux panel end, cutting all the drawer parts, working out the hinges, bloody sanding etc.
I did get the carcase ready to go for the morning though.
Meet the MiniFix jig.
I bought this a couple of years ago (in the good times), primarily to attach drawer fronts like this…
using these handy little fixings…
They come in a variety of lengths, and for a variety of material thicknesses.
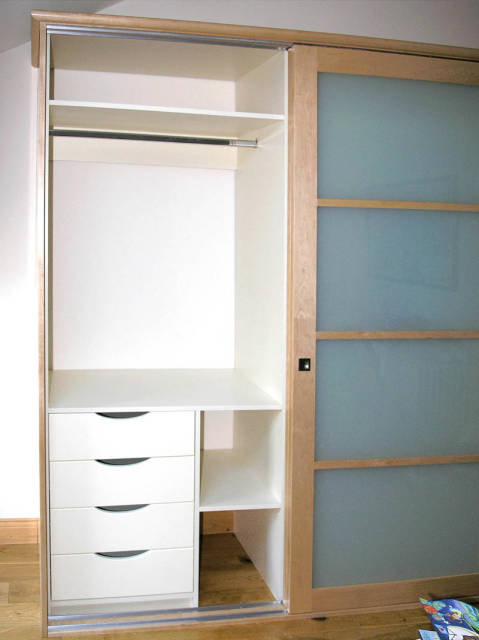
As I said in the last part, this job is going in an upstairs bedroom. Ideally, I would have liked to have glued and screwed it all together, but that presents three problems. 1). It wouldn’t fit in my van 2). It would take the winner and runner up of ‘The World’s Strongest Man’ to get it up the stairs. 3) The entrance to the bedroom has a wall to an ensuite jutting out, which I don’t think even the strongmen could negotiate if it was fully assembled.
So it has to be put together in the room. There are other knockdown systems available (I’d like to get a Rafix at some point), but for the time being, the cam and dowel will have to do.
These are usually seen in flat pack kitchen and wardrobe manufacture in conjunction with dowels, but I thought a better fixing to complement the minifixes would be dry biscuits. Dowels are fussy and unforgiving, with a biscuit I figured there’d be a little bit of room to slide the pieces to line up perfectly at the front, I also see the added surface area as a bonus in this application.
So I did a few set up pieces and had the choice of making a template or just winging it. I decided on the latter. There was never any danger of it going wrong.
First the biscuit jointing. Marked out and cut on the ends of the horizontal pieces, using just the base plate to set the height.
Then transferred the marks to the vertical panels, and ran a length of timber across the bottom pencil marks to use as a fence. Biscuit jointer in the vertical position plunging down, the cuts correspond exactly to the cuts on the horizontal members.
Yes I know they are not centered between the lines, but I think in the case of mdf, it doesn’t hurt to have more material on top.
Then out with the minifix jig.
You bore two holes, one for the cam, one for the dowel. To make sure I had them all lined up, I did the dowel holes first and pegged them with beech dowels to position the jig for the cam hole.
A few minutes later, the air thick with the smell of scorched mdf…
Then the final piece of the puzzle, locating the holes on the other piece for the dowels to screw into…
The old dowel centering pin trick… put the piece together with just the biscuits for alignment and pressed down to mark the centres, then bored for the post screw with a brad point bit.
Then time to put the pieces together
They are a good fit
and the joints are pulling together really neatly.
So the plan now is to do a full assembly and get the doors on and take care of any fettling with a plane and sander in preparation for painting.
2 Comments

I feel I am sitting in a classroom! I
I have seen these joining system from various furniture I bought over the years but never knew the name or how they were installed to match so nicely. I thought there would be some kind of jig. Now I know.
Since you are not assembling, does it mean the top coat will be done on premise?
Thanks!
Abbas, Castro Valley, CA
Ian, this job will be prefinished. There will almost certainly be a visible line at the joints when assembled, but I plan on wiping in a bit of paint on installation to mask that.
More from Renners
Sash Windows - journey into the unknown #11: Why didn't I think of that before #738 & #739
Sash Windows - journey into the unknown #10: Glazing Part 1
Sash Windows - journey into the unknown #9: I knew I should have used oil based paint
Sash Windows - journey into the unknown #8: The finish line is in sight....
Sash Windows - journey into the unknown #7: Falling behind but that's ok