


Share your craft projects
Make new craft buddies
Ask craft questions
Blog your craft journey
MontyJ
226 posts
and
11 followers
in over 12 years
in over 12 years
Sewing box phase two #1: Getting started
This is
part 1
in a
2 part
series:
Sewing box phase two
-
Getting started
-
Dovetails and a bow front drawer
- Getting started
- Dovetails and a bow front drawer
The sewing box I made for the wife is very heavy. It was never made to be carried around, but rather to sit near her sewing table and give her extra storage. I’m now building a table for it to sit on. Here is where I’m at so far:
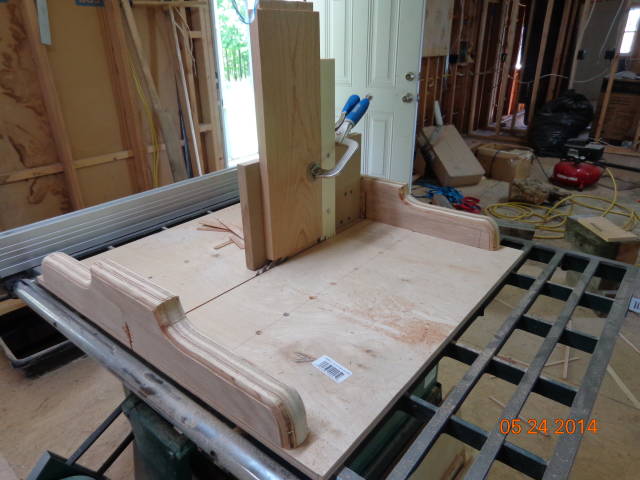
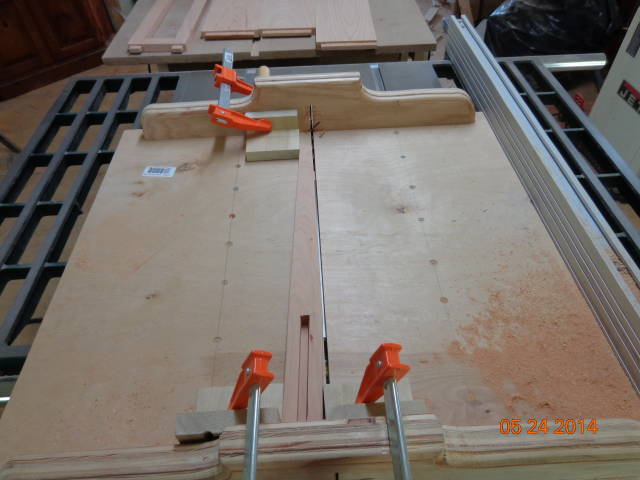
After cutting everything to length and width, I started on the tenons. I figured if I did the tenons first, I could use them to help lay out the mortises. I made this quick and dirty tenon jig and to my amazement, it worked perfectly! Having my saw tuned up tight and a new cross cut sled made it easy stuff.

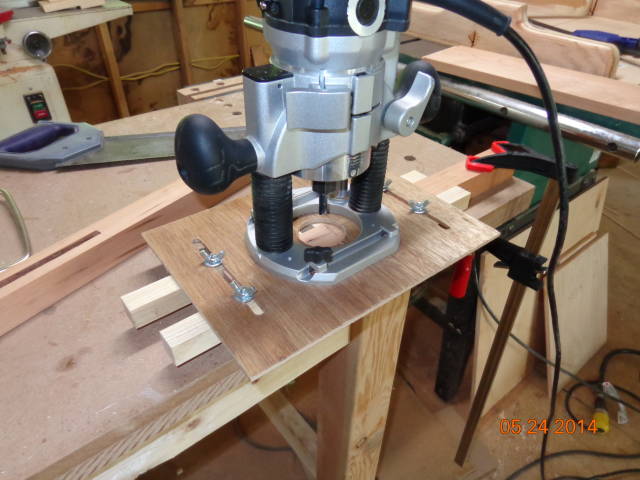
Next, I used the tenons to set up the mortises. Again, I made a quick and dirty jig. I marked each side of the center of the hole in the base of the jig so I could align it with marks I put in the center of where I wanted the mortise. Again, it worked great. All that was left was a very small amount of work with a chisel to square up the corners of the mortises.

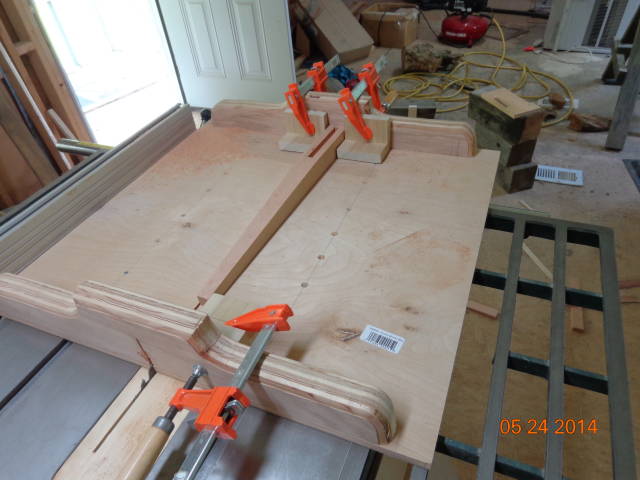
Then, I set up a few stop blocks and tapered the legs. I know there are jigs for this, but I was on a roll. Luck must have been with me today, because this worked too. I am really loving the cross cut sled. I just line up the cut marks on the edge of the registration cut in the sled and away I go.
Next, I sanded everything to 80 grit. The tapering process really left some saw marks. The ROS took care of them pretty quickly.
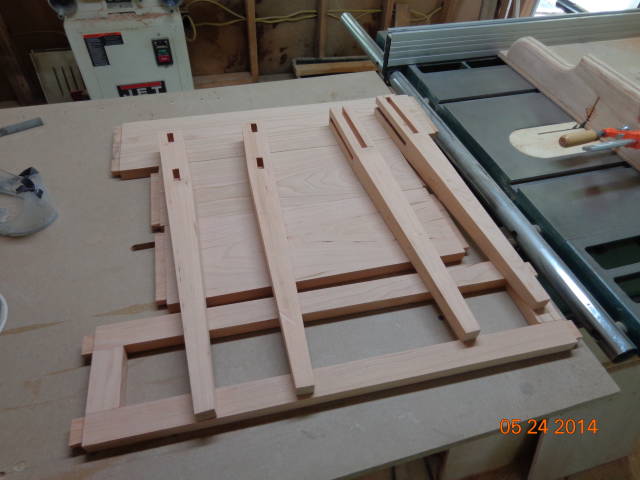
And finally, I did a test fit:
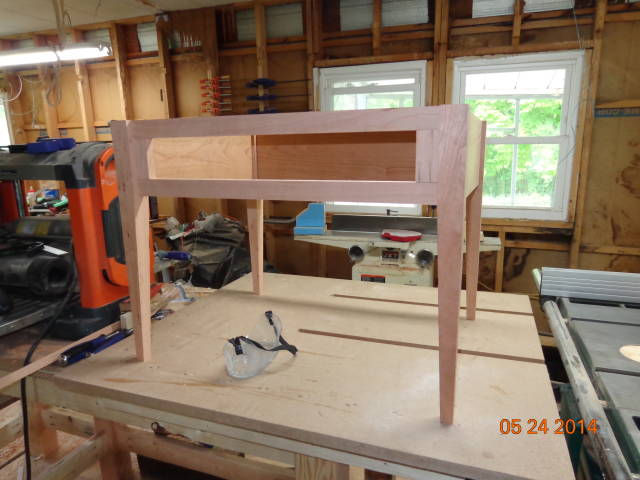
I have already glued the front assembly together, taking extra care to make certain the drawer opening was perfectly square. Once I get everything sanded to 220, I’ll start the rest of the glue up. In the mean time, I’ll start on the table top.
For those that are curious, not a single band-aid has been needed thus far.
Where are the band-aids?---Pro Libertate!
8 Comments

Monty,
You’re really making quick work of this! Congratulations on the no-band-aid day!
L/W
“Those who would give up essential Liberty, to purchase a little temporary Safety, deserve neither Liberty nor Safety.” Benjamin Franklin

… and it looks beautiful already!!
JAGO - just a grandma’s opinion
Thank you ladies. I have to make a small design change. When I asked the wife what size her cutting mats were she told me 12″ × 18″. The whole reason for the drawer is to hold her cutting mats. Well, I sized the opening in the face frame to 19-1/8" wide which would give me an outside drawer dimension of 19" with 1/16" gap. Using 1/2" stock for the drawer, with 1/4" slots for the bottom gives me 18-1/2" inside dimension. Perfect. Not. I happened to look at her cutting mat this morning. The measuring surface is indeed 12 × 18, but it has a 1/2" border around it. The _overall _measurement is 13 × 19″. I blame myself for not checking it sooner. It’s a simple fix though. I’ll just eliminate the stiles and widen the drawer to fit inside the legs.
Where are the band-aids?---Pro Libertate!
oh no …….
“never assume” is the lesson here, I guess.
JAGO - just a grandma’s opinion

Just think how much you’d have gotten done if you hadn’t stopped to take all those dang pictures….
Good use of jigs and sleds. Building them can be time consuming on the front end, but the accuracy and utility of them more than makes up for it!
Artisan Woodworks of Texas- www.awwtx.com

Monty Your work is meticulous. Everything seems to be planed and every detail thought through.
The right jigs are built to make sure you get it done perfect.
Reading your blog, I feel you are very experienced: A pro.
At least That’s the perception I am getting.
How much planning do you do?
Abbas, Castro Valley, CA
lanwater, I haven’t planned anything out really. I went into the shop with an idea of what I needed ( a table) and just went from there. I learned a lot from building the sewing box. This time around, I didn’t cut anything until I was ready to cut everything, if that makes sense. I cut all of the legs at once, all of the apron pieces, etc. I knew I wanted mortise and tenon joinery, so I made sure to have every piece ready so I could cut them all at once. Doing it that way was not only fast (it only took about 10 minutes to cut all the tenons), but it also assured that all of the tenons would be exactly the same size. I was even careful to cut them a tiny bit wide so I had to pare them down with a chisel for a nice snug fit. I really want a shoulder plane now! I’m also not gluing anything together until I have all of the pieces completed.
I’m far from being a pro. This is just a simple table. I’m taking what I learned from building the sewing box and applying it. I’m trying to think the entire project through by building it in my head.
Bill, the jigs are great. They literally took only minutes to make. The sled took the longest because of getting the rear fence dead square with the blade. Now I can cut with 100% confidence, knowing that when I line up the marks with the cut in the sled, that’s exactly what I’m going to get. I still use the miter saw to cut 8’ stock to within a few inches of final length, but the table saw makes the finish cut.
And hey, everybody loves pictures ;)
Where are the band-aids?---Pro Libertate!
We love pictures indeed.
Thanks for extra info; it makes perfect sense.
Abbas, Castro Valley, CA