Originally posted on August 28, 2020 (LumberJocks). A few months ago, I added a few coats of matte General Finishes High-Performance Topcoat. The Watco finish was looking a bit dull.
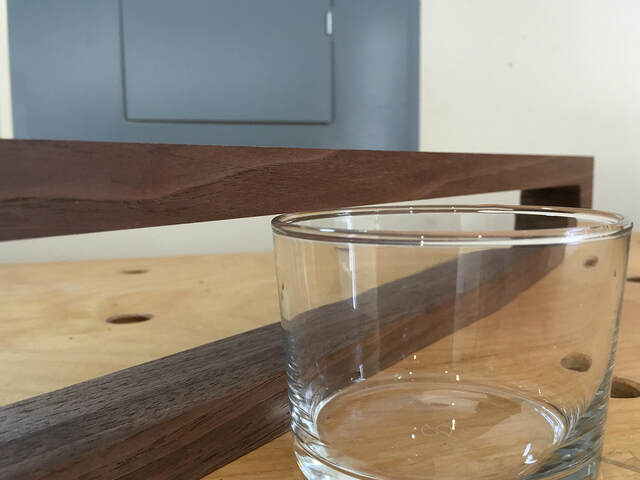
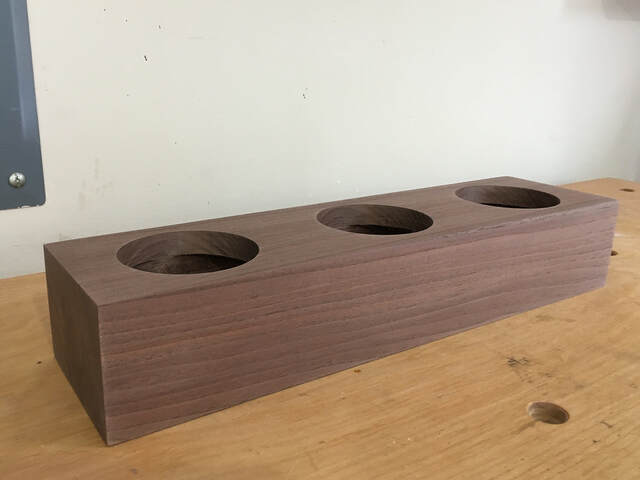
My wife decided to decorate one of our kitchen countertops with a set of three succulents or other miniature plants. She bought 3 1/4" diameter by 2 5/8" tall glass cups to hold them, and she wanted a wooden planter to display them as a unified collection.
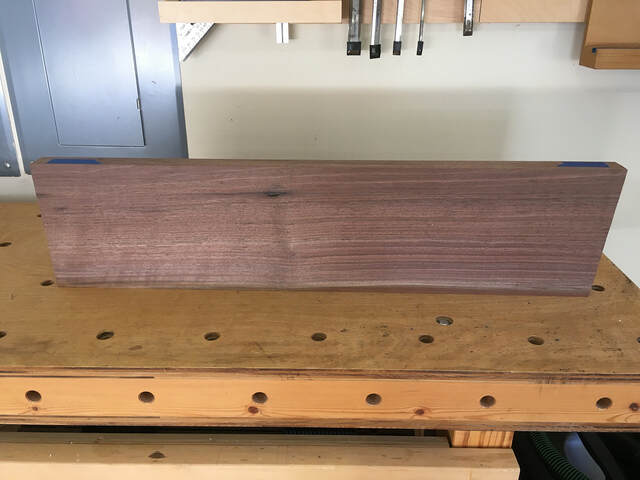
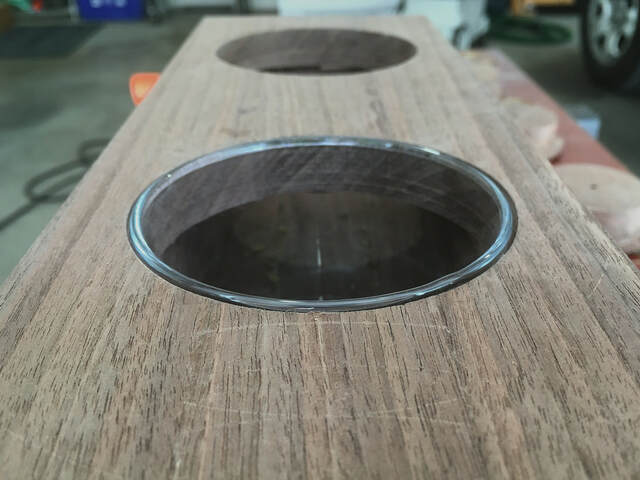
Here's the planter I built for her. It's made of walnut, finished with Watco Danish oil. It's 17 1/4" long, 4 1/2" wide, and 3" tall. The glass cups sit in circular recesses with their rims flush with the top of the planter. I also drilled 1" finger holes in the bottom (centered in the cups' bases) to make it easier to remove the cups.
This was a relatively simple project, but I've included construction details and photos below.
My wife wanted the planter to look like it was made from a single block of wood. That ruled out a standard mitered or miter folded box.
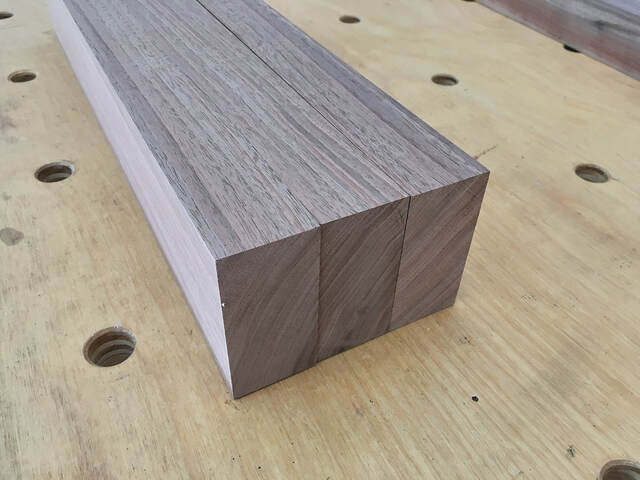
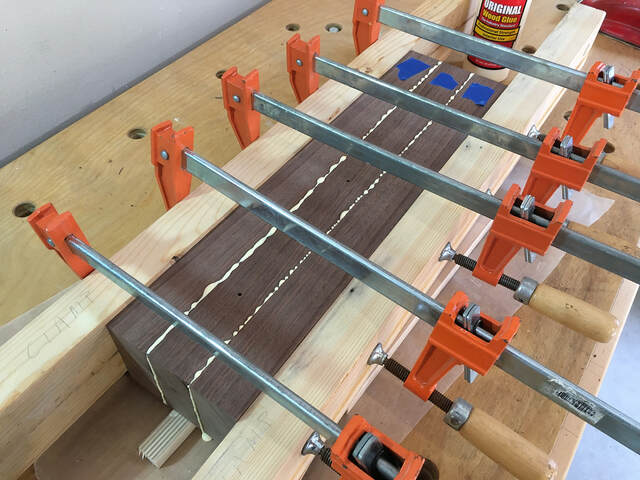
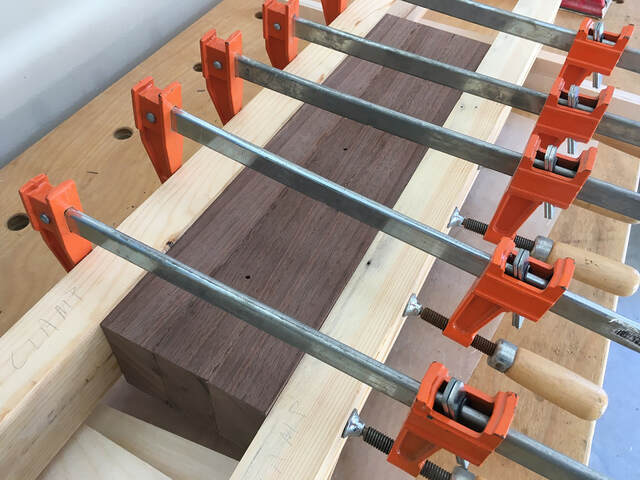
I'm not aware of any source of 3" thick planks of walnut, so I knew I'd have to glue up several pieces. We decided to position the pieces vertically so the long sides of the box would be seamless.
We found a nice 6/4 walnut board at the lumber yard.
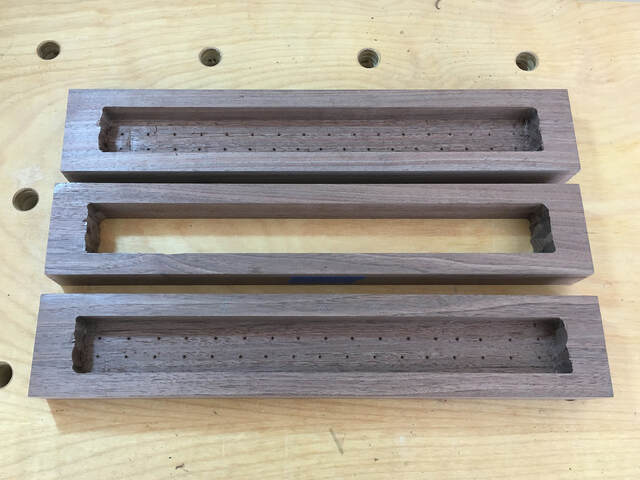
I cut three 3" slabs from it and arranged them to make the end grain look as continuous as possible.
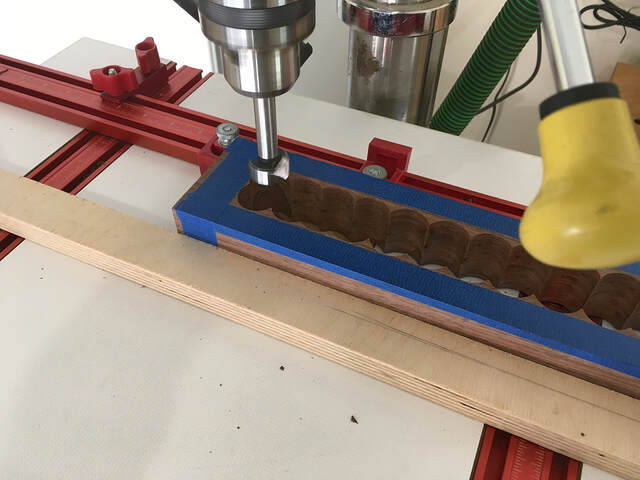
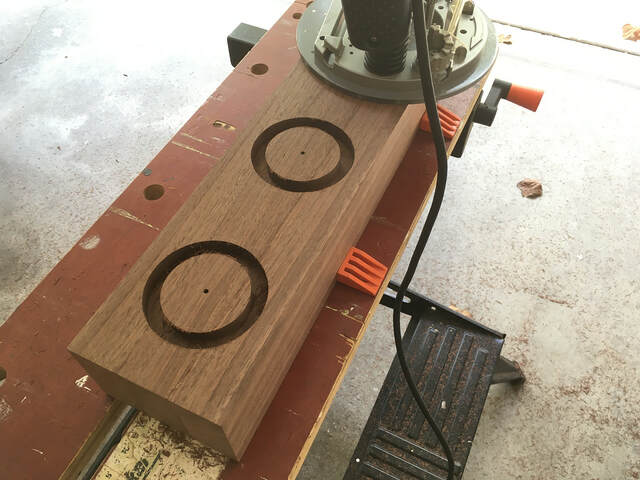
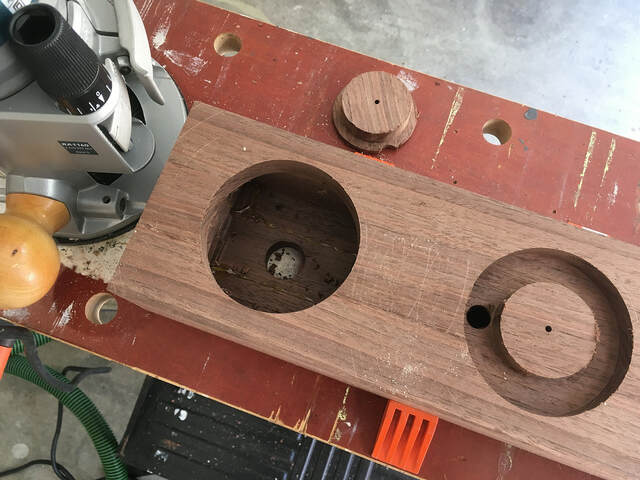
The most challenging part of the project was figuring out how to cut the 3 5/16" diameter, 2 5/8" deep cup recesses. I wished I had a Forstner bit of that size (and a drill press strong enough to spin it), but I don't. I do have a Jasper circle cutting router jig, but I don't have any straight bits long enough to reach the bottom of the deep recesses.
I decided to build the planter as a hollow box, with the top and bottom sized to make the cups' rims sit flush with the top. Then I could easily cut holes through the top.
To do that, I hollowed out the middle of the center slab completely, and the two side slabs partially. I started by removing as much stock as possible with my drill press and 1" Forstner bit.
Then I used a straight bit on my router table to nibble away the remaining material, eventually creating flat surfaces (except on the ends, where it doesn't matter).
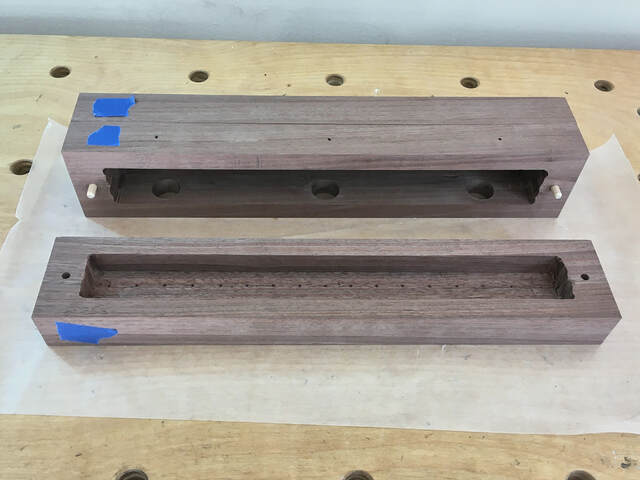
Before gluing the pieces together, I drilled the pilot holes for the circle jig in the top of the center piece and the 1" finger holes in the bottom. I also drilled holes for dowels that would keep the three pieces aligned during the glue up.
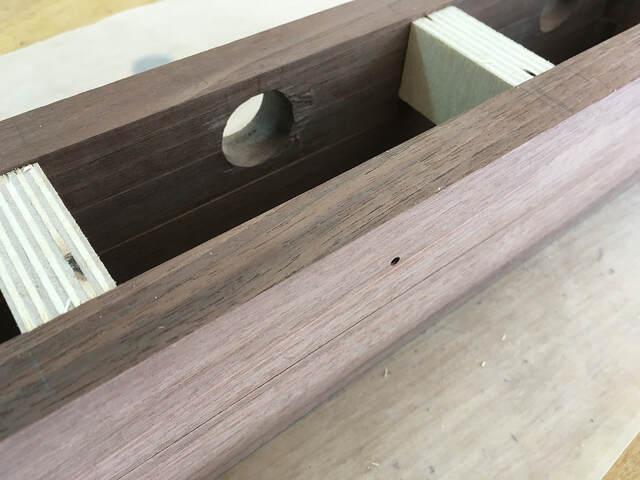
While dry fitting the pieces, I noticed that the top of the hollowed-out center piece was bowing in slightly. It wasn't much, and I thought I could sand it out later, but it was easy enough to cut some spacers from scraps and press them into place. That flattened out the bow nicely.
Glue up was simple because of the alignment dowels.
I let the squeeze out plasticize and then removed it with an old chisel.
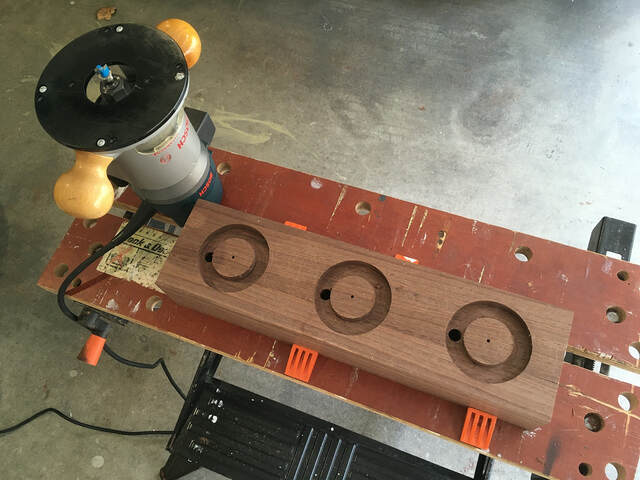
With box assembled, all that remained was cutting the cup holes. Usually, when I use my circle jig, I use a sacrificial board under the hole to support the cutout during the final cutting pass. In this case, I didn't add a temporary backer before I assembled the box. (It seemed like too much trouble.) Instead, I cut the holes in two steps.
First, I used a 1/4" spiral upcut bit to cut the 3 5/16" holes, but I didn't cut all the way through the top; I stopped about 1/8" short. The bit cut a 1/4" slot. I needed a wider slot for the next step, so I adjusted the jig twice, reducing the overall hole diameter by 1/4" each time, to widen the slot to 3/4".
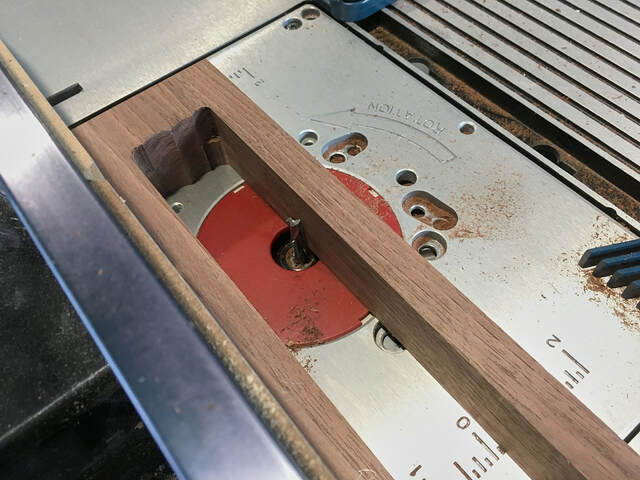
To finish the holes, I used a top-bearing 1/2" pattern bit like a flush trim bit. I drilled 5/8" starter holes, then trimmed off the remaining 1/8" depth.
A test fit showed that the cup holes (and the thickness of the box's bottom) were correct.
You might have noticed that the router base left circular scratches in the top. (Initially, I tried to prevent that by covering the top of the box with painter's tape, but the router base didn't slide over the tape as smoothly as it did over the wood, so I removed the tape.) The scratches sanded out easily. I sanded the entire box, starting with 80-grit and finishing with 280-grit.
I didn't take any photos of the finishing step, but there wasn't much to it. I just wiped on some Danish oil, removed the excess, waited a day, and repeated.
Great design and elegant, you can up with a good solution to drilling the required holes. This is something to keep in mind, if not for plants, candles.


 - Project by Ron Stewart")
 - Project by Ron Stewart")