


Share your craft projects
Make new craft buddies
Ask craft questions
Blog your craft journey

Ron Stewart
954 posts
and
24 followers
in over 3 years
in over 3 years
More from Ron Stewart
 - Project by Ron Stewart")


 - Project by Ron Stewart")
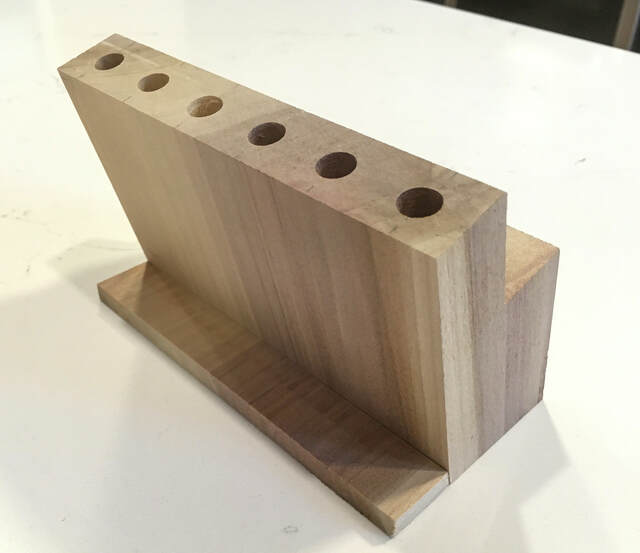
Tiered, Tilted Pen/Pencil Holder


Originally posted on February 17, 2022 (LumberJocks). My wife has been using it regularly since then.
My wife recently took up coloring as a hobby. She has large sets (100+ colors) of pens and pencils, but needs only ten or so for a given drawing. This holder helps her organize the pens or pencils (up to 11) she needs for her current drawing.
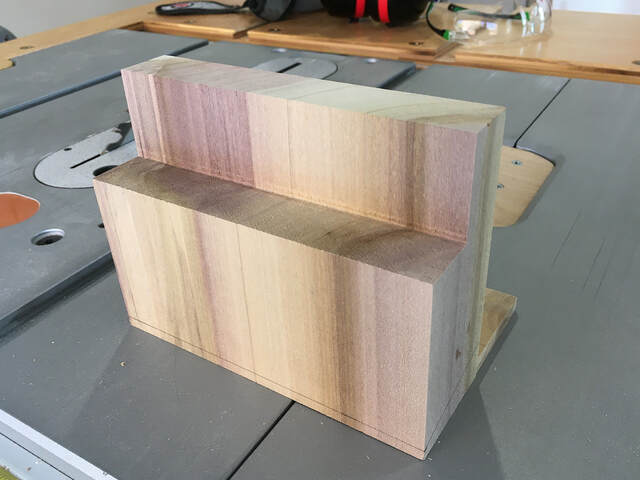
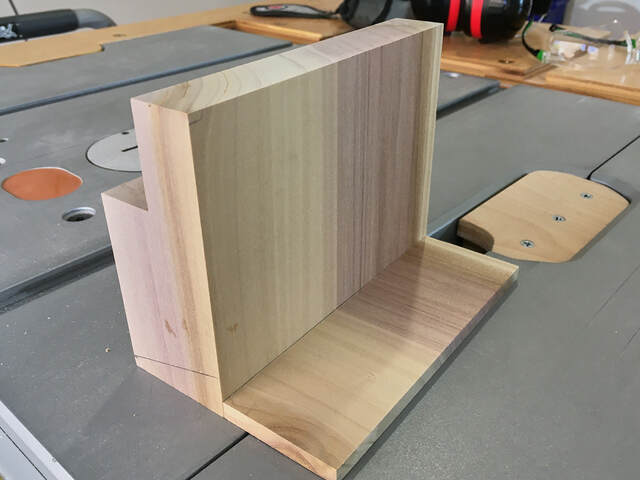
The holder sits on a small, low table beside our couch, so she wanted it to be compact (about 6" wide, 4" tall, and 3" deep). To make it easier to see the pencil colors or labels, we decided to store the pencils in two staggered rows and tilt the holder back 15 degrees. A 1" wide rear stabilizer keeps the holder from tipping over. The pencil holes are 3/8" diameter, 2 1/2" deep, and spaced 1" apart.
I built the holder from a scrap of 2" thick poplar, finished with General Finishes Polyurethane Water Based Topcoat (flat sheen).
It was a simple project, but I'll provide some construction details for anyone who is interested. I also uploaded the SketchUp Model to 3D Warehouse.
Construction Details
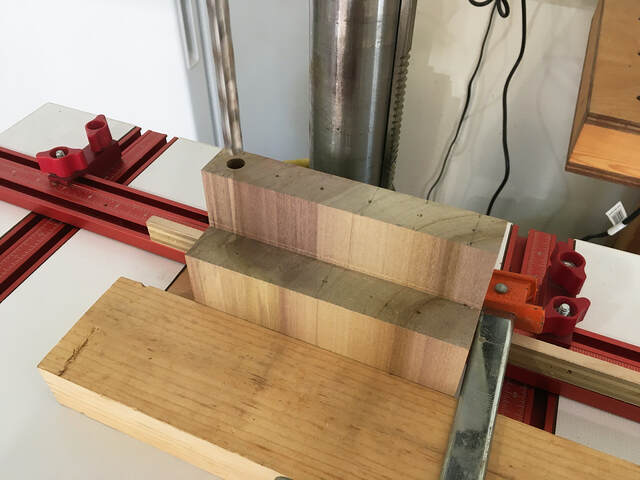
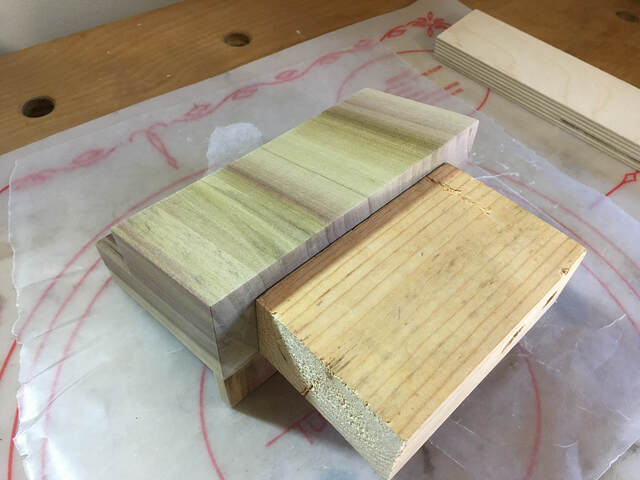
I started by cutting the poplar to size, leaving an extra 1/4" or so of height. Then I cut the big notch that creates the two tiers on my table saw. Each tier is 1" wide.
My wife recently took up coloring as a hobby. She has large sets (100+ colors) of pens and pencils, but needs only ten or so for a given drawing. This holder helps her organize the pens or pencils (up to 11) she needs for her current drawing.
The holder sits on a small, low table beside our couch, so she wanted it to be compact (about 6" wide, 4" tall, and 3" deep). To make it easier to see the pencil colors or labels, we decided to store the pencils in two staggered rows and tilt the holder back 15 degrees. A 1" wide rear stabilizer keeps the holder from tipping over. The pencil holes are 3/8" diameter, 2 1/2" deep, and spaced 1" apart.
I built the holder from a scrap of 2" thick poplar, finished with General Finishes Polyurethane Water Based Topcoat (flat sheen).
It was a simple project, but I'll provide some construction details for anyone who is interested. I also uploaded the SketchUp Model to 3D Warehouse.
Construction Details
I started by cutting the poplar to size, leaving an extra 1/4" or so of height. Then I cut the big notch that creates the two tiers on my table saw. Each tier is 1" wide.
At this point, I wasn't sure how wide the stabilizer needed to be or how I was going to attach it, so I cut it oversized.
My JessEm doweling jig's 1/4" guide block has holes spaced 1/2" apart, so I used it to mark the holes 1" apart. I set the jig's fence to 1/2" to center the holes in the top tier.
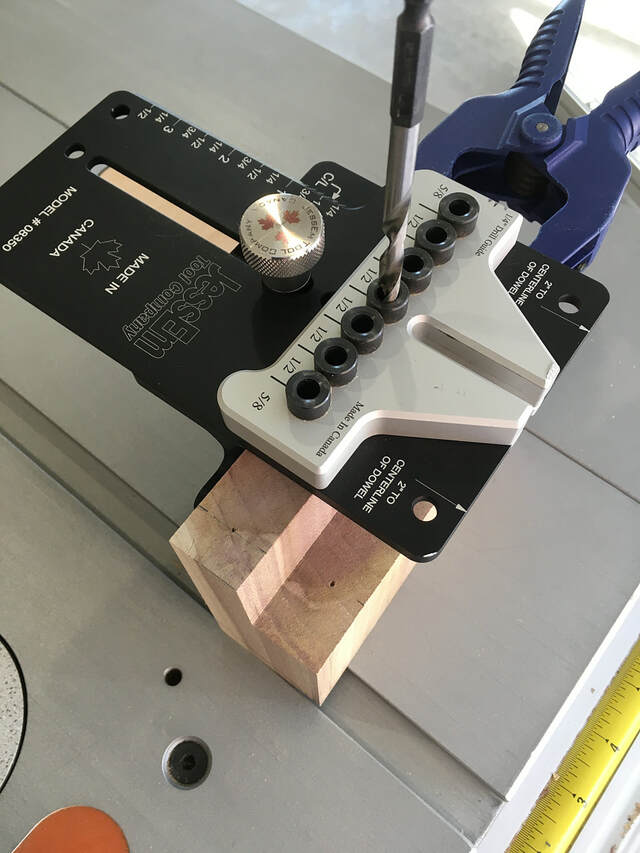
Then I moved the fence to 1 1/2" for the front tier.
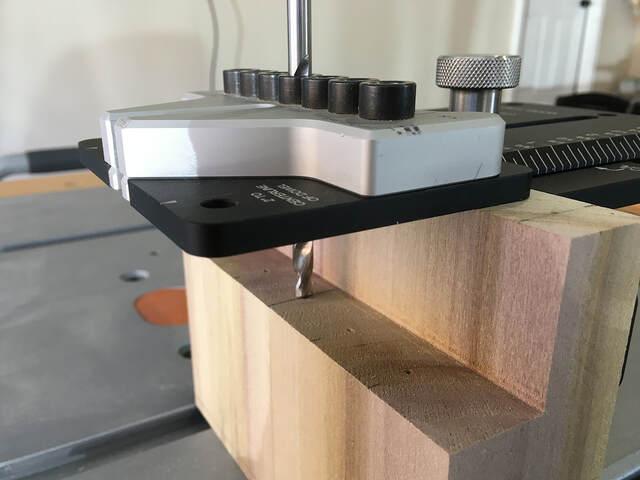
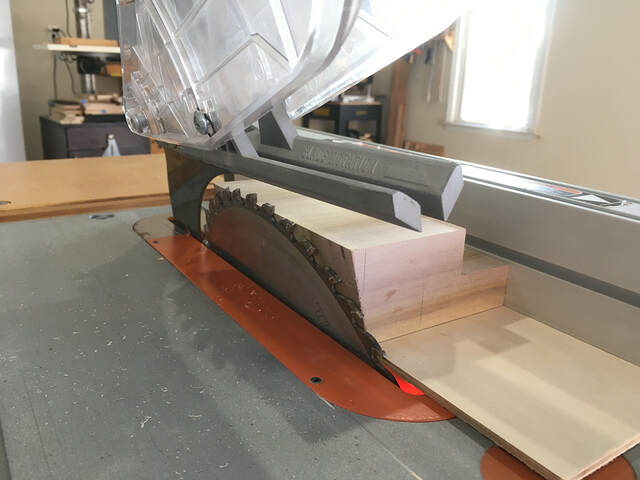
I drilled the marked holes on my drill press. Fortunately, my 3/8" brad-point bit has a 4" cutting depth, allowing me to drill the holes for the front tier without having the chuck hit the top tier.
With the holes drilled, I cut off the bottom of the holder at 15 degrees for the tilt-back. I used a scrap of 1/4" plywood as a makeshift zero-clearance inset.
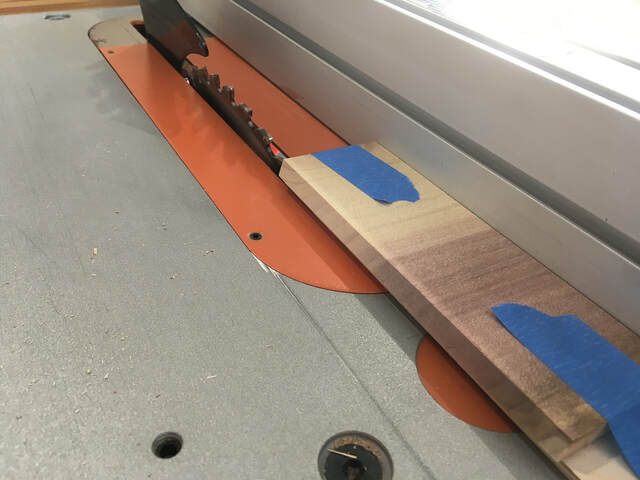
By this time, I had decided to use a butt joint to attach the stabilizer, so I cut it to 1" width (at the top).
With the stabilizer cut, all I had do was sand both parts and glue them together.
When I use poly, I usually finish one side at a time so I'm always finishing a horizontal surface to avoid runs or sags. This time, I decided to finish all sides except the bottom at once. I used carpet tape to attach a scrap wood handle that let me rotate the holder to any angle. I applied four very thin coats, sanding with 600-grit paper in between. After the poly dried, I finished the bottom.
After the bottom dried, I attached some cork squares as feet/bumpers (not shown), and the project was finished. Thanks for looking!
7 Comments

simple project and it probably made here very happy.
working with my hands is a joy,it gives me a sense of fulfillment,somthing so many seek and so few find.-SAM MALOOF.
Thanks, pottz. It did make her happy, and it cost nothing but a few short hours.

Projects don't need to be large to be appreciated - do they?

Slick idea and keeps them from rolling off the table. Small and simple is best at times.
Main Street to the Mountains
Thanks, Steve, Eric, and Bentlyj! Yes, small projects like this (and Bentlyj’s pill tray) are some of my favorites.

Nice custom holder. The poplar looks nice. I have found some really interesting pieces and am surprised how much they have darkened over time.
Thanks, Barb! I think I’ve painted (or used very dark stain on) every other poplar project I’ve completed. It will be interesting to see if this one darkens over time.
More from Ron Stewart