Originally posted on October 7, 2020 (cookbook stand, LumberJocks) and October 21 (napkin holder, LumberJocks).
A few months ago, I ended up applying a few coats of matte General Finishes High Performance Topcoat to both pieces. The Watco finish was looking dull and dry, and the open pores were trapping flour and other dust. The poly perked it up a bit (even though Arm-R-Seal would produce a richer finish.) I think I'm done using Danish oil. If I want an oil finish, I'll just use Arm-R-Seal instead.
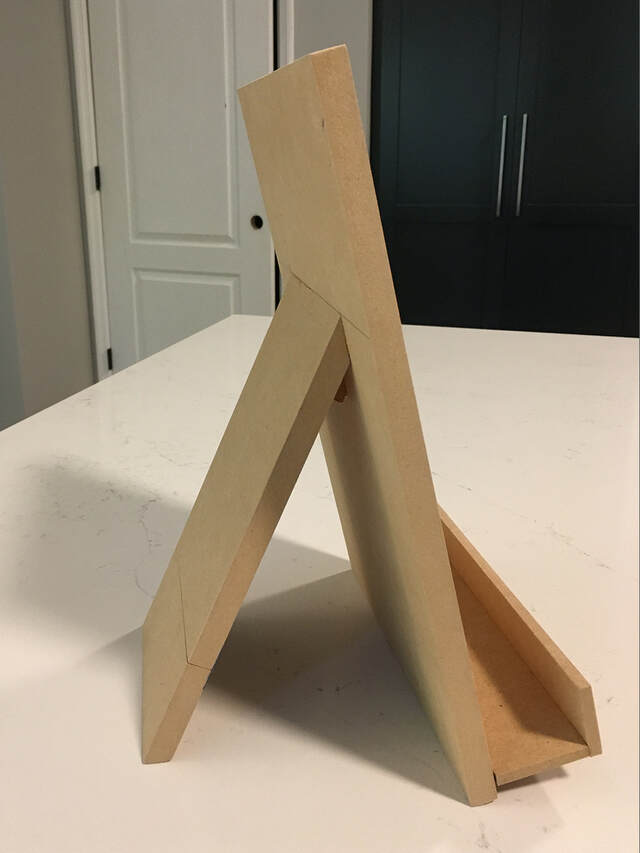
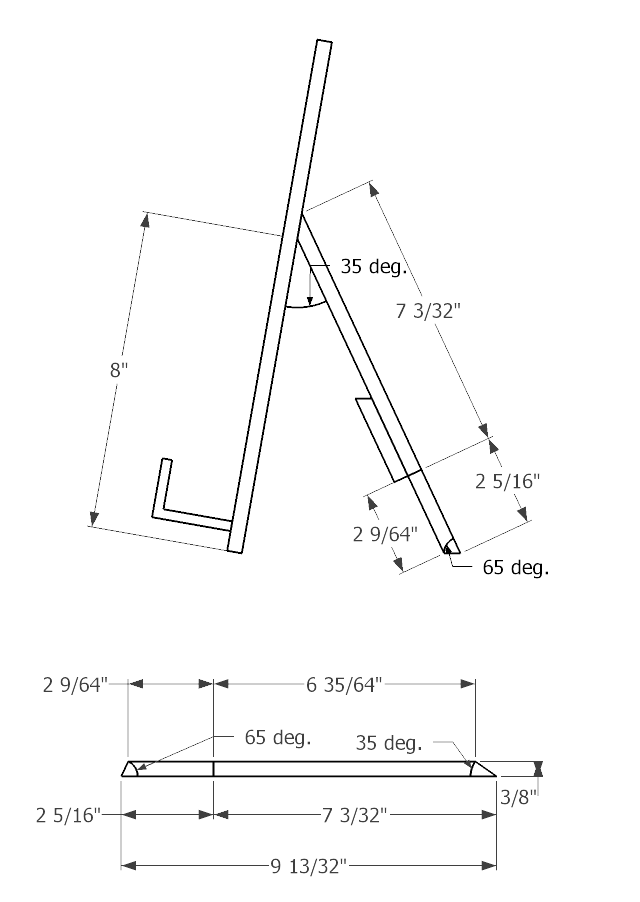
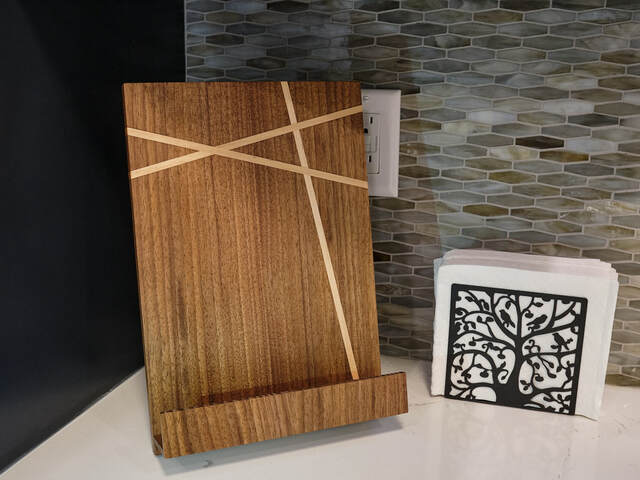
I built this cookbook stand for my wife as the last (*) project related to our kitchen remodel. It's made of walnut with maple accent strips, finished with Watco Danish Oil. The back panel is 9" wide x 13" tall. The ledge is 1-1/2" wide, and its front lip is 1-1/2" tall. A 4-1/2" wide hinged rear support leg supports the back at two different angles: 80 degrees from horizontal when extended, 55 degrees when folded.
I copied the accent strip design on the back from a beautiful cutting board my wife found online at Treeline Studios. My wife and I looked at many bookstands and cutting boards for inspiration, but the search ended the minute she saw that board there. She was set on that design, period.
I'll provide more background information and in-progress photos below for those who are interested. Thanks for looking!
(*) About this being the last kitchen project… My wife doesn't like the way our metal napkin holder looks next to the stand, so I offered to build her a complementary one from walnut and maple. That means the cookbook stand was my next-to-last kitchen project…
Overall Design
My wife wanted the stand to be decorative enough to keep displayed on the countertop, but she didn't want it to take up too much space when not in use. She also wanted it to support just two tilt-back angles: a steep angle for display and a shallower angle for use.
We experimented with an iPad cover and decided that an 80-degree tilt angle (measured from the countertop) was good for display and a 55-degree tilt was optimal for actual use. She didn't want any other tilt-back angles, and she specifically didn't want a design with a slotted rear base plate and hinged rear leg or loop that rests into those slots to provide multiple viewing angles.
I came up with the idea of using a fixed support leg with a hinged flap behind the stand. With the flap extended, the stand would be more upright and compact (front-to-back). With the flap folded up, the stand would be tilted back to make the cookbook on the stand easy to read.
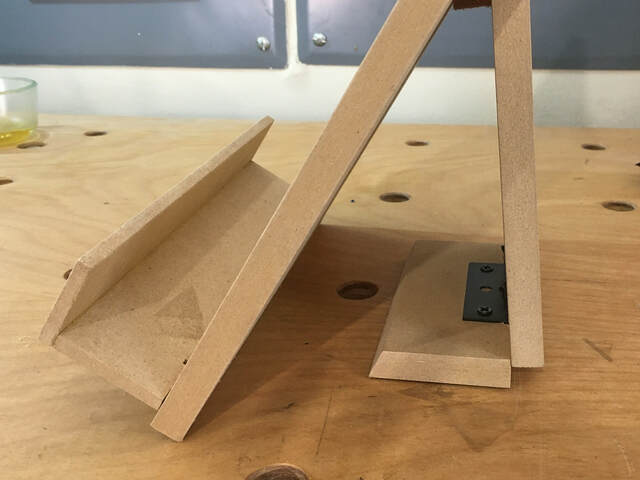
I used SketchUp to determine the angles and lengths for the support leg's parts. Not knowing how well the design would work, I built a prototype from 1/2" MDF, using painter's tape as the hinge. The prototype also let us determine if the ledge dimensions we chose were good.
The prototype showed us that the design would work, so I started on the actual stand.
Back Panel Design
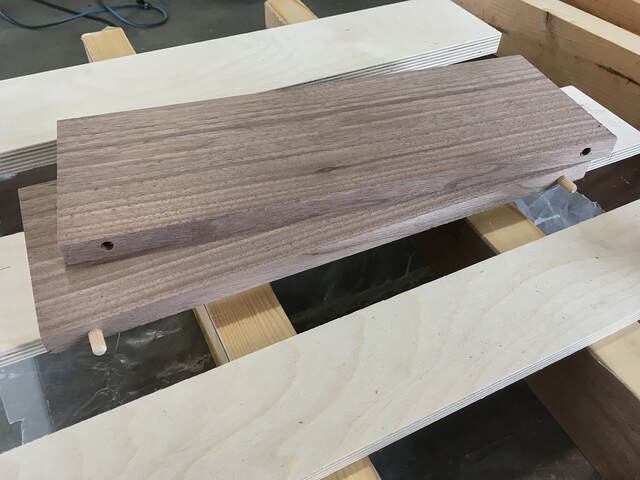
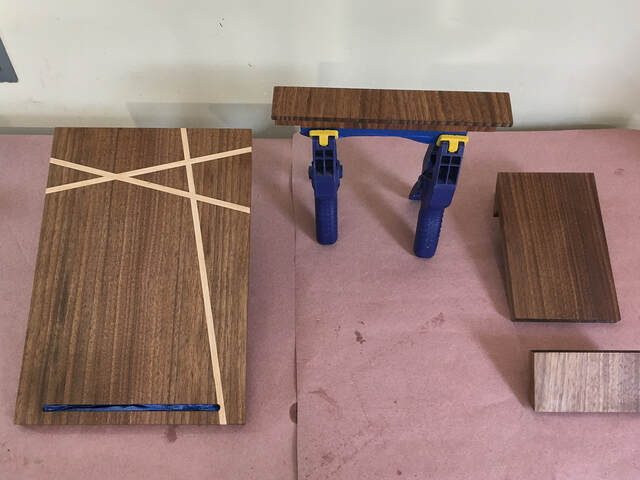
I started building the back panel by planing some walnut stock down to about 9/16" thickness and edge gluing two pieces together to create a slab slightly larger than 9" x 13". I used dowels for alignment to simplify glue up.
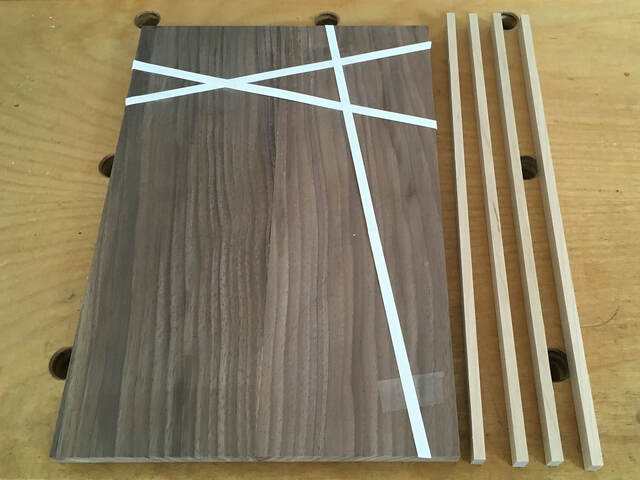
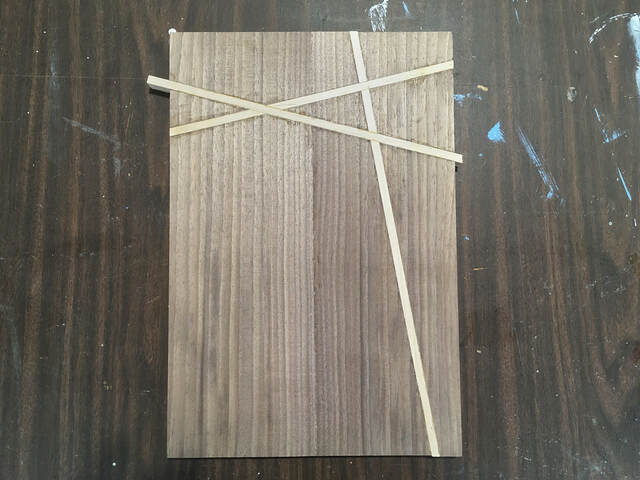
My wife cut thin strips of card stock in 1/8", 1/4", and 3/8" wide strips so we could finalize the size and positions of the accent strips. We settled on 1/4" width, with an arrangement similar to that of the inspiration cutting board. I took careful measurements and updated my SketchUp design.
I cut the accent strips from a scrap maple board and planed them to 1/4" width and 5/8" height/thickness.
Back Panel Construction
The first decision I had to make was how to cut the back panel to accommodate the accent strips. I knew that, for each of the three accent strips, I'd have to cut the panel in two and then glue the parts back together with the strip in between.
But I couldn't just cut the back panel in two each time. The cut had to be 1/4" wide so the accent strip would replace the removed stock and preserve the continuity of the grain and of the other accent strips.
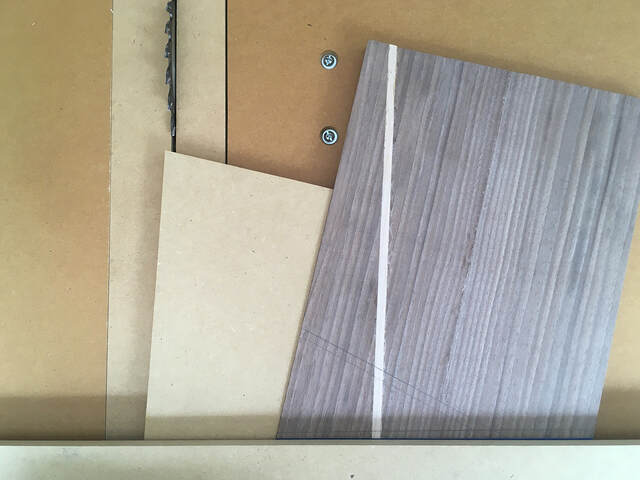
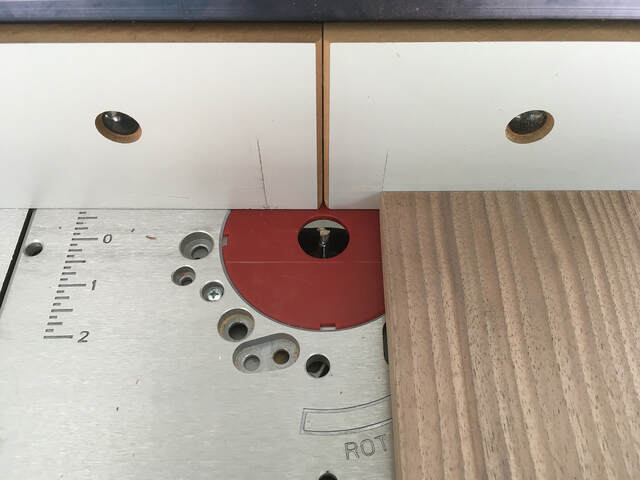
LumberJock JustinCA outlined a good procedure in his Live-Edge Cutting Board with Curves project: cut a slot with a router and a bit whose diameter matches the accent strip width, separate the board in the middle of the slot, clean up the edges with a pattern bit, and glue everything back together. I decided to follow his procedure, using my router with a 1/4" straight bit and pattern guide bushing and a straight board as the template.
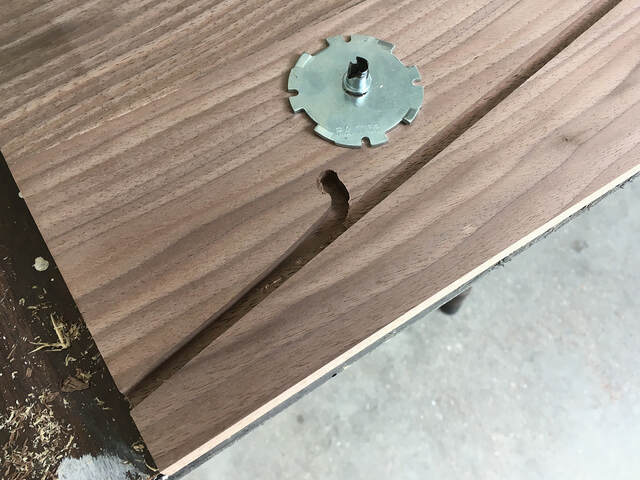
I routed a shallow (1/8" deep pass). It was as easy as I had hoped. I decided to make another pass before cutting the panel in half. A few inches into the pass, I knew something was amiss; the router was moving in a way that shouldn't have been possible. I didn't know what happened, but I knew I had ruined the panel in an instant.
When I flipped the router over, I first noticed that the bit had mangled the guide bushing's sleeve. Then, I saw that the guide bushing had failed completely. The sleeve around the bit had separated from its mounting plate, leaving the bit free to cut into the sleeve, the guide board, and outside of the intended path into the panel.
I promise I didn't cry, and I try not to curse, but refraining from both was difficult. That mistake stopped the project cold, and I had to wait until the next weekend to go back to the lumberyard to buy more walnut to start over.
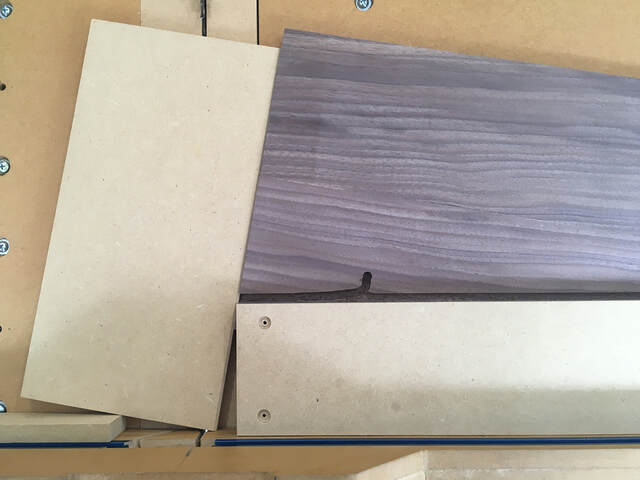
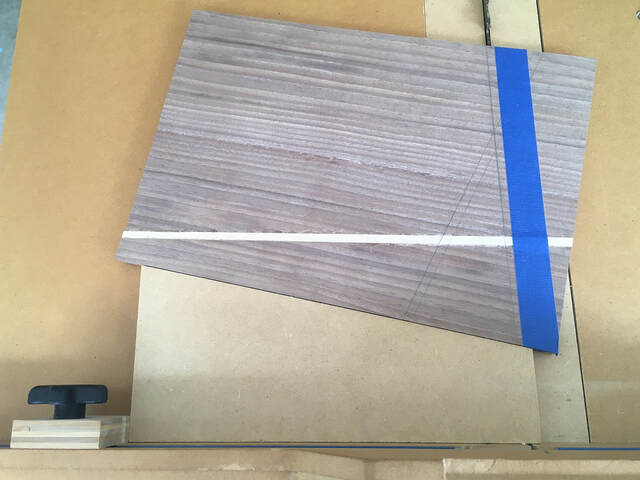
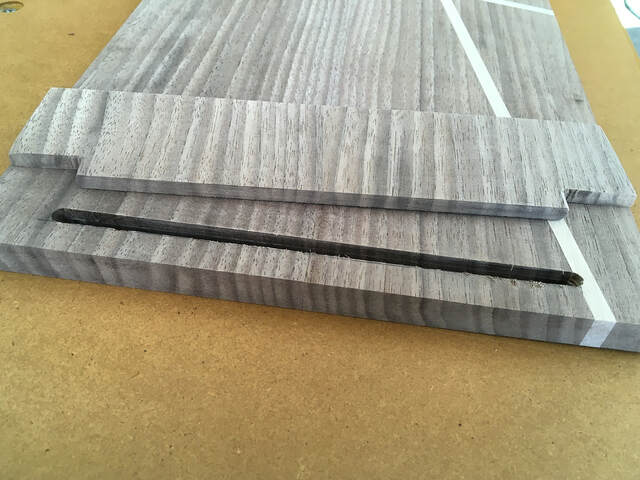
After reconstructing another back panel, I pondered round two. I had other (larger) router guide bushings, but I wasn't inclined to trust them, so I decided to use my table saw, crosscut sled, and kerfmaker.
Now my process was to (1) cut a sacrificial MDF wedge to place between the panel and sled's fence to support the panel at the proper angle, (2) hot-glue the wedge to the panel, (3) cut the panel in two, and (4) use my kerfmaker to adjust the stop block to make another cut to remove the extra material from the wider of the two parts.
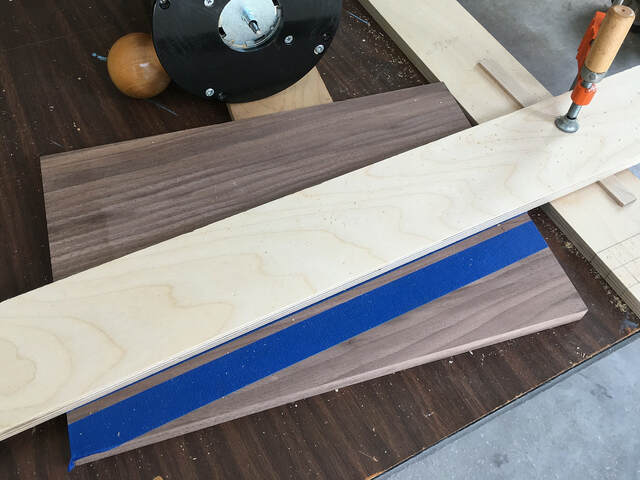
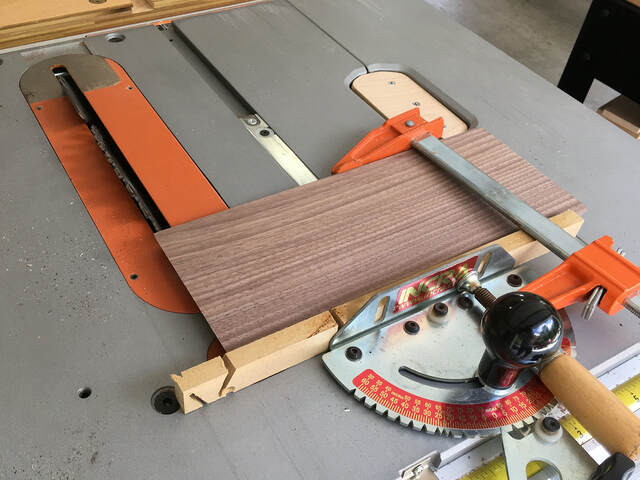
Here's how I cut the wedge for the first accent strip. I started by placing a straight guide board along the sled's fence and slid the ruined first panel under it with the slot aligned with the guide. Then I placed my wedge stock (1/2" MDF) so its long edge rested against the bottom of the panel. Finally, I used a piece of scrap to hold the wedge stock in place while I cut it.
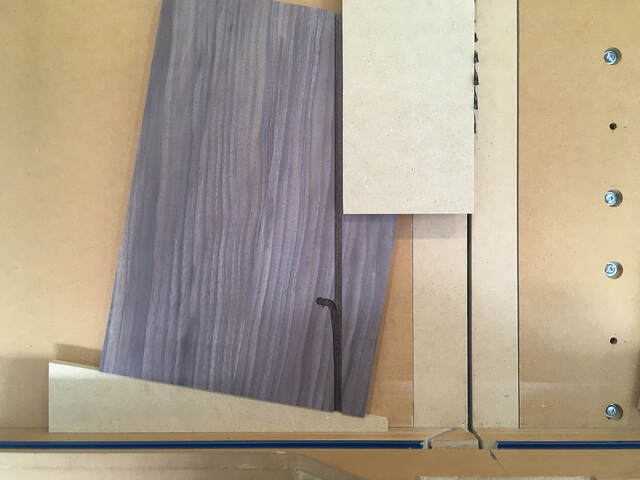
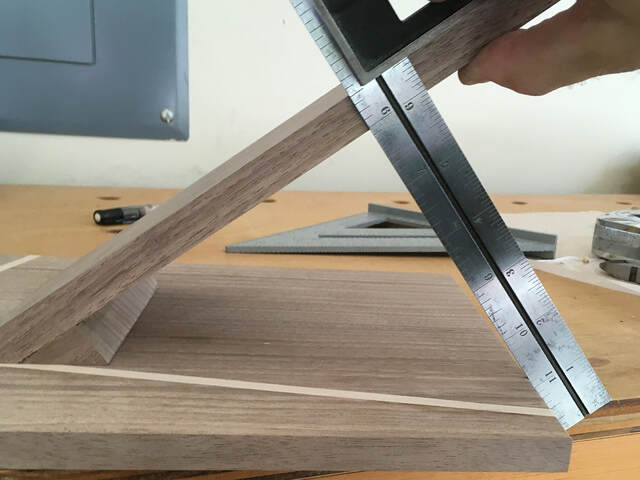
Here, I'm verifying that using the wedge would cut the new back at the correct angle.
I hot-glued the wedge to the bottom of the back panel. With it in place, it was a simple matter of setting up the kerfmaker, making the first cut, repositioning the kerfmaker, and making the second cut. That way, the width of the panel material I removed matched that of the accent strip.
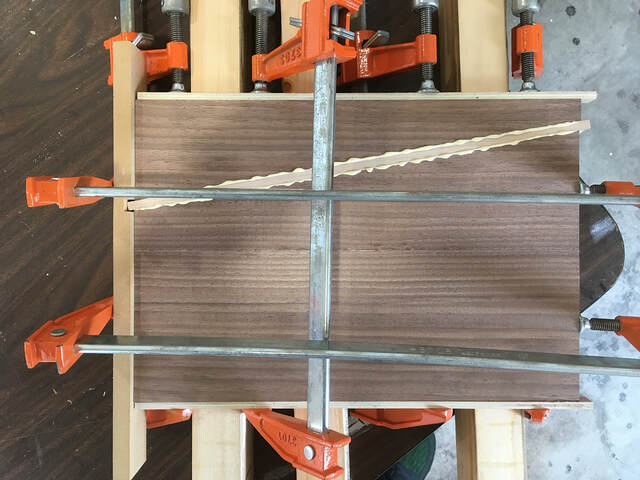
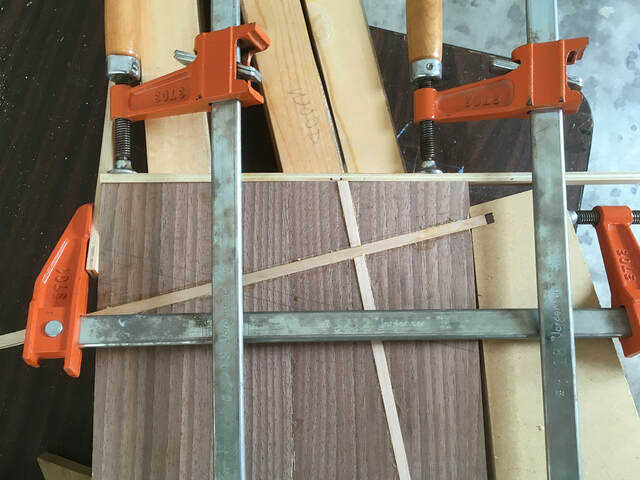
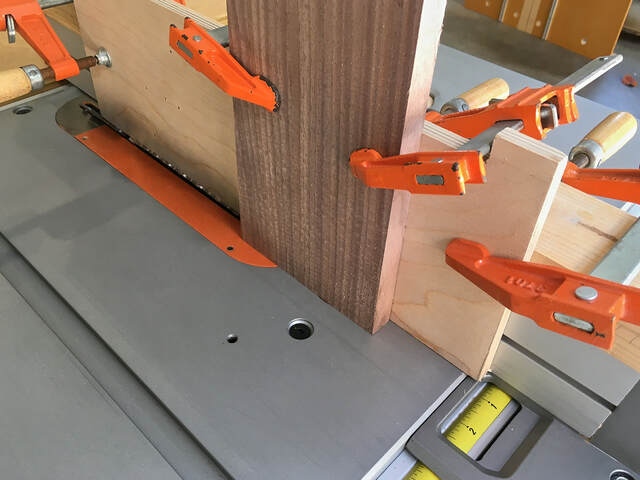
With that done, I was ready to glue the two parts of the panel together with an accent strip in between. Earlier, I mentioned using alignment dowels to align the rear panel sections. I didn't do that here, and I regretted it a bit. The pieces slid along the angled line as I tightened the clamps, and I had to add clamps in the perpendicular direction. It worked out, but it was more of an adventure than it should have been.
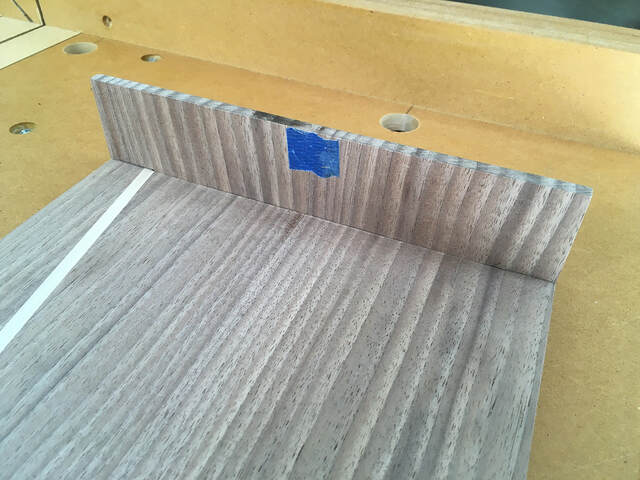
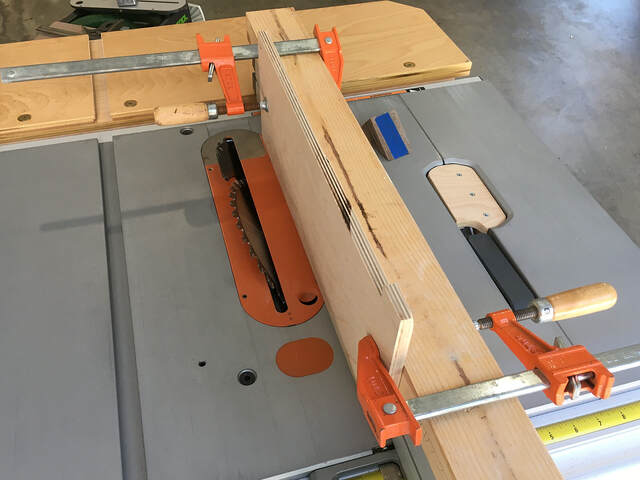
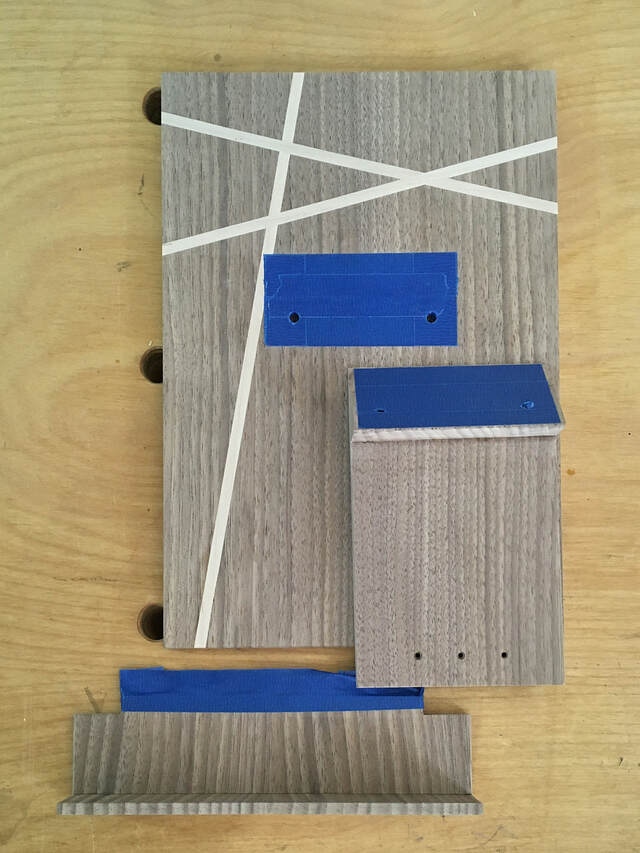
For the second and third accent strips, I repeated the process, but I used markup lines (highlighted with blue painter's tape) on the panel, to set the angle. Again, I didn't use alignment dowels, but I had a better idea about how to set up my clamps, so I had no real problems. If I ever build another one of these stands, I'll take the time to drill the dowel holes.
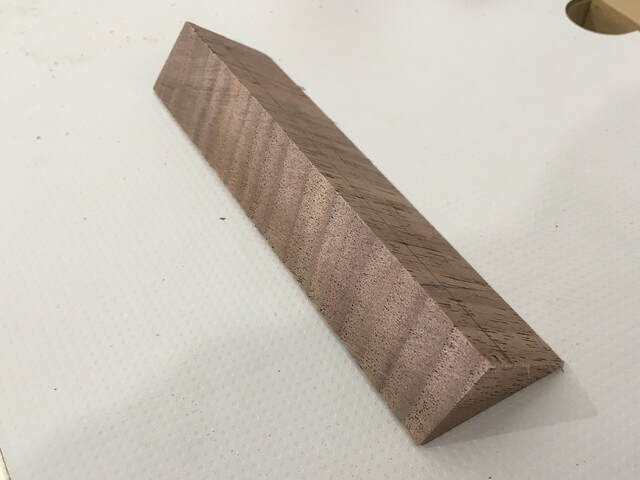
Here's the panel with all three strips in place, ready for sanding. After sanding, the panel was 1/2" thick.
I considered building a nice taper jig instead of cutting the sacrificial wedges. That would have been simpler in some ways, but adjusting the cut to remove precisely 1/4" would have been trickier.
Ledge Construction
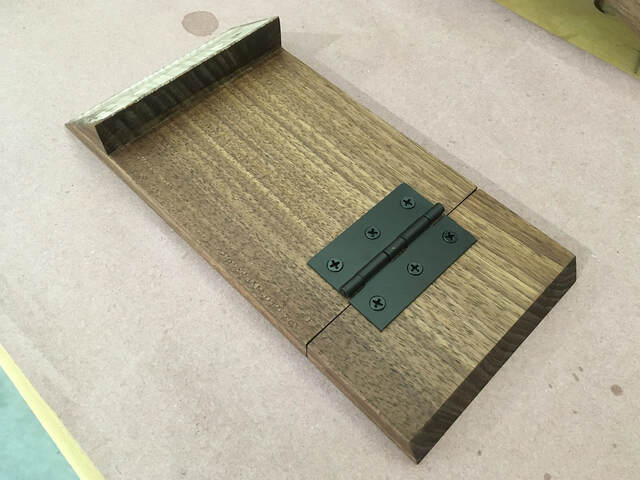
The ledge is very simple-just two 1/4" thick walnut pieces glued together with a butt joint. I notched out the back corners of the ledge to form a 3/8" wide tenon and routed a matching slot in the back panel.
Support Leg Construction
The support leg is just a 4-1/2" wide slab with tapered ends that is cut in two at a 90 degree angle. I cut it about an inch longer than the expected final length so I could fine-tune the lengths of its two parts after I had dry-fit the leg to the rear panel.
The angle of the bottom of the leg's flap is 35 degrees, so all I had to do was tilt the saw blade and use a miter gauge. I clamped the leg to a makeshift extension fence to make the cut.
The angle at the top of the leg is 55 degrees, and my saw won't tilt that far. I had to make the complementary cut vertically, so I left the saw blade at 35 degrees and cobbled together a makeshift sled (sort of like a tenoning jig) to make the cut.
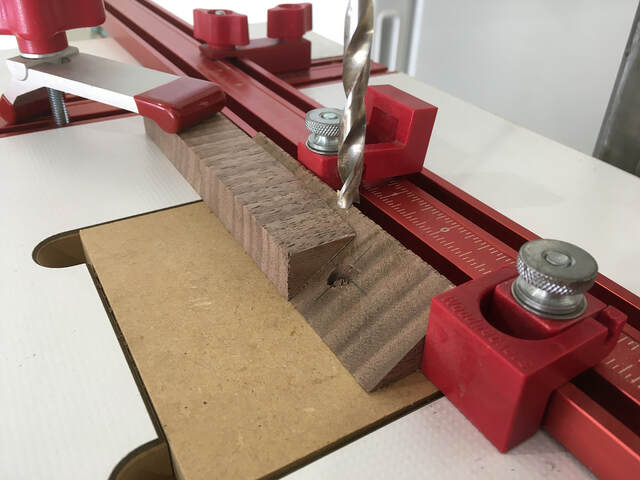
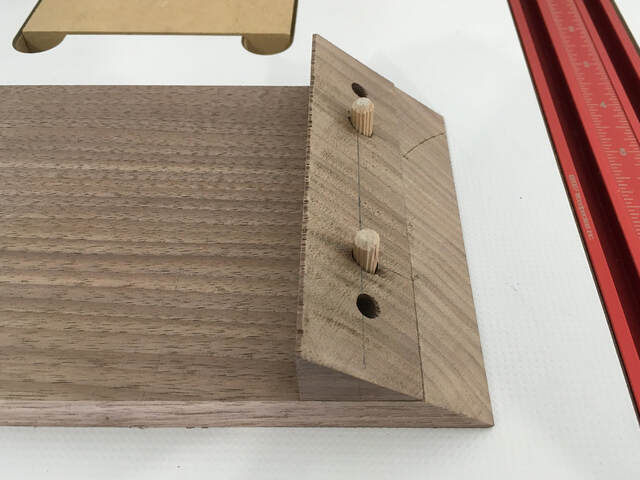
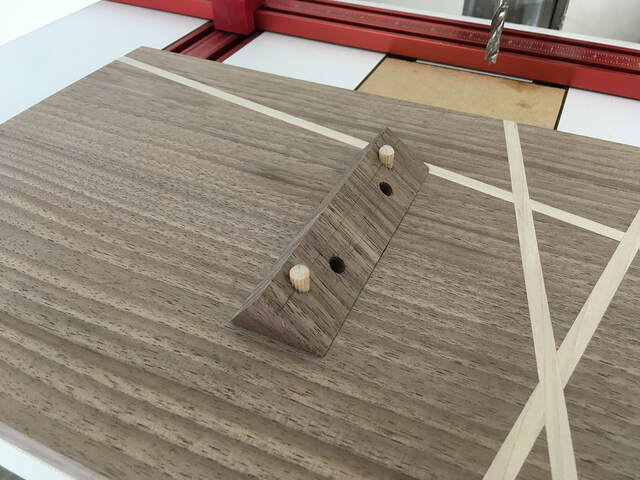
I used the same setup to cut a triangular brace that sits between the support leg and back panel.
I drilled two sets of dowel holes in the brace.
One set aligns the brace with the leg.
The other aligns the brace with the rear panel.
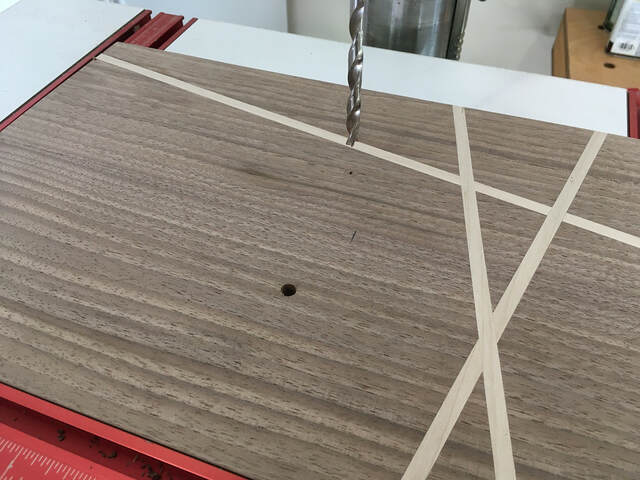
The dowels enabled me to dry-fit the support leg to the rear panel and then to confirm the location of the cut between the top part of the leg and the flap. I had the dimensions in my SketchUp model, but it's easier to cut to a marked line than to measure and draw a line 6-35/64" from an angled corner.
I didn't take any photos, but I cut the flap to length by "sneaking up" on it. I cut it a bit long, then trimmed off tiny sections until the bottom edge rested flat on my bench when the rear panel was tilted at 80 degrees.
Support Leg Hinge Placement
Before applying finish to the leg, I temporarily attached the flap hinge. I offset the hinge toward the top of the leg so its barrel cleared the edge of the top part of the leg. I didn't want the barrel to extend beyond the end of the leg, because I didn't want any metal ever touching (and scratching) the countertop.
The only thing I don't like about that hinge position is that the final stand looks a little messy when viewed from the side when tilted back. (See the fourth photo at the top of the page.) Instead of folding up against the top part of the leg like it did in my prototype, the flap flops out. (That's because the prototype uses tape as a hinge, and that hinge has no barrel to speak of.) In practice, it doesn't really matter, because you can't really see the flap when the stand is in use. But it is a bit inelegant.
I did experiment with my prototype by mounting the hinge with the barrel flipped around. I had to cut clearance mortises for the barrel. The hinge stops at 270 degrees, so the back side of the flap rests on the countertop. That looks a bit neater, but it would require changing the relative lengths of the two parts of the support leg to preserve the overall stand tilt-back angles. In the end, my wife decided she was fine with the original design.
If I were to build another stand, I think I'd investigate a stopped wood hinge integrated into the two parts of the leg. Then the tilted back stand would rest on the circular part of the leg hinge, and the flap could rest flat on the countertop. I have no idea how to construct such a hinge, but I'm sure it's possible.
Finishing
I wanted to apply the finish to the rear panel, support leg pieces, and ledge before final assembly. I sanded everything down to 280 grit, then taped off the areas that would receive glue later.
My wife wanted a natural, low-luster finish, so I used Watco Danish Oil. It's easy to use. The only problem I ever have with it is knowing how much oil to remove after letting it soak in for a while. Some instructions say to wipe off all the remaining oil so the surface looks dry, but that results in what looks like an unfinished board to me. In the end, I ended up wiping off the excess oil on the final coat, leaving a tiny amount on the surface. That improved the appearance quite a bit.
I let the finish cure for a few days, then glued the ledge and support leg to the rear panel. The alignment dowels made the latter very easy. I didn't even need clamps-hand pressure was enough. With that, I was done, and my wife was happy.
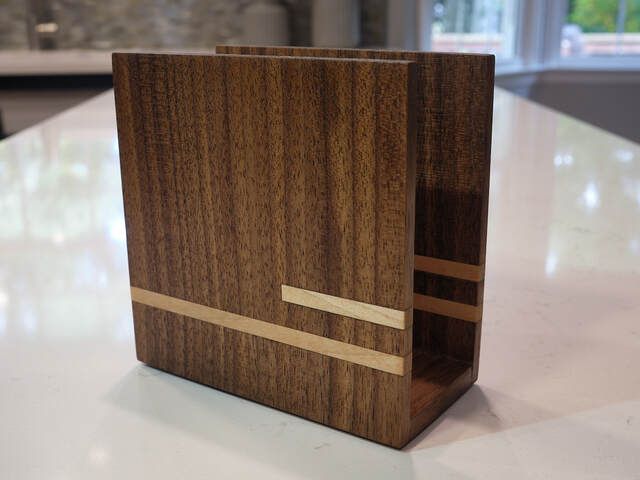
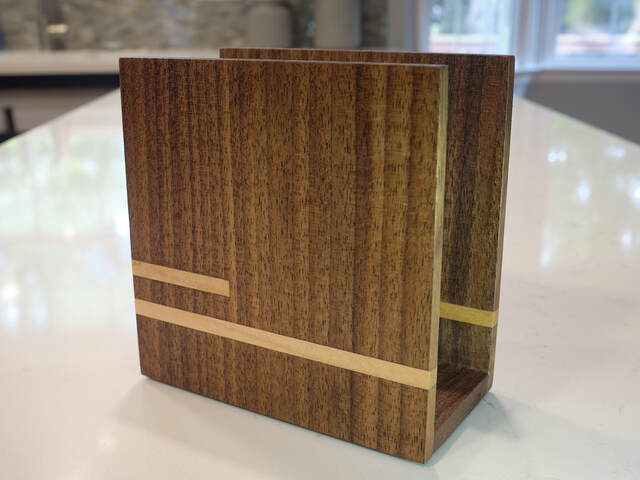
Matching Napkin Holder
Well, she was happy with the cookbook holder, but she didn't like how out metal napkin holder looked next to it.
I offered her to build a matching napkin holder, and she wanted a very simple design for it. Compared to the cookbook stand, it was easy to build. The only slightly tricky part was cutting the slot for the short segments. I cut those with my table saw's crosscut sled (with the blade height matching the slot length) and kerfmaker.
With that done, my set of kitchen projects was finally complete.
cool projects ron. once again you go above and beyond not showing the project but every detail on how it was made. i wish i had your patience to do it.when im in build mode im going at it,and then it's 20 steps down the road and ive taken no pic's. hell you guys are lucky for what i do record.
working with my hands is a joy,it gives me a sense of fulfillment,somthing so many seek and so few find.-SAM MALOOF.
Another excellent project & write up. I'll echo pottz's appreciation for remembering to take enough pictures. I try but usually miss a few at a key step.
Another interesting read! I like the two-angle support. Nice match with the napkin holder. I haven't done any accent strips so thanks for explaining your process. I cringed with you on the router cut "situation" - a tear would have been warranted. Turned out great!


 - Project by Ron Stewart")

")
")
")
")
")
")