A couple weeks back I started designing a GRR-Ripper style pushblock. I watched some videos of some DIY versions of it to see what others were doing, and then started designing my own. A few had some form of a retractable stop, and I liked the idea of having that feature, so I incorporated one into my design.
I wanted the pieces to be replaceable - especially the thin vertical piece that rides against the fence, since it's the most likely to be damaged when ripping narrow strips. My intent was to use materials I had on-hand, so it's designed for 18mm and 6mm BBP. I used some store-bought knobs and some DIY knobs.
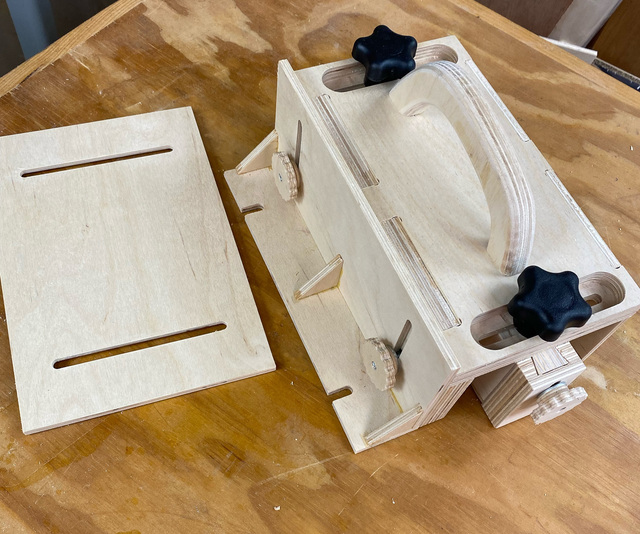
The sides and top have interlocking joints, with the sides held to the top with just some screws so that they can be removed and replaced if needed. The moving center vertical piece is fixed in position using a pair of knobs on top. The center piece has a dovetail at the trailing end, which is used to capture the retractable stop. Pictures explain things better, so….
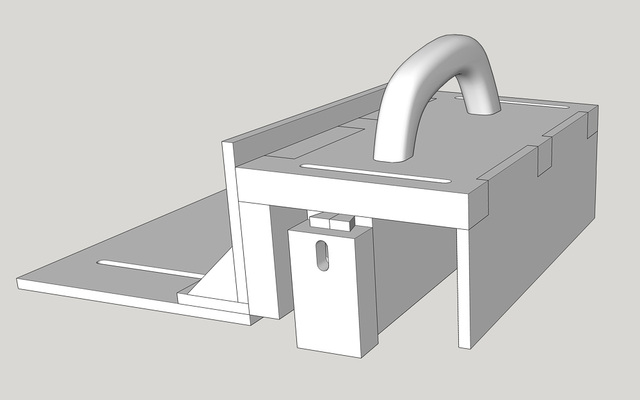
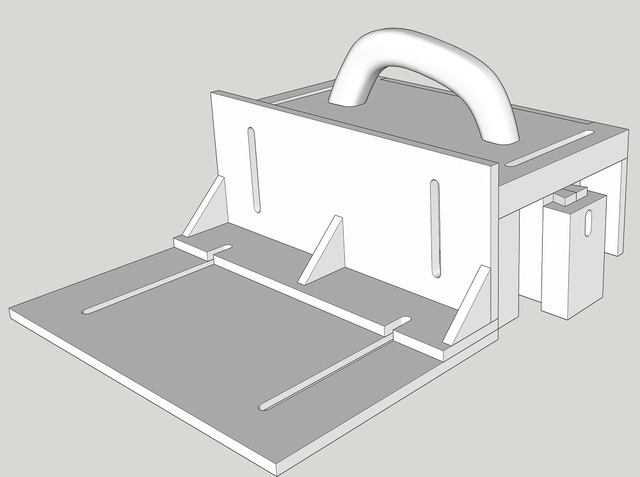
I started off making a SketchUp model.
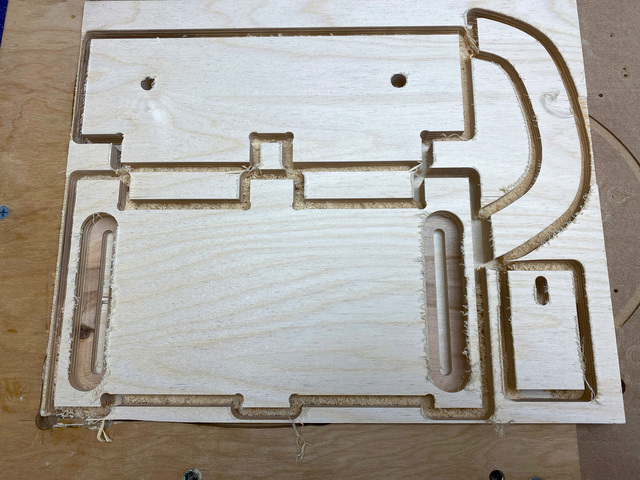
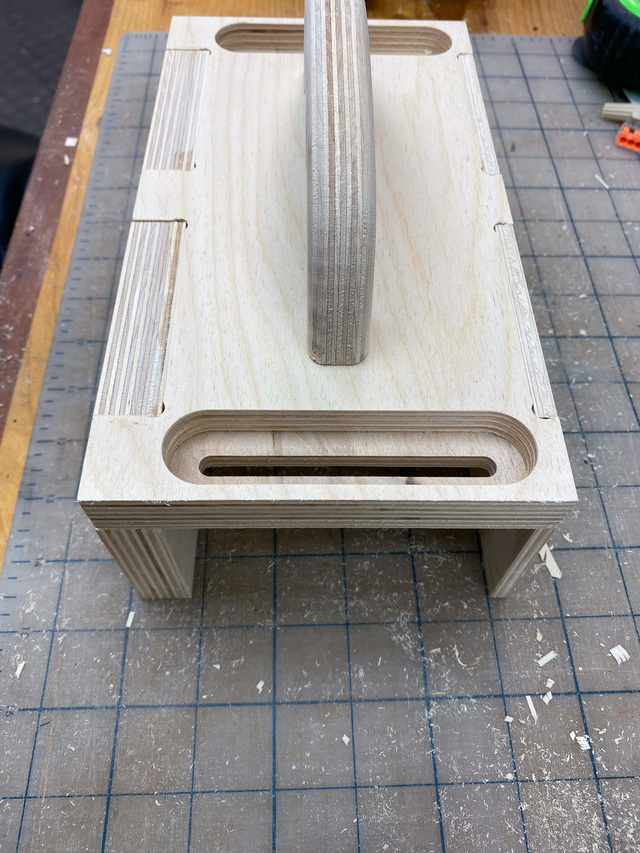
I cut out the sides, top, stop block, outrigger pieces and handle on the CNC. The two deep channels on the top were to allow the shoulder on the knobs to sit lower so that the short stud would protrude enough. (If I were doing it again, I'd make/buy knobs with a longer stud.)
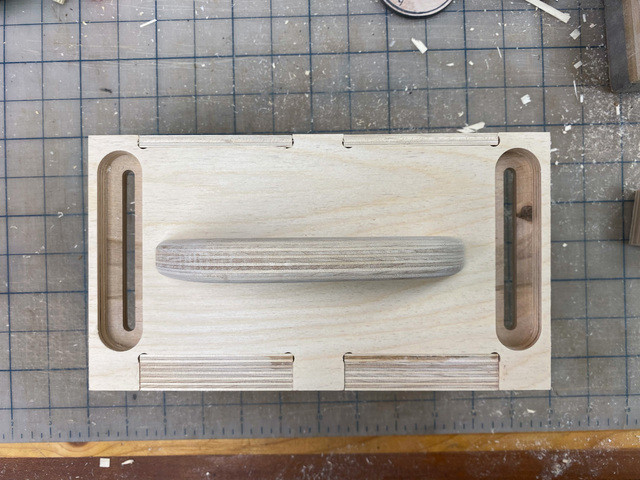
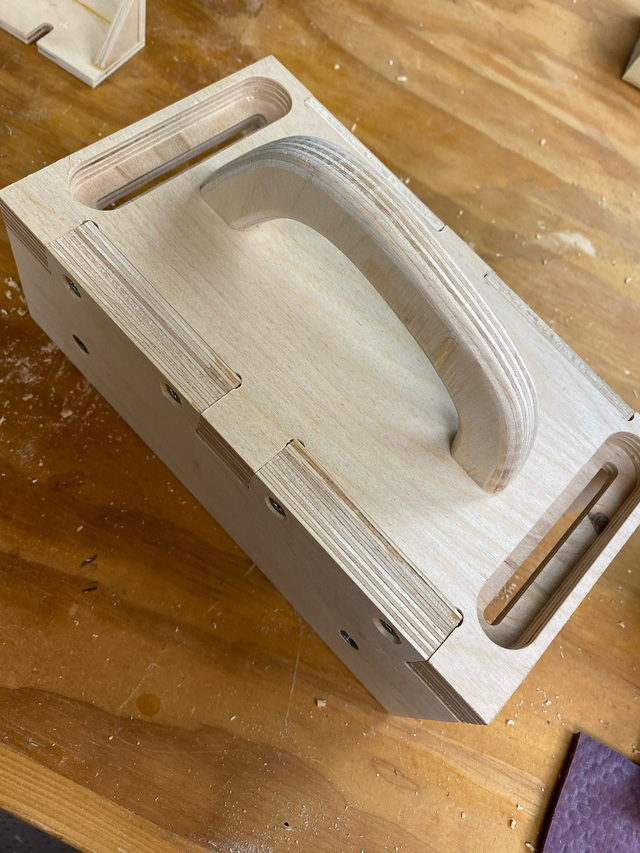
The handle received a 1/4" radius roundover. Dry-fitting the parts:
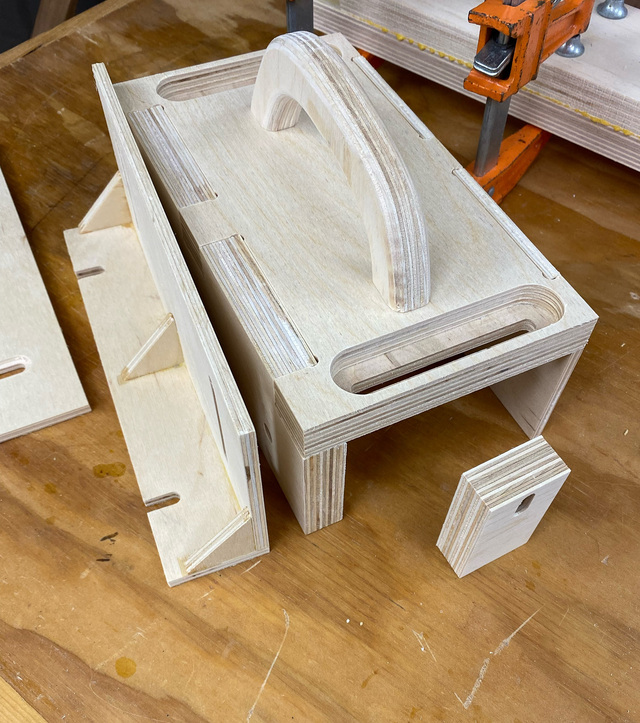
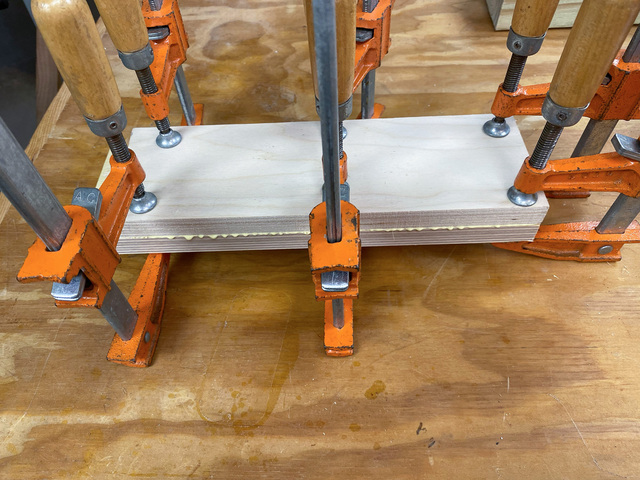
Here's the assembled outrigger glued-up. I used some CA glue in spots to keep the parts in position while the Titebond II dried.
The plate on the left is upside down to show the recess for a T-bolt. This "featherboard" plate can be attached to the outrigger to apply side pressure on the work towards the fence.
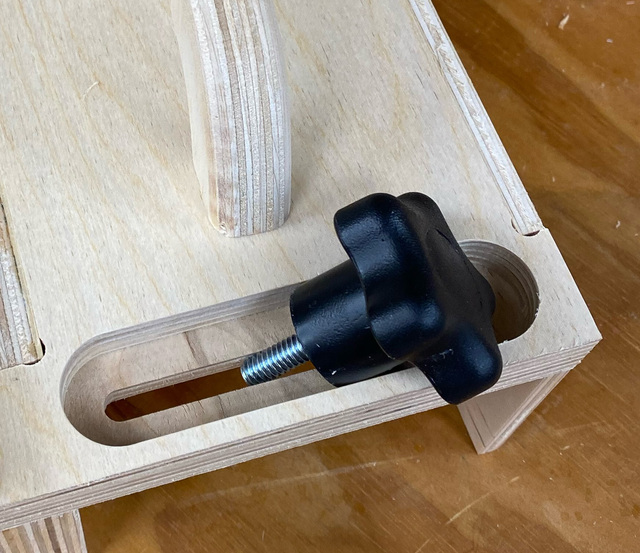
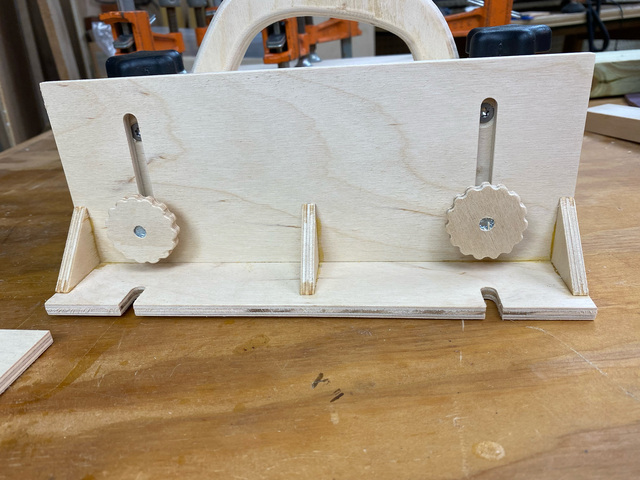
Here's one of the knobs that will ride in the channel on the top:
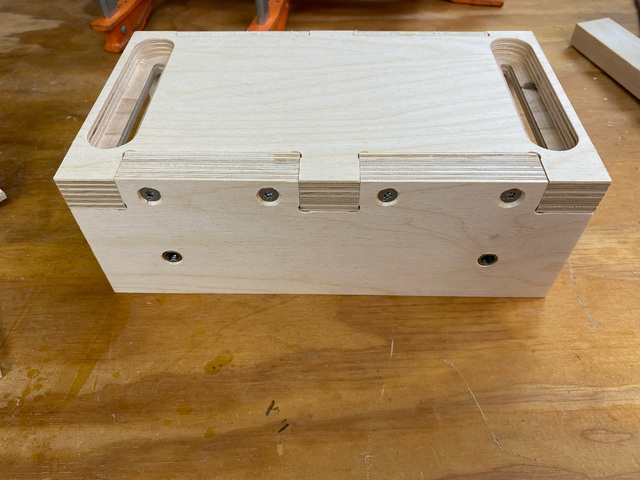
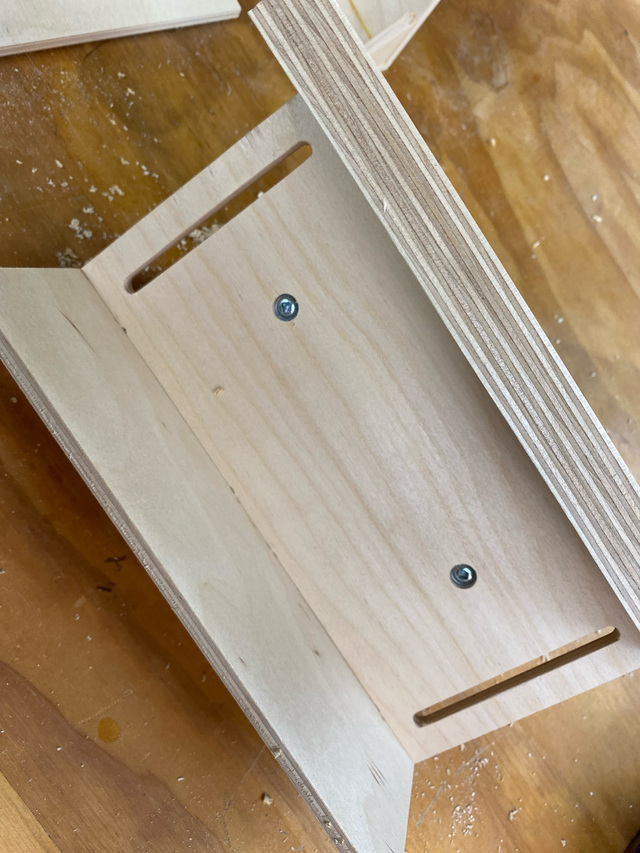
The sides are fixed in place with some screws. The lower two holes hold threaded inserts for attaching the outrigger.
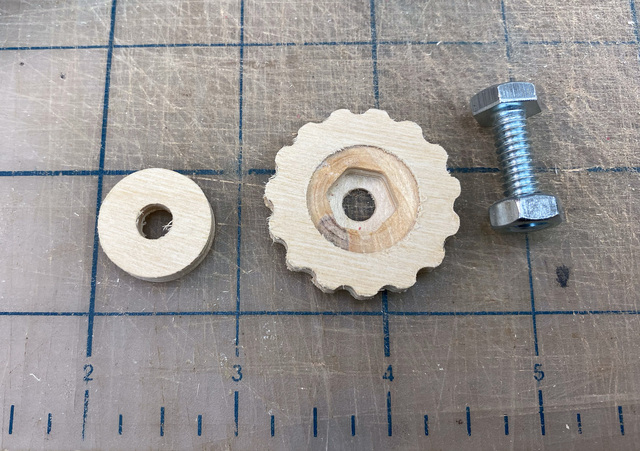
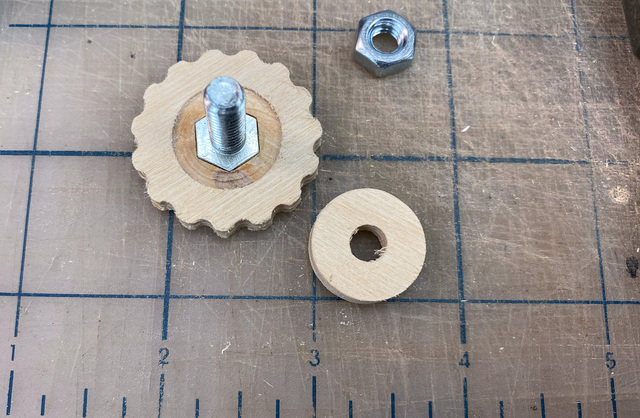
I made the knobs that hold the outrigger in place. These had to be shallow so that they wouldn't interfere with the knobs that would secure the "featherboard" plate (another redesign opportunity). These shallow knobs are made from 6mm ply. The knob can be used for either a bolt head or a nut. In this case, the outrigger know needs a bolt.
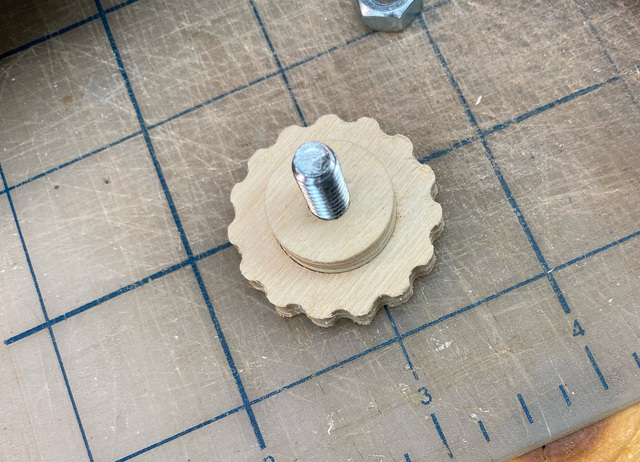
The disk is glued in place to keep the bolt head captive.
I'll make similar knobs but with captive nuts to hold the featherboard plate to the bottom of the outrigger.
The center piece is a double thickness of 18mm ply glued together. After the glue dried, I jointed one edge and cut the piece to final width on the tablesaw.
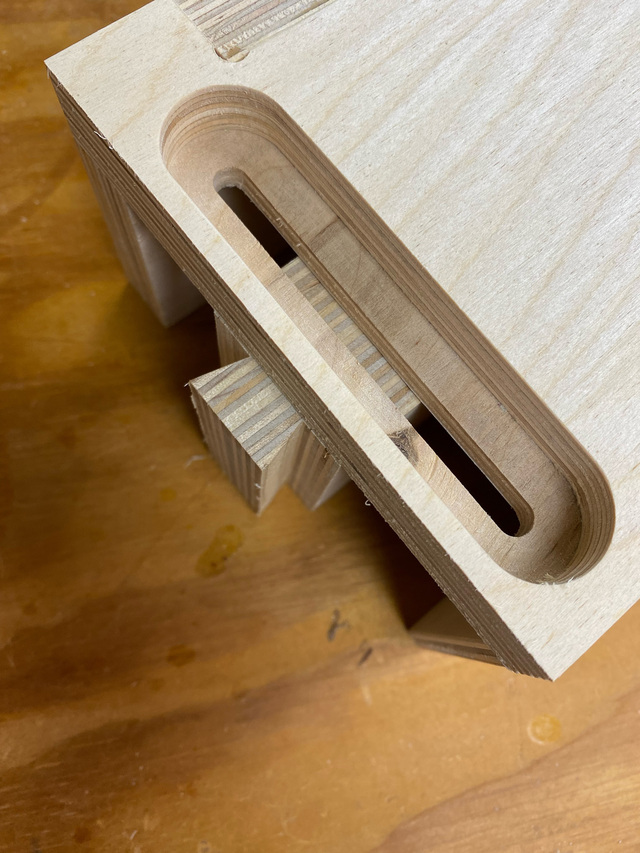
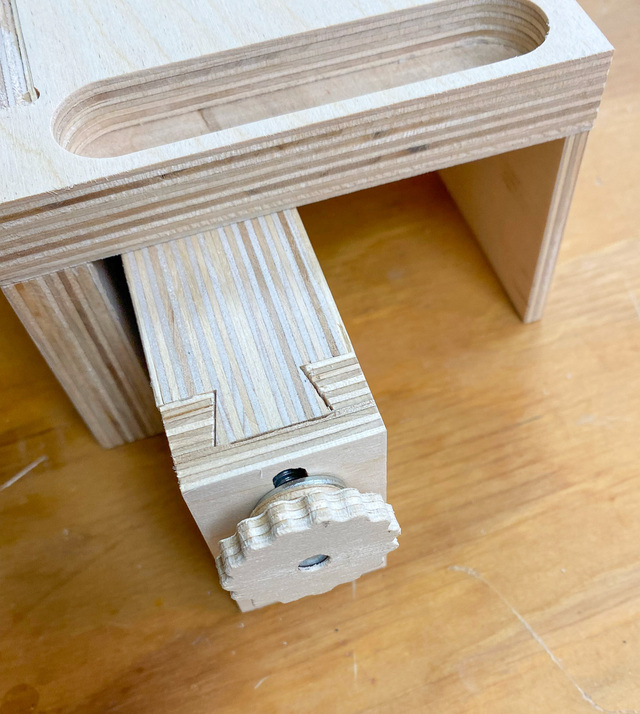
On the trailing end of the center piece I cut a dovetail that the stop will slide on.
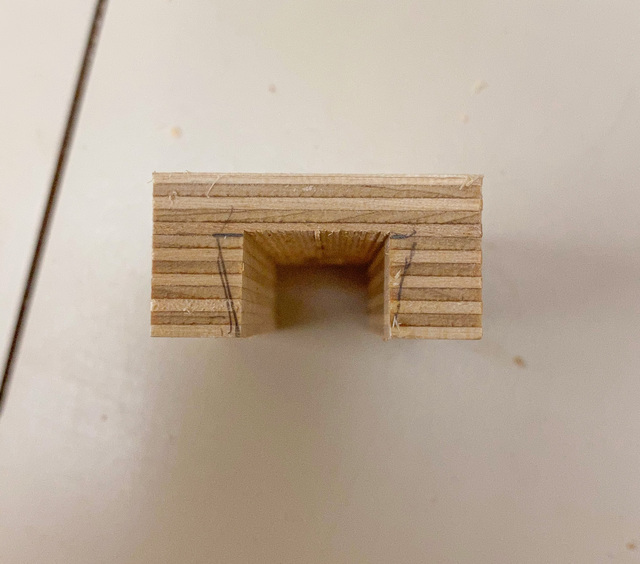
On the tablesaw, I cut out the bulk of the material for the mating dovetail on the stop.
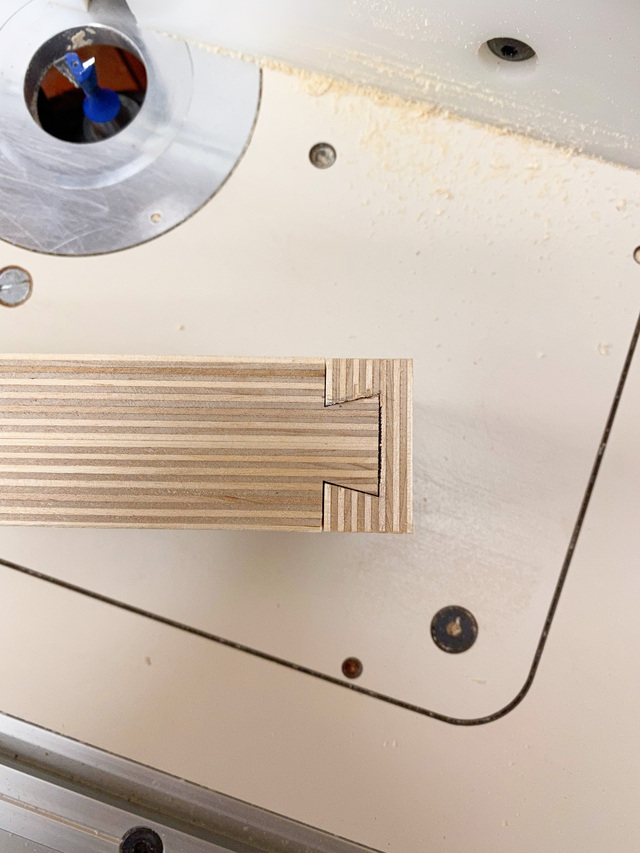
I cut the remainder of the dovetail on the router table, sneaking up on width to arrive at a loose, sliding fit.
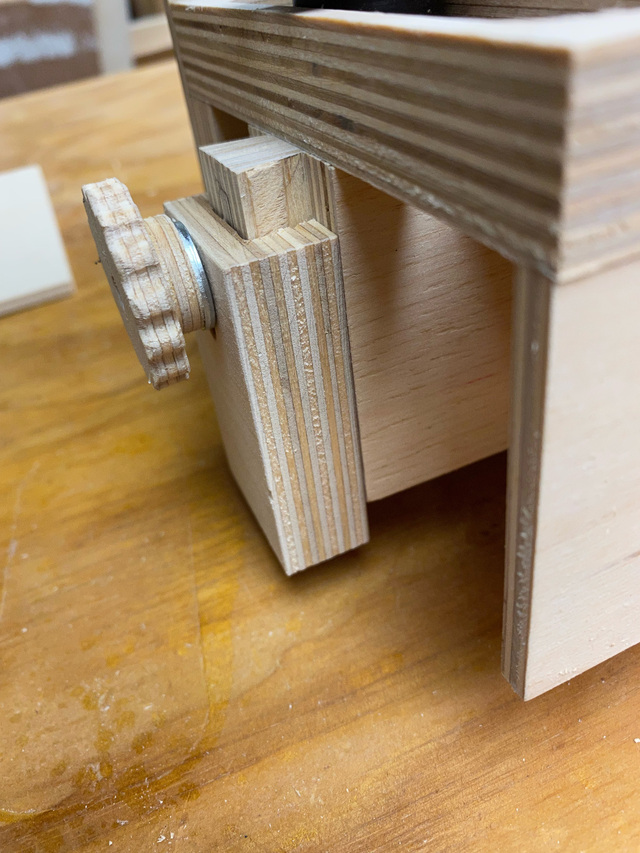
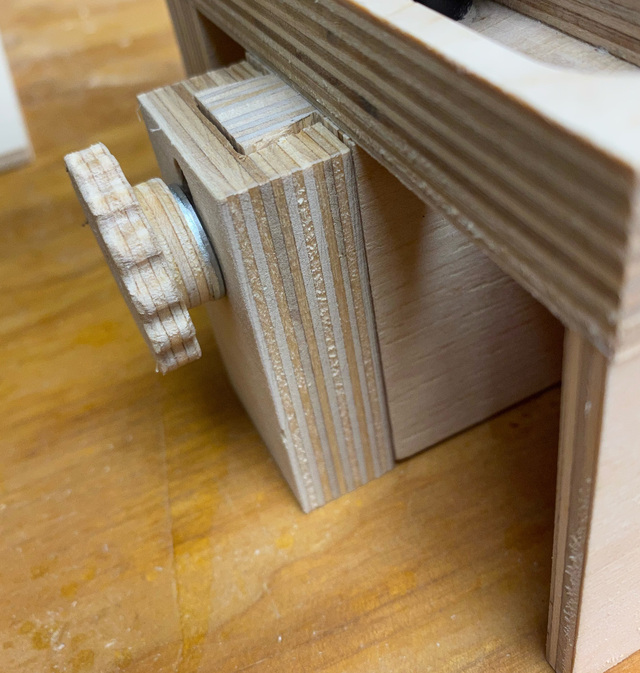
The slot on the stop will limit its travel once the knob is installed. With the knob left loose, the stop can drop and retract freely. Or it can be tightened to keep the stop in either position.
Stop extended: Stop retracted:
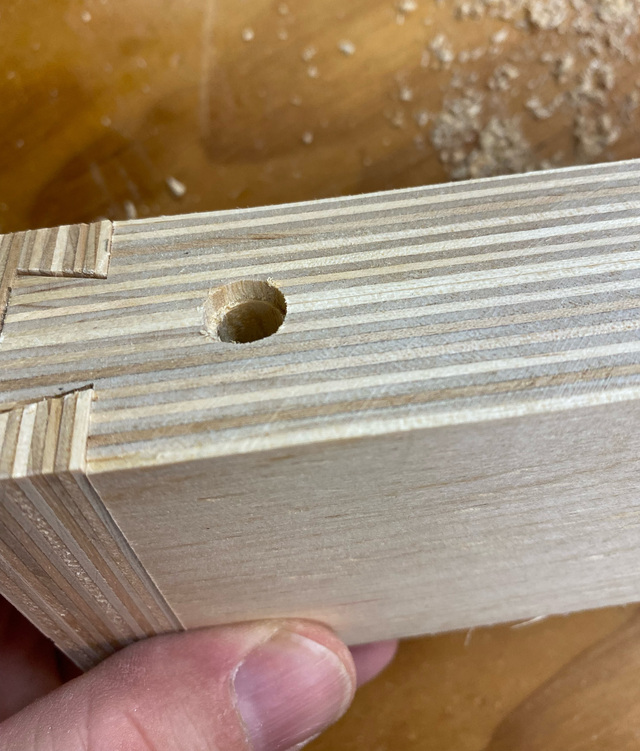
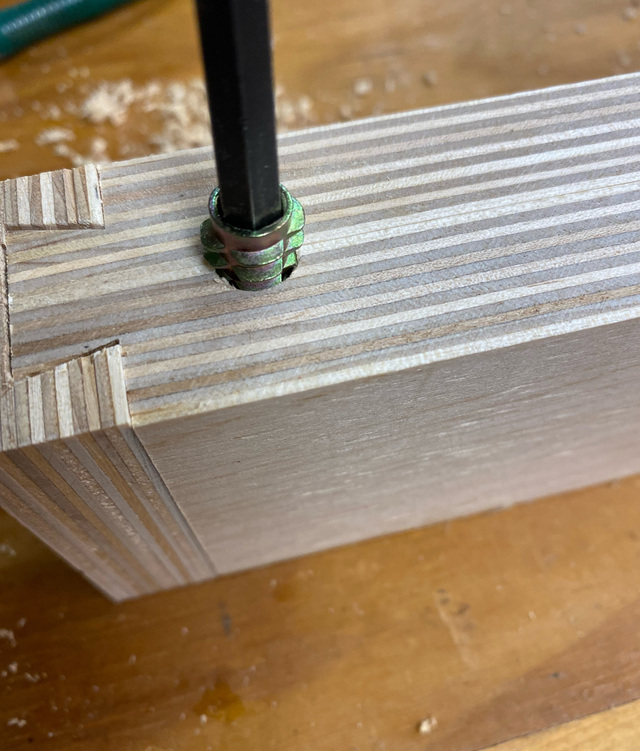
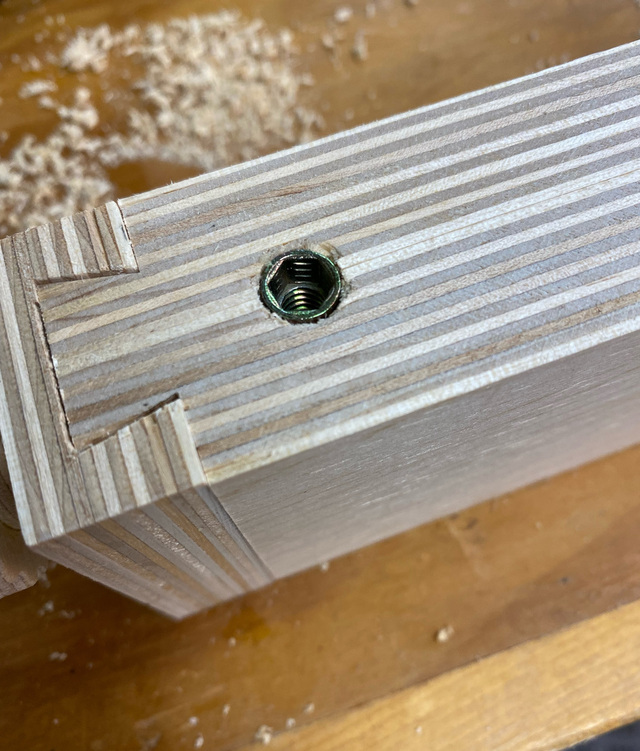
With the nut inserts that I used, I found that if I had a slightly larger counterbore for the hole, the wood didn't lift and splinter when the threaded insert was installed.
The handle is attached with screws from underneath. The heads are recessed so they don't interfere with the sliding center piece.
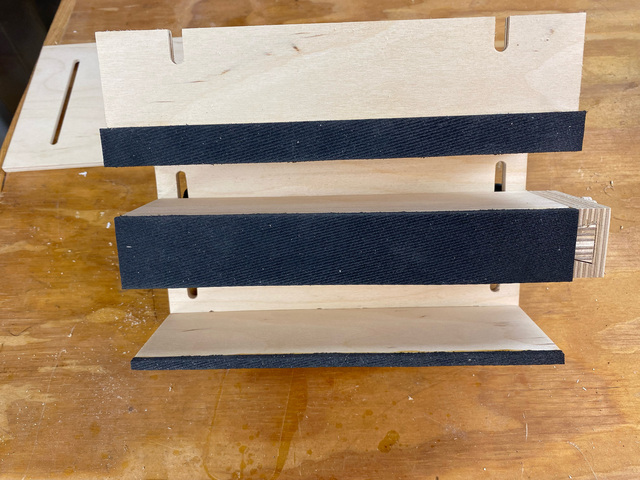
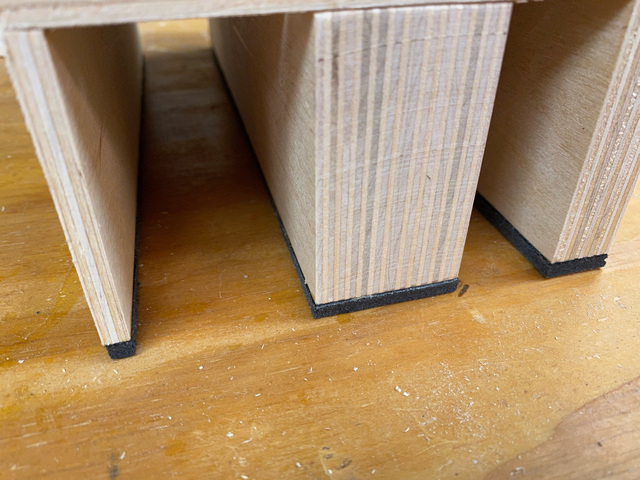
All done except for some sealer and some grippy material on the bottom, which will be an old mousepad cut into strips and attached with some contact cement.
With the grippy mouse pad strips applied:
I can't say I've put much mileage on this tool since it was built. Frankly, I forget about using it. But the times I've used it, it worked great. I just need to use it more until it becomes a habit (or I decide that I don't care for it).
yeah ive got one of the originals and i often forget to use mine too. gotta get in the habit myself. there was someone back on the old lj's that made one and it was one of the biggest viewed threads ever.you did a great job on this one.all the pic's are perfect for someone wanting to make one.
working with my hands is a joy,it gives me a sense of fulfillment,somthing so many seek and so few find.-SAM MALOOF.
Nice job. I have a couple of the "commercially" made ones also. I won't use my table saw or router table without them. They ARE habit and automatic 100% of the time.
Hey folks, I appreciate all the positive comments - thanks!
What type of "mouse matt" did you use to get a good grip. Most mouse mats I've seen/used didn't have a "grippy" surface.
LBD - as a software developer, I've accumulated (and tossed) many mouse pads over the years. I don't know for certain, but I think this one was an old Apple one. The bottom had a very textured rubber surface. It seems to be pretty grippy.
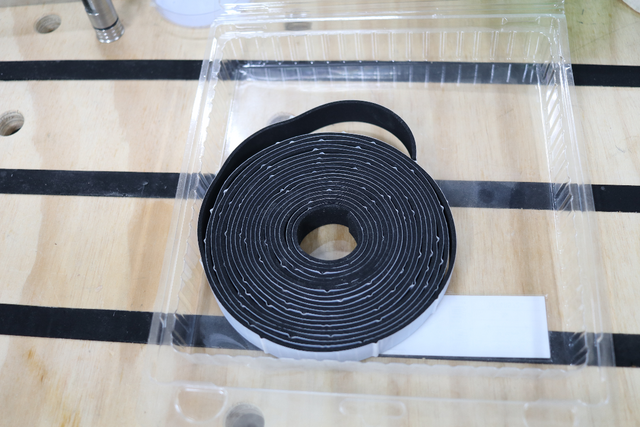
The Fe$tool Rail Guide adhesive as an alternative first came to mind.
But then I would have paid more than the price of a commercial GRR-Ripper. :)
Touché RL... however there may be tracksaw track owners that have relined their tracks (not becessarily the Fe$tool brand)... with some left over, wondering where they can spend the "big change", rather than in the scrap bin...
Alternatively, as mentioned, I have the originals, but if I didn't, I'd have used the "change" from my MFT style benchtop, Furtunately I have more in my scrap bin than just timber.
Would be a costly exercise if you didn't have the scraps and it didn't work, however, from my tracksaw/benchtop use, it sure seems like a likely candidate.
Rubber strips and/or neoprene (stick on) may also work...
If your first cut is too short... Take the second cut from the longer end... LBD