My oldest Son asked me for a Brazos walking stick last Christmas and it arrived damaged. The middle section of the stick was cracked. It looked like it was a returned item. I emailed the company and they sent me a replacement and said to keep the busted one.
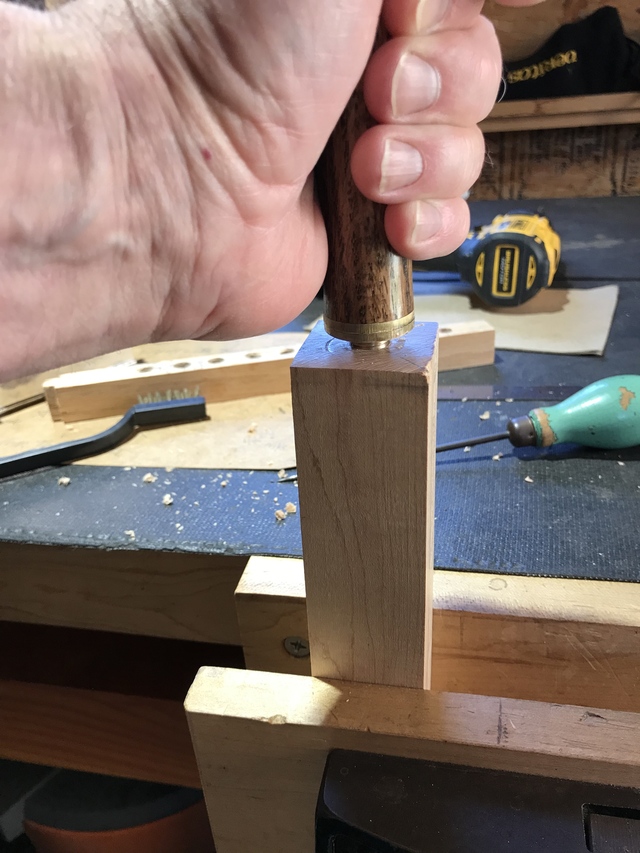
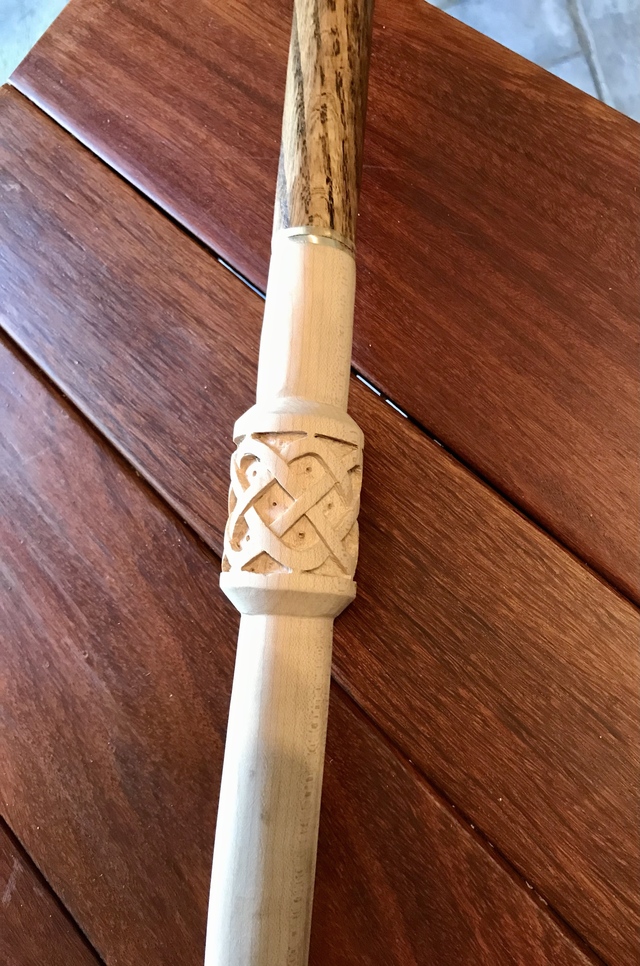
Thinking I could remove the hardware and make a replacement for the broken part I decided to add a carved detail on it. I glued two pieces of 3/4" hard maple together with water proof Tite Bond III because it may be exposed to moisture outside.
Here are a few of my process photos.
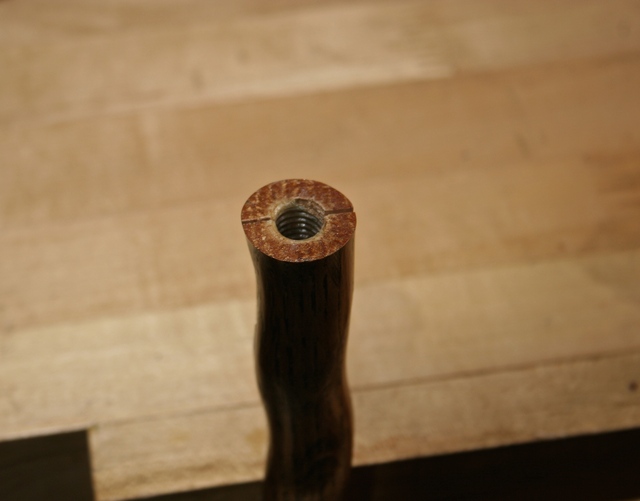
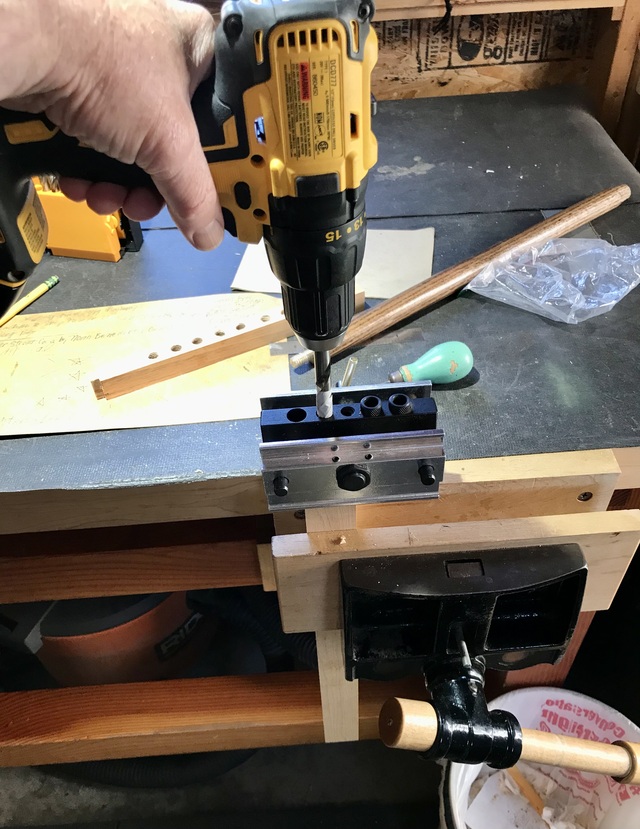
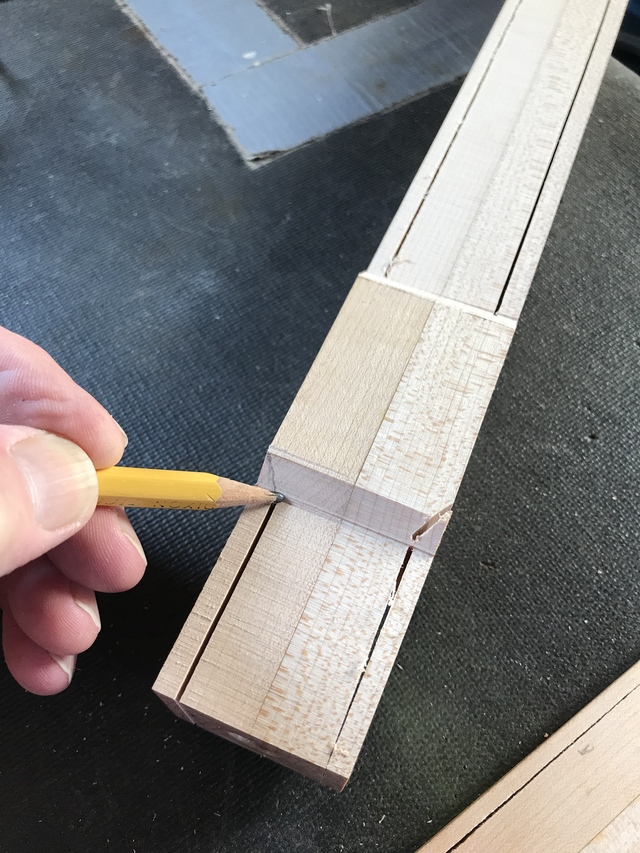
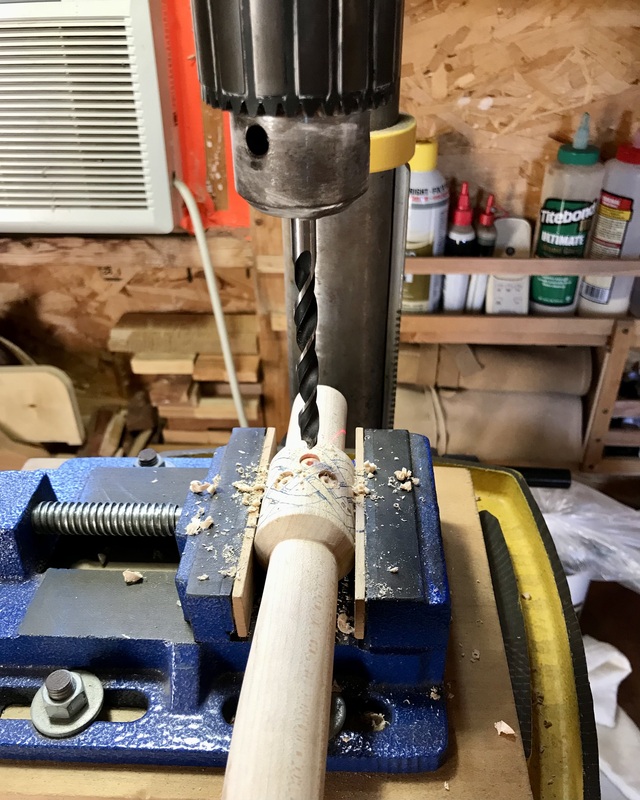
Drilling the hole for the brass hardware with a doweling jig. Creating the threads with the brass screw using bees wax.
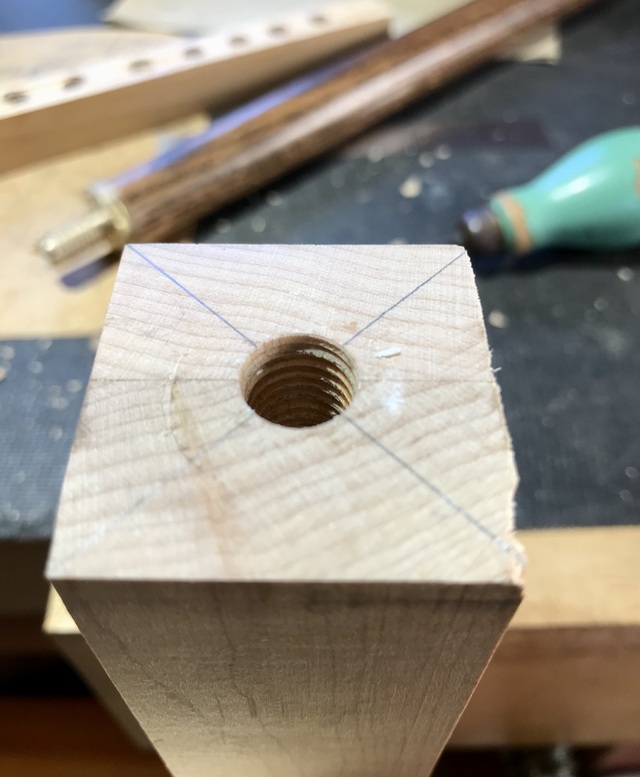
Leaving a 1-1/2" x 1-1/2” Section for the carving.
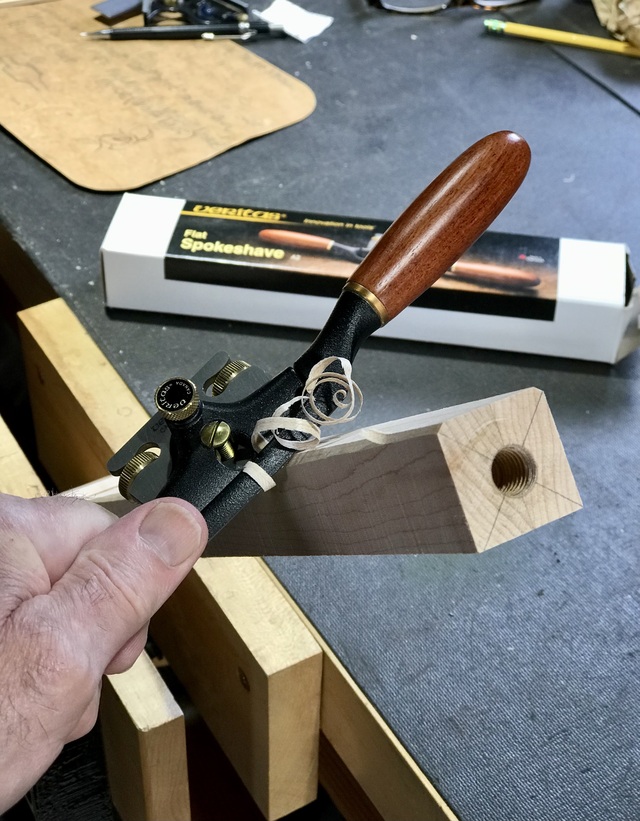
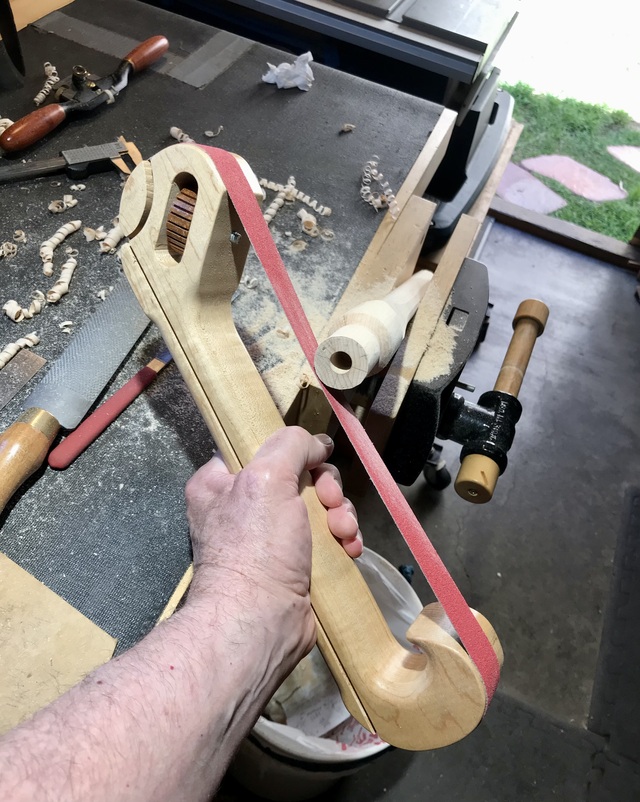
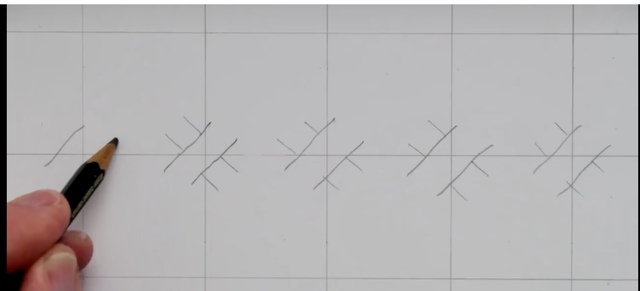
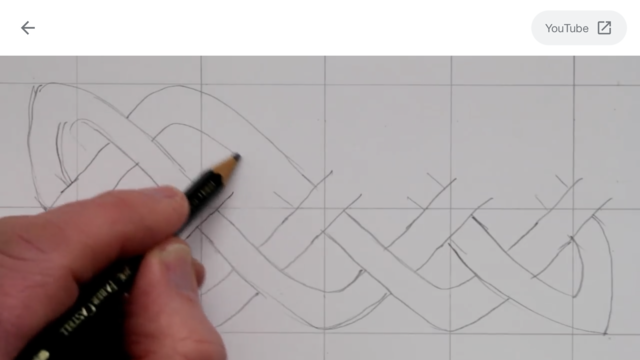
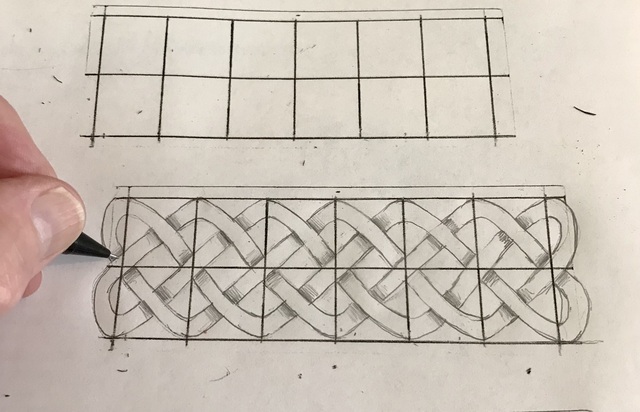
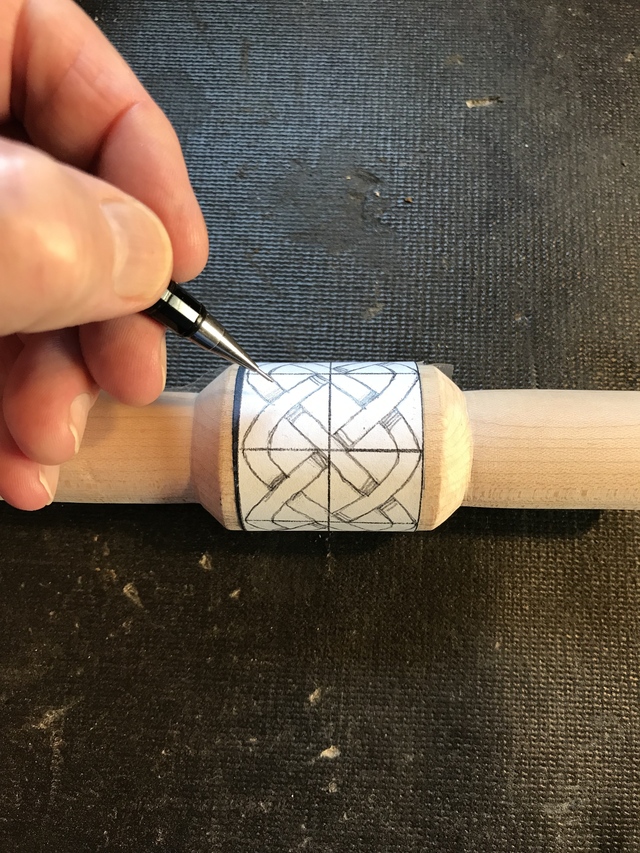
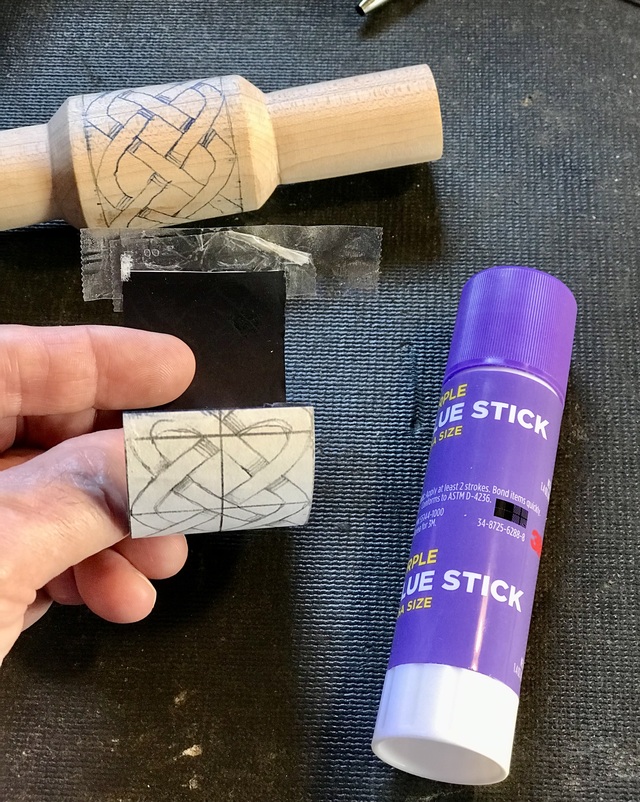
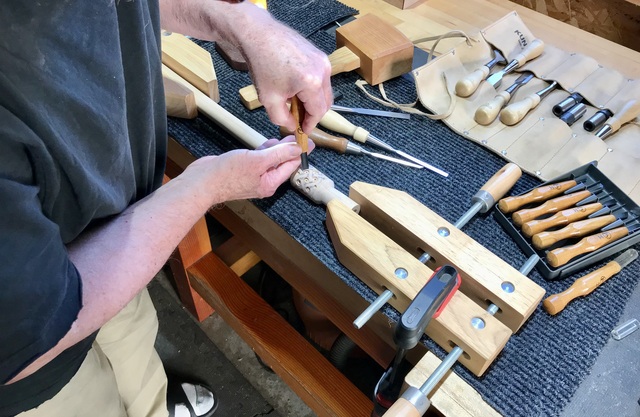
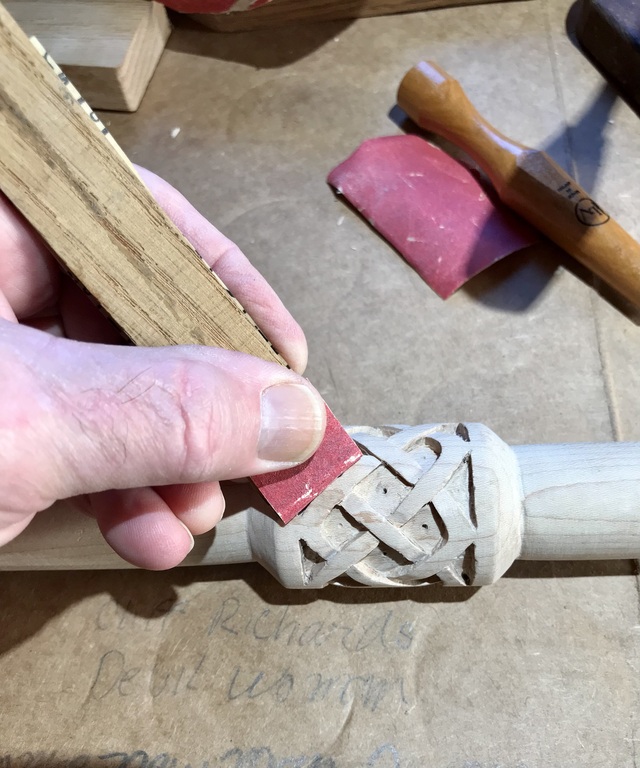
I left a 1-1/2" x 1-1/2" section for the carving. I don't have a lathe so I used a spoke shave, files and a bow sander I made. This is the way they made wagon wheels back then. This demo of how to draw a Celtic Knot was on YouTube. Here I'm drawing a knot following the instructions above. It had to be the correct height and length to fit my stick. Gluing the drawing with a glue stick to carbon paper then taping it to the walking stick and tracing the drawing over the area to be carved.
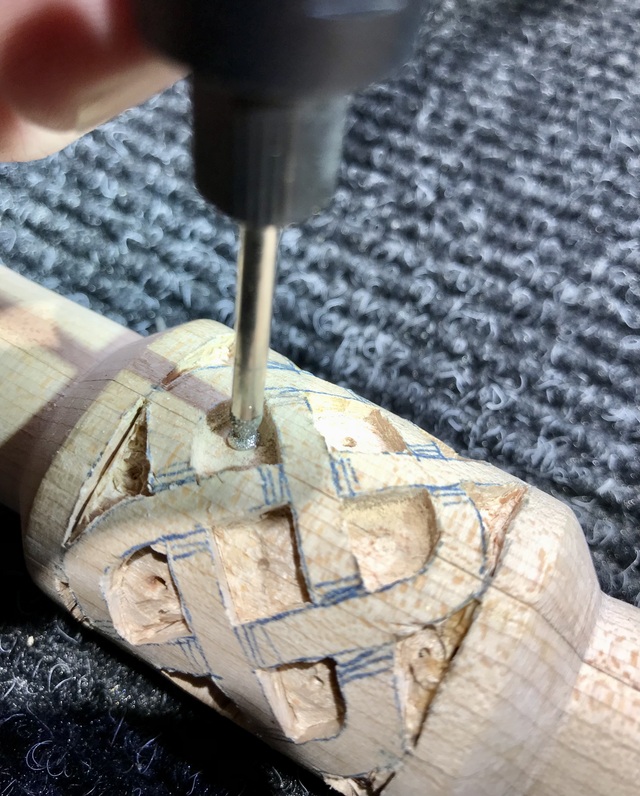
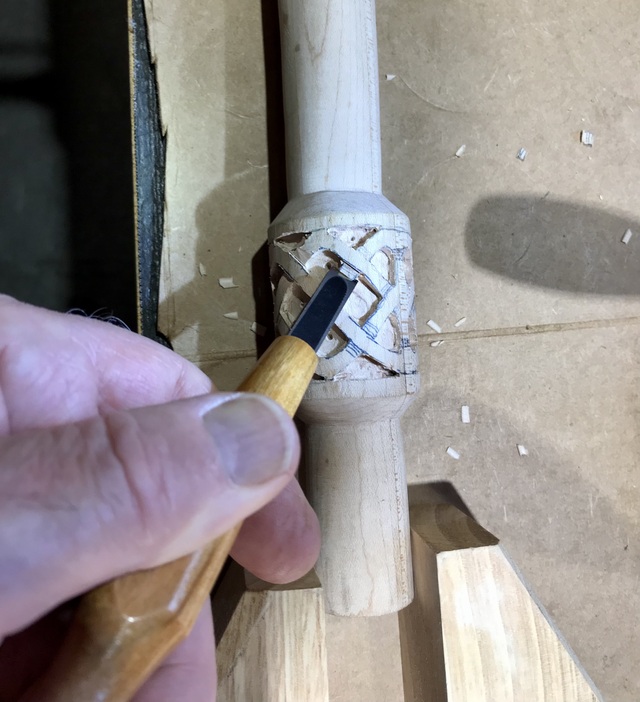
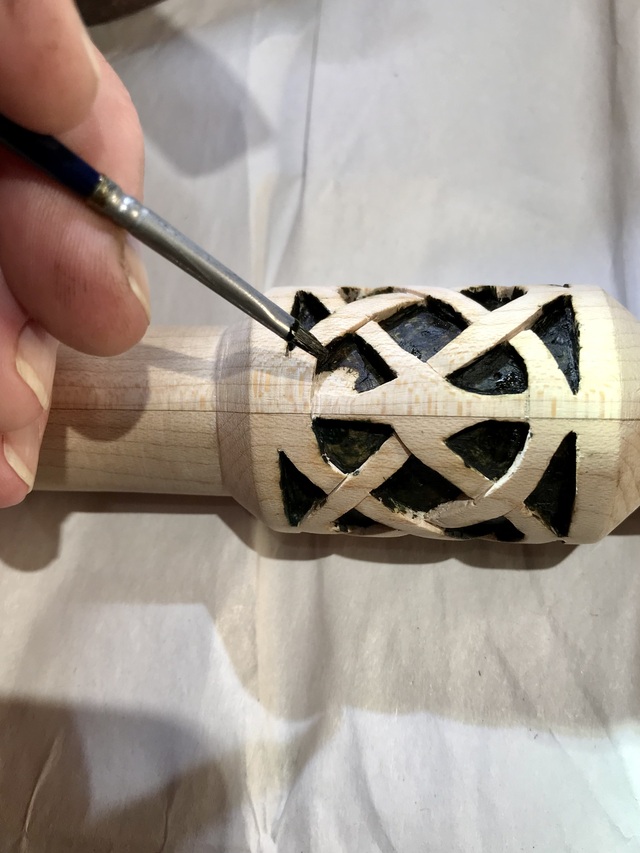
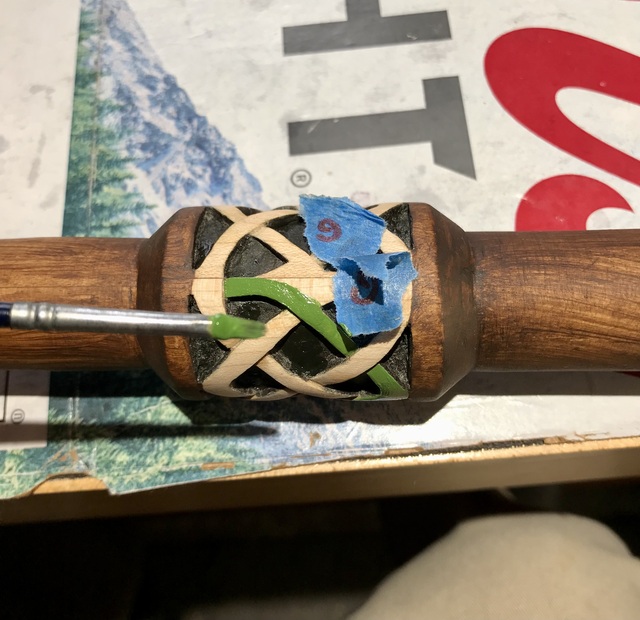
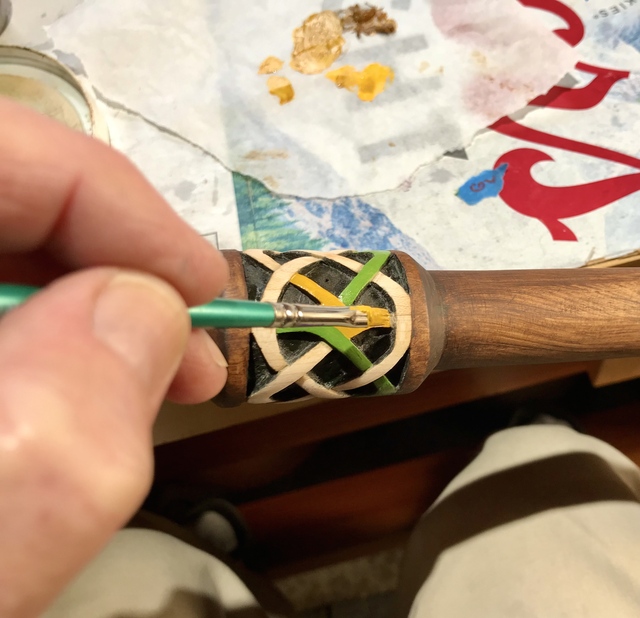
I drilled out the space between the lines using a dept stop on the press. Holding the piece down with hand screw and f clamps while I carved the knot. I order the wood carving chisels from Iee Valley. They range from 7.5 mm gouges and 7.5 mm straight to 1.5 mm. I used a rotary tool with a flat tipped diamond bit to level off the bottom of the carving. Looks like my little helper fell asleep. Cutting out the parts of the knot that goes under the top part of the knot Some sanding with a wedge to smooth out the transition. A little wood fill will cover up the holes left from the brad point bits. Here I'm painting the negative space black with oil paint. Applying the stain. I tried to match the oaks color and grain by leaving brush strokes in the stain. I only got close. The oak grain and color are hard to match. I’ll bet it could be done if I had a month off. 8-) Next time I may leave the knot the natural wood color.
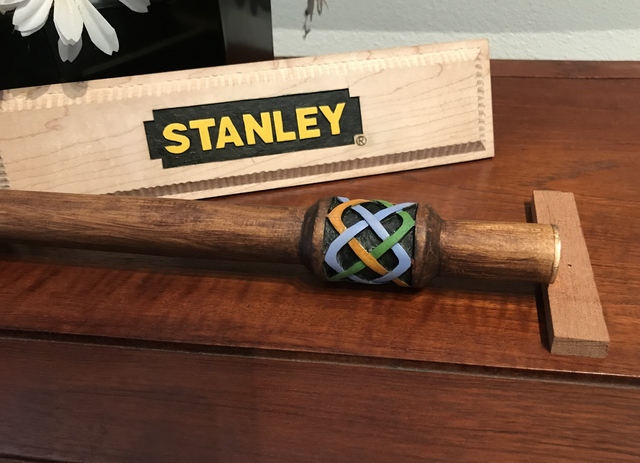
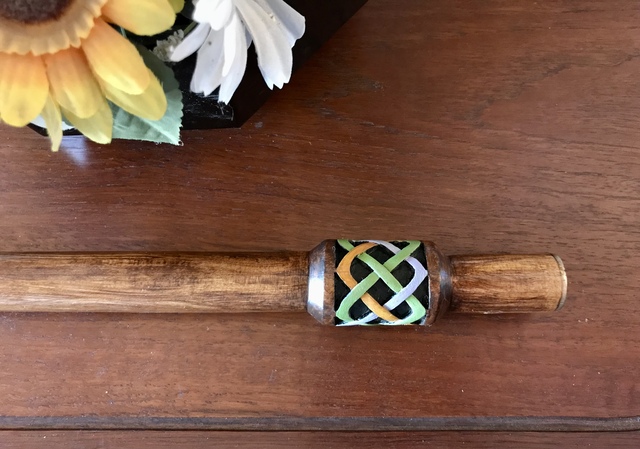
The first painting was with green, gold and lavender. I decided it needed more green so I reversed the lavender and the green.
This is my first wood carving and I sure learned what Knot to do next time. :-} Does anyone know if a CNC or Laser can cut a knot like this on a dowel? Thanks for visiting.
A great carving James, you made the cut on a first try. It looks good and makes the walking stick better, great save. A Celtic Knot is on my list of projects one day.
James, We love that you took what others would have thrown away and made it into something spectacular. You certainly put a lot of loving work into it and the result was well worth it! L/W
“Those who would give up essential Liberty, to purchase a little temporary Safety, deserve neither Liberty nor Safety.” Benjamin Franklin