Share your craft projects
Make new craft buddies
Ask craft questions
Blog your craft journey
Brit
474 posts
and
40 followers
in over 11 years
in over 11 years
More from Brit
Labyrinth Game for Two Players
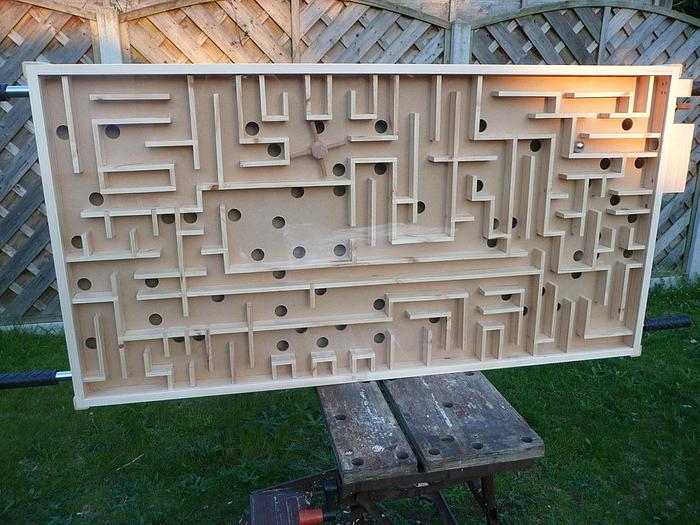
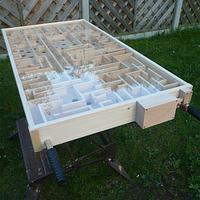
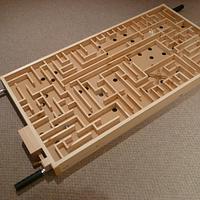
This is the first of a number of woodworking projects my wife asked me to make for the street party she organized for 235 residents on 6th June 2012 to celebrate Queen Elizabeth ll's diamond jubilee. Apart from using a router to hollow out the lid of the ball delivery system and a cordless drill to drill around 200 holes to screw the walls of the labyrinth to the board, it was all made with hand tools.
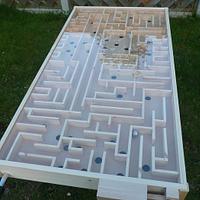
This labyrinth game is for two players and you need a good dose of coordination and concentration to successfully navigate the maze. You also need to communicate with your partner as neither player can see all the holes from where they stand. The only rule is that you cannot tilt the game in any direction more than 45 degrees.
I designed the labyrinth route in Sketchup and used it as a guide to measure and cut all the pieces which are made from pine. They are joined at the corners with hand-cut box joints and a few halving joints for good measure.
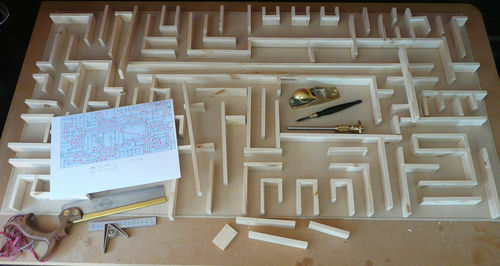
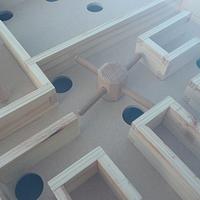
I added a turnstile to the game for a bit of variation which is made of hard maple and beech dowels.
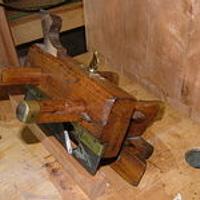
The frame (4ft x 2ft) is made from pine joined at the corners with through dovetails. The grooves in the frame were ploughed with a Record 044. There are three levels; the top is 4mm clear perspex, the labyrinth and bottom layers are 4mm MDF.
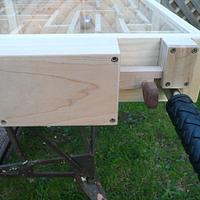
I designed the ball delivery mechanism to convert 8mm of sping-loaded linear travel between two stops to 90 degrees rotational movement. This lifts the ball from the bottom layer after it has fallen through one of the holes and puts it back into play on the labyrinth layer. It took quite a lot of experimenting with McDonalds coffee stirrers and sewing pins before I got the linkage lengths and pivot positions worked out correctly.
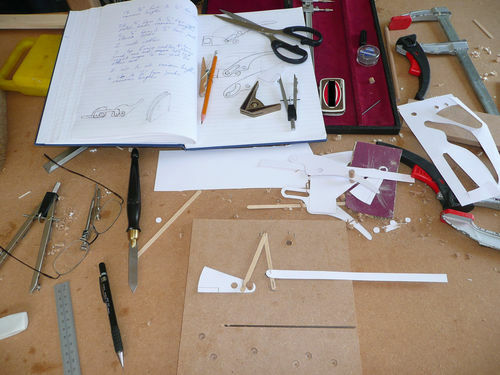
Here's a quick and dirty video of me testing that the linkage lengths and pivot points will move the bucket that will hold the ball bearing through 90 degrees.
Here's a video showing how this translated into the actual mechanism (the cover has been removed).
The ball delivery mechanism is made from hard maple with a sapele knob operated by the player's thumb. There are two fixed pivot points and three moving pivot points, one of which has a slightly elongated hole as it connects a link moving in an arc with a link moving in a straight line.
This project was never meant to be 'fine woodworking', but it was great fun to make and quite challenging to design.
Thanks for looking!
Andy -- Old Chinese proverb say: If you think something can't be done, don't interrupt man who is doing it.
10 Comments
Wow this is some build. Nice job
pretty cool brit. so have you played and won ?
working with my hands is a joy,it gives me a sense of fulfillment,somthing so many seek and so few find.-SAM MALOOF.
Your attention to detail never ceases to amaze me Andy.
"Duck and Bob would be out doin some farming with funny hats on." chrisstef
Thanks guys. @Pottz - Yes I have played it many times and won about 3 times. I always blame the person at the other end though.
Andy -- Old Chinese proverb say: If you think something can't be done, don't interrupt man who is doing it.
That is a cool game, I bet it was a hit at the block party. Well Done.
Main Street to the Mountains
Great little "big puzzle" brit...
Could it be adapted to a smaller scale one person "toy"? Any chance of the SKP file? Whether I use it or not it could give ideas for other projects... though bear in mind, I could possibly share it.
Talking about SketchUp,
Could it be adapted to a smaller scale one person "toy"? Any chance of the SKP file? Whether I use it or not it could give ideas for other projects... though bear in mind, I could possibly share it.
Talking about SketchUp,
It took quite a lot of experimenting with McDonalds coffee stirrers and sewing pins before I got the linkage lengths and pivot positions worked out correctly.
Did you consider or actually use SketchUp to plan the outlay?
I often use arcs of travel/intersection to plan outlay... sorry been looking for a good example, but after about 30 mins of searching I gave up... guess I may have deleted them... normally I would store them all in a $guidelines layer, but couldn't find any
If your first cut is too short... Take the second cut from the longer end... LBD
I never thought of using Sketchup for that, but I guess you could. What I find incredible with that first video clip is that because I called the video 'Converting Linear to Rotary Motion', it gets looked at by loads of students and has now had 370K views. LOL. I tell you what I also find funny is that people subscribe to my YouTube channel thinking I'll feed them another video. :-) 1.8K people think my channel is worth subscribing to. Lord save me from becoming an 'influencer'.
I don't think I have the SKP file anymore. I haven't even used Sketchup since I made this project back in 2012. Sorry.
I don't think I have the SKP file anymore. I haven't even used Sketchup since I made this project back in 2012. Sorry.
Andy -- Old Chinese proverb say: If you think something can't be done, don't interrupt man who is doing it.
Nice design and build.
Another great project Andy.
.................. John D....................
Cool game! Looks like it would be fun to play over and over.


