It seems like everyone goes down the french cleat path for tool storage eventually. After watching innumerable youtube videos on tool storage on french cleat walls, I took the plunge and started making holders for my various clamps. After a couple design iterations, I landed on a holder that is strong and can hold 12"-13" of heavy stacked clamps and has a simple locking mechanism.
Background
I recently purchased a portable planer without having a dedicated spot for it, and I started work designing a flip-top cart for it and a drum sander. My small shop is currently a disaster, with no place to comfortably even start work on the cart. So after wrapping-up the Danish Cord Bench project, I turned my attention to shop layout and reorganization. I'll be moving a number of tools around to hopefully make better use of the space I have. But in the shop's current state, moving tools around is like the sliding tile game.
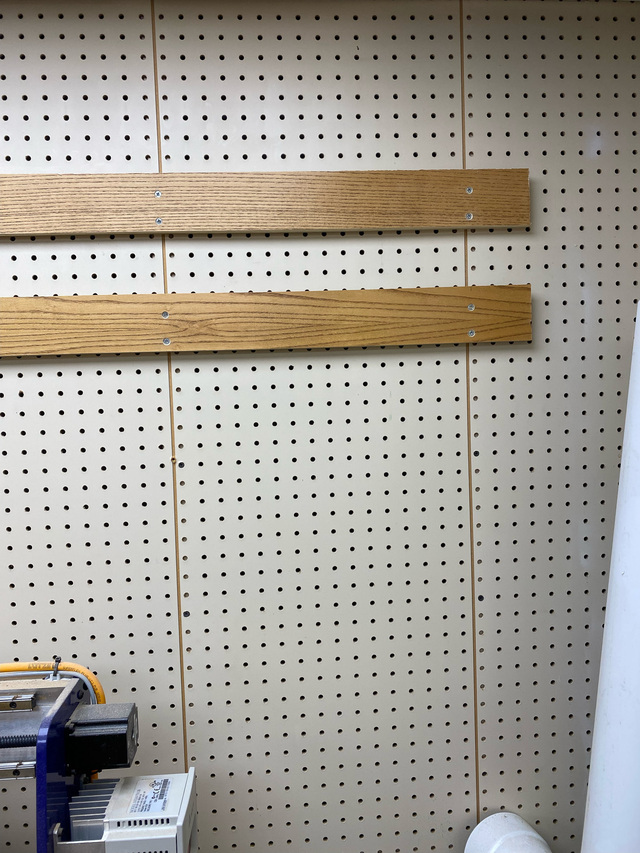
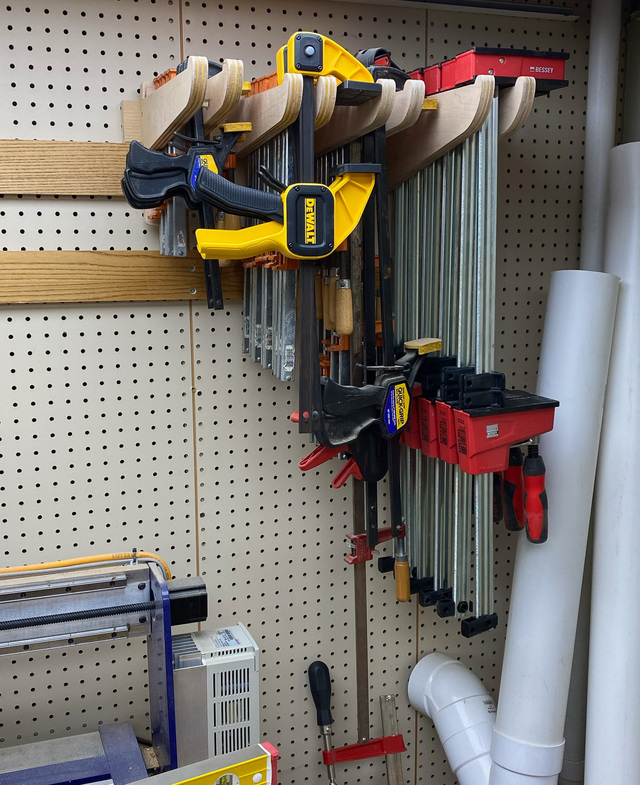
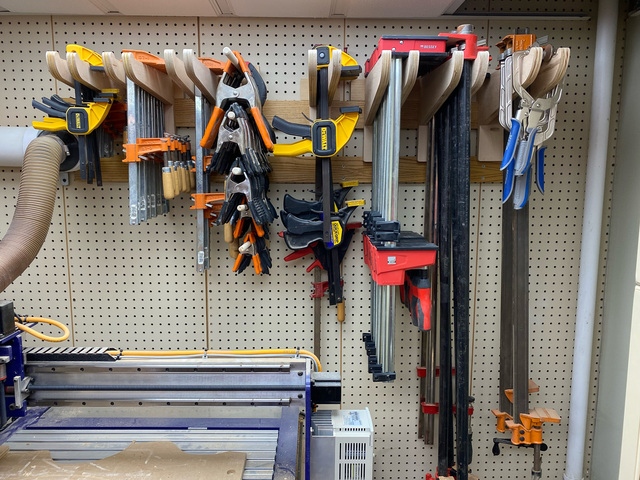
The first step towards better organization is to get rid of the rolling clamp rack. I bought it years ago and was never crazy about it. Now it's taking-up valuable floor space, so I'm moving all the clamps to french cleats. Once the rolling rack is empty, I'll move the CNC to the location vacated by the rolling clamp rack. The CNC is currently located along a wall of pegboard that was installed by the previous owner, and I've never used it - I dislike pegboard. I'll be installing french cleats on that wall, and while the CNC is currently in the way, there was enough room to install a couple short trial rows, which should be enough room for most of the clamps.
Design
I had a bunch of odd-sized scrap 3/4" plywood from a basement cabinet project last year, and I used it to build the holders. The main design goals were to be able to fit 6 parallel jaw clamps on one holder (12"+ depth), to have some way to lock the holder to the cleat, and to minimize the amount of material required. Without having a plan for the locking mechanism, I went ahead and built a few holders anyway.
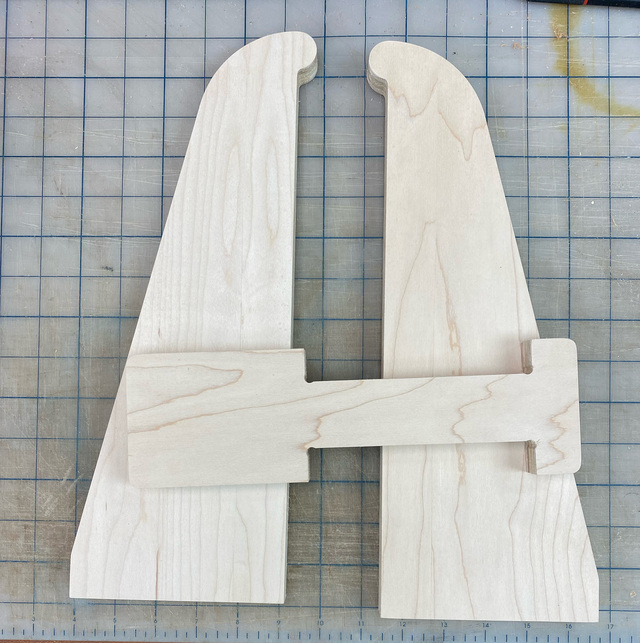
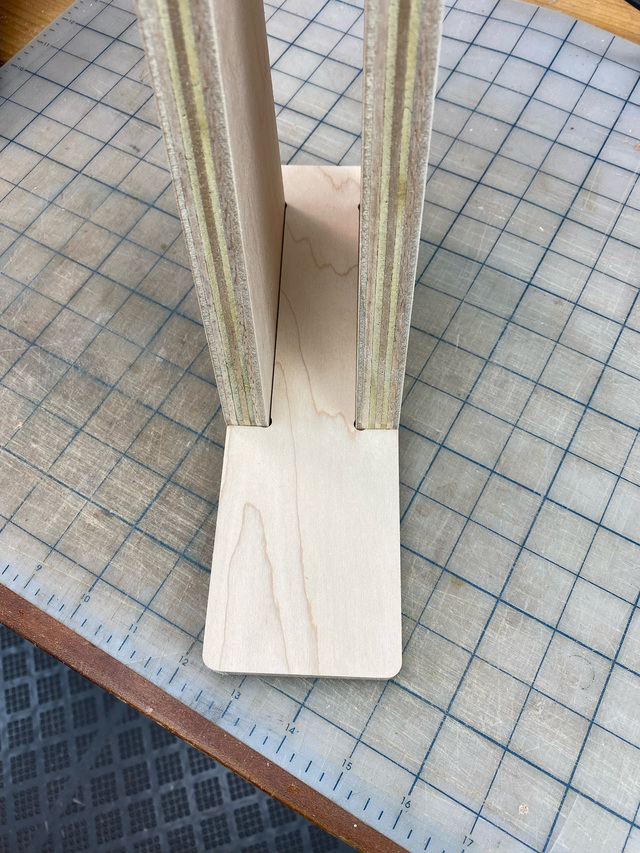
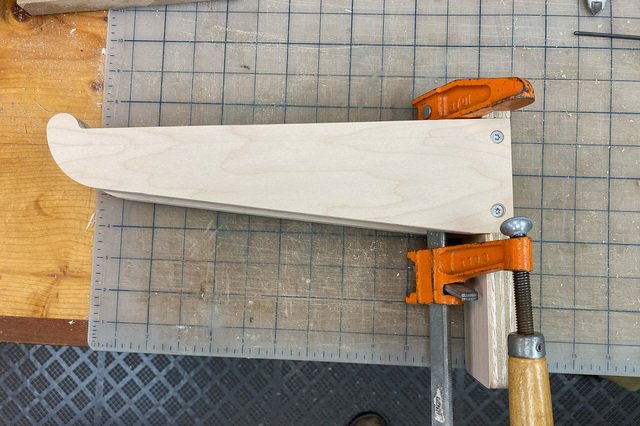
This was my first iteration. The arms have a raised tip at the end to prevent the clamps from sliding off. Two arms fit into notches cut into the back support. Glue and screws attach the arms to the back.
Glue and 2-1/2" screws hold a section of cleat to the back. I made the cleat wider than the back with the thought that it would help with stability and would spread the weight. It would dictate a minimum spacing between holders, but that wasn't really a problem because the holders had to be spaced apart to prevent clamp heads on adjacent holders from touching.
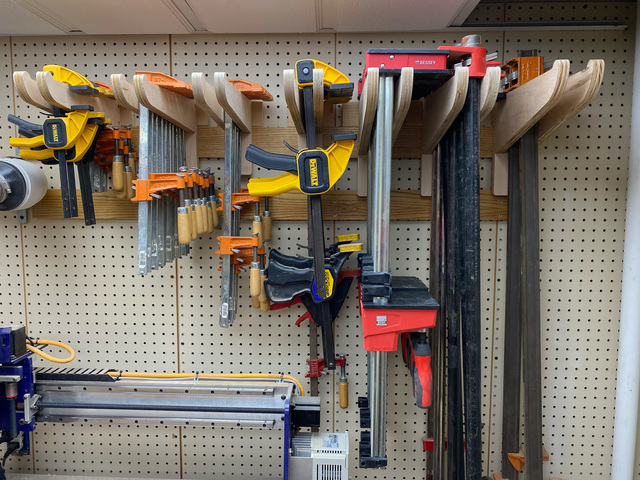
My wall cleats came from a living room built-in that I tore-out a few years back (also from the previous owner). I installed a couple rows that should be enough to get most of the clamps up on the wall. After the CNC gets moved, I'll fill-in a larger part of the wall with cleats.
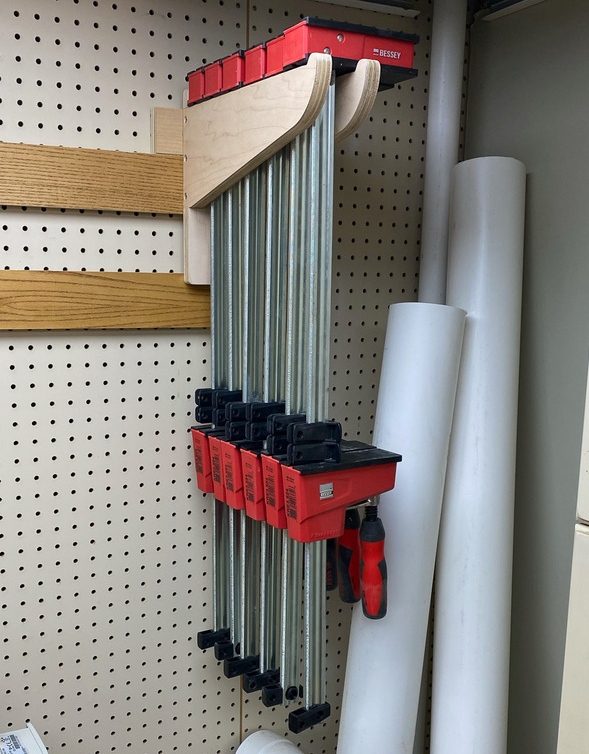
The back on the holder was long enough to span 3 rows of wall cleats (only 2 here since there's not a 3rd wall cleat installed).
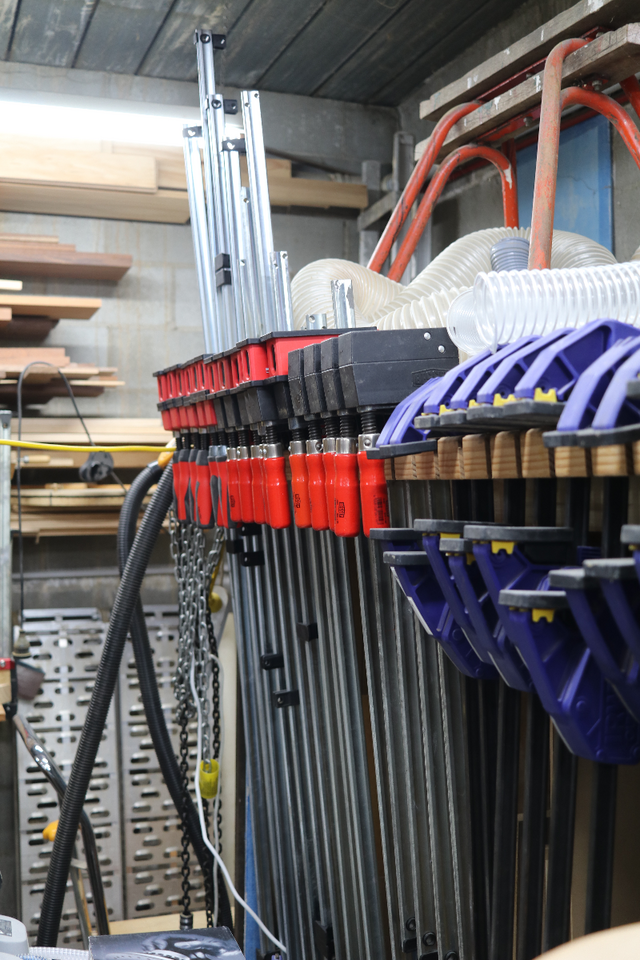
Finally, my parallel jaw clamps had a home. They had been leaning up against a wall since I bought them.
I used the same general design to make holders for the lighter-weight clamps, having a narrower arm and narrower gap between arms.
As I got holders built, I tossed them up on the wall.
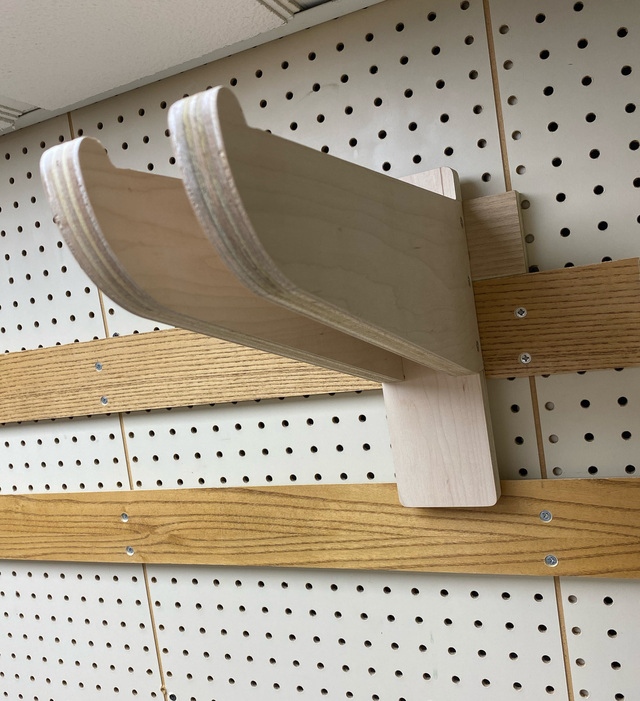
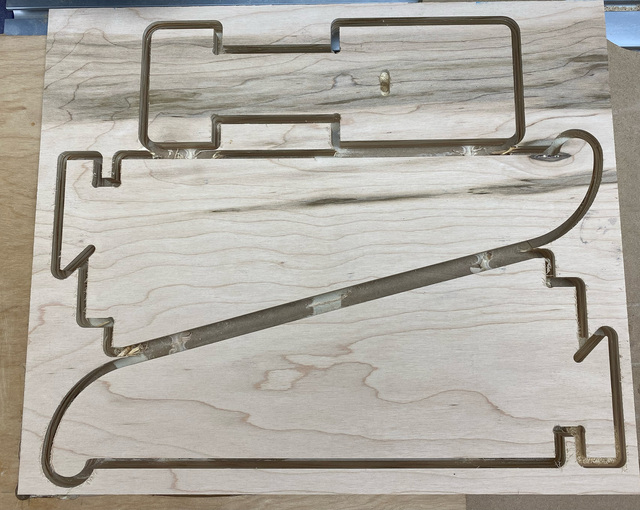
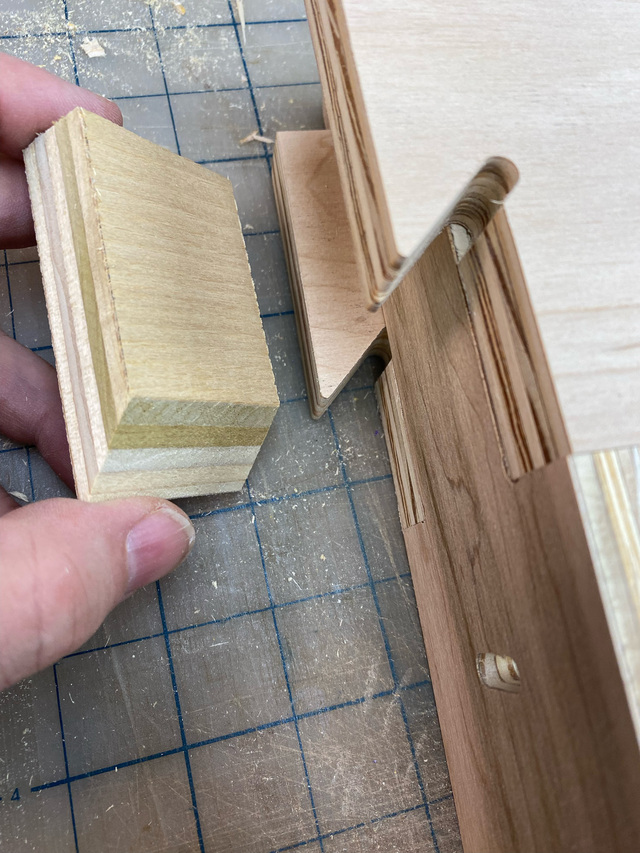
What I found though was that the side screws were splitting the plywood back piece on the narrower holders, which I'm sure compromised their strength. I still needed to build holders for some heavy bar and pipe clamps, and I didn't want them falling off the wall. I started thinking about ways to make the holder stronger without relying on screws. I went to bed thinking about this, and that's always a recipe for a fitful night's sleep. But, I do some of best thinking then. In the morning, I made the design changes I came up with during the night and cut some new brackets.
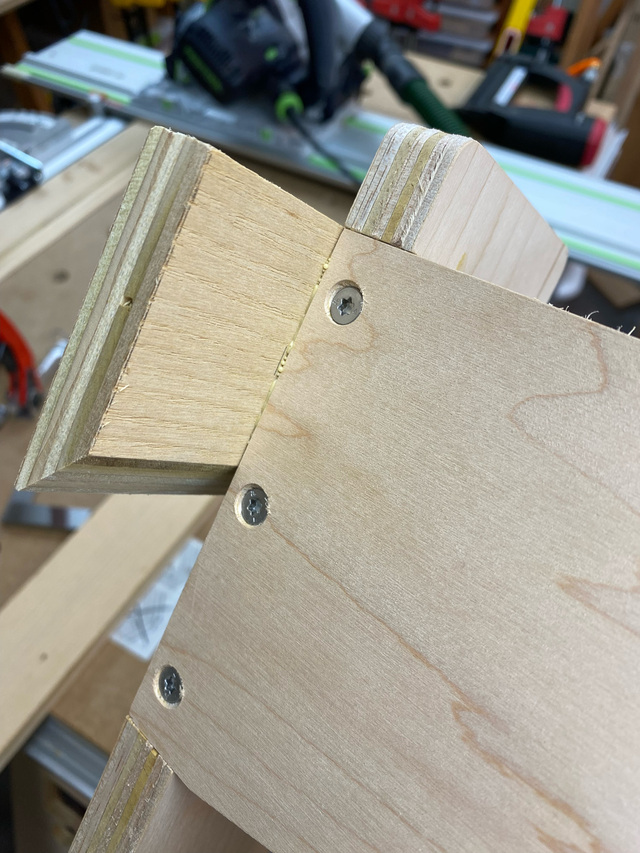
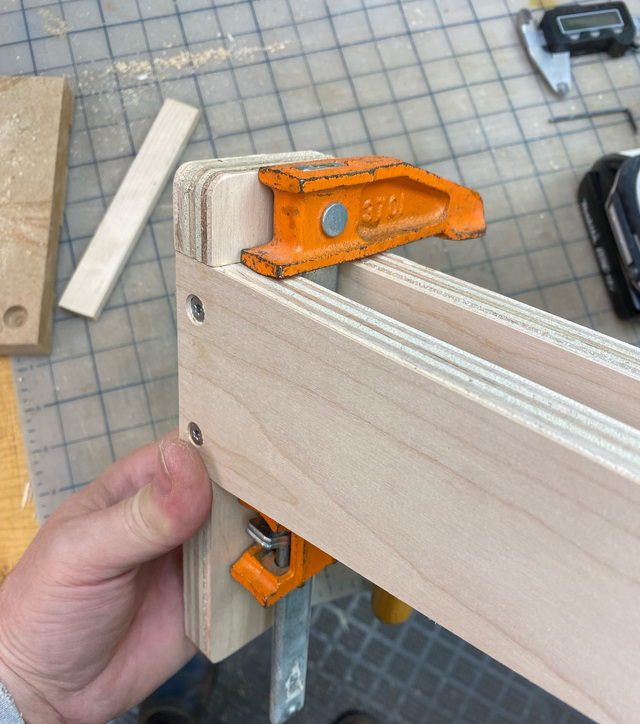
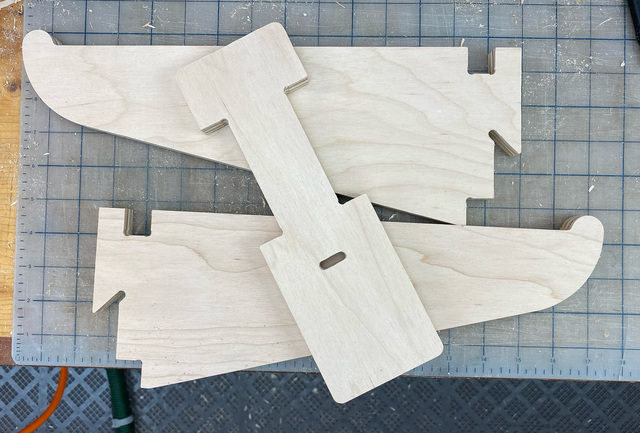
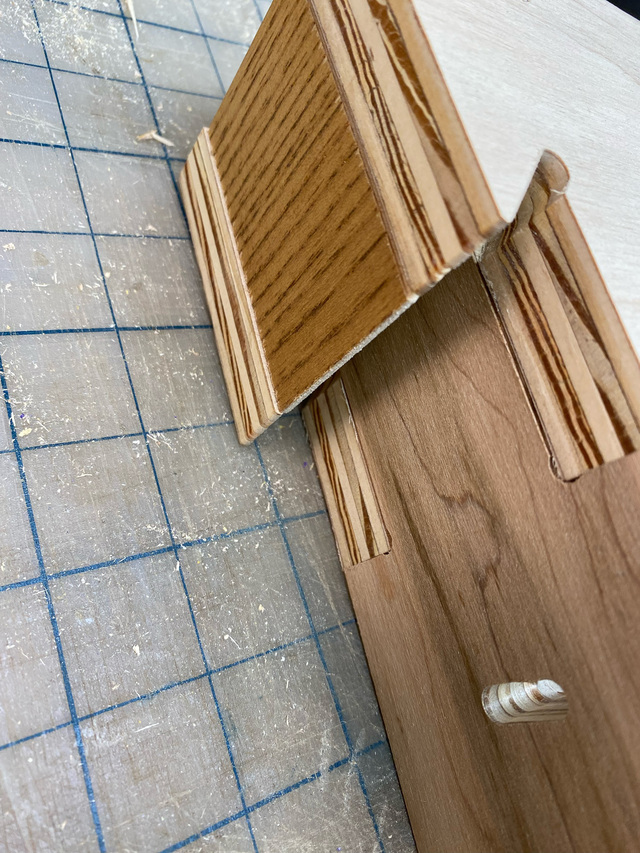
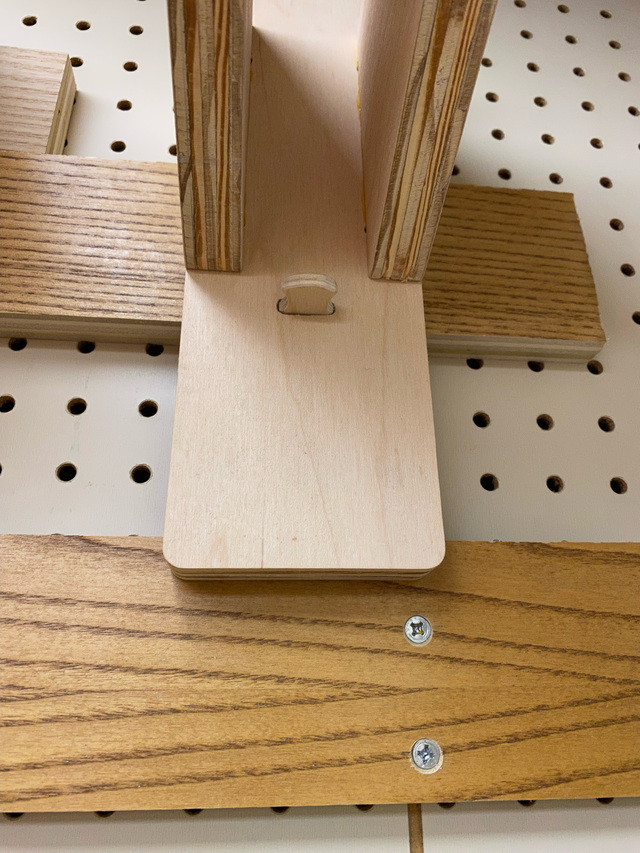
The side pieces have an integral cleat built into the wall end and notches where they seat into the back. The back also received a slot that would hold a length of floating tenon for the locking mechanism.
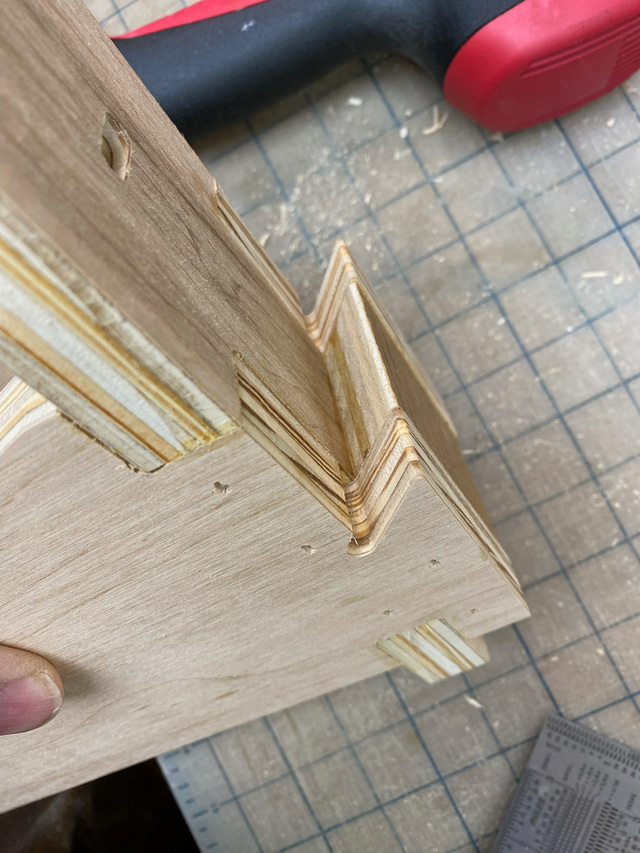
With it dry-assembled at this stage, I was able to hang from the bracket. (Although, I was holding on at the back end. I didn't want to overdo it.)
A section of cleat gets glued-in between the integral arm cleats. I found that the holder was plenty stable without having a wider cleat attached like the earlier ones.
It's all held in place with glue on all of the mating surfaces and some brad nails. No screws.
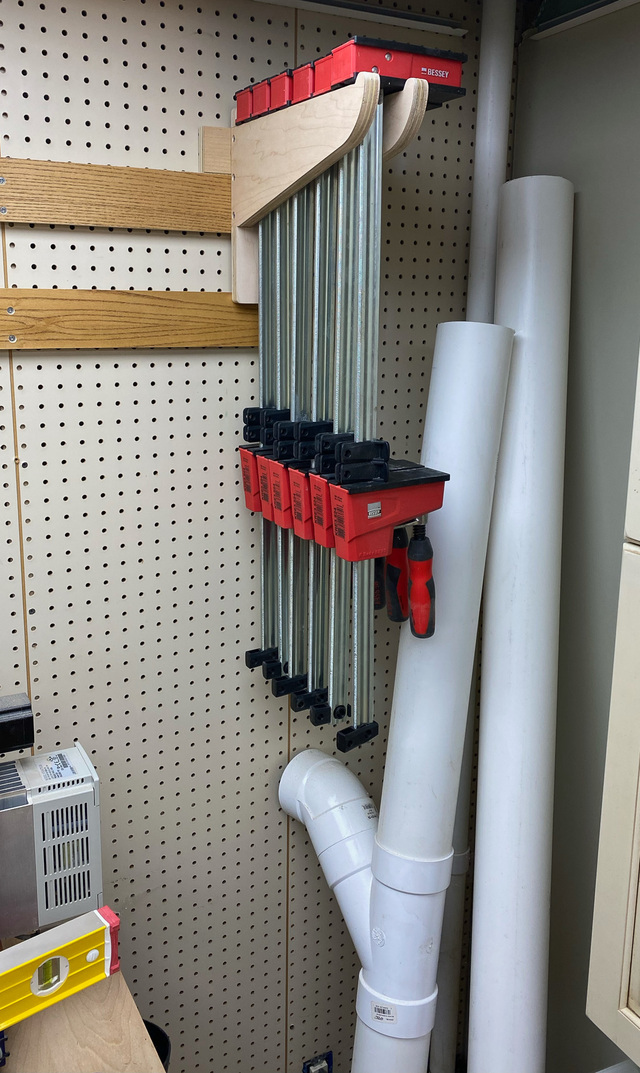
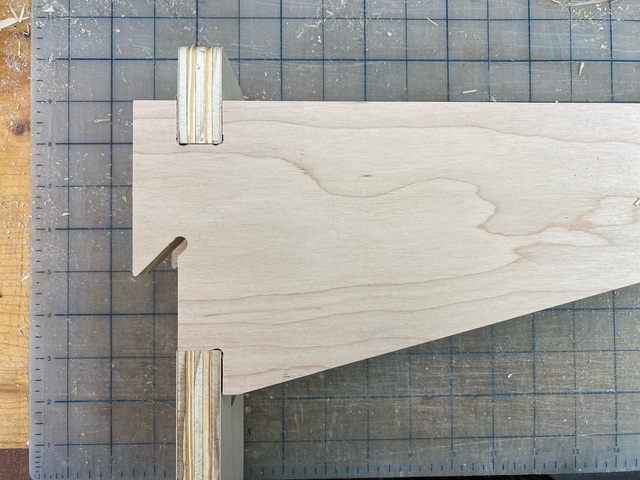
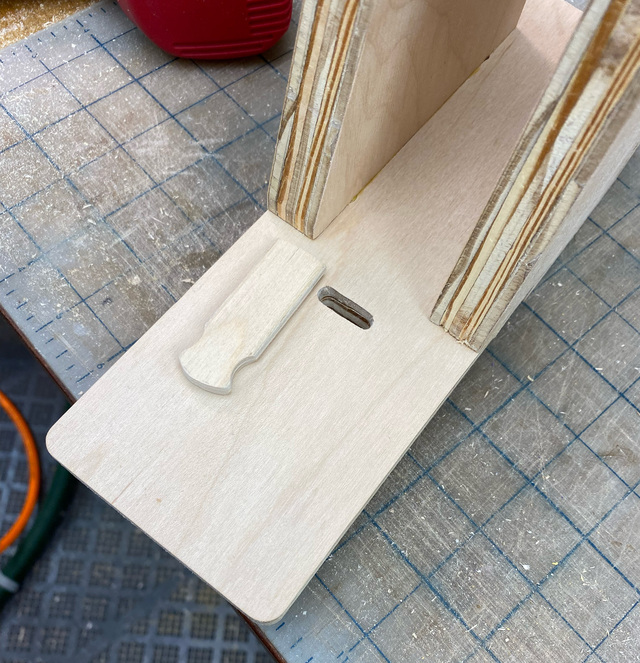
The slot on the holder is positioned so that it falls just below the lower edge of a wall cleat. I made the prototype lock key with a scrap of 1/4" ply. The two divots allow you to grip it to pull it out when repositioning the holder. It has a snug fit but is still easy to pull out.
With the holder on the wall and the key pushed in, the holder can't be knocked off. Simple and effective.
The new cleat wall is slowly getting populated.
At some point, I'll go back and retro-fit a slot into the earlier holder so that they can be locked, too. It won't be long before that rolling clamp rack will be history.
Thanks all for you your comments. I do have some cabinets in the shop held by french cleats, but this is my first foray into using them for individual tools. I like the freedom of being able to make an appropriate hanger and then later work out where to put it.
What sized screws did you use? I'd be terrified to walk under that weight,
LBD - I did not hang the cleats on the pegboard, if that's what you're thinking. I used 2-1/2" Spax construction screws through the 1/4" pegboard and into the stud wall behind, so there's 1-1/2" of the screws into the studs.
pottz commented about 12 hours ago you cant beat a french cleat system for versatility. it's funny thought that you mounted it on top of peg board !
I put pegboard in its place - as a substrate. Who knows, maybe I'll pop in few hooks in the pegboard for things like rulers or levels.
Ross Leidy ..... LBD - I did not hang the cleats on the pegboard, if that's what you're thinking. I used 2-1/2" Spax construction screws through the 1/4" pegboard and into the stud wall behind, so there's 1-1/2" of the screws into the studs.
More a tongue in cheek comment, however, loosely based on my experience when clamps breed like rabbits and start putting on weight... mainly referring to my Besseys. Not overly obvious, but my rack has sagged more than 10° out of original vertical, from sheer weight, ... I believe, hardware fault.
If your first cut is too short... Take the second cut from the longer end... LBD