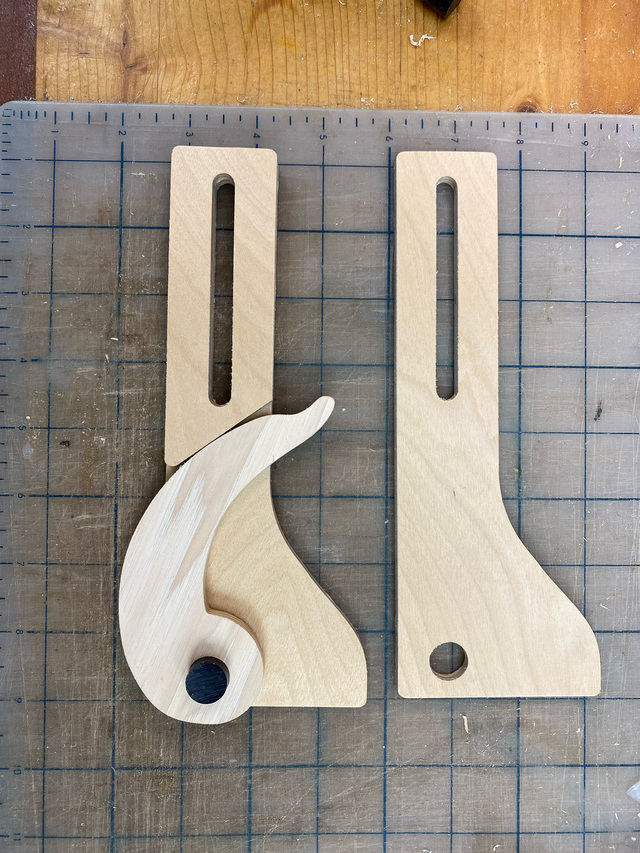
TLDR; "Sea" Clamp? I saw a dolphin in the cam lever, Angler fish in the body, so I had to top it off with a Starfish knob.
While I've had my CNC machine for years, I never spent much time on the problem of work-holding. I got by with double-stick tape and screws for the most part. As a follow-on project to the dedicated CNC cart, I wanted to add a new spoilboard with some thought spent on clamping methods.
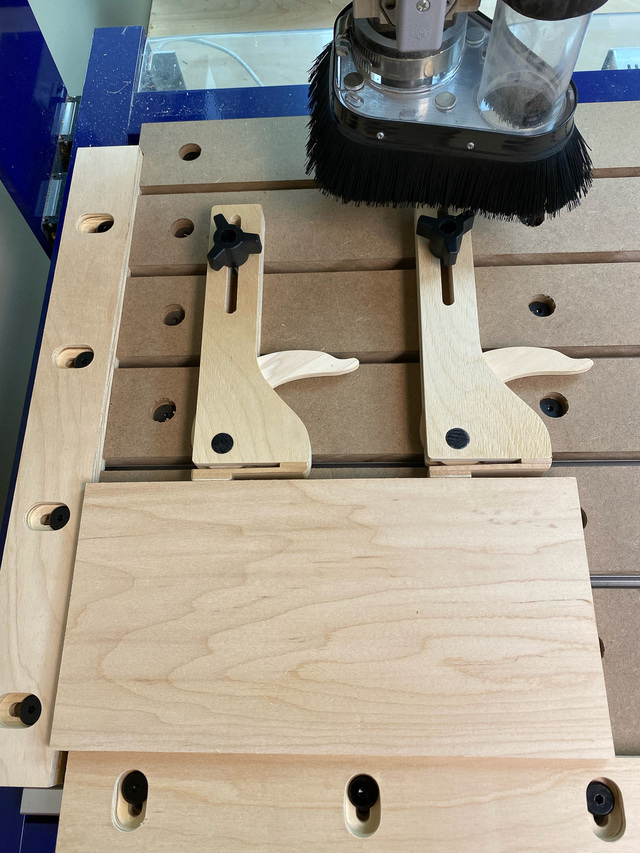
Because the current spoilboard was not long for this world, I could use it to experiment with some ideas. I like cam clamps for their simplicity, and I made a couple of them. The idea is that the spoilboard could have a grid of dog holes so that the clamps could be placed in any of them.
The things I don't like about this is that:
I've got to put holes all over the spoilboard, most of which will probably never get used so it's wasted effort,
Unless they're really close together, you'll end up needing a spacer between the cam and the work (or different size cams), and
When double-stick tape is the appropriate clamping method, it's not going to hold as strongly due to the perforations.
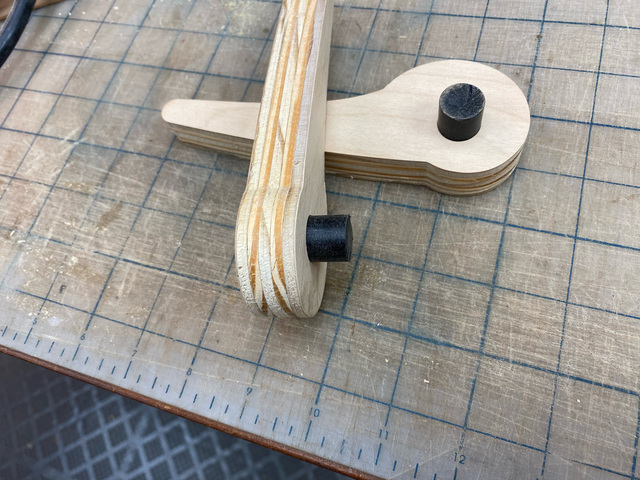
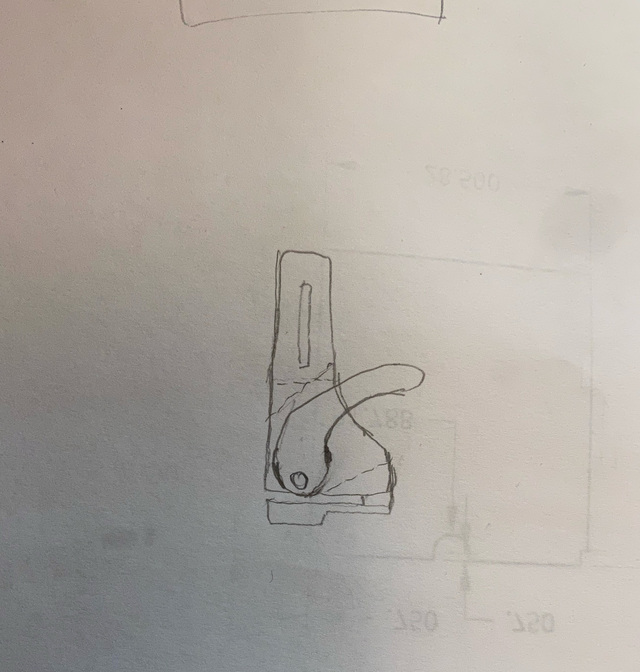
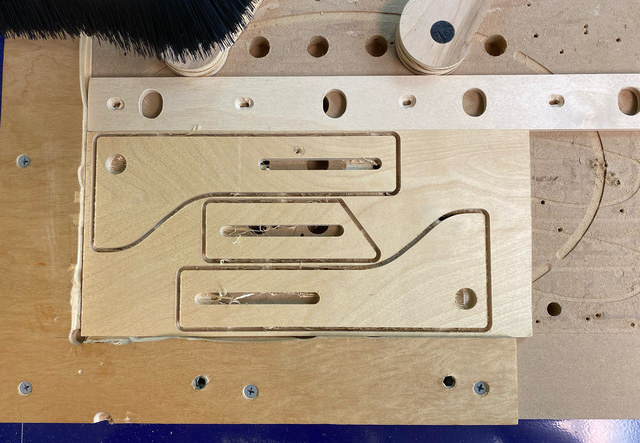
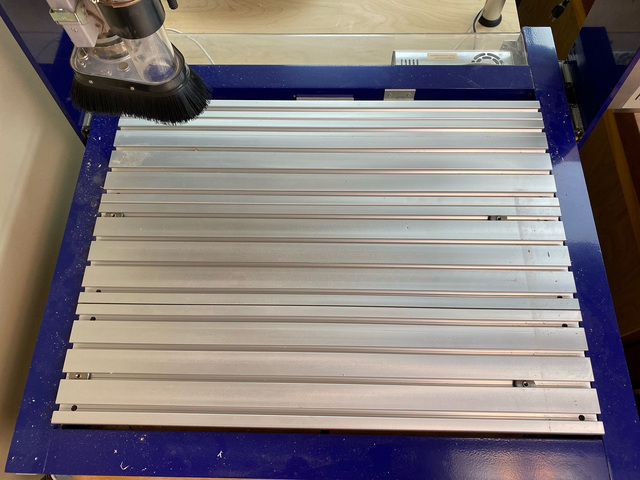
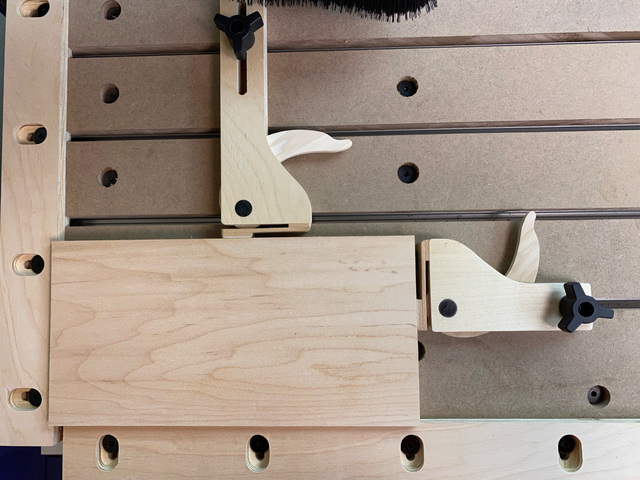
My CNC bed is extruded aluminum channel, so I started scheming ways to expose some of the tracks to use for clamping. Keeping with the plan of using a cam lever for tightening, I came up with this clamp. The design is not without its flaws, but it's a workable first attempt. It's like a luthier's cam clamp in a spreader configuration. The clamp can be anchored to the spoilboard with a T-track bolt anywhere along the slot in the clamp. The bolt, cam rotation point, and work contact point are all aligned so there's no tendency for the clamp to shift out of position. From this rough sketch, I modeled the parts and got the first set cut out.
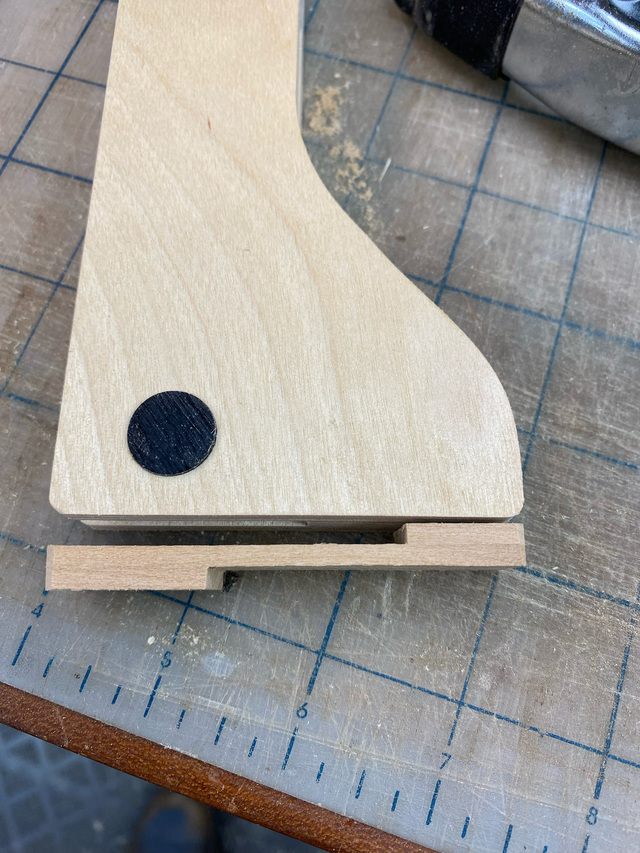
The materials are 1/4" plywood for the body, some resawn hickory flooring for the lever, and some cherry scraps for the flexing clamp pad. You can see the experimental dog holes in the old spoilboard for the initial set of cam clamps. Note the spacers that are necessary to engage the cams against the work.
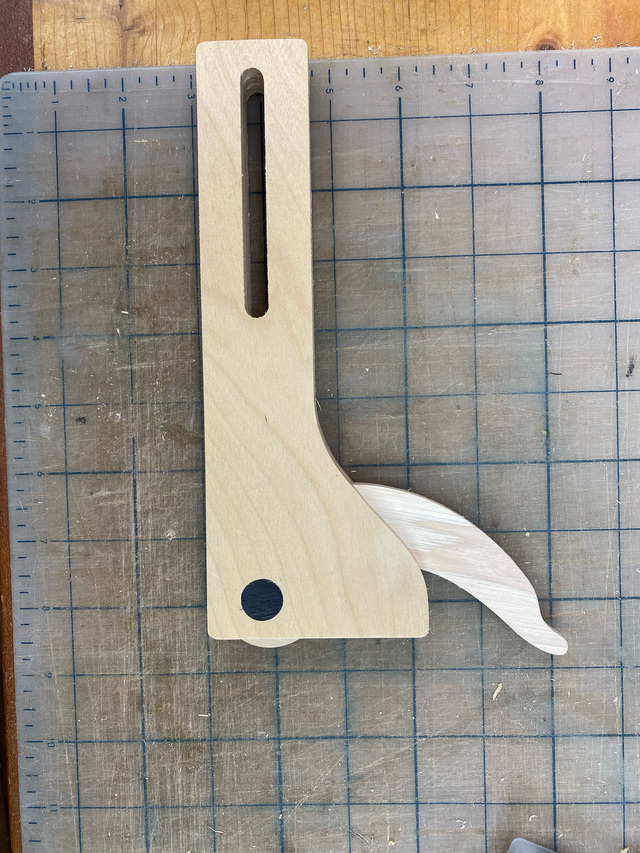
The pivot point (copolymer rod) is a press fit, so after an initial test fit, I glued the body together and later installed the cam lever.
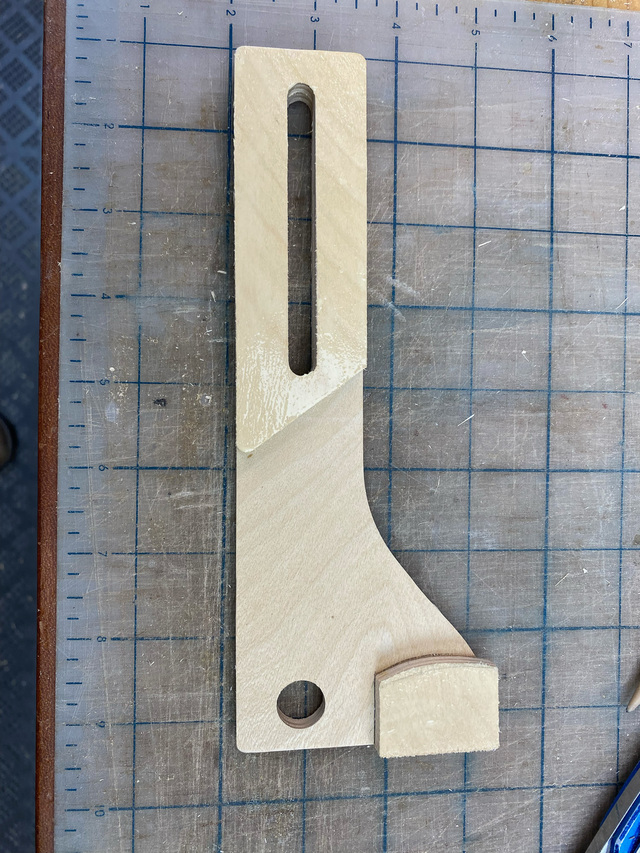
Dolphin? Anyone? I didn't model the stop in the lower right on the prototype, but I did on the remaining ones.
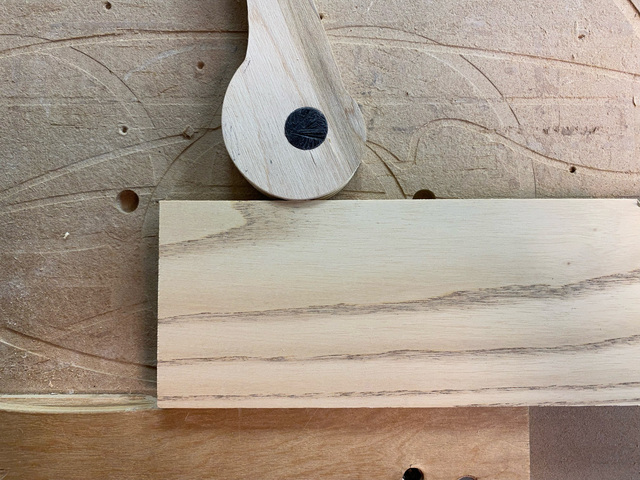
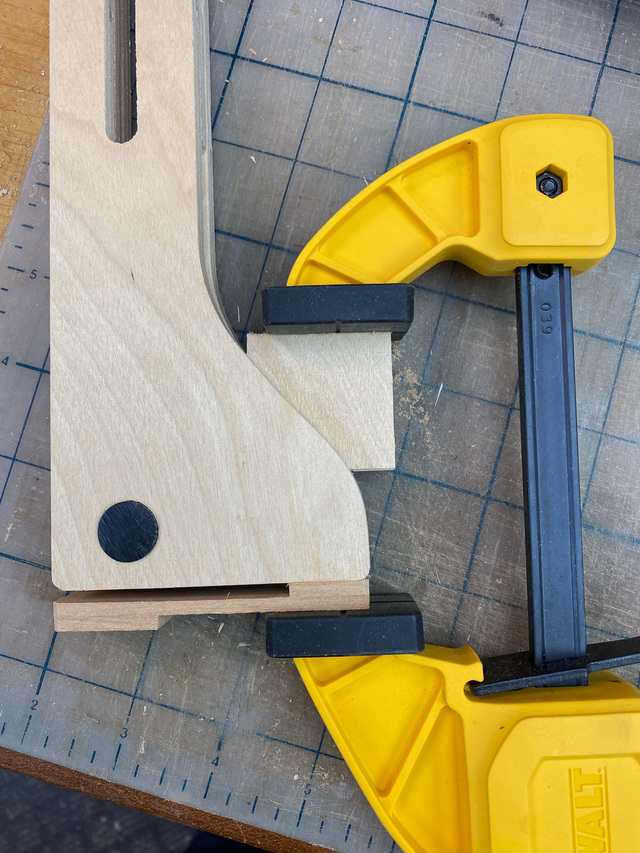
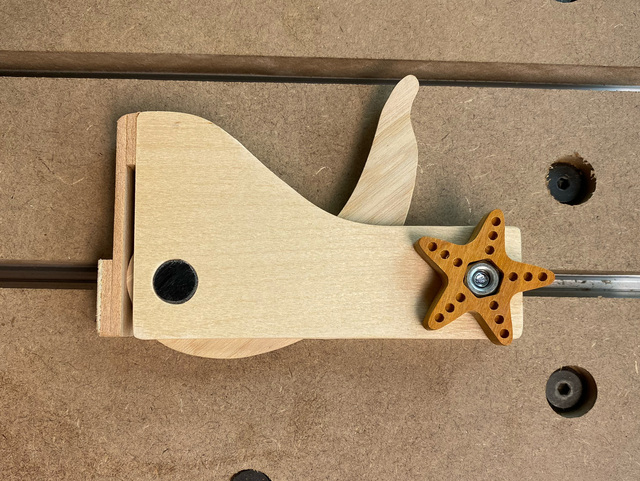
With the clamp body finished, I glued-on the clamping pad. I was concerned that the 1/8" cherry might not be flexible enough. It seems okay in trials, but if it breaks, it's an easy repair.
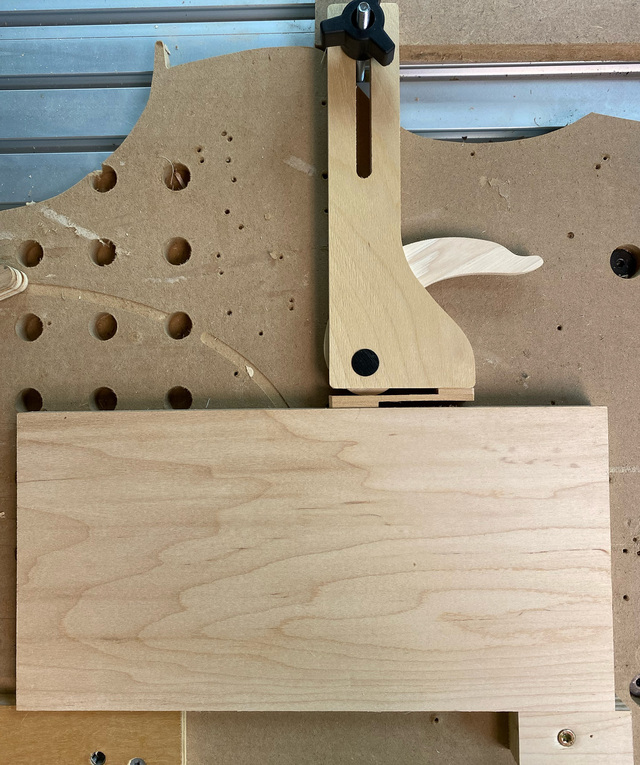
Once the glue was dried, I gave it a test on my sad, incomplete, embarrassing spoilboard. It worked great. Bye, spoilboard.
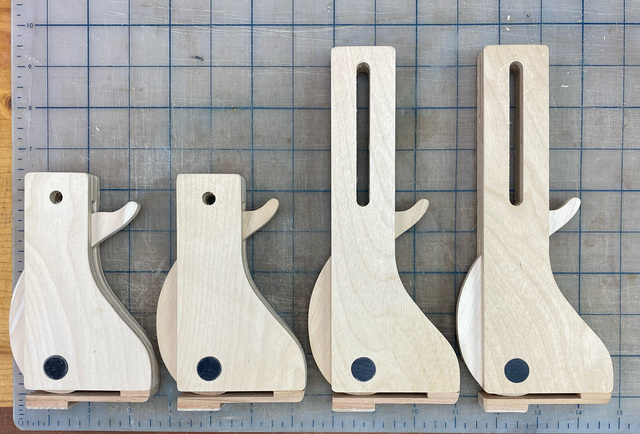
After a successful test, I made 3 more clamps, including 2 stubbies for side clamping.
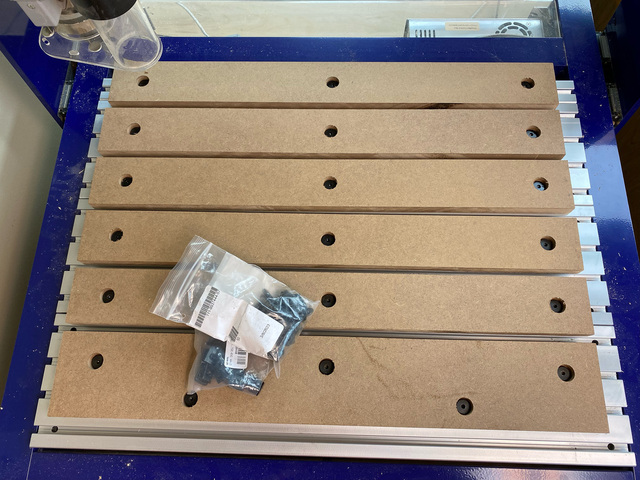
With the old spoilboard removed, I installed the sectioned spoilboard that I prepped a few days prior.
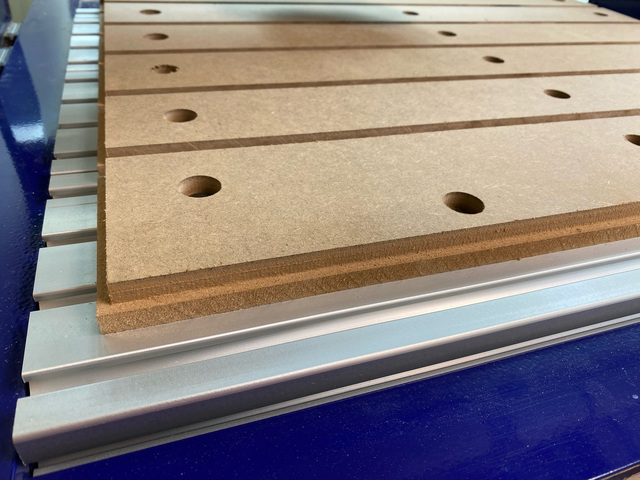
The left and lower edges get a rabbet that defines Y=0 and X=0.
The two fences get attached on the exposed bed. Each fence has a 1/2" spacer underneath so that the fence can slide over the rabbet. And a couple clamping tests on some scrap. Rock solid.
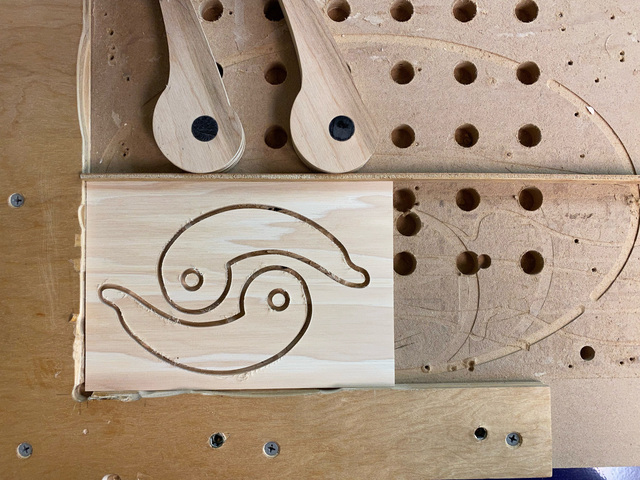
Angler Fish?
To complete the "sea" motif, I made some Starfish knobs. (Chatke Viga) This was the inaugural use of the clamps on the new spoilboard (which hasn't even been surfaced yet, but these are small parts). I've got some other ideas I'm working on for clamping, but this is already a huge improvement over what I had been doing.
Great idea! I’ve been meaning to build some cam clamps for some time. The problem is that I don’t use the dog holes on the bench for work holding very often, so it’s only when I do that I think ‘Damn, I could have used those clamps I haven’t made yet…’. Someday!
Ryan/// ~sigh~ I blew up another bowl. Moke told me "I made the inside bigger than the outside".
A nice set of cam clamps Ross, a great idea and it looks like it works as intended. Using the track over dog holes gives you much variation in setting up, Well done.
Very clever, Ross! I like the Z-shaped flexible contact pad.
I saw the dolphin immediately, but it took a few seconds for the anglerfish to emerge. Maybe you need to buy one of those lasers a couple of members use and burn in some pointy teeth to complete the look. :-)
Those clamps are well designed and well made. A friend of mine used plastic nails to pin the work to the spoil board. I suspect these clamps and plastic nails would cover nearly every case.
Steve Rasmussen commented about 12 hours ago Those clamps are well designed and well made. A friend of mine used plastic nails to pin the work to the spoil board. I suspect these clamps and plastic nails would cover nearly every case.
I'm guessing the plastic nails would be less destructive to the MDF spoilboard than screws. Screws always leave a little raised rupture that has to be scraped-off with a chisel to bring the surface flat again.
Those are really cute and functional cam clamps. They look like whales!!! I love the name!!!!!!!!!!!!Great project made on the CNC for the CNC....almost like AI to rebuild it self!!
Cheers, Jim ........................ Variety is the spice of life...............Learn something new every day