I got inspired by a Taylor Tools video and started a blog about it. (the link introduces you to the Taylor Tools video).
If you haven’t seen the video, may I suggest you view it which may influence whether you might be interested in continuing to read further, wait for that blog’s expansion or simply expend your time on more fruitful pastures.
I no longer need to use intrusive clamps to secure my hand screws,
and can now just worry about the hand screw handles poking me in the gut, while my backside is now smiling horizontally without worrying about that pommy guy, Ben Dover.
I bought 3 pairs of the available (10" was sold out) kits at the time and decided to make a video of the build. Could not find any metric ones so I had to improvise. After my workshop stint, once loaded into my video editor, the videos grew into an epic of over 2 hours, which even my kids could not endure watching, no matter what coercion/pressure/bribe/disinheritamce I exerted on them... pleading "life's too short"... I will never share my casks-o-vino.
I have elected to break the video into a number of episodes during editing so sittings can be endured in smaller unpleasant installments.
In the meantime I thought to post this as a project, as there may be many that really couldn’t give a rats to follow what turned out to be an elongated, tortuous and clumsy layman’s build.
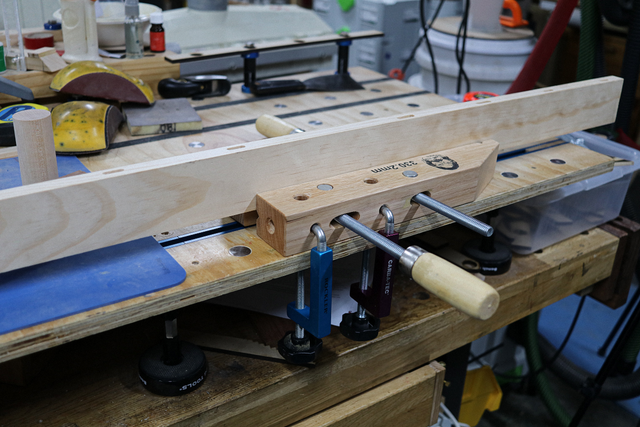
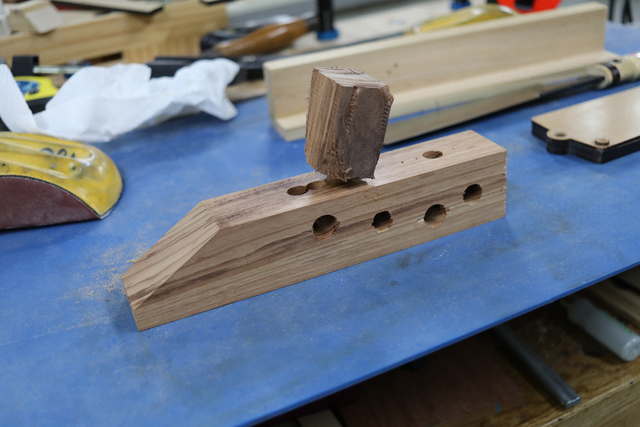
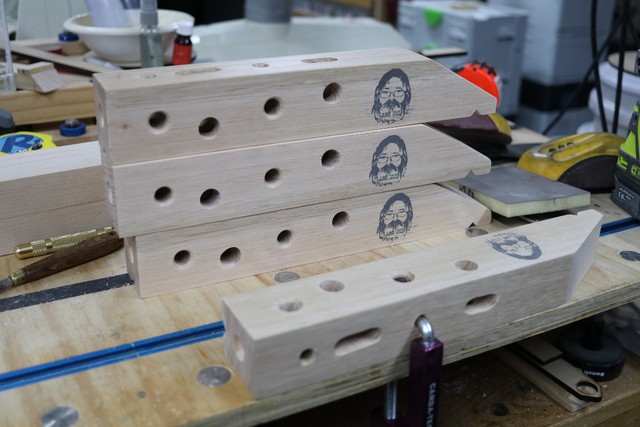
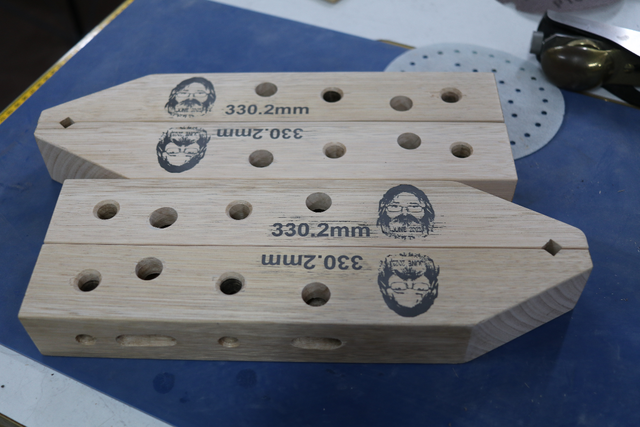
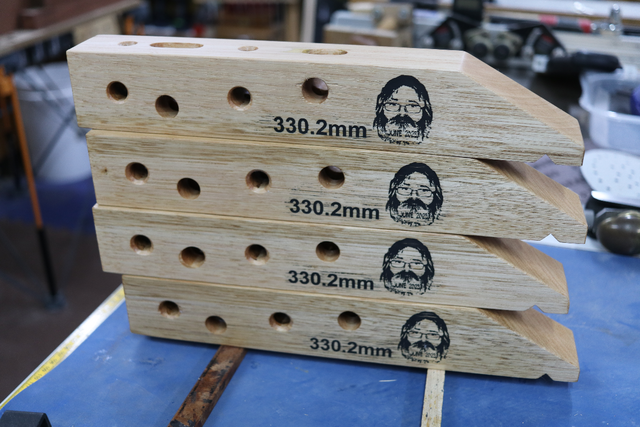
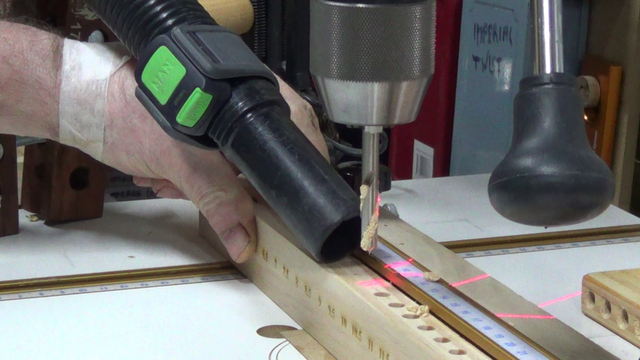
The primary additions were "V" grooves near the tip and down the base's centre, and a number of 9mm and 12.5mm holes to permit clamping (with specialised clamps) to a workbench, while holding bits of timber… where those bits of timber may be just a tad inconvenient for a standard vise or simply at a more manageable location.
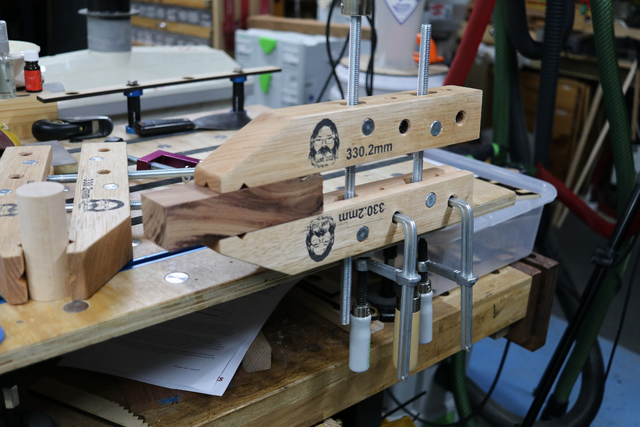
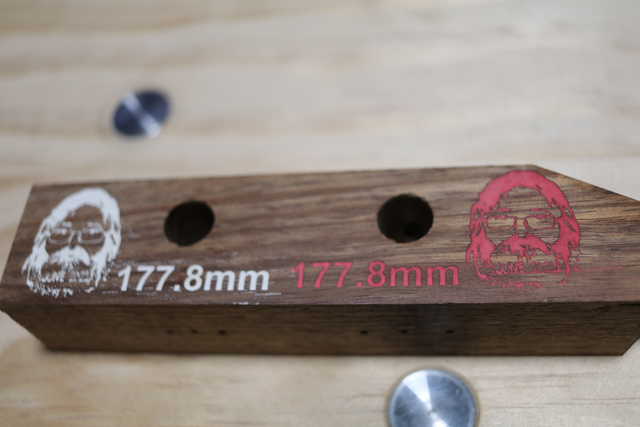
As with normal hand screws, bearing the Suppliers logo, I have engraved mine with my, in your my face, new logo, Tried a few different colors for contrast... settled on black (ebony) and white.
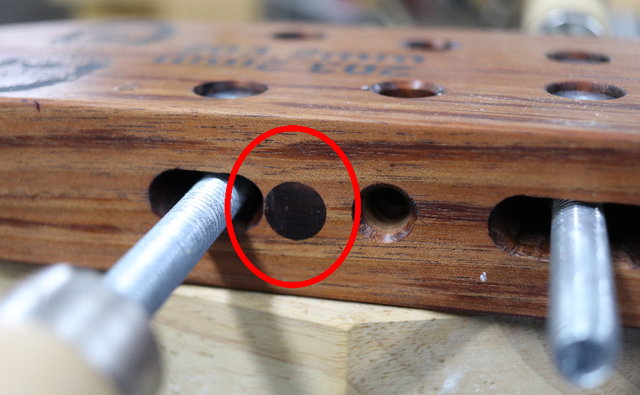
For anyone undertaking this project, watch out for your ducks... make sure they are in the correct row when drilling the 15° holes... drill in the wrong place and you'll be looking for an unorthodox dowel size to plug the hole,
unfortunately poor timber match and end-grain (oiled) made a nice contrast, but not a good cover up.
I think the photos attached should suffice to impart the new usage message/benefits for this thread and I plan to update my blog of the build as I “chapterise” the upcoming video (if it actually gets published)... as unfortunately I was too busy playing moving pictures cameraman and the stills were few and far in between, however, I plan to freeze a few activities from the video for later publishing. In the meantime, these are all that I have.
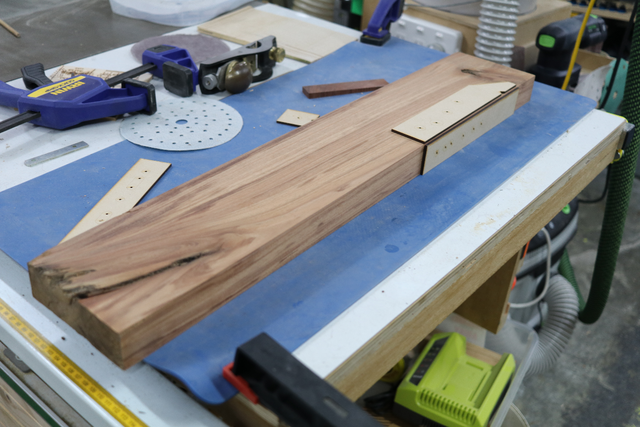
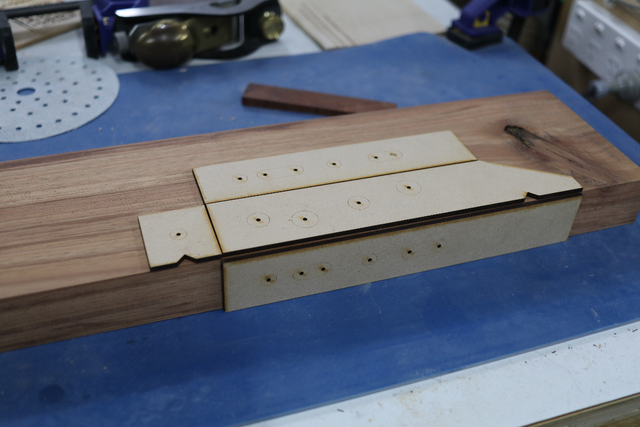
Used some MDF laser cut templates to size and select the timber to be sacrificed,
the 2mm laser cut holes were used to mark the centre of the holes to be drilled using a centre punch. The resulting hole was paramount to ensure the drill could be correctly aligned when drilling at 15°.
A picture of the large clamps (in the nude)
and with tung oil makeup, after some civilised additional engraving of the clamp's size, as an after thought,
I did epilogue the original blog with… “Feel free to try and beat me to …”
Damn… I wish someone would have beaten me to it as it wasn’t as quick as the Taylor video suggested.
Anyone interested, some links to easy your navigation:- Files are available at this link and the 3D Warehouse model,
Nice write up and build. Made a couple of these from Lee Valley kits a few years ago. Hang on the wall most of the time, next to my Grandfathers. Neat multi use clamp.
I've alway found these handy, though I always gravitated to the plastic fantastics and dragged these out for those special awkward occasions. With the modifications, those situations can now be more easily satisfied. Will the time spent to make them be returned? I may never know, but I will appreciate their added versatility.
Have already made use,
with the left hand free to move the workpiece, and found them quicker to setup and better control than this Rockler "investment". just far too rigid and difficult to maneuver in tight spots.
If your first cut is too short... Take the second cut from the longer end... LBD
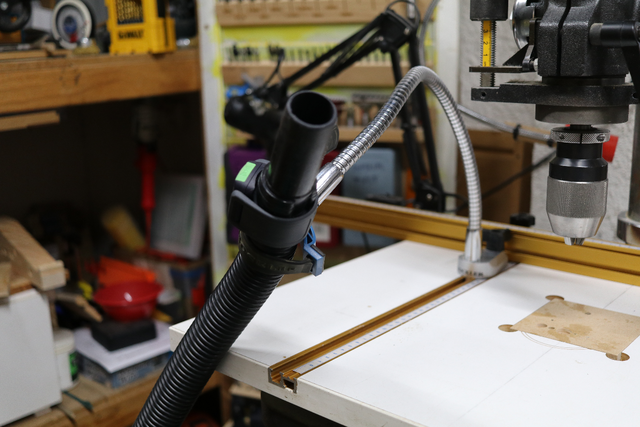
Nice write up! I’ve got one of those Rockler goose necks. Works well for my drill press table, but it is stiff. I extended the T-track off the back of the table making a less severe bend to get the hose where it needs to be.
Ryan/// ~sigh~ I blew up another bowl. Moke told me "I made the inside bigger than the outside".
I'll admit it's probably because they are fresh in my mind and on my workbench, but I have used them extensively in favour of other setups since making.
RyanGi commented 1 day ago Nice write up! I’ve got one of those Rockler goose necks. Works well for my drill press table, but it is stiff. I extended the T-track off the back of the table making a less severe bend to get the hose where it needs to be.
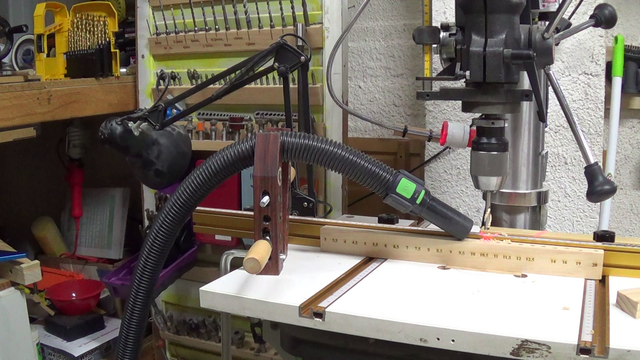
If I remember properly when I bought it, it was for the lathe using the 100mm ducts. With the heavy duty ducts it was manageable... I then upgraded so I moved it to my drill press... abdolute dissaster... I practically have to stand on the tabletop to force it into a bend... a directional bend was practically out of the question... however, the slightest touch of the hose would send in a 180° spin.
If your first cut is too short... Take the second cut from the longer end... LBD
I knocked up a few notes on looking after the clamps for respective users. Dust and Grime
Tack Cloth, or An oiled rag
This can be an effective way to remove dust and grime from your acquisitions.
Soap and Warm Water
Sometimes, it is necessary to remove grime that adheres a bit more firmly. Do not soak! The intent is to wet and wash the surface, not to get water into the wood. This can be very effective with old hide glues.
TSP and a Scrub Brush
Warning: Tri Sodium Phosphate (TSP) attacks skin. Wear gloves and eye protection. Read the warning label on the package!
There are phosphate free versions of TSP, usually based on sodium meta-silicate. These too attack exposed skin. Read the warning label!
Again, do not soak! The intent is to remove minor crud and the like from the jaws, and the handles of the spindles. You may well lose the patina when you remove the glop. Work gingerly and gently, a little at a time.
The usual starting strength is 1/2 cup of TSP to 1 quart of hot water, but you may choose other proportions. The used solution may be left to settle, so the clear fluid can be drained off the sediments, and re-used. Keep the solution in a safe place, with proper labels and safeguards!
Paint and Glue
As a consequence of being next to wood that is being finished, painted, or glued, it often happened that a clamp got covered with spatter, or drips, or spills. Most collectors prefer clean. The trick is to remove the glop without reducing the clamp to "bare wood". The same techniques that remove grime, if pursued with more vigor, will often remove paint.
If they don't then the next step is the use of mineral spirits, or paint thinner. The problem is that this often removes the original finish, if there was one. This may also get you to "bare wood" with no patina.
Waxes and Polishes
When you have succeeded in removing all the obstacles that kept you from seeing the wood, then you may want to put a good polish on the clamp. I can recommend Tony Seo's Old Time Refinishing Formula for cleaning and polishing jaws and handles (but keep it off the threads). If you experiment with it, remember to substitute only other drying oils for the linseed or tung oil. Non-drying oils, as the name implies, will remain sticky, and may support the growth of molds - yucky (DAMHINT, or Don't Ask Me How I 'Now This).
There are two schools of thought on waxing the threads of the screws. Some feel that beeswax and other soft waxes invite saw dust to stick and clog the threads. Others believe that the benefits of lubrication outweigh the inconvenience of having to wipe down tools when the project is done.
So I am quite knowledgeable eh!
Not really it came from Hans Gorgensens site around 3 Dec 1901 when he applied for a patent! No doubt Pony is a decedent,
as for new fangled Jorgensen style clamps I have just bought some and will report back soon. stay tuned for more amazing drivel!


dust - Project by LIttleBlackDuck")


. - Project by LIttleBlackDuck")