If you happen to surrender to your dark side by buying a Fe$tool Bluetoothcordless and getting mesmerised by its great features… before you turn it into a F$FO (Fe$tool $Flying Object), make sure your batteries are charged.
But we are not here to discuss battery charging.
I have owned a TritonJigsaw for more years than I can remember, however, fairly recently I had a misfortune with it…
More my idiotic fault than the product, but it was due to a disagreement with my ample body, workbench, loose tools and that bloody umbilical cord while using the saw in an inverted position… why inverted… analyse my mind if you’re qualified. You’ve never done it? Psychiatrists are not cheap.
Something had to give, and seeing as I’m permanently riveted to my apparent idiocity, the cord was the sacrificial lamb.
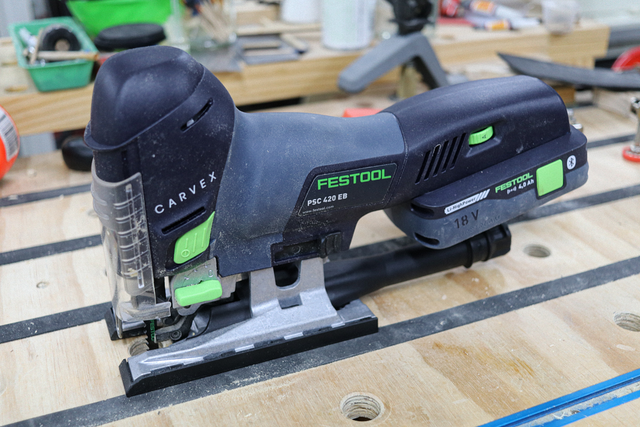
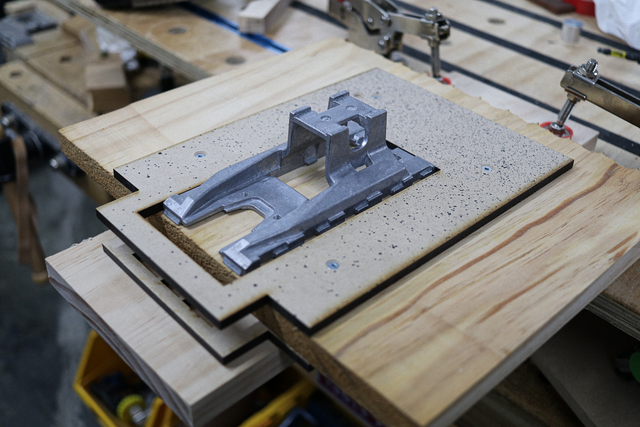
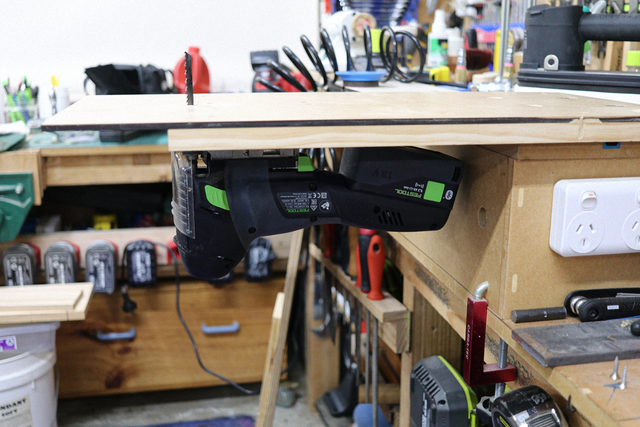
I bought a Carvex,
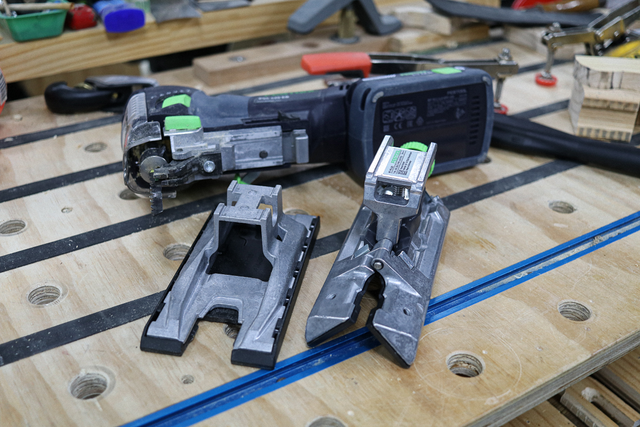
What inspired me was not the glory of spending more shekels, but the fact that it had a removable/interchangeable bases,
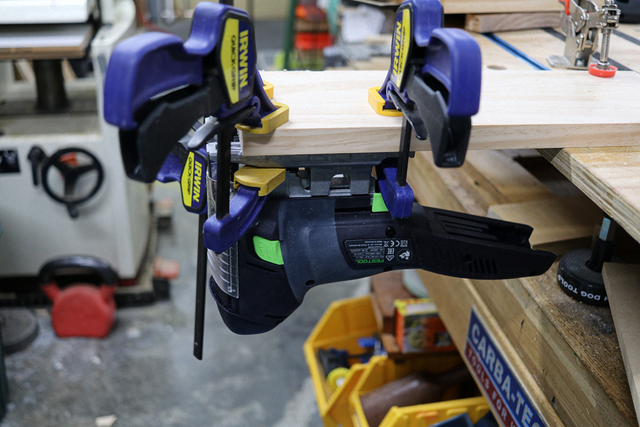
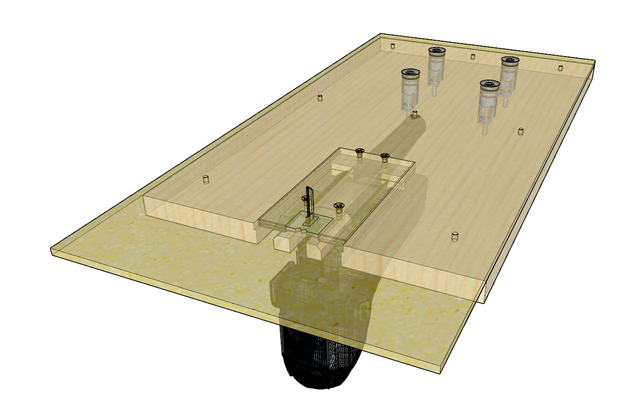
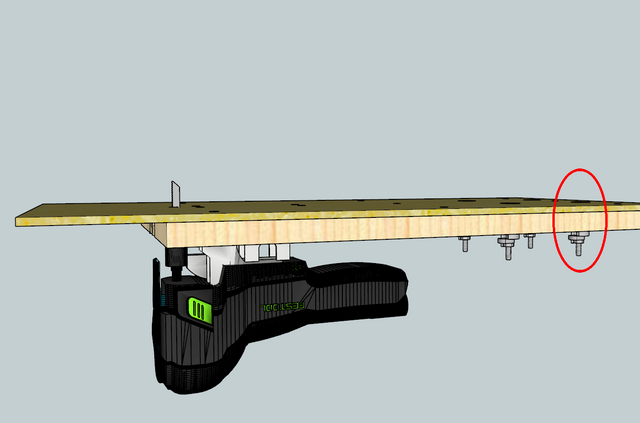
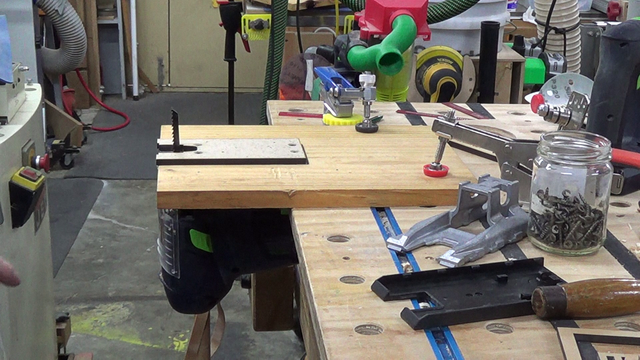
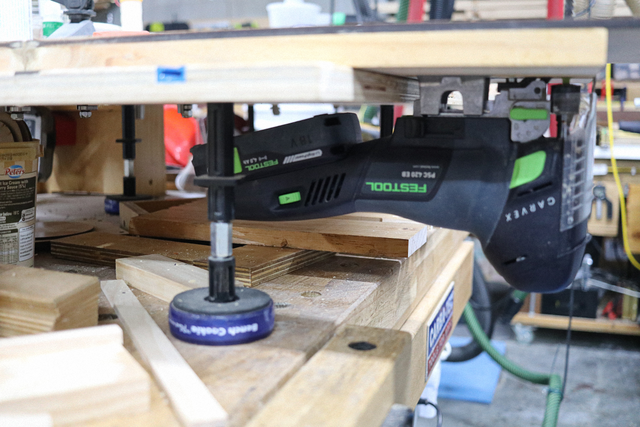
The mind boggled and I was determined to go down the path of imbedding the base plate into a timber base that could attach the Carvex upside down on my workbench to make a beefy scrollsaw or light bandsaw.
Why bandsaw? An oopsie will mangle your fingers while the same oopsie on a bandsaw will chop them off.
The challenge was to make it removable (both the attached base and the Carvex’s base plate).
Toted around with a few different setup concepts
to get a feel of what needed to be done.
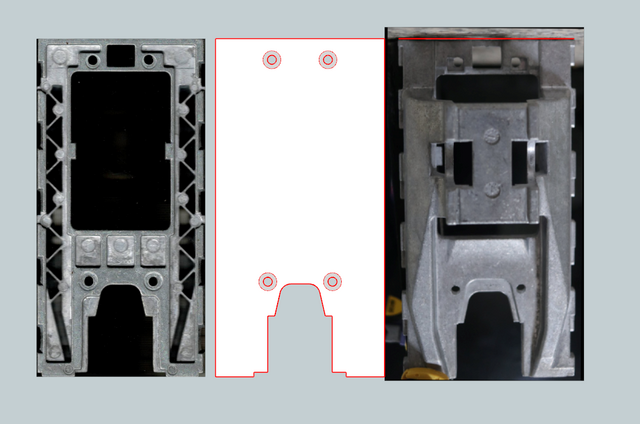
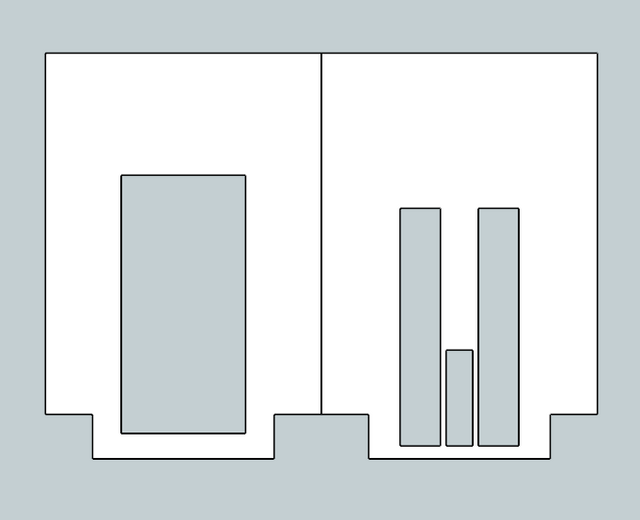
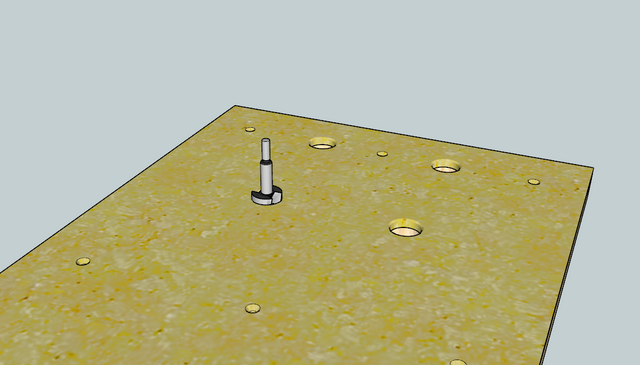
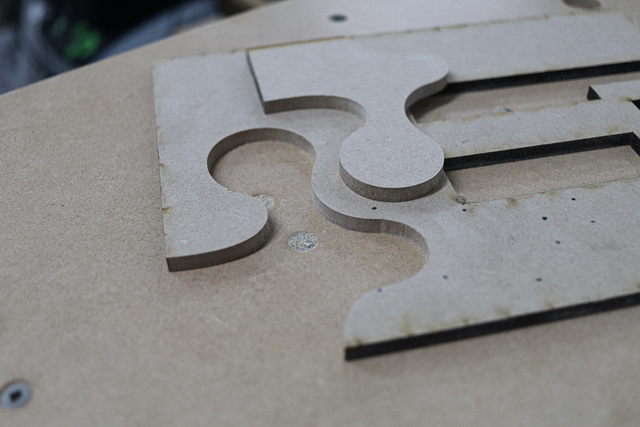
The first step was to scan the base plate and import it into SketchUp,
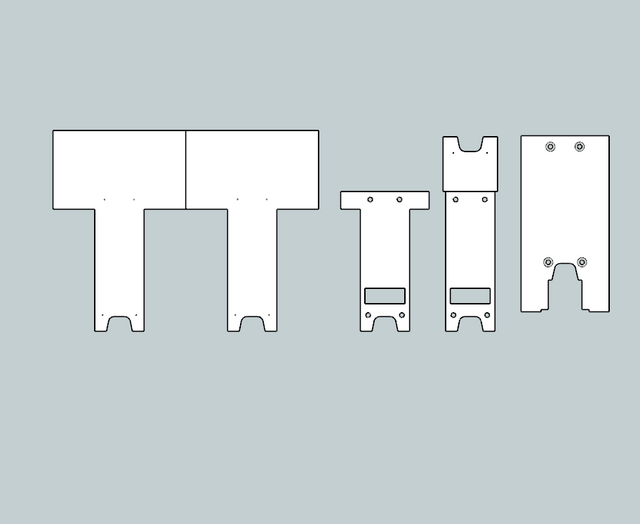
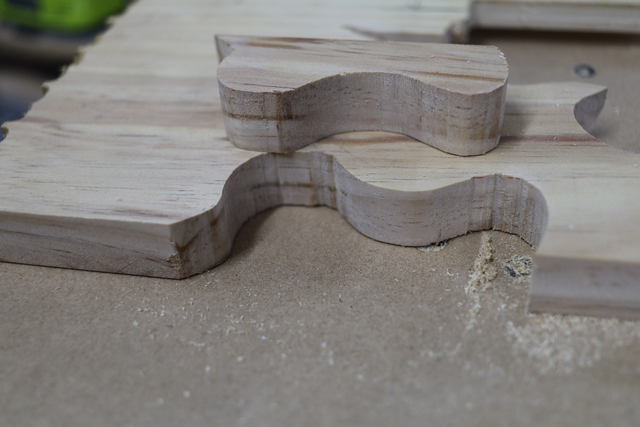
designed a few profiles,
and laser cut them,
to better assist me with measurements to design some routing templates,
which after a test cut with my router, I measured a 1.5mm displacement between the router’s template guide and the 8mm spiral TCT router bit used and the model adjusted accordingly.
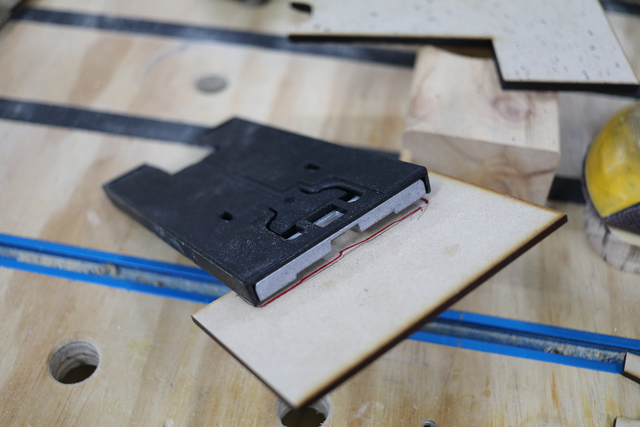
I needed several attempts to streamline the dimensions to permit “thereading” the Carvexbase onto the support base. The secret was in lining up the two separate templates to the top
and bottom of the pine board used,
and then tested for actual fit,
and after 2 attempts (small test bases), I came up with this (hopefully) final design
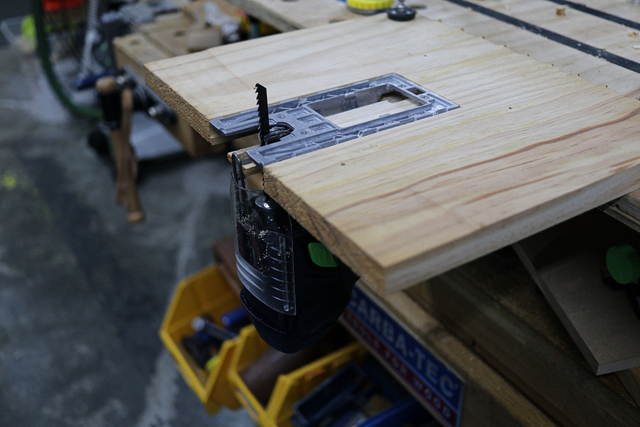
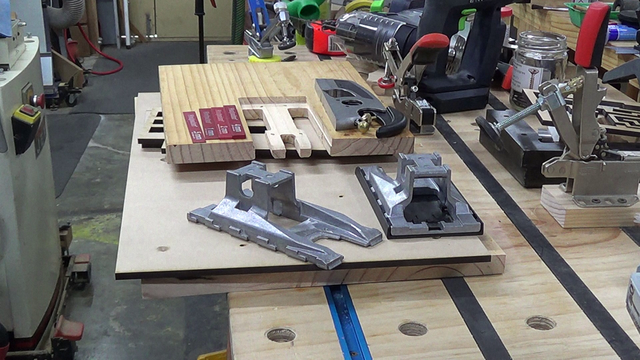
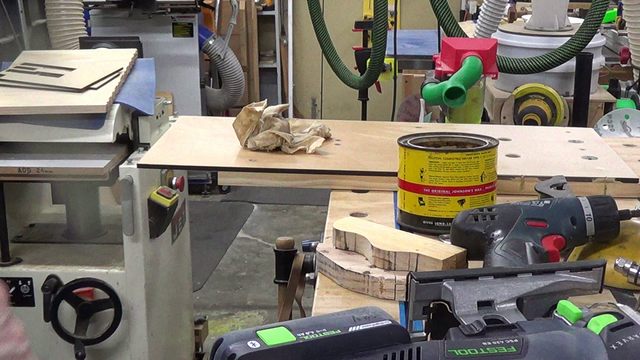
it was time to go full scale. Tools required,
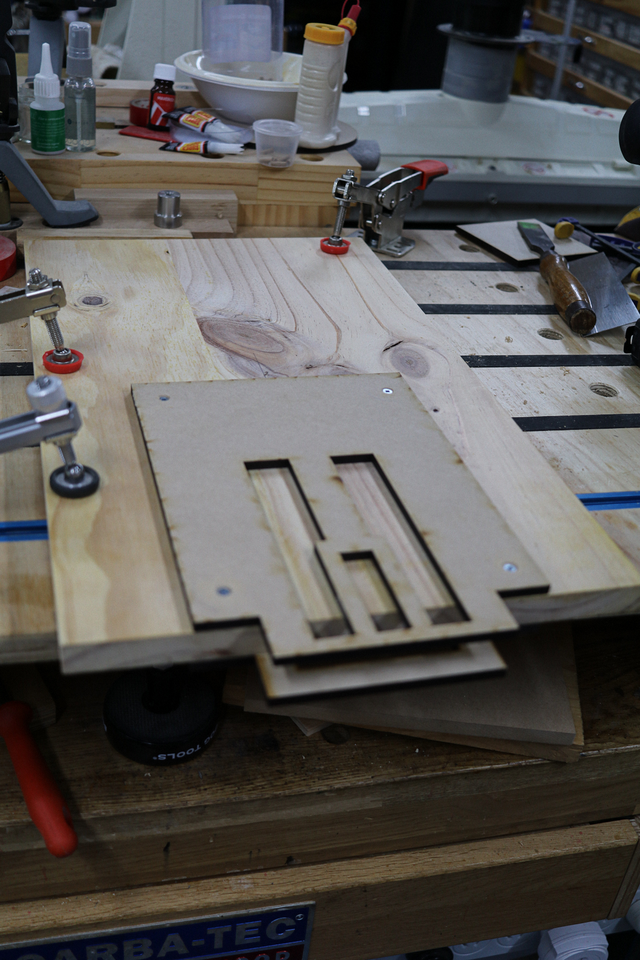
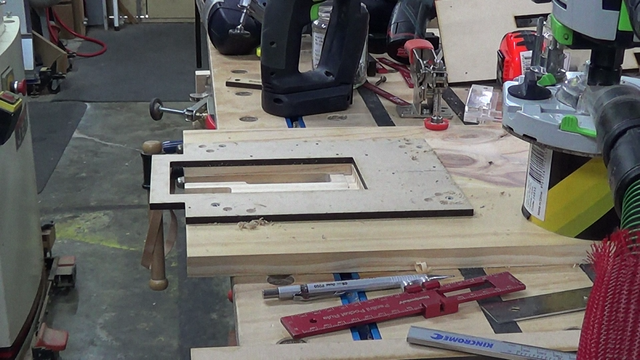
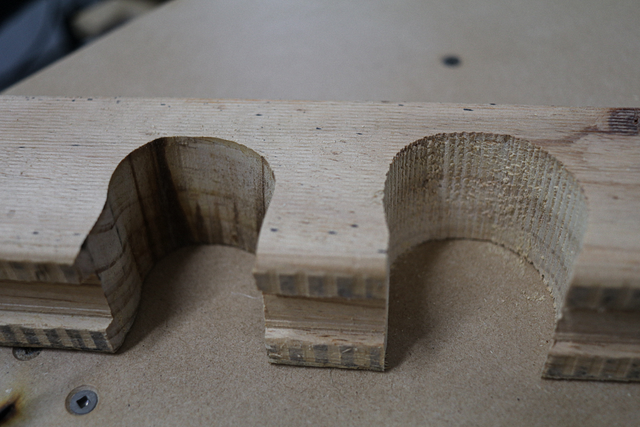
and routing templates fitted and screwed in place,
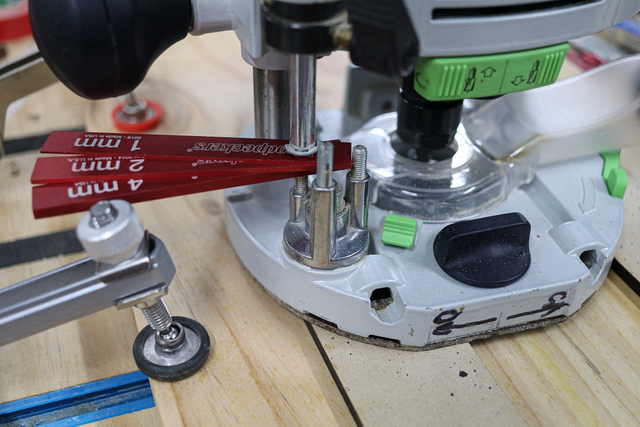
Using some dimension blocks, the depth was set at 7mm plunge,
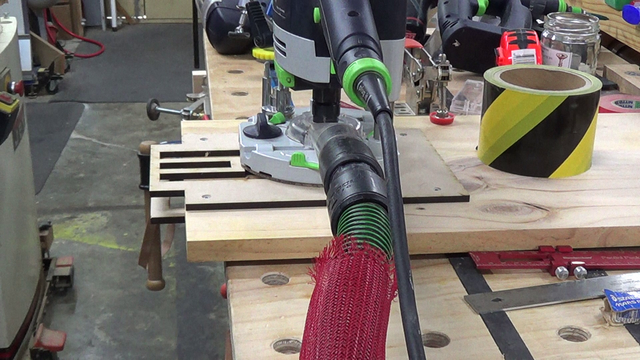
and started routing (without the double“oo”)
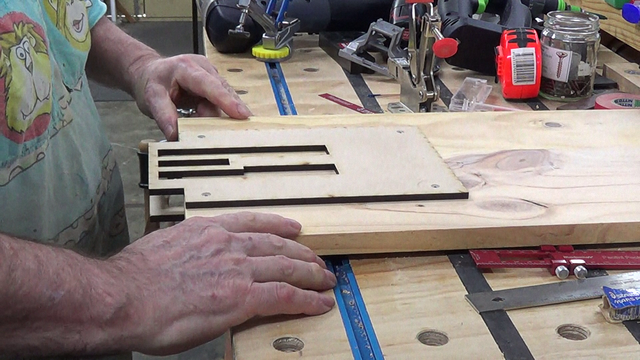
Flipped the board and using the second template, It was a case of routing all the way through,
with continual reference with the previous test bases,
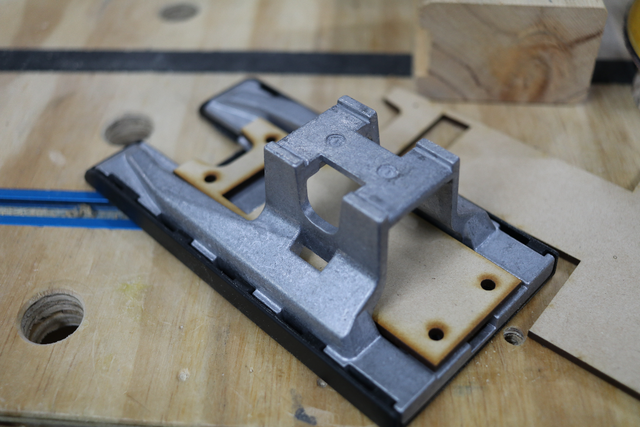
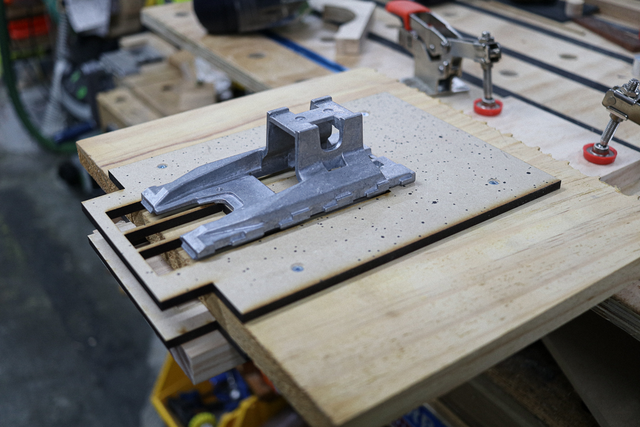
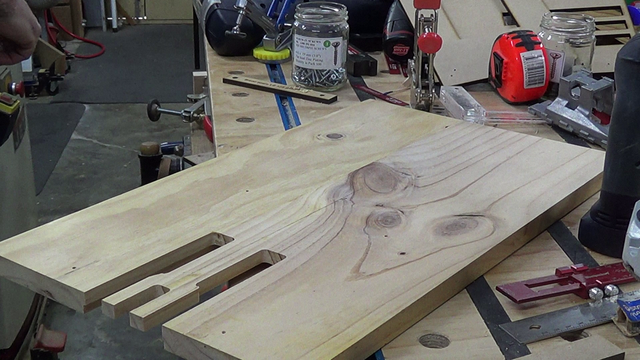
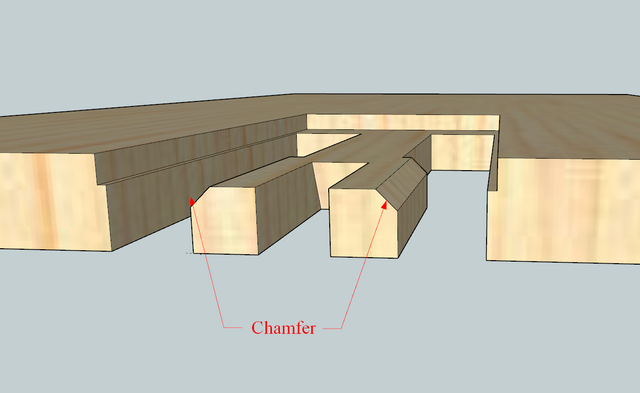
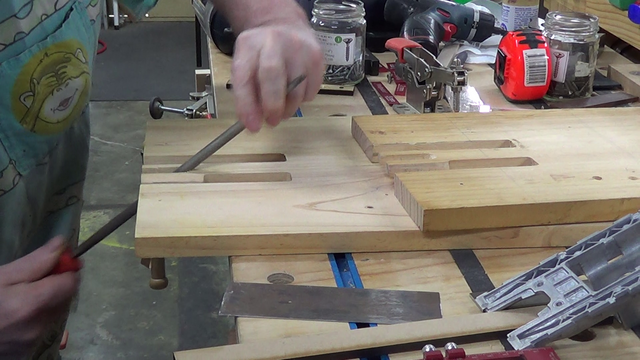
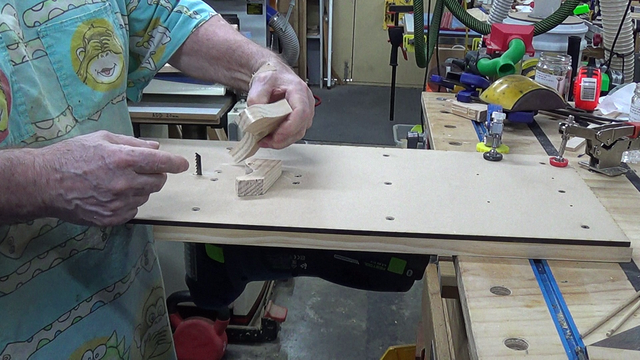
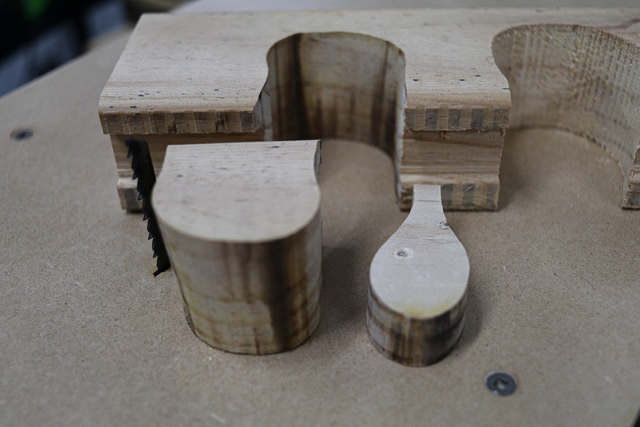
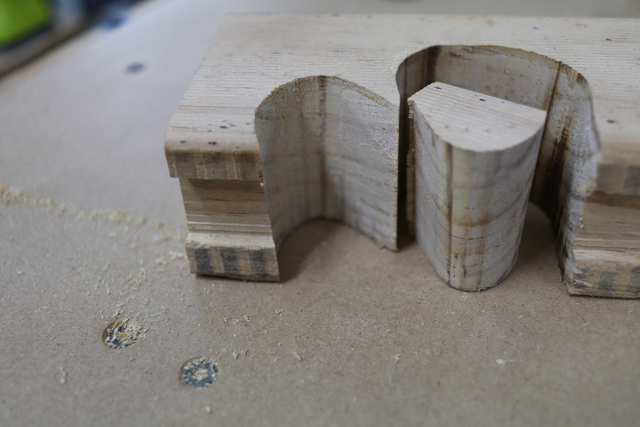
Had to do a tad of chamfering with a small shoulder plane to permit the Carvex base to be eased over the forked tongue,
The center of the “fork” had to be angled (filed),
to accept the blade support mechanism and as it eventually fit, it stayed as just “forked”.
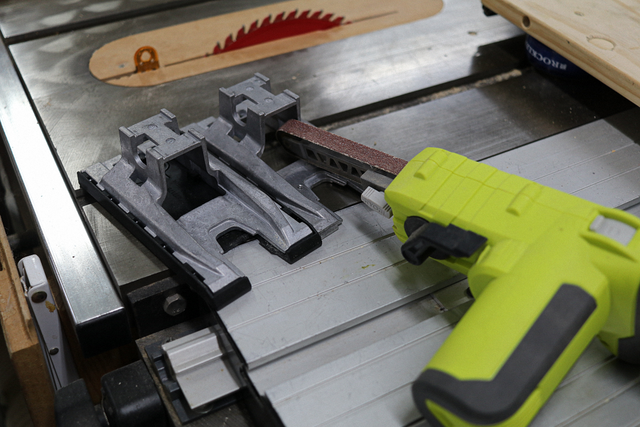
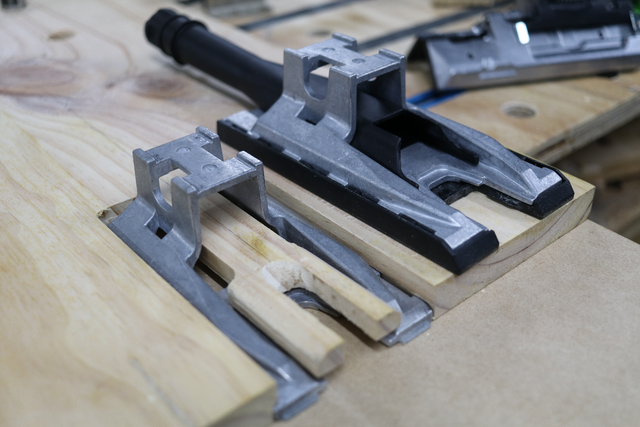
The Carvex base had a “lip” (integrated with the dust extraction) on it that had to be sanded/filed down,
I don’t know whether tools have feelings, but I sensed the Ryobi belt file had a smile on its face. Dust extraction using the attachment was no longer practical as it has to be attached to the base plate through the now positioned timber fork So if you're a dust freak, don't go rushing out to buy a Carvex, just for this modification.
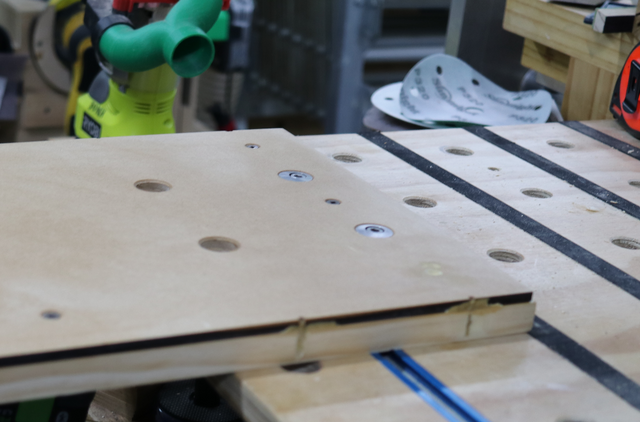
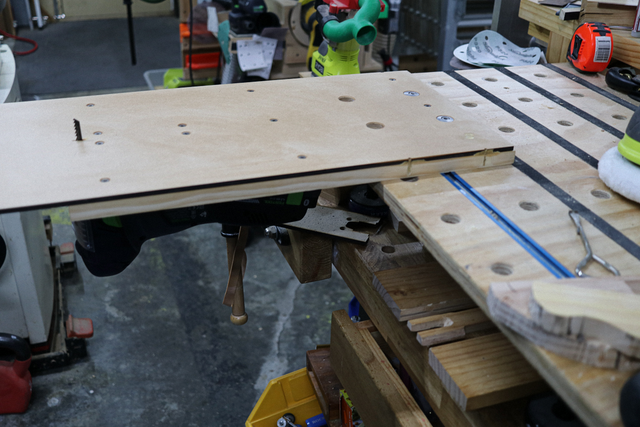
Placed the countersunk MDF skin over the top using 4mm dowels in the anchor holes for alignment
and was just about to "screw it up" when I had a brain wave,
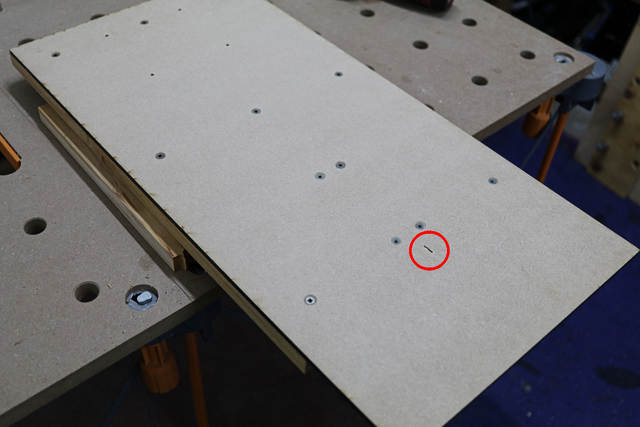
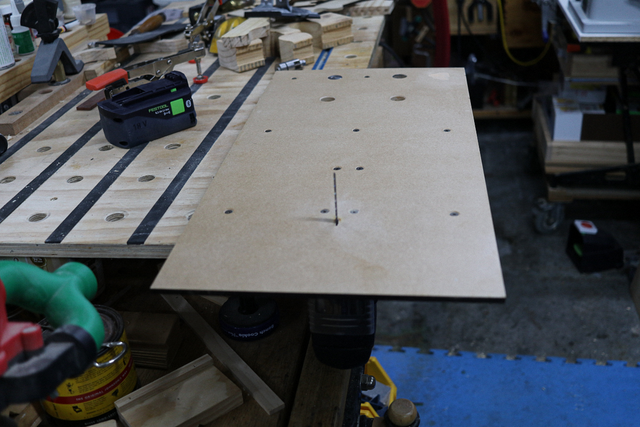
The base board was missing an “infeed table”… zipped upstairs and feverously redesigned the skin to the full extent of my laser bed. I cut a blade entry hole into the skin,
unfortunately I was trying to emulate a ZCI so the Carvex blade had to be guided through upside down,
before flipping back over,
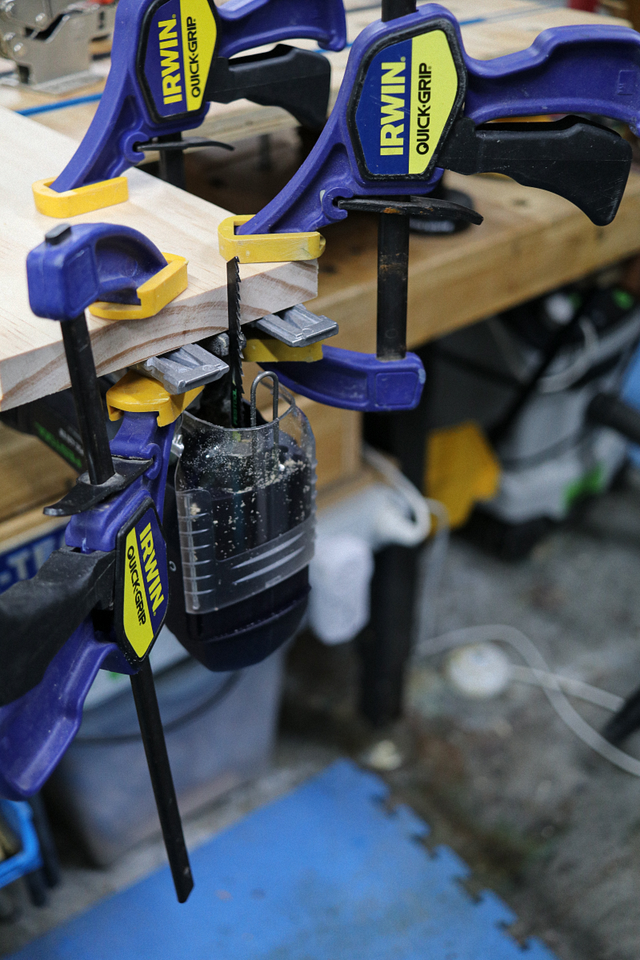
It was time for a test cut,
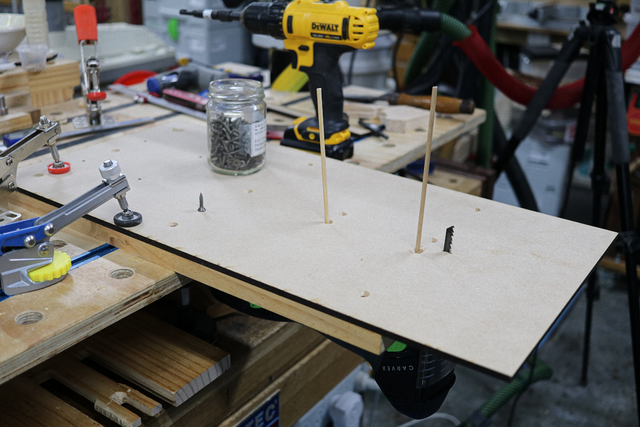
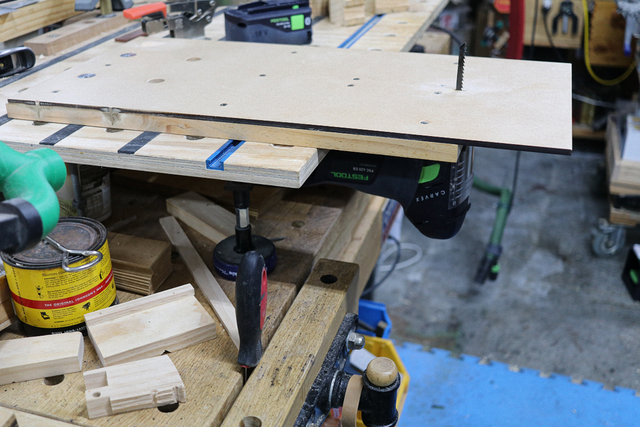
It was time to break out the UKJ Parf Sytem to place the dog holes.
(no happy snaps) to permit attachment using the TSO loc dogs
Locked in place with the TSO dogs,
ready for some more test cuts,
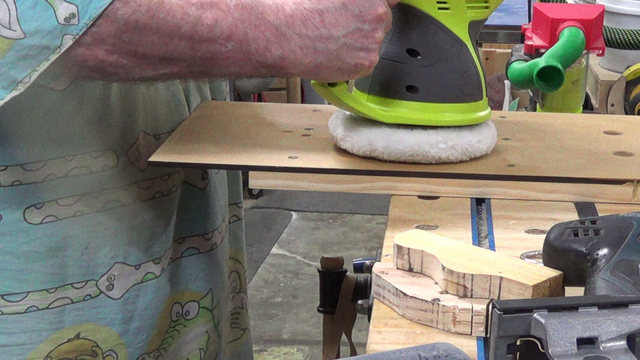
but a coat of wax,
and a buff first
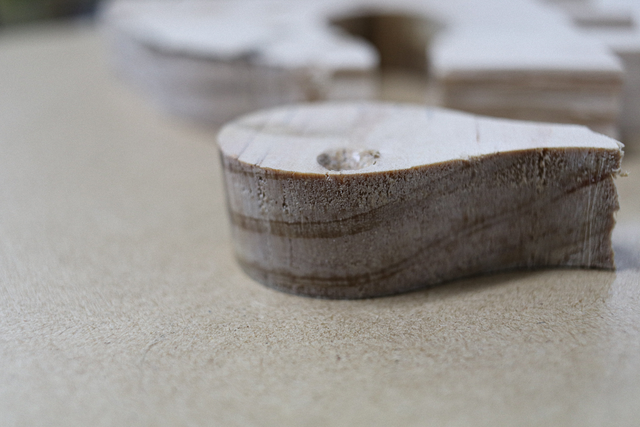
Some test cuts… Not sure how the pictures will get displayed, but at my 1200 pixel resolution, I could see a shine on the smooth cut surfaces,
(even on the MDF).
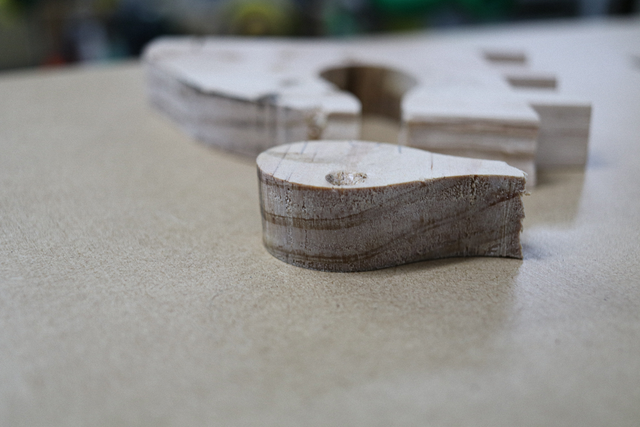
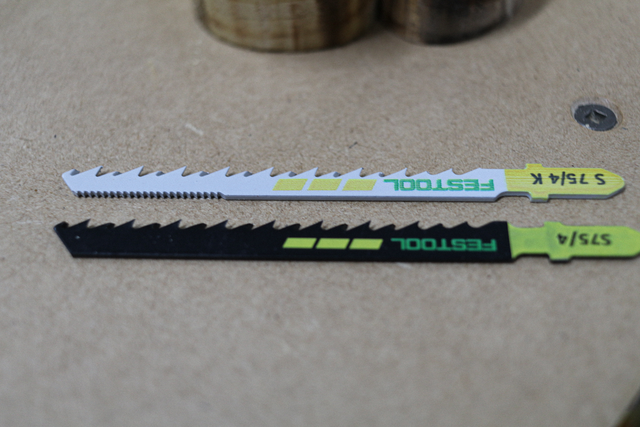
Here is a comparable cut on the Carvex and my bandsaw with a ¼” blade,
I don’t want to drift down the path of a review, however, with the appropriate blade,
the black is a standard blade and the silver is specifically for curves... with the latter, I could imagine exemplary results.
I can see me doing some heavy duty scrolling in the future… especially if I ever get back to some of my models and their fenders.
If anyone needs something to send them to sleep while sipping on a beer or two, there are some videos I made of the process. Unfortunately I yak unrehearsed through the videos which was hard to edit as some of it was actually informative and I couldn’t reshoot as I’ve already routed and I didn’t want to waste more timber for the sake of a video (or series of four).
If your first cut is too short... Take the second cut from the longer end... LBD
I really liked reading this story. My Jigsaw is one of the cheapest ones. Which means allways a bad sawing curve. Never right-angled. But I don't have shekels. I have to do it with €.
Nice job Ducky. I tried something like that with a Dewalt jig saw and it didn’t like hanging upside down and the parts that hold in the blade got lose.
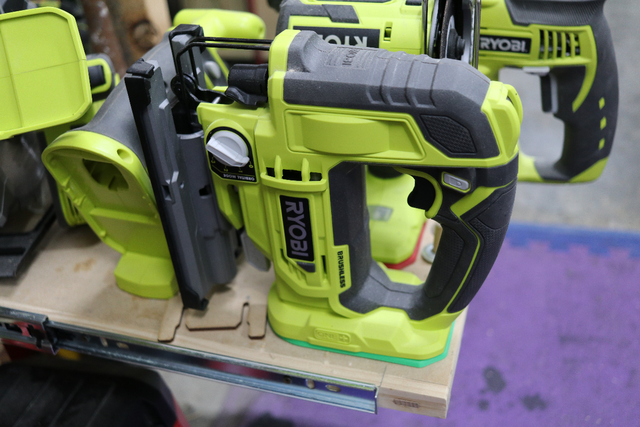
The Dewalt service and repair place is 75 miles round from me. Instead of getting it fixed I bought a Ryoby. It’s green like the Fe$tool so there can’t be much difference.
How far is the Fe$tool repair shop from you? What is the depth of cut on your hanging upside down like a bat setup?
I'm w/James on knowing what your depth of cut is. I've always wanted a scroll saw (I have the FIL's really cheap Delta) and have considered a similar, but wayyyyy less elaborate setup.
The smooth cuts are something I'd never had expected, no sanding is a win in my book fo things I hate.
Any info on the budget versus a standard scroll saw?
Locked in place with the TSO dogs
I know you are near China, but how did you get the General to loan out his dogs?
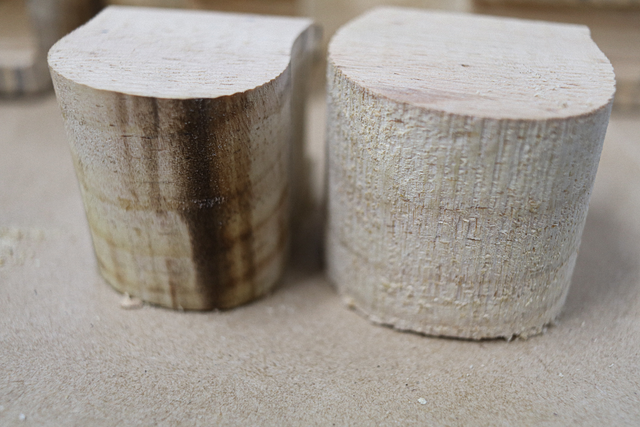
Splinter, Ducky are the smooth cuts the burnt ones on the left? I guess if your going to paint them with latex or milk paint sanding isn’t required. Most of my work involves clear coats and some sanding. And there is a lot more sanding when the wood is burnt than just having saw marks.
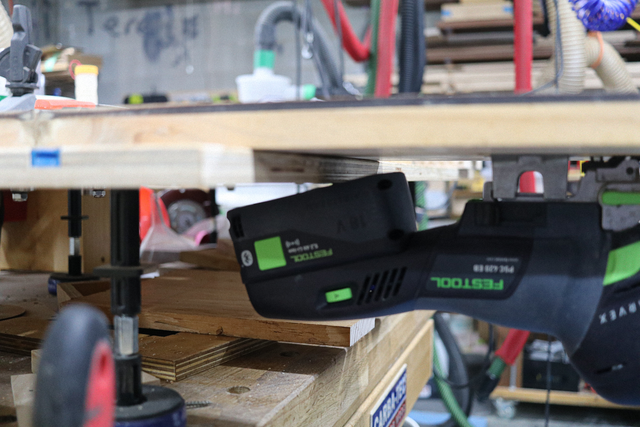
It looks like the fes is out on a limb or a spring board. What’s the vibration travel up and down? You could attach a stick to the floor to calm it down.
You can't make inner cuts with a bandsaw unless you cut and weld your own blades.
Scrolling can get very complex, however, they tend to be "light" work... (don't know about yazall, but I can't work in the dark). Most scrollsaws have a size limit (for inner cuts) except for the more expensive, bigger throated ones... and I believe (without formal costing) a good one will cost a lot more than the Carvex... and until they release a cordless one, it's a case of location, location., location potentially working against...
I got the Ryobi, nothing against it per se, however considering it was an ad-hoc purchase to replace my corded Triton, my regret is that I didn't use it as a deposit for my Carvex instead. I'm not explicitly spruiking the Carvex, I'm spruiking the concept with any jigsaw (if possible), especially for people that don't have a scrollsaw/bandsaw... it's just that I now have a Carvex and it's features/accessories makes this setup easier (and may permit greater depth of cut in this configuration).
Repair service is through their distributors (25K away)... however, of all my Fe$tools since my first purchase 14 years ago, I've only had to get 1 serviced... it was a sander i dropped onto concrete from on top of a ladder... hell even the ladder winced.
The smooth cuts surprised me... but then I'm guessing (without a review) it is a feature of the Carvex with Fe$tool blades, inversion independent.
Now for the cutting depth and burn marks. The blades I used are rated at 30mm cutting depth... the thick piece of test timber was 45mm. The curves were just a lets see what I could do... I was concentrating big time on holding the piece flat to the table than the direction of feed. Also I was using a standard straight cut blade. I could potentially reclaim 4mm loss of depth by omitting the skin, due to the 6mm skin (6mm less the 2mm for base plate skim not used), however, it would require contersinking the base plate drill holes and extensive redesign to permit "threading" over the fork and still have an infeed. (You guys are making me dig deep into my BS bag.)
Fe$tool has a dedicated curve cut blade, but I was too bloody lazy to put it in. One of the features of the Carvex is to adjust the blade guard for exact 90° cuts for each blade change... I was testing proof of concept not screw around with settings.
I have some other things to do, but I will try to get off my arse, change the blade and make some more test curve cuts... problem is., I don't have a scrap bin full of all those magnificent variety of off cuts that everyone brags about and I am hesitant to waste my timber on a throw away demo.
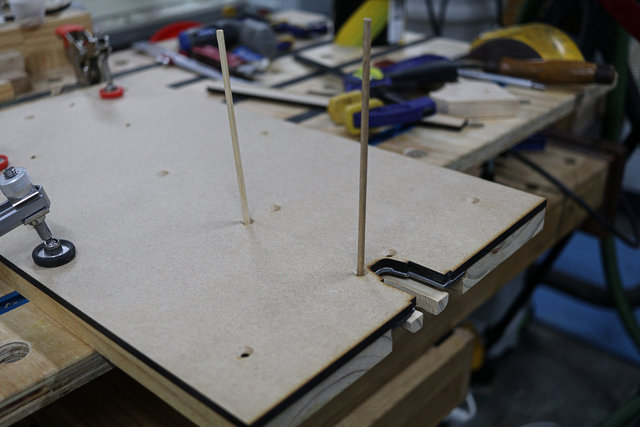
I never considered the "spring board" affect, though on the small tests I made it was not an issue. I have chosen that "extreme" setup explicitly using my TSO loc dogs to a MFT style workbench with a solid face. If its a bench without a face, I can slip in a smaller battery to maximise the thickness of the benchtop I can slip it under,
alternatively a more prudent choice of dog holes and a different mount,
Support for the front could be an option for large heavy work... and now to contradict one of my arguments, it may be more prudent to cut in the upright position.
If your first cut is too short... Take the second cut from the longer end... LBD
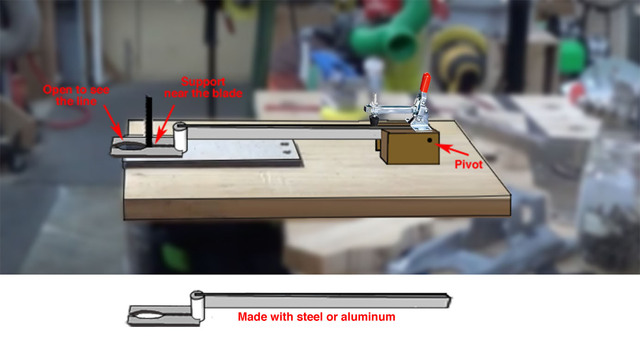
Alex, do you think something similar to this would work?
A few years ago when I attached my Bosch jigsaw upside down to a board I was going to make something like this. I found out quickly that you must hold the board down, and you can't let your mind wander for even a second or you'll have a problem. I was using mine to cut metal.
I was going to make this out of aluminum because I have a tig welder. With thicker material it could be pinned instead, or I suppose it could be made of steel also if you have the means.
There is no adjustment for different thicknesses, but I didn’t think that far ahead because I was going to use it on sheet metal less than 3mm.
I had forgotten all about it until your post.
Bruce, my Bosch is not expensive and I think it's as good as most could hope for, it is an excellent tool.
Hold down had crossed my mind when I quickly discovered, like you, that it must be held down and no lapse in concentration. In the past I always moved the saw under the work and not the work over the jigsaw.
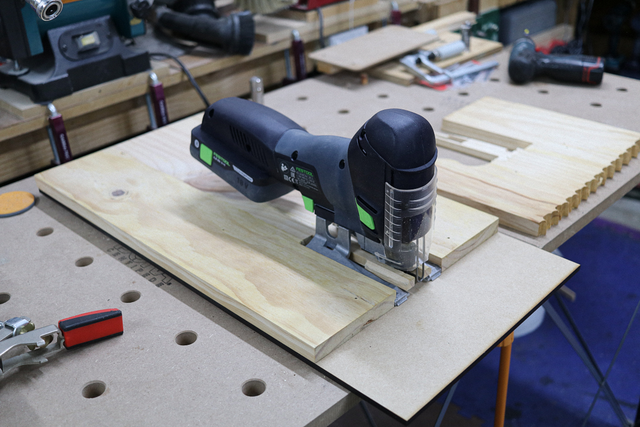
For a hold-down, I was contemplating a roller/bearing/something suspended from above exerting downward "pressure"... actually just preventing upward movement. Any attachment to the board would inhibit movement of larger pieces. Then I thought uneven surface, the thought bubble burst.
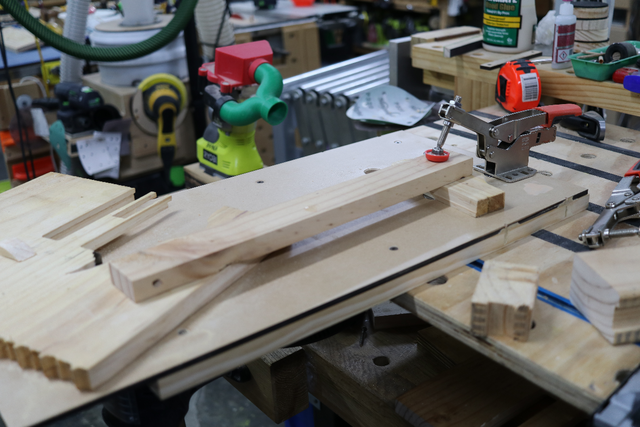
Being ispired by your suggestion I found that the hold down could be controlled by a TSO loc dog mounted Bessey clamp (using your type of arm), All it did was to hold that long piece to stop the work from rising. It was just tight enough to provide easy movement underneath yet leave it stationary.
I slapped a curve cut blade into the Carvex. I could do much tighter curves, with fairly smooth cuts and minimal burning...
I quickly discovered that my jigsaw scrolling was no better than my normal scrolling.
RobsCastle commented about 5 hours ago OMG you should have rung me I could have sent you a new power cord in the mail I have heaps of them! What length would you want 6" 8" or longer?
pottzy, I'm also sorry but there are other people on this earth that do not have YOUR bandsaw and scroll... friend you may be but this was not directed at only you!
If your first cut is too short... Take the second cut from the longer end... LBD
Boys and Girls, lets get it clear, I'm not advocating getting rid of your bandsaw or scrollsaw, or even spruiking a jigsaw (let alone the Capex... though I may have hinted... hint, hint).
All I'm saying is that a jigsaw can do a lot of the jobs a bandsaw ('cept thickness) and scrollsay ('cept tight turns and minimal kerff), but then there are many things the jigsaw could do that the other two may not... at least as easily.
Basically what I may be hedging at is, if a novice (poor choice because of care required in the inverted position) asked whether he should buy a scroll saw or a bandsaw first, I'd suggest he consider a jigsaw... If you have both than a jigsaw could be an unnecessary luxury and if you didn't have a jigsaw, making this jig could be a tad futile.
If your first cut is too short... Take the second cut from the longer end... LBD
I can see there are times when you need just the right tool to get the job done, and looks like a really well thought out plan so it’s as safe as can be, the rest is up to the user. As long as my fingers are far away I would use it, and I like that it can be a table surface that can be tucked away until needed again. Leaving the base there so an easy hook up is brilliant.
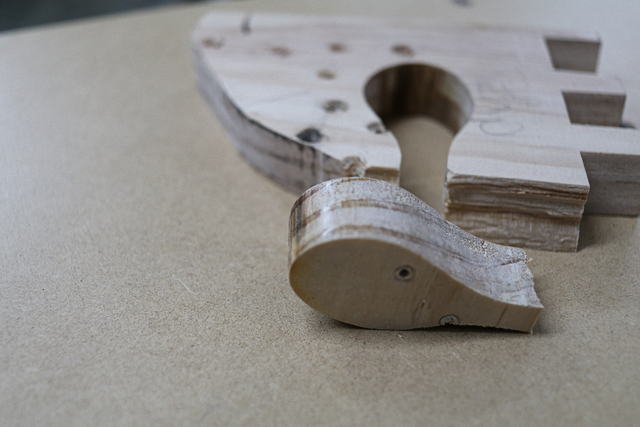
My take is that there are plenty of times when I needed to close-tolerance cut the center out of a wood ring for routing. Can't use the BS without cutting the blade and this here is a good solution. I can use the JS as intended, but for these cases I'd rather move the workpiece than move to tool to make the cut.
There is no universal tool so making what one has more flexible is always a win in my book


… - Project by LIttleBlackDuck")

.")
.")
.")
.")
.")
.")