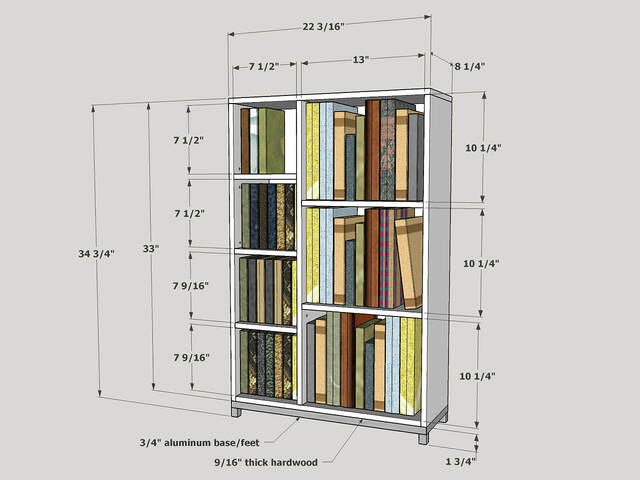
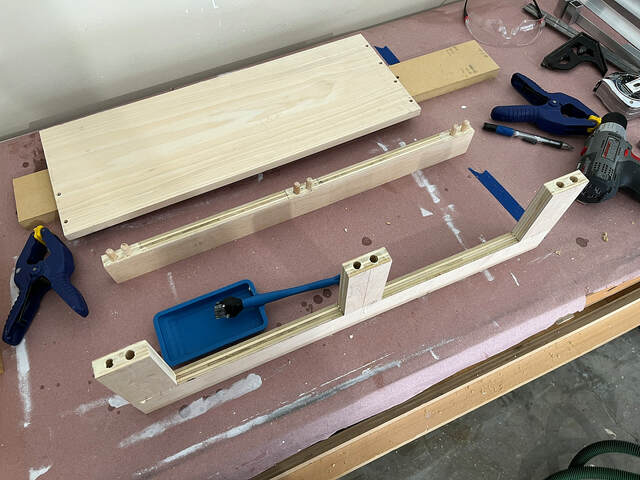
My wife’s BFF asked me to build her a small bookcase to fit into a corner of her sunroom. It would replace a three-shelf melamine bookcase that had seen better days. She gave me free rein over the design, subject to a few requirements: dimensions around 32” high, 22” wide, and 8” deep, some adjustability for the shelf spacing, and a painted finish to match the trim in the room.
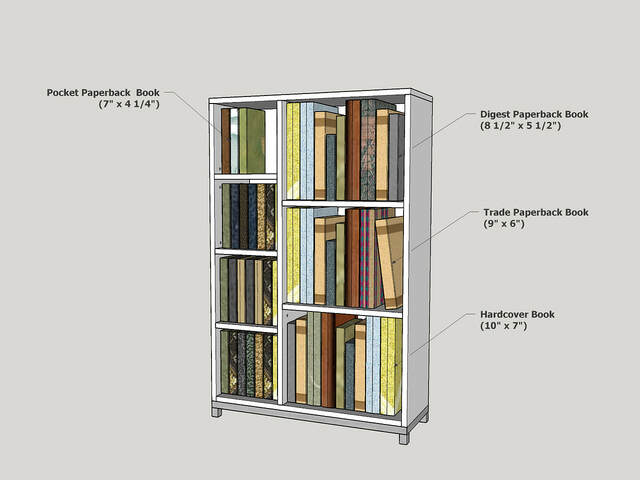
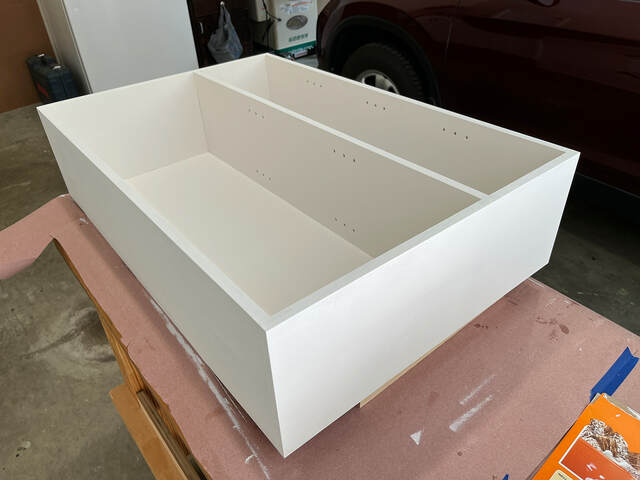
The small size (it’s tiny for a bookcase) pretty much ruled out any elaborate designs (I modeled some designs that just wouldn’t accommodate the larger hardcover books in her collection.) To try to make it a little different, I came up with this two-column design with smaller shelves on one side (to hold smaller paperbacks) and larger shelves on the other (to hold larger paperbacks and hardcovers). To dress it up a bit, I added an aluminum base. I modeled this design, filled it with virtual books of various sizes, and sent it to her for approval.
This finished bookcase is made of poplar (planed to 7/16” thickness) with a 1/4” (actually 3/16”) thick maple plywood back. The base is aluminum “veneer” over a wooden frame. The finish is two coats of Sherwin-Williams Emerald paint (color Snowbound, finish matte) over Zinsser 1-2-3 primer.
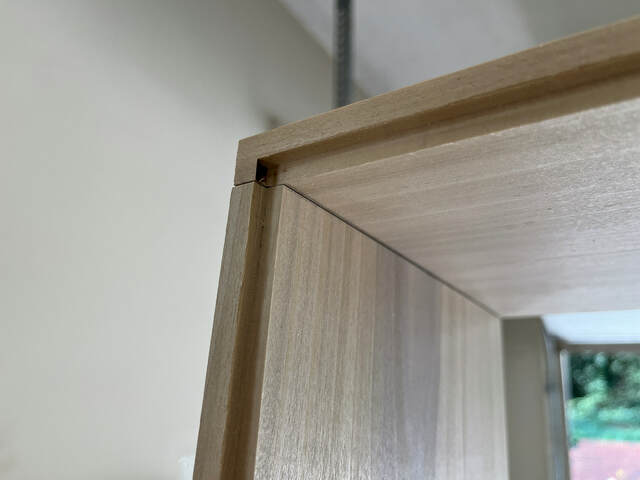
Preparing the Case Panels The case is simple--doweled butt joints with a rabbeted back panel. The rabbets in the top and side panels are stopped, so I cut them using a 1/4" bit in my router table instead of my table saw. The back has a shallow (1/16” deep) dado for the vertical divider; I used my table saw and a flat-top-grind blade for that.
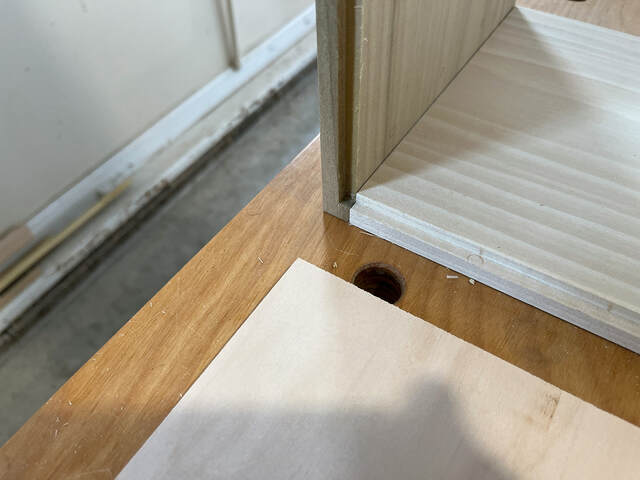
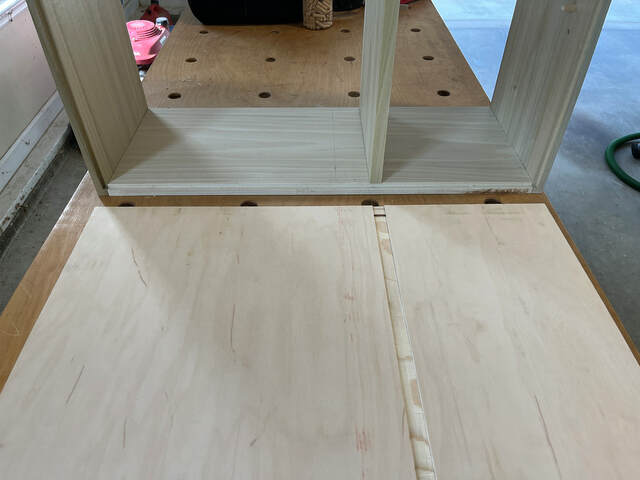
Things got off to an inauspicious start. When I was drilling the dowel holes in the top using my JessEm doweling jig, the stop on the drill bit slipped, and I drilled a hole all the way through the panel. Because this is the most visible panel in the bookcase, I decided not to patch it. Fortunately, I had a big enough piece of poplar leftover from a previous project to make a replacement. To make sure I didn’t repeat my mistake, I added a second stop to the drill bit.
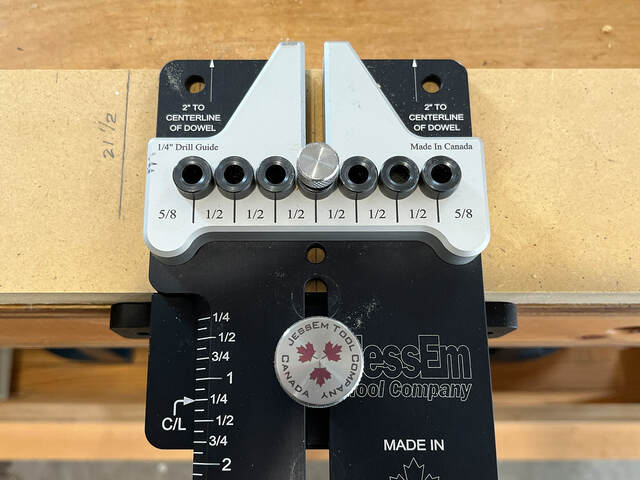
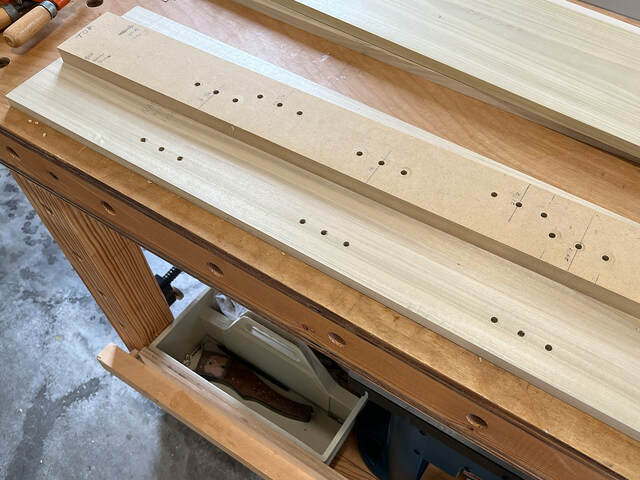
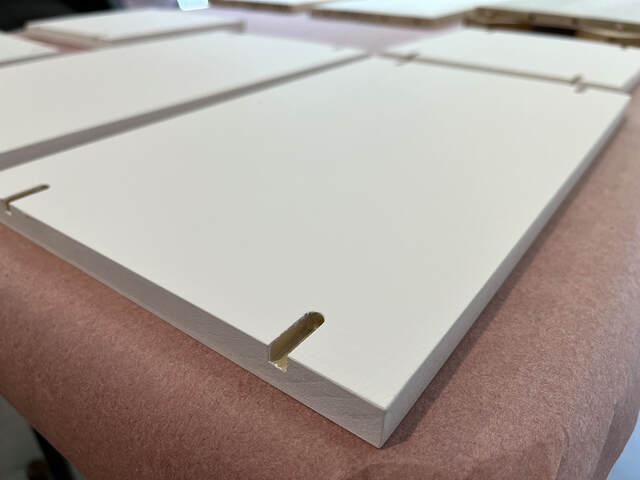
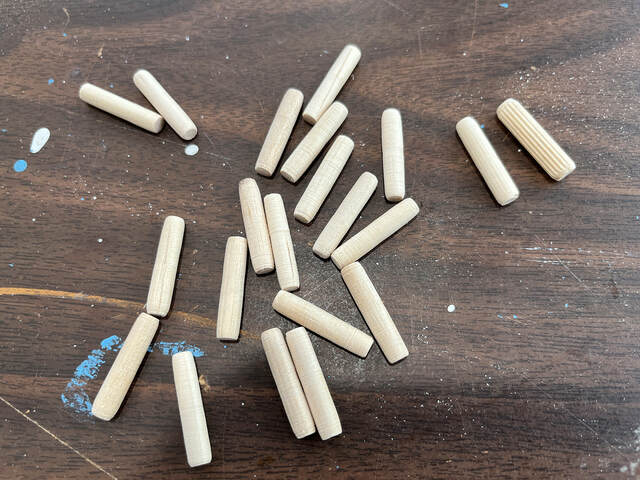
Shelf Pin Holes Early on, I decided to use 1/4" dowel pins, set in 3/8” deep holes, as shelf pins. The shelves have matching slots that cover the dowels completely. Laying out the shelf pin holes was tedious because it was easy to make mistakes with the offsets for the slots (and because the two vertical cavities needed different hole spacings). I used SketchUp to figure things out and modeled a jig to use to drill the holes.
I used my JessEm doweling jig to make the drilling jig (from 3/4" MDF). Once I lined up the center hole in each triad of holes, the jig made it easy to add the flanking holes 1” on either side.
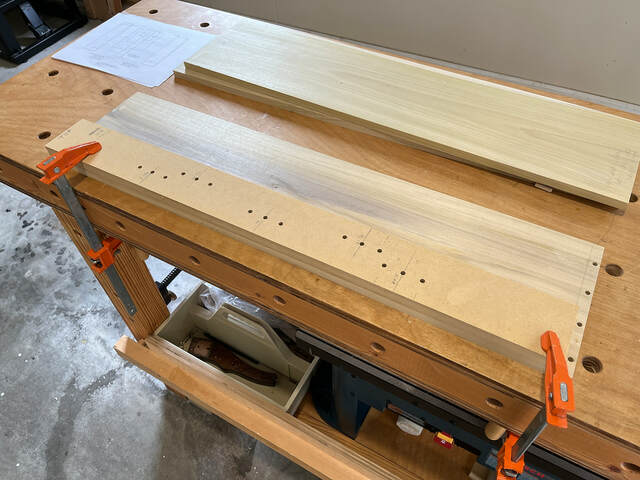
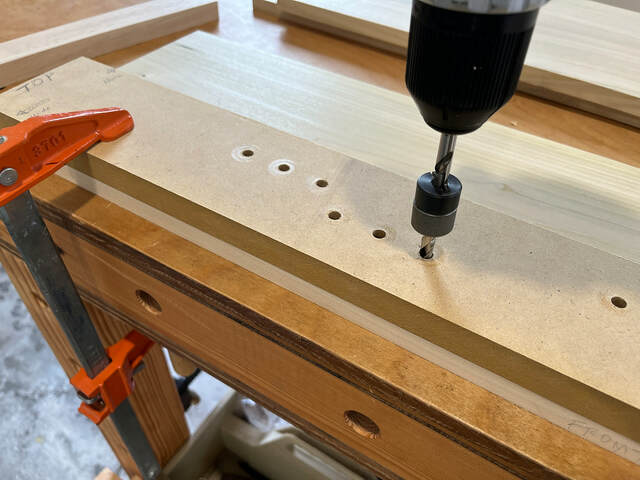
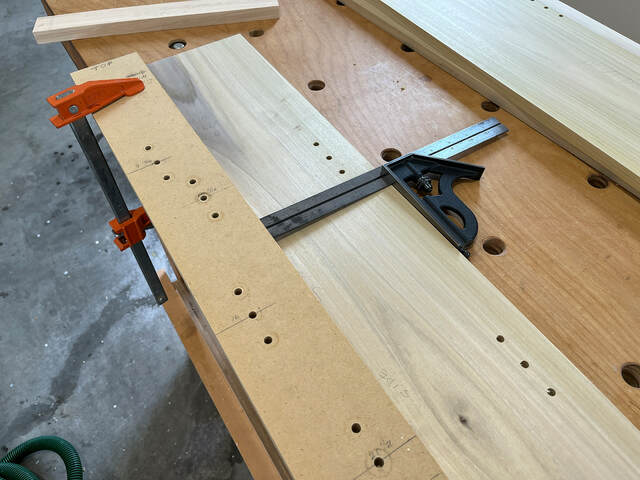
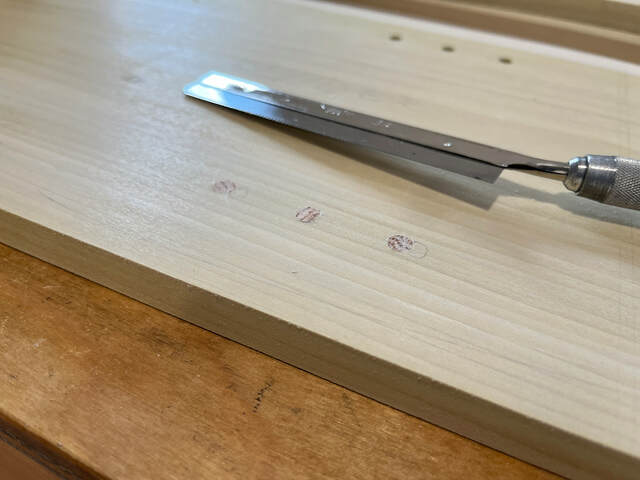
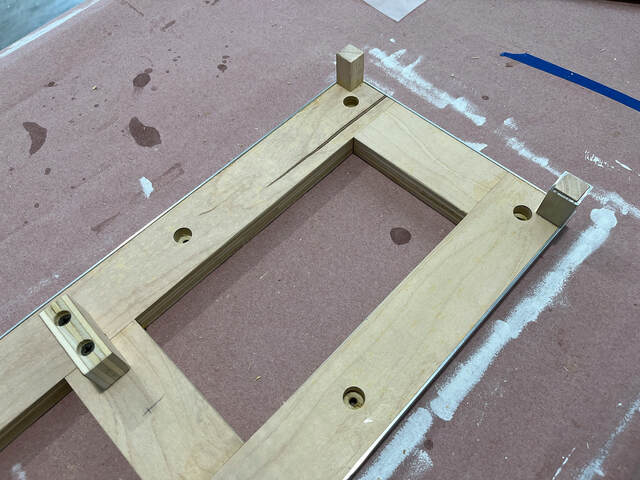
Using the drilling jig was easy. I just had to clamp it in place and drill the holes with a handheld drill. (In the second photo below, you can see the secondary drill bit stop I mentioned earlier.)
When aligning the jig for the back row of holes, I had to take care to measure the offset from the front edges of the sides and divider. (The divider is 1/16” deeper than the sides because it fits into the dado in the back panel. If I positioned the jig based on the back edge of the divider, the holes would have been offset 1/16” too far to the rear.)
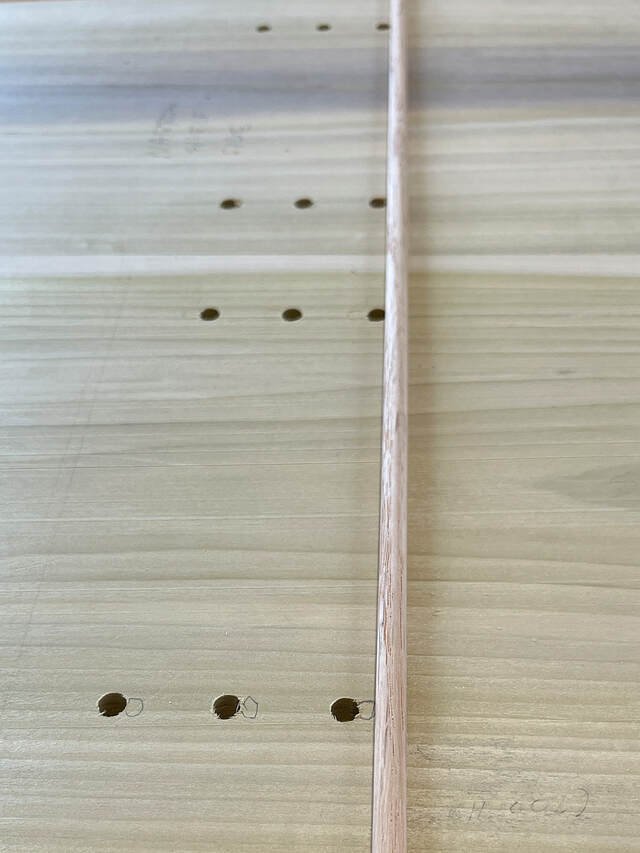
Drilling proceeded smoothly, but, when I finished, I noticed an error in the back row of holes on one side of the divider. I still can’t figure out how I messed that up. I must have flipped the jig top-to-bottom for that row of holes.
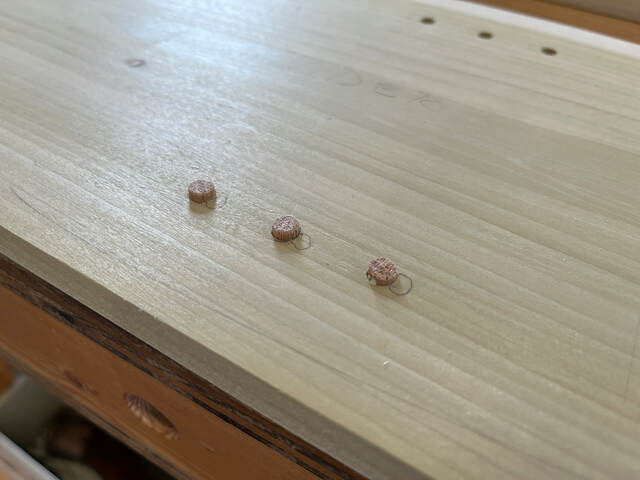
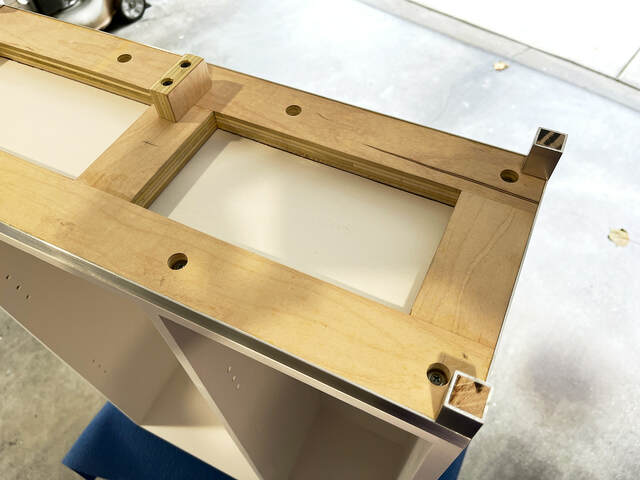
I kicked myself for a good long time for making that silly mistake, but it took just a few minutes to fix it. I cut plugs from a 1/4” dowel rod, sawed them flush, and sanded them smooth. Because they’re near the back of the bookcase, they wouldn’t be visible.
Shelf Pin Slots
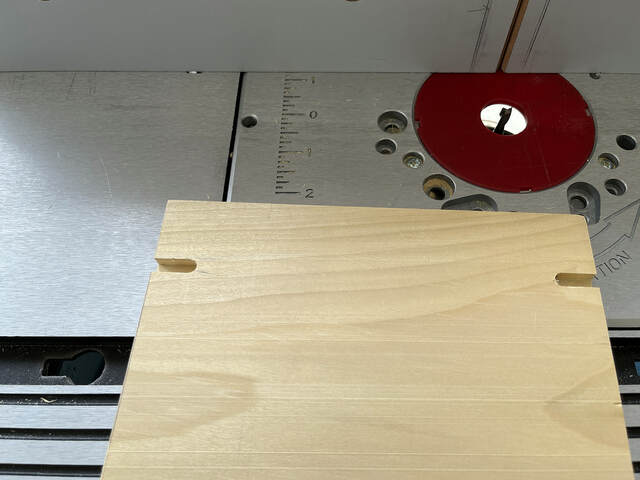
I used my router table to cut the slots for the shelf pins on the bottoms of the shelves. I used climb cuts for the slots on the right sides of the shelves so I didn’t have to move the fence when switching from the left and right slots. I wasn’t removing much material, and I moved slowly, so I felt safe.
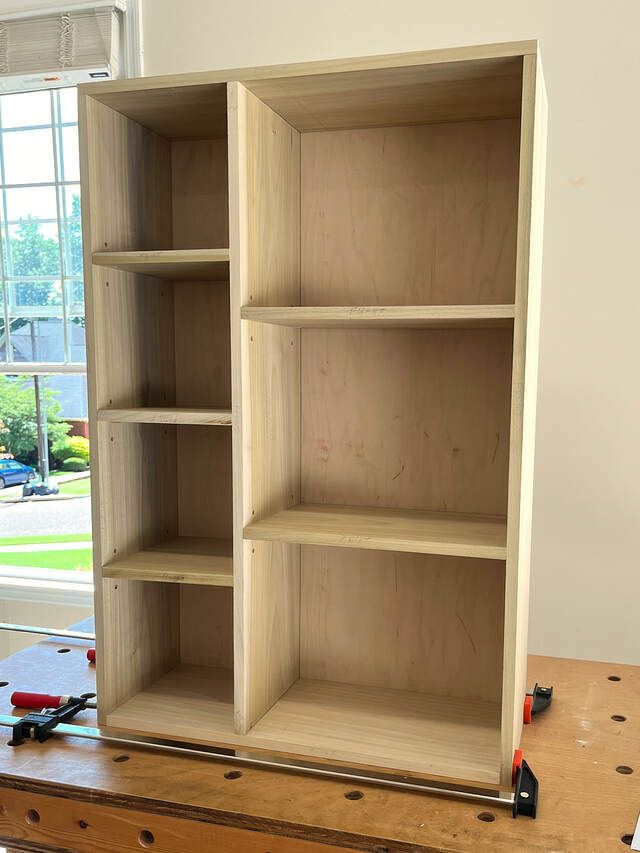
With those slots cut, I could dry-fit the entire bookcase.
Painting Interior Surfaces
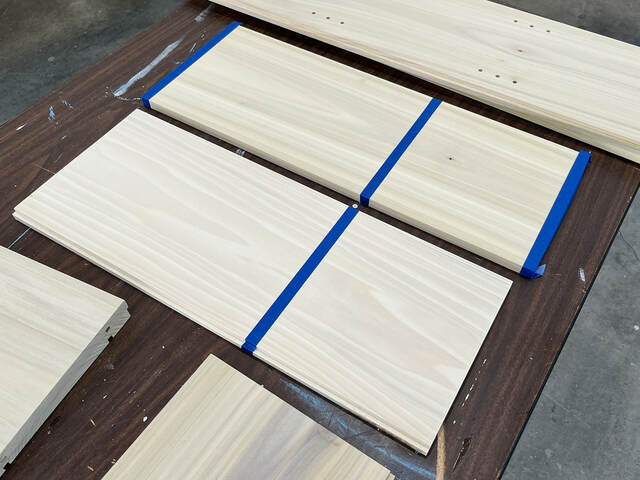
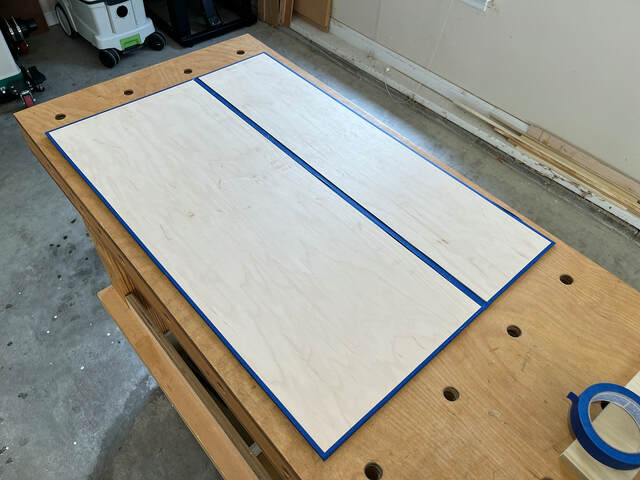
I decided to paint the insides of the case before assembly. That way, I could use a roller if I wanted. I sanded everything using 80/100/150/180 grit pads (except the back, which I think I lightly sanded with a 220 grit pad.) Then I taped off all areas that would eventually be glued.
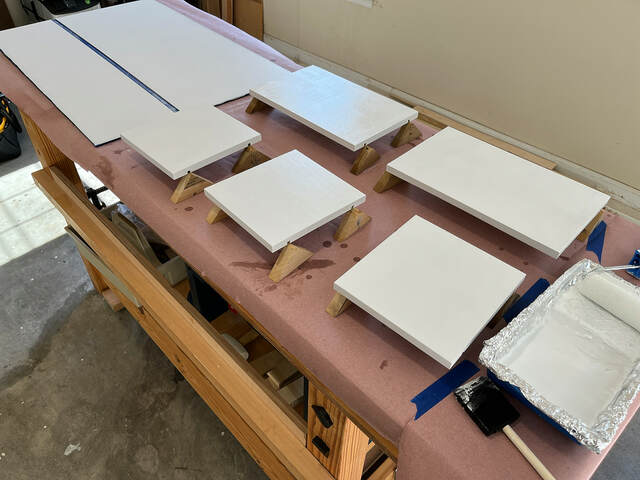
I used a 4” foam roller to apply two coats of primer, sanding each coat with a 320 grit pad.
I successfully used a brush to paint a fireplace mantel I built, so I decided to try it again. The Sherwin-William Emerald acrylic paint was very thick, and brush marks were very visible in the wet paint. Unfortunately, the paint didn’t level out as it dried, and the brush marks remained. (I don’t know if the problem was the paint, or that it was 90+ degrees in the garage and the paint dried too quickly. I thought the high humidity would have offset the temperature, but who knows. Maybe Floetrol would have helped too, but I’ve never used it.)
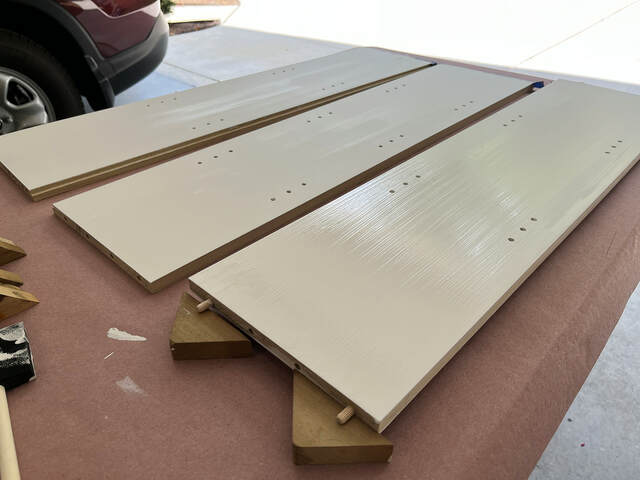
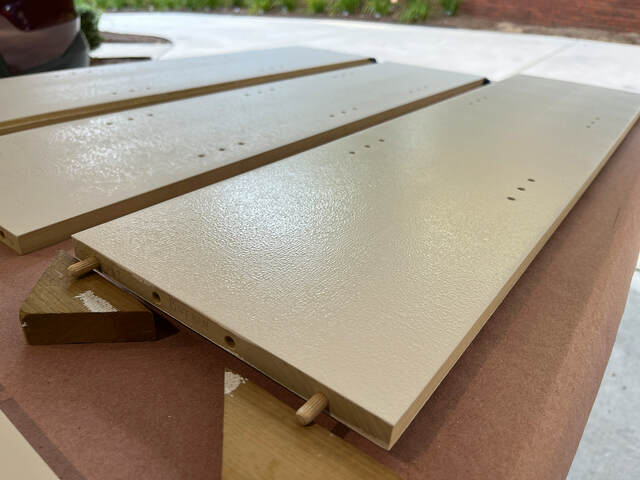
After sanding the first coat to 320 grit, I switched to a 1/4" nap roller. That left some stipple (some of which did level out), but another round of sanding smoothed it well. (I even sanded the final coat. My Festool ETS125 does a really good job.)
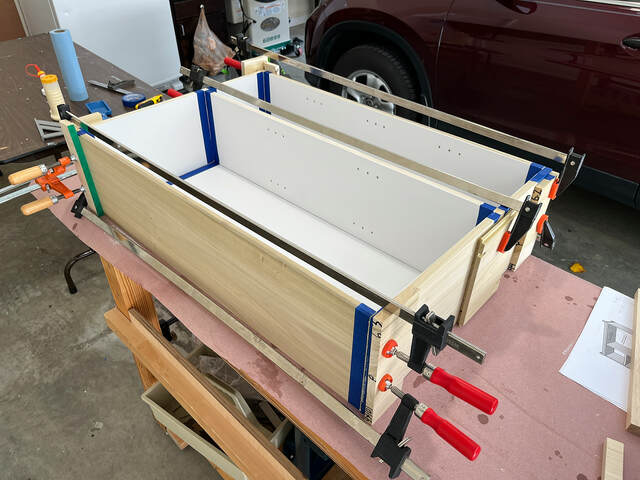
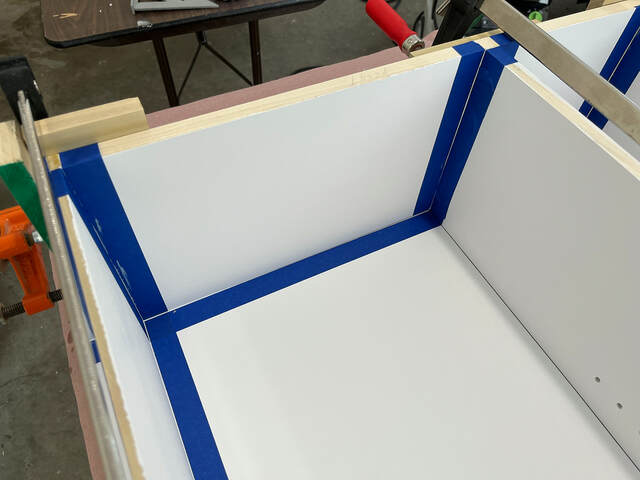
To simplify the glue-up, I decided to do it in two steps: (1) glue up the top/sides/bottom and vertical divider, then (2) glue the back on. I used more tape where glue would squeeze out.
I used the back panel (dry fit) to help square the case.
The tape made cleaning up the squeeze out easy.
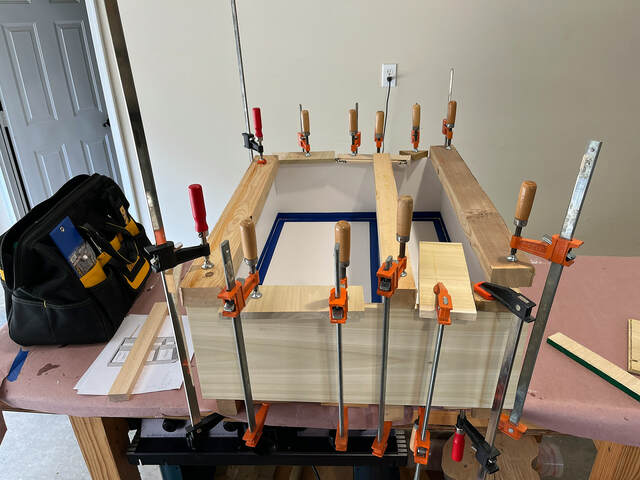
I let the glue dry for a few hours, then moved on to the back. I didn’t want to use any fasteners, so the biggest challenge was figuring out how to clamp the back to the rest of the case. I have six cauls I use for panel glue ups. I used three of them to support the back, placing one behind each vertical rabbet and one behind the divider dado.
That let me clamp all the glued surfaces.
Painting Exterior Surfaces
With assembly complete, I could move on and prime and paint the exterior surfaces (outer sides and front edges).
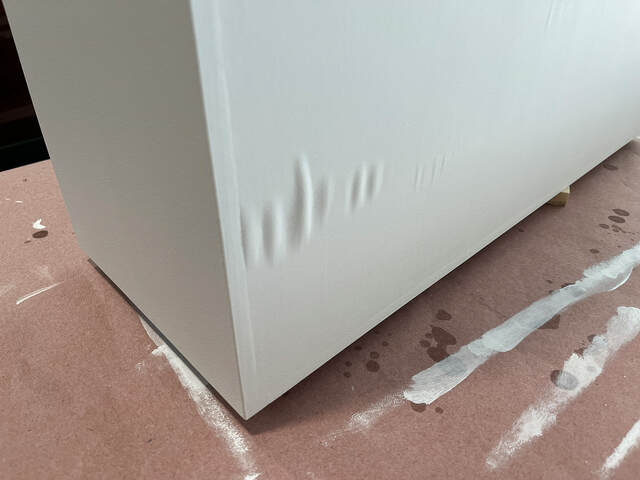
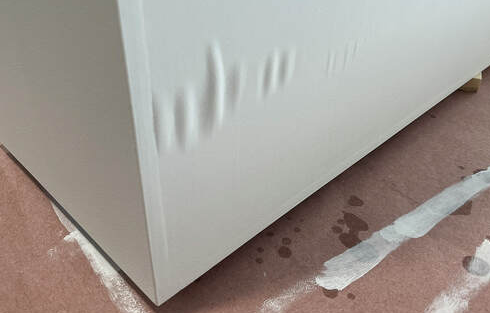
In other project posts, I’ve mentioned the poor quality of the plywood I get from the local big box stores. Here, you can see evidence of voids on the non-finish side (the "bad" side) of the back panel. (And I paid $25 for a quarter sheet of this plywood!) I consulted my “client,” and we decided to leave it. It did flatten out a bit after the paint dried fully, and it’s not in a place that will ever be seen, but this is still disappointing.
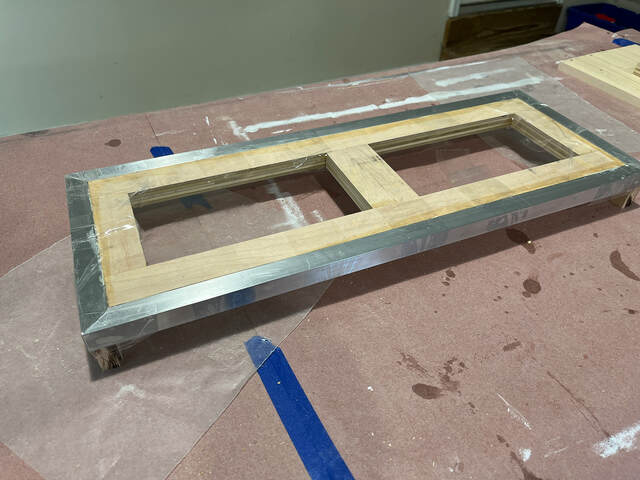
Building the Aluminum Base
I don’t have the skills to fabricate a real metal base, so I faked it. The base is really a 3/4" thick plywood frame with hardwood (hickory) feet. The frame is covered with 3/4" aluminum angle, and the feet are surrounded by 3/4" square aluminum sleeves.
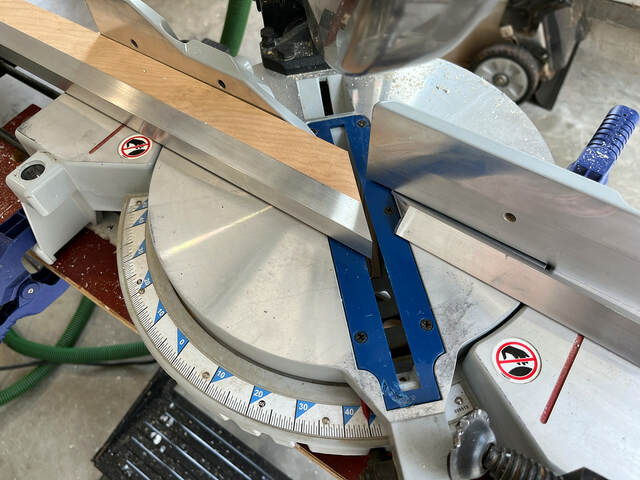
I started by cutting the aluminum angle. It has mitered corners, so I used my miter saw, supporting the aluminum with scrap plywood.
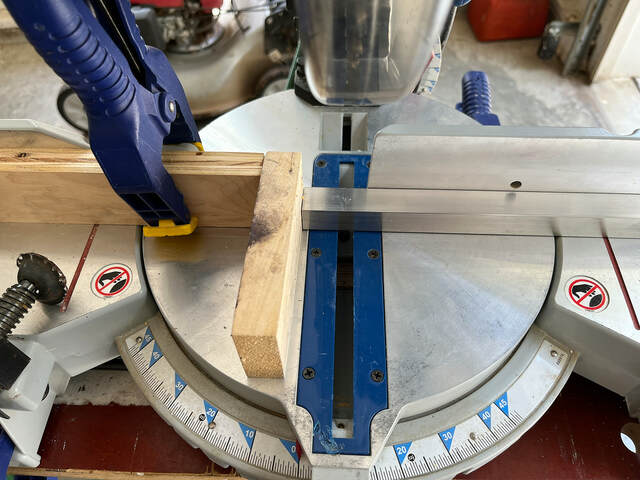
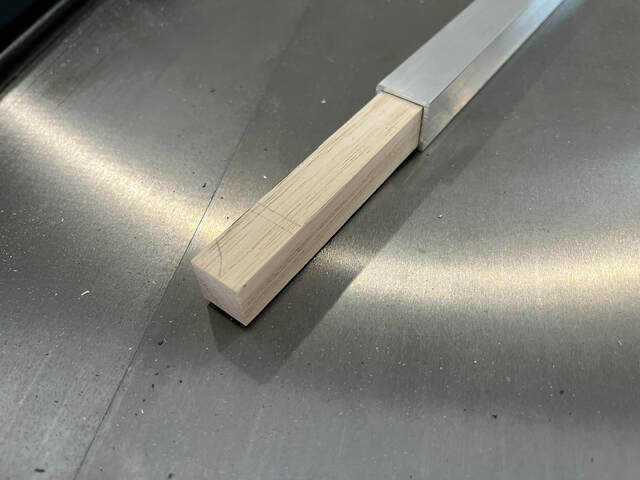
I didn’t have to use anything to support the square aluminum when I cut the feet. (I just had to remember to let the blade stop fully before I lifted it so the cutoff didn’t go flying.)
I built the frame from 3/4" plywood and 3/8” dowels. (The solid panel is the one I ruined when I drilled all the way through it. It came in handy as a sizing reference for the base.)
I cut the hardwood feet to fit snugly within the aluminum angle.
Then I cut notches in the frame and glued the inner feet to it.
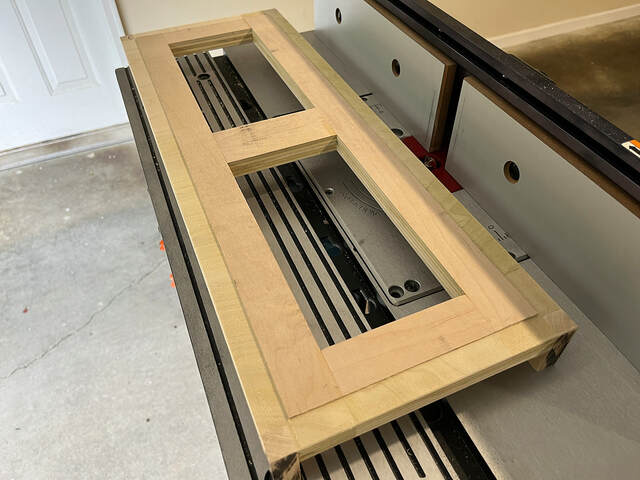
The aluminum angle is 1/16” thick, so I cut a matching 11/16” wide, 1/16” deep rabbet in the top of the frame using my router table and 3/4" straight bit.
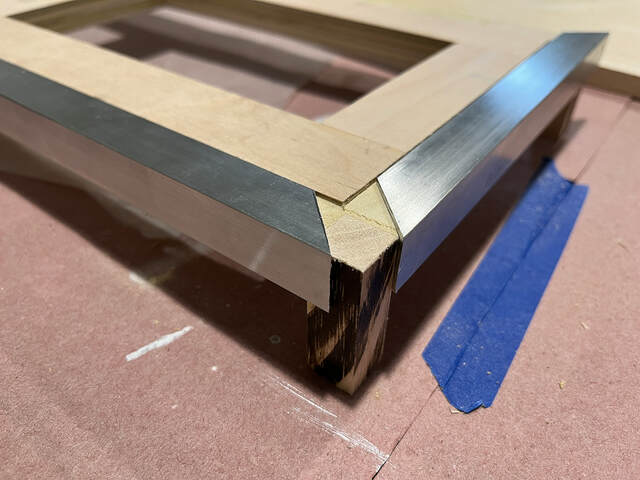
I used regular Titebond to attach the aluminum to the frame, using packing tape as clamps.
After the glue dried, I added the square aluminum sleeves. Finally, I trimmed off the inner feet and added a hidden foot near the back of the frame. I don’t know if the bottom panel of the case would sag over time, but the foot should prevent that. I also drilled counterbored holes for the lath screws that would hold the base to the case.
I wanted to create a thin shadow line between the case and the base, so I used strips of two-ply veneer (about 3/32” thick) to act as a spacer. I used double-sided tape and wood glue (after I ran out of tape) to tack the veneer in place.
I attached the base using eight 3/4” lath screws.
Shelf Pins Revisited
When I started adding the dowel shelf pins, I found that they were too tight to be usable. I could insert the dowels, but there was no guarantee they’d ever come back out. (The culprit was dried paint inside the shelf pin holes.) To solve the problem, I carefully chucked each dowel into my drill, used sandpaper between my fingers as I spun the dowel to thin the exposed part, flipped the dowel around, and repeated. It took a while, but it was easy.
With the pins suitably thin, the project was complete. Thanks for reading!
Makes me feel only half useless, when others fess up to their oopsie. ability. That flush cut saw, glue and dowels get more use than most of my other equipment. I've gone down the track of investing in plug cutters as not all the oopsiescan be painted over and timber/grain is a chore to match.
Like the way you "aluminium-ised" the base... Again, nice detail.
Though Jess-Em make great products, I'm still glad that after putting it off for 13 years, I finally bought my Domino.
Now this is something both metric and imperial have in common.
If your first cut is too short... Take the second cut from the longer end... LBD
This is great, your wife's BFF must have been thrilled with this. The proportions are just right and I like the contrasting aluminium base - which is very neatly done.
Ron a great piece, and well-constructed, Popular is a good choice for painting. I like the fact you made the shelves adjustable and the little trick about hiding the pins. The aluminum base is a nice contrast. Did you put any kind of a pad on the ends to prevent any scratches to the floor?
Nicely done, and I appreciate the description of fixes along the way. Also, I seem to also struggle with painting, no matter how hard I try. Your final project looks great!
LBD, it seems like fixing oopsies accounts for half of my project time. I’d love to try out a Domino. I’d have a tough time swallowing the price tag, though. The thing I like the most about my JessEm is that I’ve used it so much that I don’t have to think about it. The only exception is holes in the middle of panels (like the holes in the top and bottom for the divider). Those are fussier. I guess you see your share of junky plywood in your part of the world too.
Renners: she seemed happy when i dropped it off. She hasn’t started using it yet, so I don’t know how usable it will end up being.
Eric: I sanded the cut edges of the feet smooth, and I also put thin cork pads on the ends. I was extra sensitive to the potential scratching issue because I put the bookcase on our wooden floor while the paint cured.
Barb: you can say that again. Maybe I need to take a class at one of those places around here that restores and resells furniture. Their painted surfaces seem smooth.
some might look at this case and think, well thats a simple project until all the details are shown as to what it took to complete. love the base design. great project and a very detailed write up ron.
working with my hands is a joy,it gives me a sense of fulfillment,somthing so many seek and so few find.-SAM MALOOF.
Great project and a thorough write up. Like others I really like the aluminum base. Did you cut the aluminum with your regular blade or switch to one specifically for aluminum?
Thanks guys. I appreciate the comments. It turned out to be more complicated than I first thought too. :-)
SplinterGroup, that blue paint is actually in our house (our office). Her friend's room has beige-ish walls. The bookcase looks good there too, just less contrasty.
Steve, I used my regular blade to cut the aluminum. I don't use my miter saw very often, and I think the blade on it is the one that came with the saw, so I don't mind cutting aluminum with it. I have an old, but nice Tenryu blade on my table saw that I treat more carefully. Do you know if cutting aluminum significantly shortens a blade's lifespan?
My original 10" Delta miter saw (refurb) came with a non-carbide 100 tooth blade. I cut lots of 1/8" x 2" Al tubing with that blade and it doesn't seem to phase it at all. I'd avoid carbide just because of the chance it could throw a tooth if a weld broke.
There are blades specific for non-ferrous metals that have a negative rake, etc. but if you just let your blade do the cutting that thin stock will take a long time to dull a blade.
In general, if you are going to do a lot of cuts, it makes sense to have a dedicated blade (cheap HF blade) and go through the effort/time to swap it in. Too tempting not to use the installed blade for quick cuts I know.
Thanks for the information, SplinterGroup. I should check my blade to make sure all the carbide teeth are still there. I cut the aluminum in super slow motion, so I think the blade is okay. Still, it’s something I need to be aware of.


 - Project by Ron Stewart")