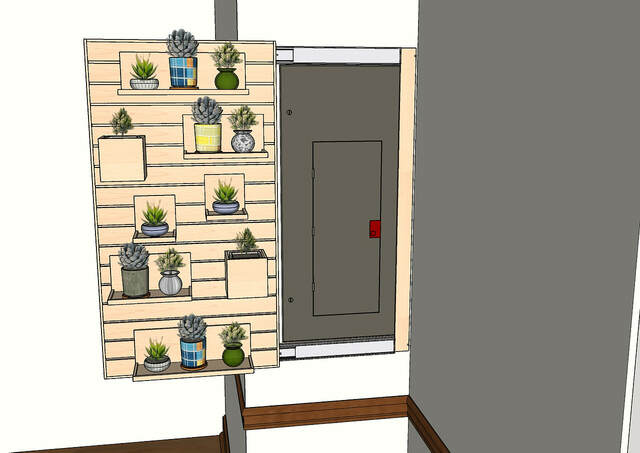
This is a shelving unit I built for my daughter. Her house’s circuit breaker box is in the kitchen (in a very visible location), and she wanted to hide it while still having easy access to the breakers. She plans on using it to hold a set of plants in miniature pots, but it could be used to display other small items (as long as they’re not overly heavy). It includes a variety of boxes and lipped shelves (three different widths) that can be configured in many ways.
I don’t know what configuration she’ll use, so I went a bit overboard and built more boxes and shelves than she’ll ever need at one time. Having spares won't hurt, though.
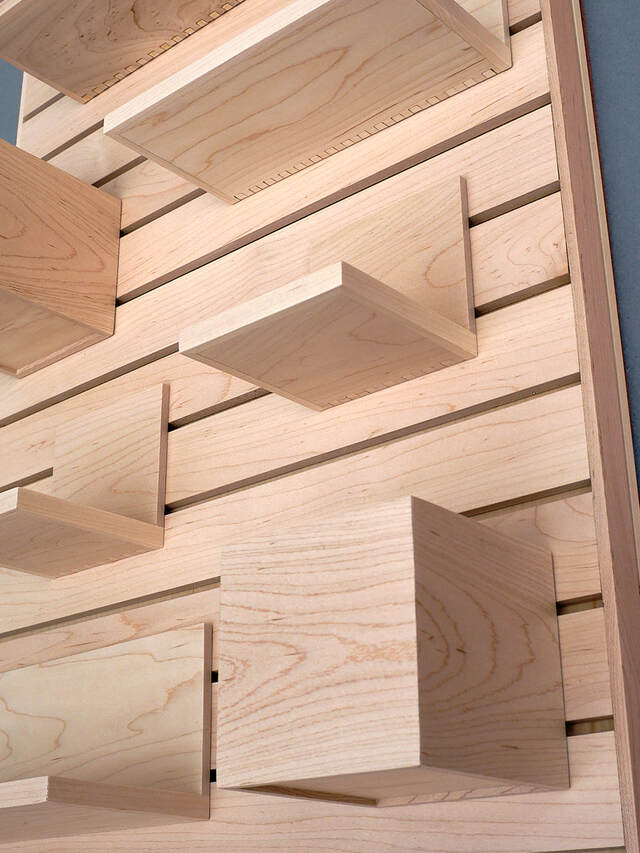
The slats on the back panel are notched in the back, and hangers on the backs of the shelves and boxes fit over the notches. The shelves and boxes aren’t anchored in place, but they’re secure enough not to fall out accidentally. (The greater risk is having the shelves break. Their L-shape looks nice, but it’s not the sturdiest design.)
The fun part is the movement. I mounted the panel on self-closing, full-extension drawer slides. For some reason, watching this thing move on my test scaffold was much more satisfying than watching a drawer move, even though the motion is the same. Maybe it’s because, as my daughter said, it’s like something you’d see in a movie, although there it would cover a safe or something mysterious.
The shelf is made of solid maple (except a maple plywood backer behind the slats and the mounting bracket, which is poplar), finished with General Finishes water-based poly (flat).
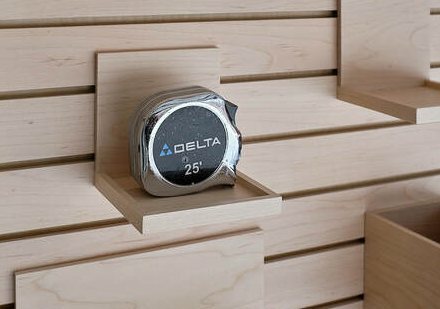
Here are a few more photos. The upward-facing photo shows the box joints I used for the shelves, and the tape measure is there to show scale. The boxes and single-width shelves are 4 1/4" long, wide, and deep. The other shelves are twice and three times as wide.
The back panel is 36 1/2" tall, 19 1/2" wide, and 1 1/2" thick. The panel, mounting bracket, and slides weigh about 13 pounds. Each box weighs 7 ounces. The shelves’ weights are 3, 6 and 11 ounces. The relatively low weight should make the overall shelf easy to open/close and avoid placing undue stress on the slides.
One challenge with this project is that my daughter lives 500 miles away. I had to take thorough measurements of the breaker box and its wall the last time I was there. The overall concept and design were a collaboration between my daughter, my wife (who also acted as a local proxy for my daughter), and me. I shared many renderings, dimensions, and text descriptions with my daughter throughout the process.
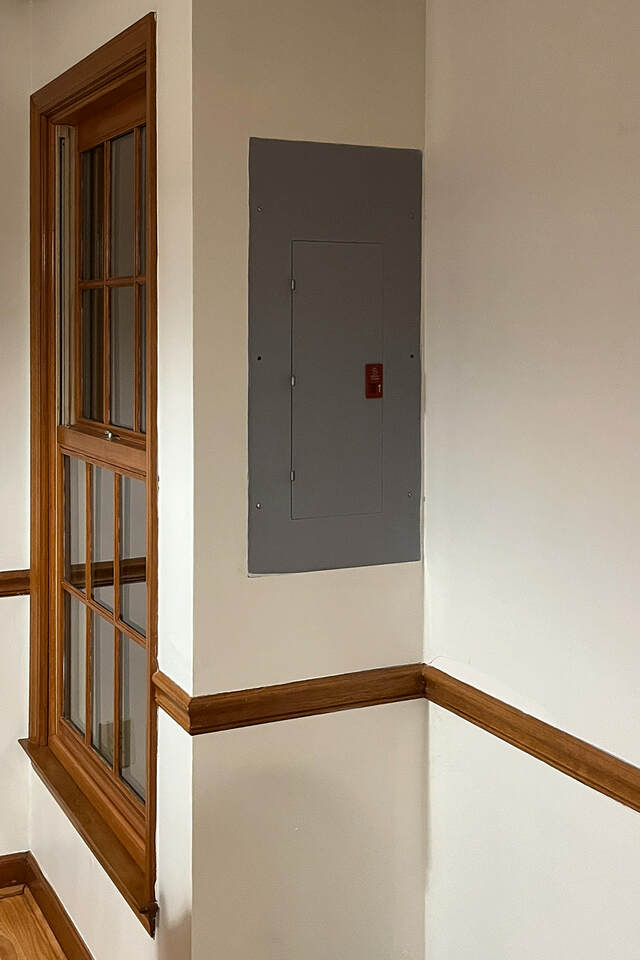
I’ll deliver and install the shelf in a few months. That’s why I don’t have any photos of it in place or with actual plants on it. To give you a better idea of how it will look, here’s a photo of the kitchen wall. If you walk in from the garage and look to the right, that’s what you see. Their kitchen table is located to the left of the window.
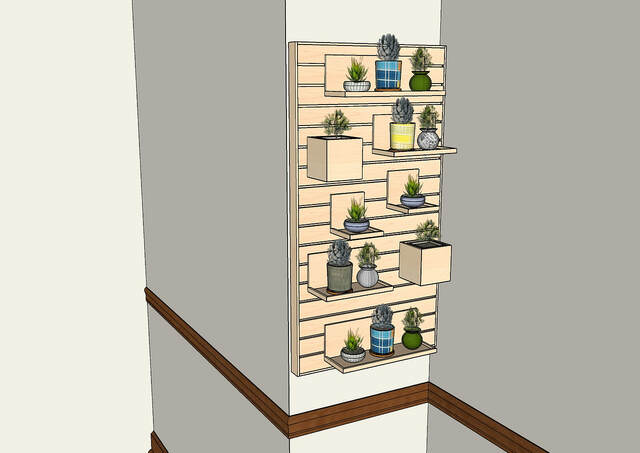
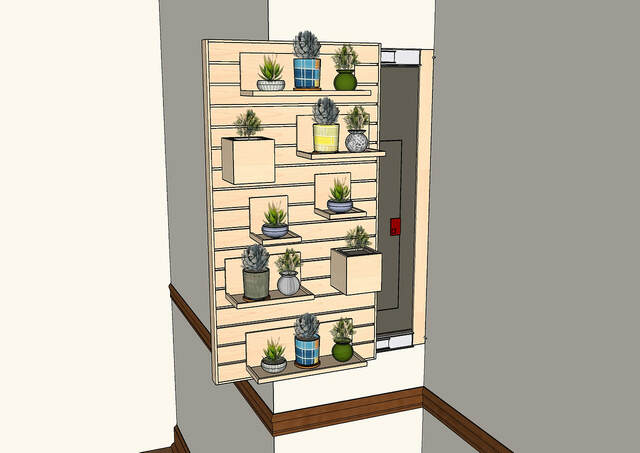
Here are some SketchUp renderings showing how the shelf might look in place.
One final thing… I’m aware that covering a breaker box like this is almost certainly a building code violation, and I’ve made sure my daughter knows this.
ron what a beautiful display wall. not just good for home use but a great idea for those that sell crafts too. now you mentioned some sort of violation ? no idea what your taking about. ive got a panel behind a cabinet and hidden behind a framed print and the inspector said nothing ? hmmm maybe he didn't know about it ? i probably should have mentioned it ? 🤔🤣🤣🤣😎
working with my hands is a joy,it gives me a sense of fulfillment,somthing so many seek and so few find.-SAM MALOOF.
That's what we said. It's there because the original house didn't have a garage (which was added later), so that location was on an exterior wall. It's certainly an eyesore.
Thanks, Pottz! I think there are all kinds of codes related to breaker boxes--this much open space on either side, height above the floor, no obstacles to access, etc. It's good that your inspector didn't say anything.
Yeah, it’s against NEC. 30” wide and 36” of clearance in front of it. But it’s her house. If she was ever going to have some sort an electrical inspection done, just remove it. And make sure everyone knows where it is in case someone needs access to it.
Ryan/// ~sigh~ I blew up another bowl. Moke told me "I made the inside bigger than the outside".
Cool idea and a nice build RS... however, isn't it a tad overkill, just to store a solitary tape measure... and its not even one of those fancy $$$ digital one.
If your first cut is too short... Take the second cut from the longer end... LBD
Very elegant solution to an ugly breaker. I noticed the finger joints on the shelves. Nice touch that most folks won't even notice.
I have a lot of slat wall that I'm installing in my shop and I hadn't considered making shelves or boxes that could be attached to it. Thanks for the inspiration.
Petey: that tape measure is probably 35 years old. I had forgotten Delta made it. If you had asked, I would have said it was a Stanley.
LBD: as you can see, that tape is sort of an heirloom… I see now that I missed a great opportunity. I could have tried populating the whole thing with small shop tools and supplies and created a photographic homage to woodworking. It was cold and cloudy, so I was rushing to take the photos so much I didn’t have time for creativity that day. (Also, I had screwed the mounting bracket to a half-sheet of hardboard with two tiny screws, so I didn’t want to press my luck by mucking around too much.)
Earl: Glad to help. This thing is similar to a mini French cleat wall. I had considered using cleats for the hangers, but I thought the holders would be too easy to dislodge with an accidental upward bump.
but I thought the holders would be too easy to dislodge with an accidental upward bump.
This is good planning 👍
Imagine your Daughter trying to lift and place aside a full shelf to get to a breaker. As we all know, breakers only pop at night and the flashlight batteries are dead....
Great concept and execution, Ron, as always. You certainly exercised your bulging Sketchup muscles with this one! 😁 How will you attach the slides to the wall? With great care, I imagine. There's a high concentration of romex in that small area and you don't want to puncture any.
Thanks, Ross. I’m going to write a blog post about the mounting method. The slides are mounted to the top and bottom rails of mounting bracket frame, so I just have to screw the frame to the wall. I’ll use two screws per rail. I know I can put the screws on the left/outside corner in a stud. I shifted the bracket as far to the right as I could, and I think I can put the screws on that side in a stud too. (If I were there, I’d take off the breaker panel cover and see where the stud is, but I don’t want to ask her or her husband to do that.) If I miss the stud there, I’ll use a plastic wall anchor, and I’ll make sure to use a stop collar on the bit so drill just through the drywall. I don’t want that to be the last hole I ever drill.
Ryan, I took the cover off one of my breaker boxes and saw how it was installed between two studs. (I also watched some breaker box installation videos.) I also saw how the stamped metal interior box has a 5/8" (or so) wide lip wrapping around the front with tapped holes for the cover's bolts. I know the positions of the screw holes in my daughter's breaker box cover, so I know approximately where the studs are. I just don't know if the screw on that side of my bracket will hit that stud near the center, just graze it, or miss it entirely. It depends on the width of the internal lip on the box how she wants the display shelf positioned horizontally. (Or maybe I'll have to drive the screws on that side at an angle.)