I was angling to making some pizza cutting/serving boards for the BeerBQ swap this year. But I drew RyanGI to send a package to and he mentioned he would really rather not have something pizza related because he doesn't do them often. I was kinda disappointed because I had a pattern worked out I really liked and wanted to use. So after pondering it for a couple days, it dawned on me that the pattern would look pretty cool in a beer mug too.
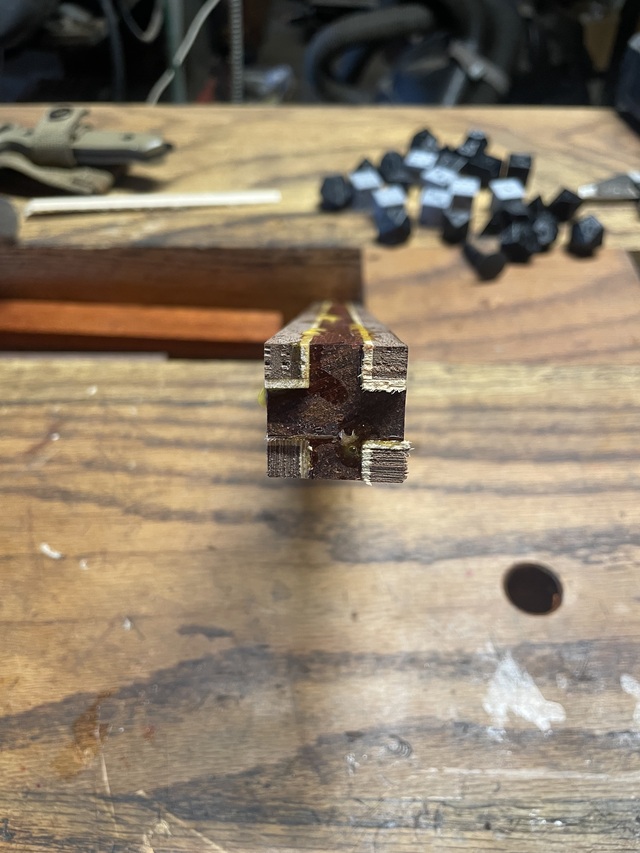
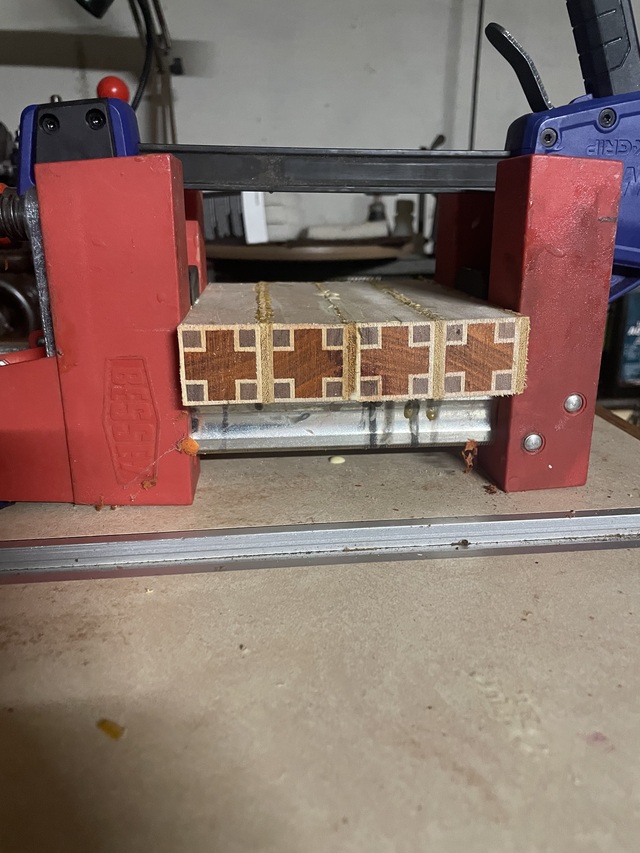
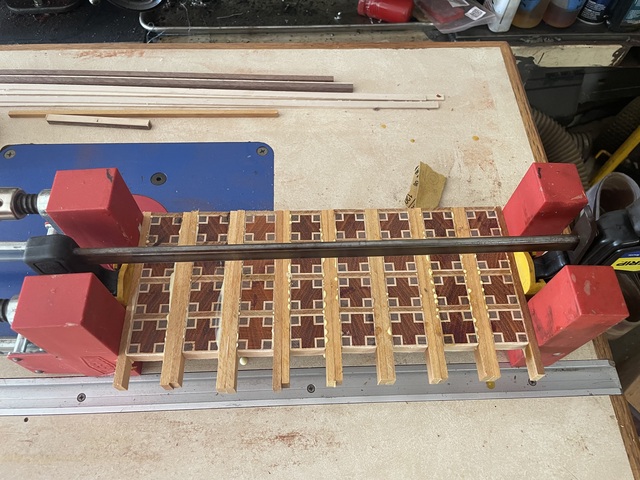
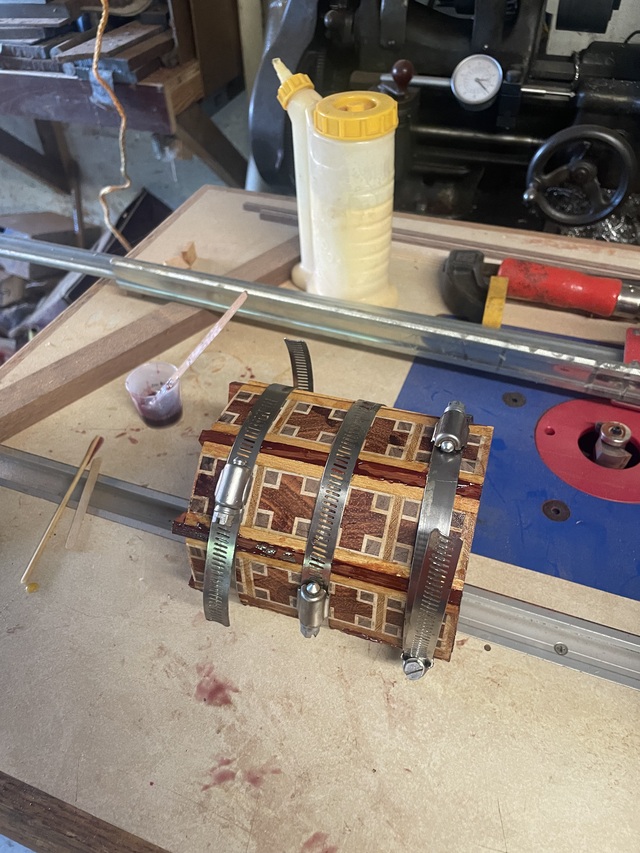
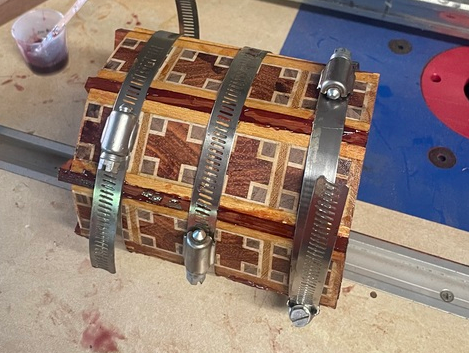
So after some glue ups: And planing: And gluing: And planing: And gluing: And planing: And gluing:
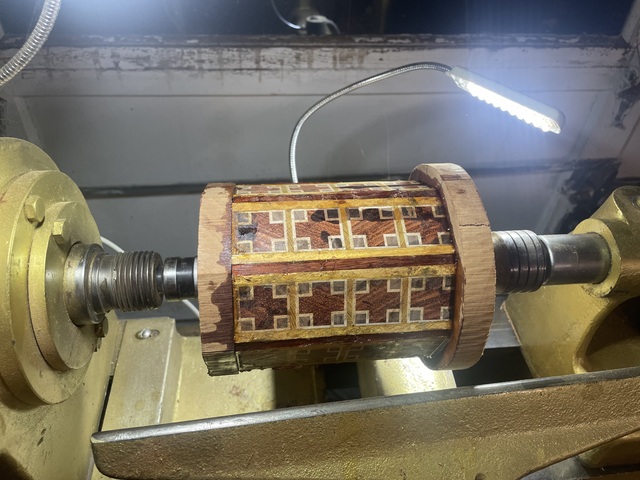
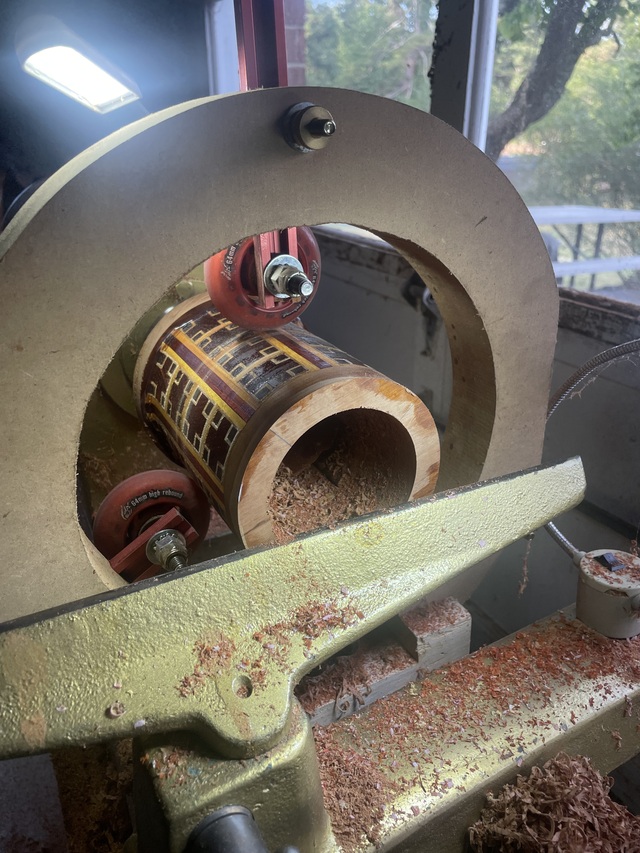
I was finally able to start turning.
And eventually finish:
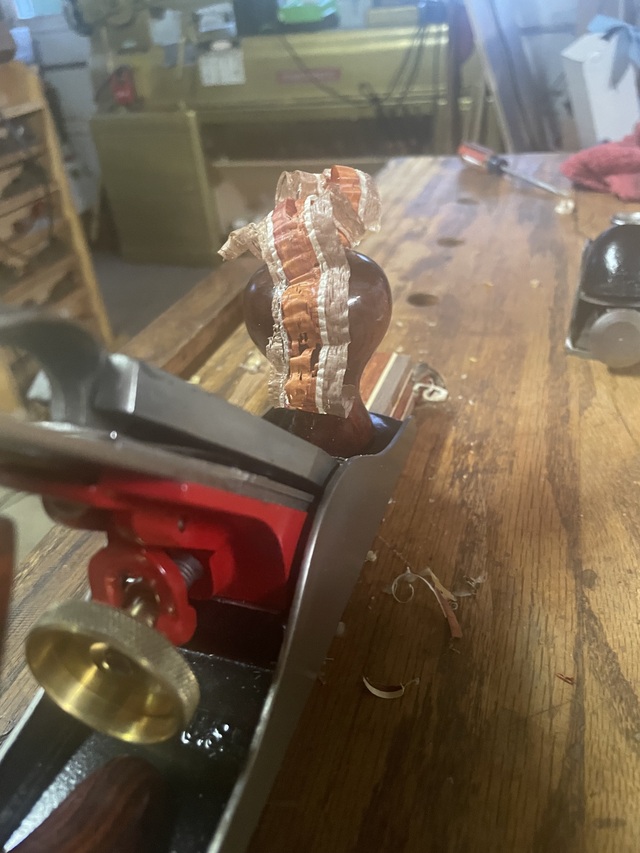
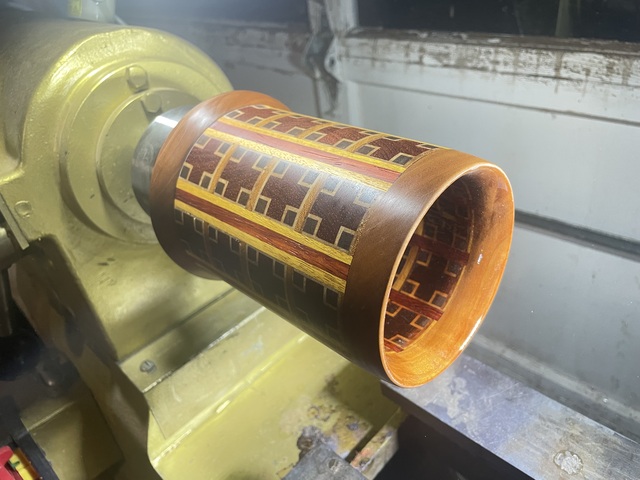
I was really happy with the final result. Though I wish I had used some denser woods than the Maple and Walnut in the cross segments. I had a lot of tearout in the endgrain on those pieces since they were completely dry. I had to stop after each session and fill in about 100 tiny holes with CA glue. But eventually I got a good finish on inside and outside.
The woods used are Paduak, Walnut, Maple and Osage Orange for the cross segments and Paduak and Osage Orange for the vertical dividers. The top and bottom pieces are also Osage Orange. The finish on the inside is a clear food safe epoxy that makes the cup waterproof and able to be used with cold beverages without damage. The outside is friction polish because I like the way it looks and feels. It will also allow a film finish to be applied over top of it if Ryan wishes.
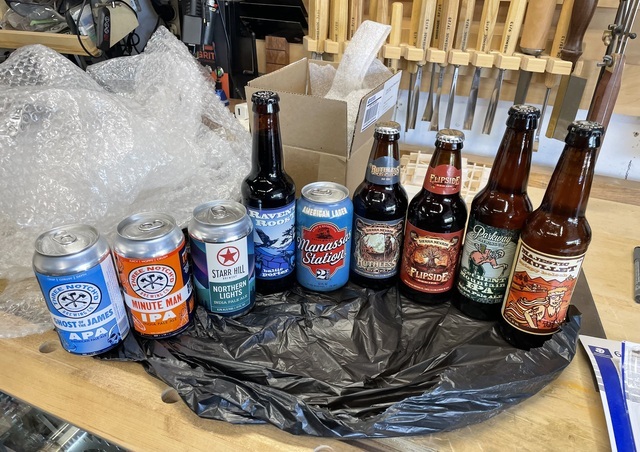
I was a little worried that the cup would be too large without a handle but I could hold it comfortably and liked it a lot without a handle so I left it as-is. I needed to send Ryan something to test the epoxy seal with so I sent these along:
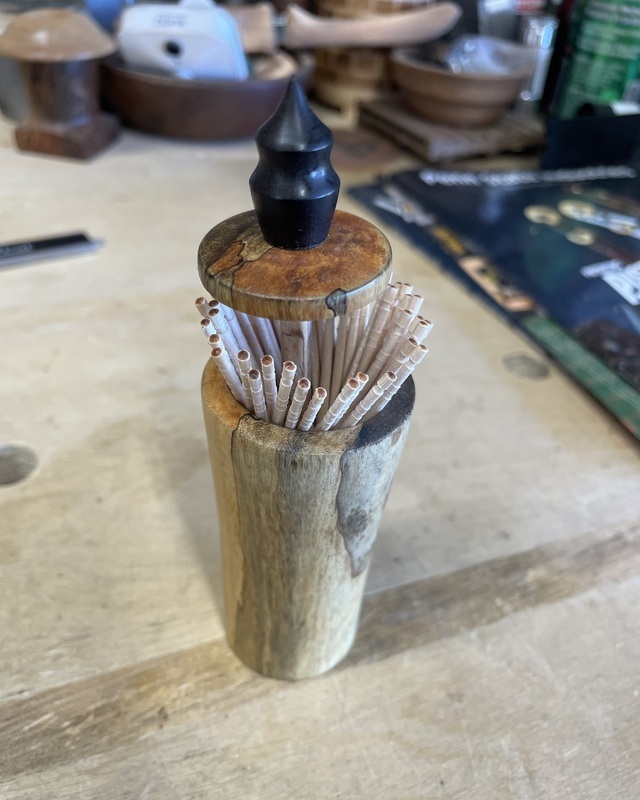
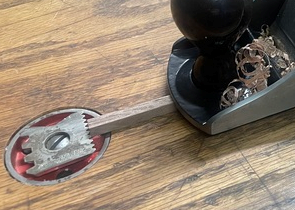
I also sent Ryan a toothpick holder in case some wood pieces broke loose and got lodged in his teeth.
I hope Ryan enjoys his package half as much as I enjoyed the one I got from Steve Rasmussen 😎
That mug is great Kenny! Lots of work but the results look worth it. The toothpick holder is cool. Next time you do something with a pattern, you should glue up one with your logo.
"Duck and Bob would be out doin some farming with funny hats on." chrisstef
He did a great job. The pics of the mug don’t do it justice! How did you go about applying the epoxy inside? There are no drips or sags and it appears very uniform. The top edge is also clean and uniform.
Ryan/// ~sigh~ I blew up another bowl. Moke told me "I made the inside bigger than the outside".
Ryan, I didn't take any pics but I tape off the outside top of the cup with painters tape before I apply the epoxy to get a clean line at the rim. I start by applying a coat in the bottom of the cup with it sitting upright to cure. For this bottom coat, gravity does the work of ensuring it's level and even. Then I put the cup back on the lathe. I brush the epoxy on in thin coats and until it's had time to at least partially cure (a few hours) I let the lathe run on the lowest speed. This is to keep it even and run-free. It's gonna spray epoxy at first though so make sure there's nothing in the line of fire. Especially you... After it's tacked up enough that runs aren't as big of a concern, I pull it off the lathe and set it upright to finish curing over night. That way if I'm wrong and it does still flow some, it'll run to the bottom and even out there instead of pooling on the sides. Rinse and repeat until everything has good even coverage. I think I ended up with 4 coats on the walls of yours. The low speed on my lathe is ~600 rpm. Applying this epoxy is one of the few times I wished I still had my old midi lathe. It would turn down to about 200. I could have done it on my metal lathe but I wasn't about to go spraying epoxy over there...
the mug is incredible kenny. lots of work in a glue up like that but worth the results i think. nice toothpick holder too. i gotta say even with one flake dropping out this is the best beerbq swap youve ever done. the quality of the projects just keeps getting better each year. thanks for running it my friend, see ya again next year !
working with my hands is a joy,it gives me a sense of fulfillment,somthing so many seek and so few find.-SAM MALOOF.
Somehow I have a feeling we'll run into each other before next summer pottz 😉 I have to agree though, every beer swap has been a good one but I think the level of the projects went up a notch this year. As awesome as that is, I hope the swap still retains the accessible and relaxing feeling it has always had. I'd hate for anyone observing to feel intimidated. And I have to say, some of the stuff you fellas made this year is intimidating!
thats true kenny ill bet many who see this will say thats way above my skills. but it's really not. it's about having some fun, good banter and pushing yourself to create something you might not otherwise ever do. no one expects something incredible. i was intimidated myself and only watched the first swaps. i would hate to miss one now. let me say kenny runs a great fun swap so all that watch join us next year and make it the biggest ever. thanks for doing it kenny !
working with my hands is a joy,it gives me a sense of fulfillment,somthing so many seek and so few find.-SAM MALOOF.
Now that is a fancy mug! The design worked out perfect, like you knew what you were doing! Prep and assembly look deceptively simple thanks to your photo essay 👍
Pictures of Ryan's show some nice chatoyance and the chewy beers will certainly stuff any micro-leaks.
Tooth picks look like pre-loaded bamboo blow guns, good for picking' and grinin'.
Thanks Splint! You're right, the prep and assembly were the bulk of the work on this one. Took me about a week to get the final segmented blank glued up. Took about 2 days to turn it. The heavy lifting was definitely up front.
That is an incredible beer mug Kenny, it makes me want to get back on my lathe. The toothpick holder is nice as well, and maybe that is part of my xmas gifts this year.
Thanks awsum. I added a link in the OP to my toothpick holder post if you're interested. It's a simple little project and a great idea for Christmas gifts. Especially if you choose something a little more cooperative than spalted Tamarind to make it from...
That is one great looking mug Hokie... and also a great write up.
When one looks at segmentation, they usually don't appreciate the major effort behind it before it hits the shaping tools (lathe etc...). After this presentation you may have scared the bjesus out of many slack newbies (and old farts), or armed them with knowledge and just watch CN get inundated by a swag of fancy cutting boards.
Assume there are no pickies of -1 (the beveling of each piece). Always found both side beveling an issue without a major snafu... even with many test cuts.... usually bugger up the first actual piece.
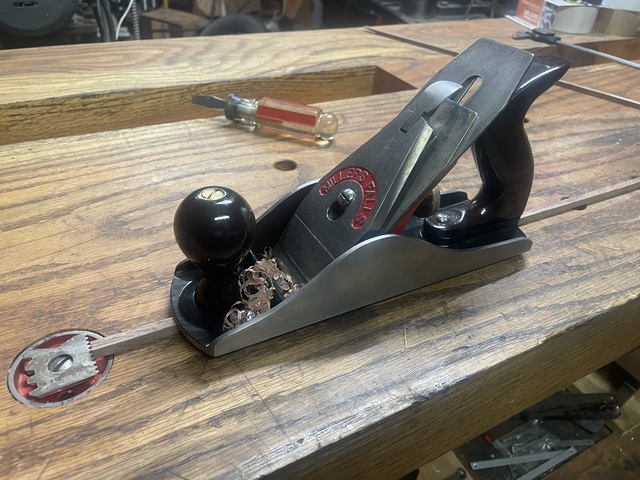
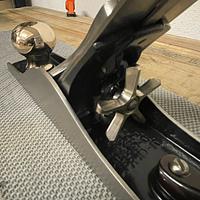
It is pictures like this (thin stock and those dogs) that makes me freak out in using hand tools, I always imagine turning my plane blade into pinking shears.
How long did it take you to turn those tooth picks?
Cheap and woodwortking in the same sentenc is an oxymoron!
Sooner or later I imagine you'll see a cutting board with the same pattern Corelz 😉
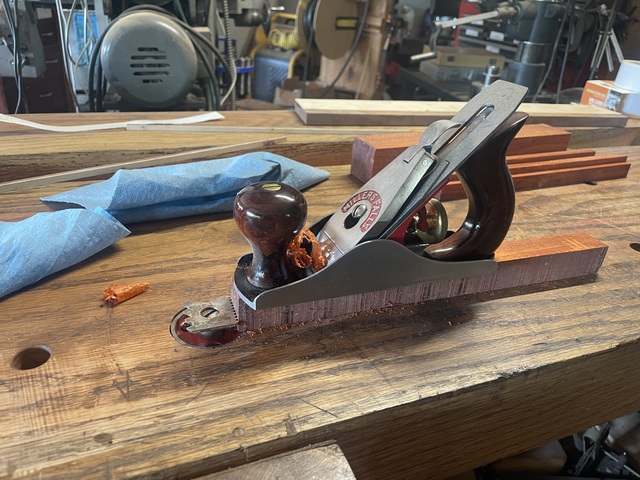
Anatadephorilabiomoratum (or whatever it is...) the toothpicks took me virtually no time to turn. The time I spent turning the holder was infinitely more. And the nice thing about that planing stop is that it's height adjustable. So I can set it so my blade can't kiss it 😎 The key to beveling both sides is to glue it up in halves. Then you can fudge the angle when you glue the halves together if your acute got obtuse somewhere along the line. And I'll have to take my licks and do my penance. I just looked back and I did indeed fail to take any pics of the beveled pieces prior to gluing them all together...
When I made an epoxy-coated tankard years ago, I did the inside in an easier fashion, Kenny. I put the epoxy on the flat staves, then glued them up and just needed a very little bit of epoxy to fill the gaps, most of which were where the bottom and the staves didn’t quite match. More than one way to skin a duck.
That said, great work, bud! You had a lot more pieces going together there, and did a great job.