Jim Jakosh
in over 3 years
More from Jim Jakosh
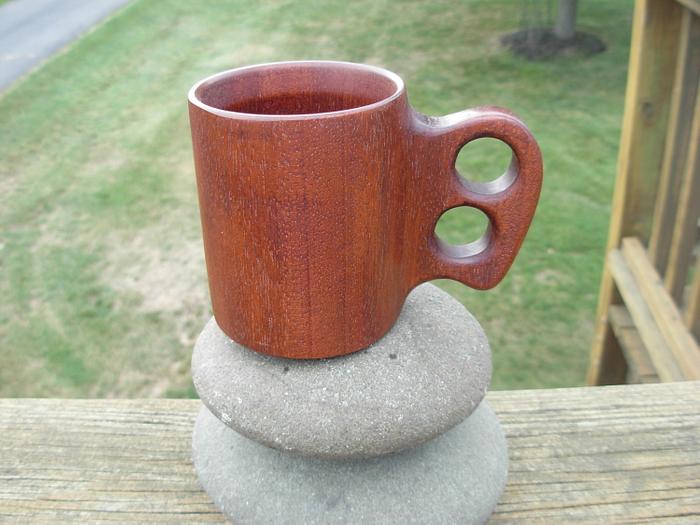
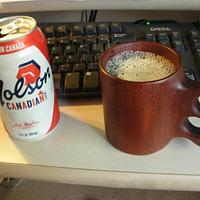
Kuksa...in Mahogany
I'd like to thank Ivan for showing me his that he made some years ago
I posed it on some river rocks from Gila Bend,Az and the last shot is the first tryout. It passed!!
It is finished with Walrus Oil and then buffed and waxed on the outside.
Cheers, Jim
Cheers, Jim ........................ Variety is the spice of life...............Learn something new every day
23 Comments
How did you manage to blend the two or even do it all as a single piece?
That's a beauty!! I that carved?
daveg, SW Washington & AZ
Ryan/// ~sigh~ I blew up another bowl. Moke told me "I made the inside bigger than the outside".
working with my hands is a joy,it gives me a sense of fulfillment,somthing so many seek and so few find.-SAM MALOOF.
May you have the day you deserve!
Hi Dave, I'm no carver I like machine work!!!
I'll try to explain it in words with out pictures.
1) Start with a solid block that is about 1/2" taller than the cup ( room for a tenon on the bottom) Grain in the vertical direction
2) Make the width one way about 1/4" wider than the finished size of the cup
3) make the other directions about 2" wider than the cup ( this is the handle side)
4) layout the shape of the cup and the handle on the end and rough cut it out on the band saw- leaving the handle about 1/4" wider than finished size and material for a generous radius where the handle meets the cup( you cut and sand that in on the spindle sander later).
5) Laying it on its side, cut away the top and bottom of the handle area so it is about 3/8" off the top and 5/8" off the bottom. Then you will not be hitting the handle area when turning the outside rings of the cup for the final cutting later.
6) Mount the blank in the lathe, turn a tenon on the bottom and an area about 5/8" from the bottom to the finish outside diameter of the cup. Then put it ins a chuck on that tenon.
7) Turn the tops outside of the cup to the finished diameter to the same dimension you turned on the bottom- go about 1/4" down. then fore the inside to the finished size and finish sand the inside
8) Mount the cup on a jam chuck and turn off the spigot and finish the bottom.
9) Band saw the excess material off around the cup closes to those finished diameters you had established and then sand it all the way around to blend them in. NOTE: Be sure they bandsaw blade and belt sander are truly at 90 degrees or you will get a taper on the outside of the cup.
10) Lay the handle area on its side and cut a handle to fit what ever shape you want and make the holes big enough so your fingers slide in and out easily. I put the holes in first and completed the contour of the handle shape last- Now lots of sanding!!................................Just like that!
Cheers, Good night...................Jim
Cheers, Jim ........................ Variety is the spice of life...............Learn something new every day
Thanks for the progress instructions . Very helpful.
Regards......Cliff.
Beautiful, a lot of work I bet. Don't put it in the dishwasher.
Petey
Maybe try again due to your inspiration. Thanks
Ron
...woodicted
thanks Mel, Cliff, Petey, Ron, Ken, Ivan and Steve
Hi 987 Ron. I hate to say this, but this one worked good with cold beverage- but it leaked with hot coffee. I guess that is because it is a living item with porous wood grain. Maybe alder and birch are much tighter grain and that is why they are the preferred woods. It might also be because I made it with the long grain vertical...but the other ways it might leak through the side?? I guess a guy could pull epoxy through the pores in a vacuum chamber but I don't know how good that would be to drink from. I just wonder how a piece of burl would do with the crazy grain in all directions????
I'll hunt for some alder and make a step by step list of photos.
Hi Ivan. I turned the top and bottom outer rings on the lathe as well as the inside with the handle stock spinning around. It is all one piece. It is a little hairy with the handle flying around about 1/4" from your tool rest...but don't drink beer when making it!!
Cheers, Jim
Cheers, Jim ........................ Variety is the spice of life...............Learn something new every day
I believe coffee grounds are the traditional way of sealing a Kuksa.
A bunch of the beer swap mugs over the years have been epoxy coated on the inside, so it definitely works OK for cold drinks, I wouldn't have thought coffee was hot enough to do anything to epoxy, so I think that would work.
Walnut oil should work as well, just need to let it fully cure before you add a drink to it.
My plan on the nest one is to seal the bottom from the outside with a thinned epoxy coat to penetrate the pores from the outside in. Those fibers are like straws and really open up when heated. I have oiled this one so much that I don't think epoxy would hold to it now.
This one held cold beer okay just as it is.
Cheers, Jim ........................ Variety is the spice of life...............Learn something new every day
working with my hands is a joy,it gives me a sense of fulfillment,somthing so many seek and so few find.-SAM MALOOF.
The coffee grounds are meant to seal up all the pores and stop it leaking.
Olive is coffee proof without any treatment, if it helps.
My travel wine glass holds coffee just fine.
Tastes a little red winey though.
