when a sled was mentioned for the Mico-Mack, like a pubescent with an infection of carbuncles, I did a Lancelot and took up the gauntlet,
OK, Kevlar gloves
for workshop safety.
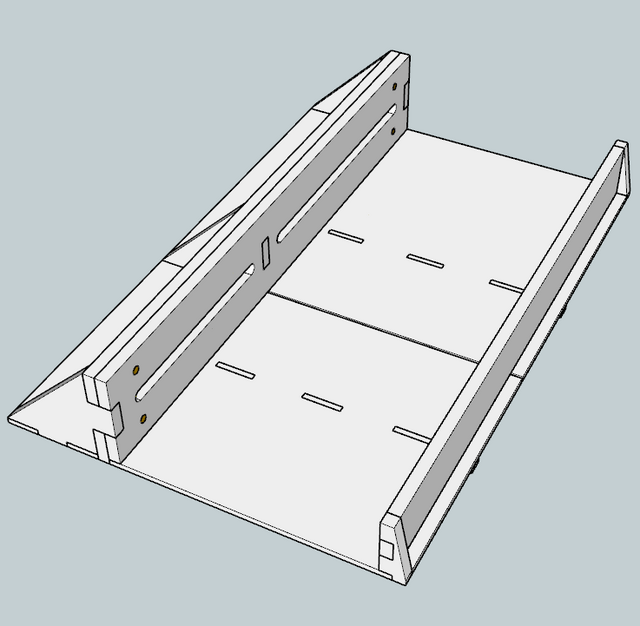
The first stop was SketchUp where I came up with this preliminary design,
which quickly morphed into,
Version 1, before it hit the production line.
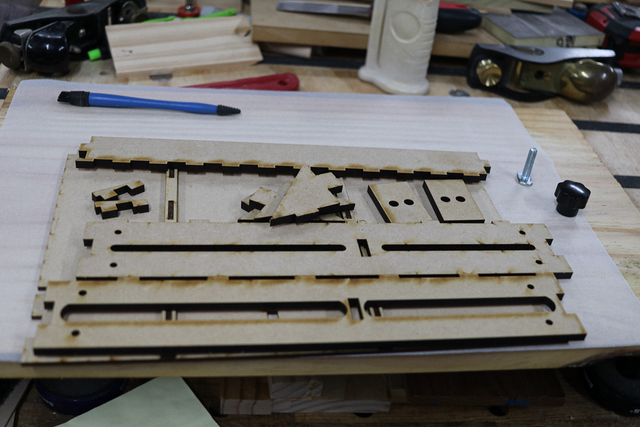
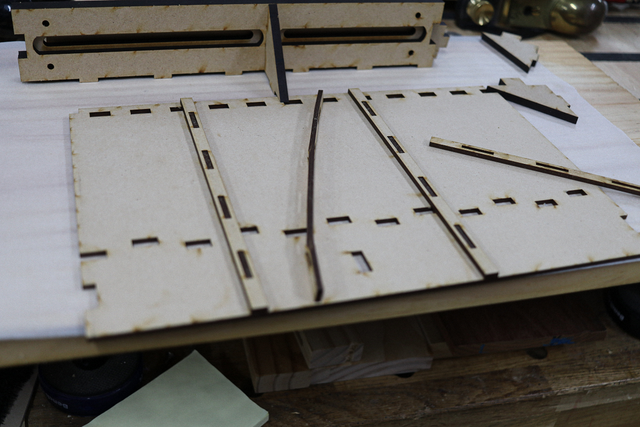
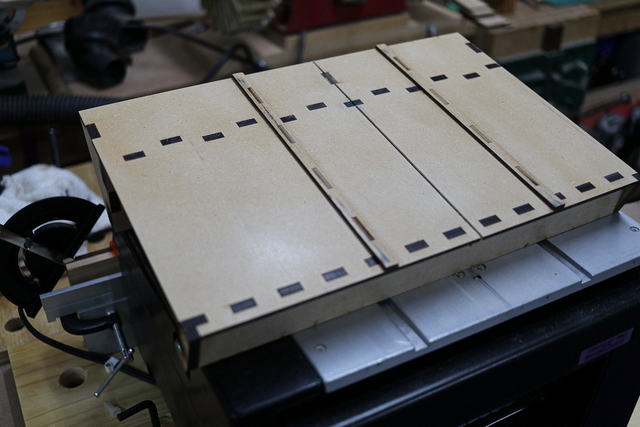
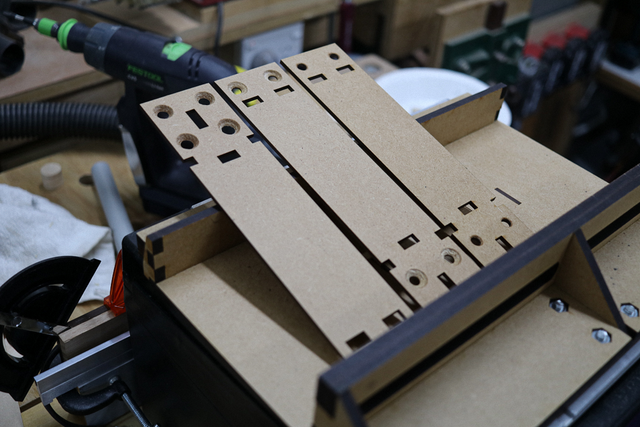
Cut on the laser,
assembly went without a glitch
other than me changing my mind about gluing on the runners and having to force them off after the glue started to cure,
No longer usable, I quickly cut a new set and fortunately there was enough residue from the attempted glue-up that they stayed on firmly by friction.
This turned out to be a fortunate digression as when the runners were initially designed/cut on the laser, they were to exact measurements, however, no allowance was made for the laser’s kerf and there was some noticeable play.
Re-cutting two new runners with a slight (0.2mm) width increase, fit with absolutely no play. The runners were held on using a “Domino” (royalties sent to that pauper Fe$tool company in fear of litigation) concept so it held firm during use, but could be changed out (the runners) if atmospheric variables dictated so.
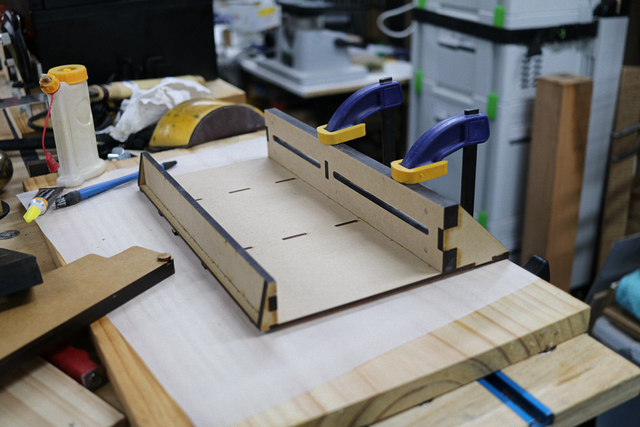
My mortice and tenon design made assembly easy, forcing exact alignment and providing what seemed to measure 90°, all over where expected.
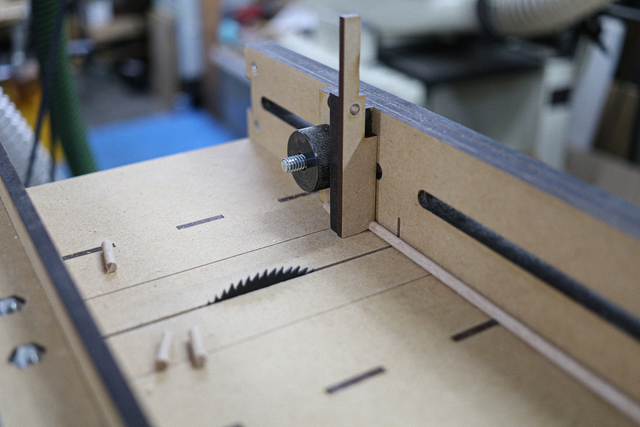
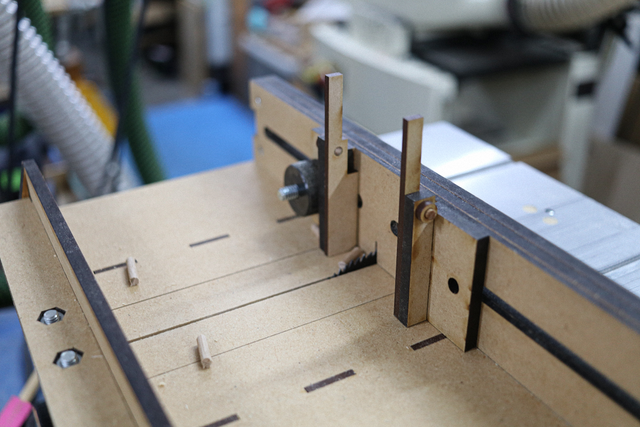
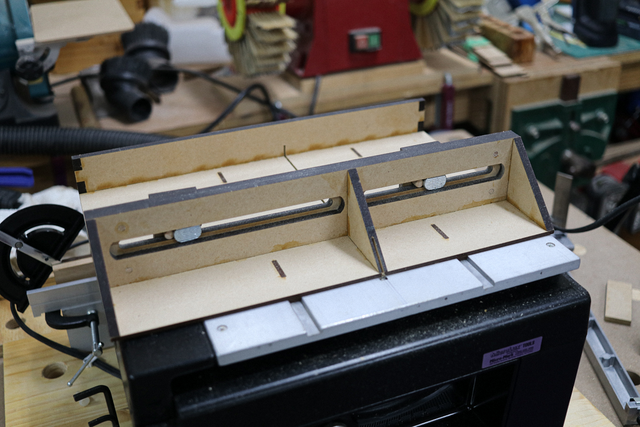
Slapped it on the saw and made the first kerf cut,
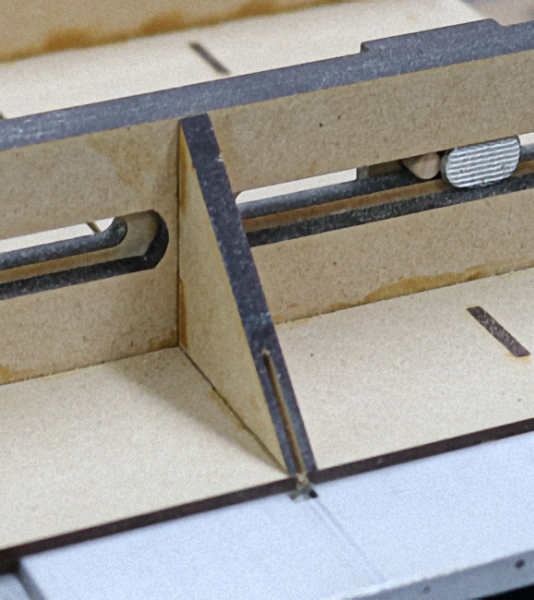
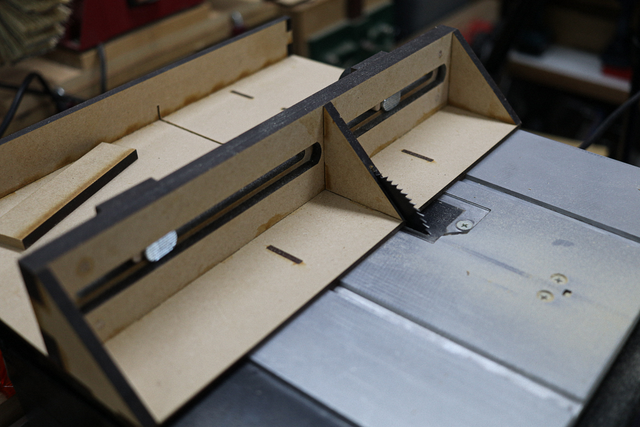
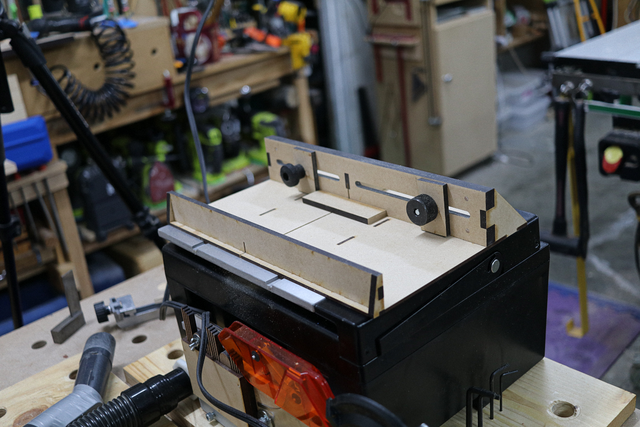
With trepidation, I extended the blade to full height and pushed the sled through. The triangle in the middle of the back fence,
was designed to act like a pseudo blade guard… though full extension and sloppy practice, managed to expose more than a comfortable exposure of blade,
Nevertheless this was pushing the extreme limits of the saw and an additional guard could be simply added,
by gluing to both sides of the middle support.
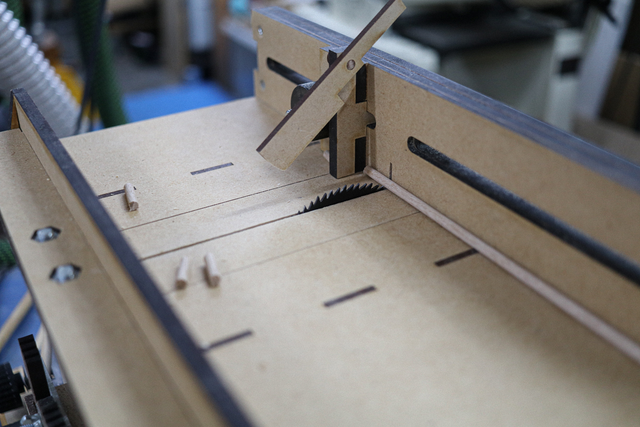
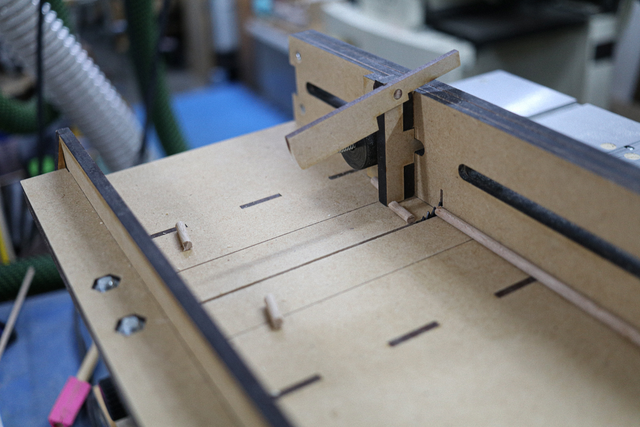
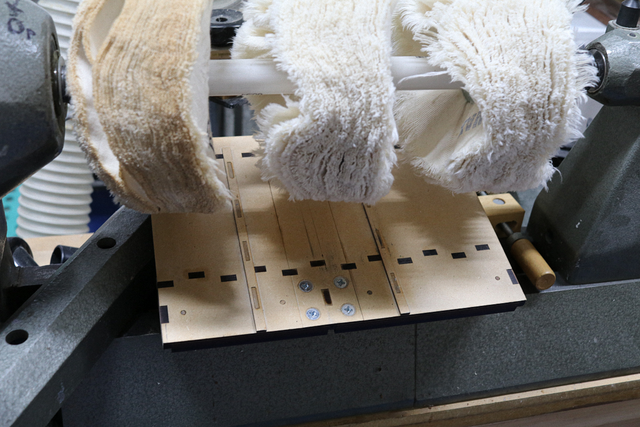
A quick pass over my buffing system made the base just that tad slicker,
Did a few test cuts
and while I initially thought about making another sled for the other TCT toothed blade, I came to the realisation that if I wanted to do bevels, my kerf/ZCI would quickly get destroyed and multiple sleds didn’t make my juices flow. I started thinking of replaceable ZCI inserts…. Hmm, unfortunately the 3mm thick MDF base didn’t give me too many options.
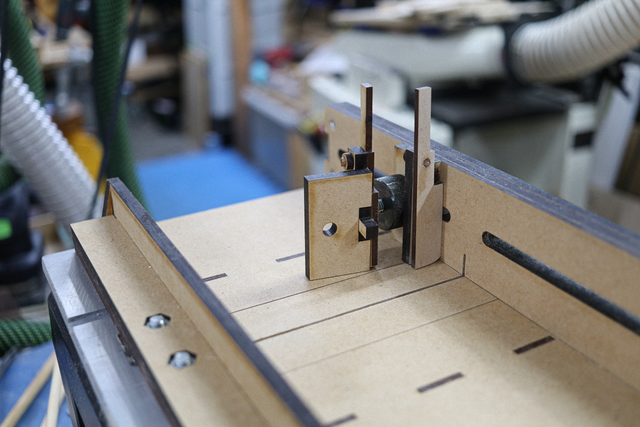
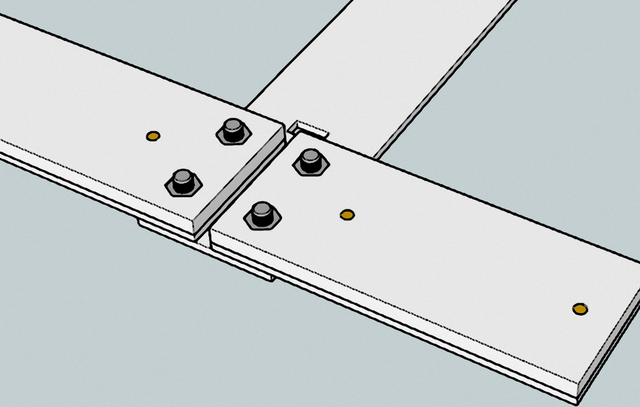
Back into SketchUp, I quickly came up with an interchangeable insert using rivnuts,
My choice of rivnuts over standard nuts was influenced by my clumsiness, knowing I will inadvertently drop some of those small nuts during skin changeover, I’ll spend hours on my hands and knees looking for them or jumping in my car to drive to my local nuts and bolts hardware supplier 25K away and not open on weekends.
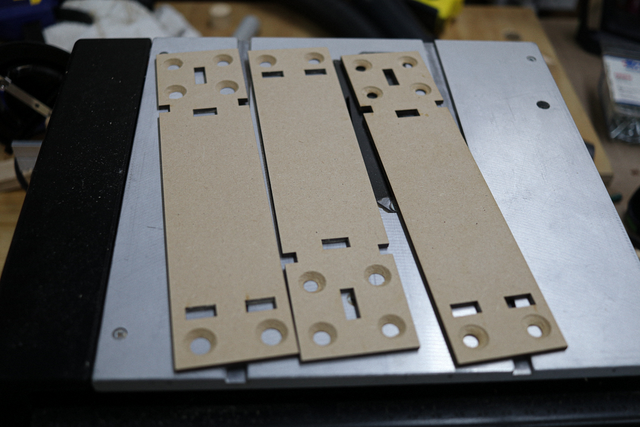
Cut the pieces including several ZCIs,
which were countersunk to ensure the top of the screw did not extend below the base. I was far too anxious to start the glue-up,
Unfortunately I outsmarted myself, as while the rivnut concept worked perfect under test conditions, they had to be “popped” prior to glue up
as after the glue up the physical geometry of the Rivgun itself prevented proper seating with my configuration
and the “pop bulge” finished up on the wrong side of the 3mm MDF
Fortunately no damage was done as with the bulge on the wrong side, the nut was unseated and just fell out.
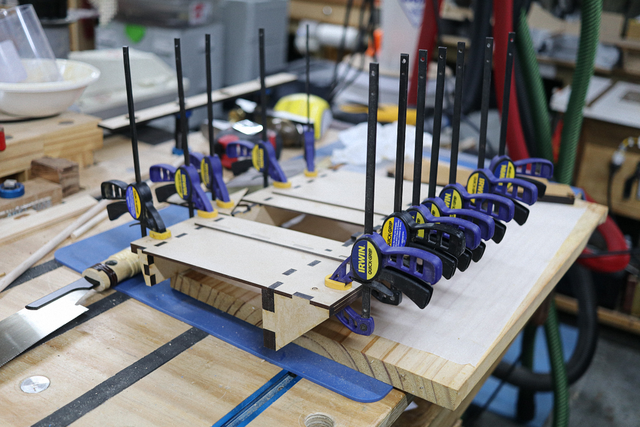
After a few quick modifications, I lasered a couple of MDF layers to captivate 6 standard nuts,
… and yes, I dropped a few… and crawled a lot… fortunately I have around 100 nuts so I didn’t have to start up the car… though there are many more nuts now in unreachable nooks and crannies in the workshop.
Buffed up the base,
gave it a good drenching of tung oil, including the ZCIs,
While admiring my untested sled waiting for the oil to cure, I remember thinking about an “outfeed” blade guard. A few minuted in SketchUp,
finished up with these little pieces
that can be glued in place after the tung oil dries,
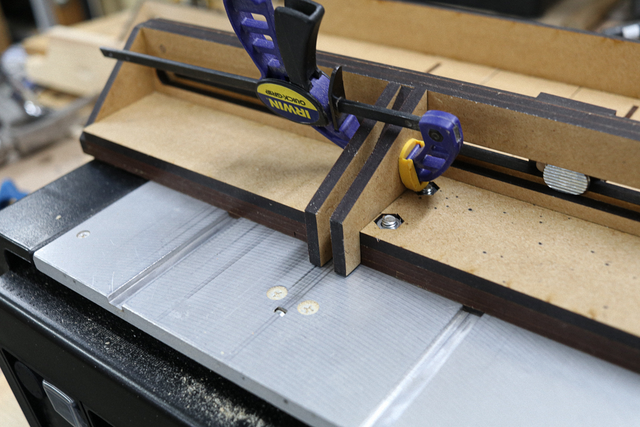
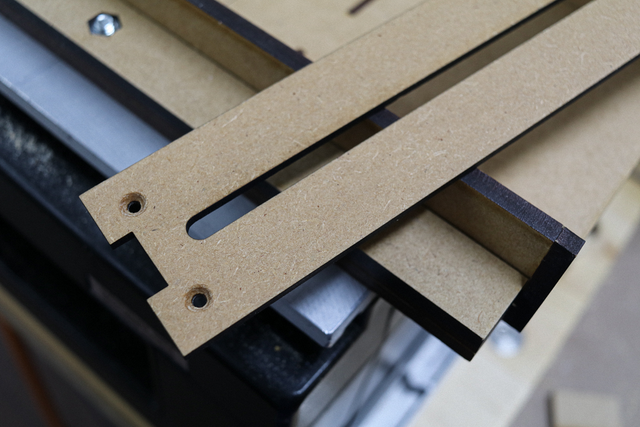
Then I remember the features I had on my full sized sled and realised for work alignment, it was handy to have a matching kerf size on the fence with the base, so it was another quick keyboard action and I cut a few 3mm MDF ZCI skins for the fence and countersunk the 3mm holes for the screws,
Unfortunately the current sled does not have all the new features, so this sled’s fence’s skin will need to be clamp/tape aligned for “tapping” the backing support’s screw holes,
however, for future sleds, it will be captivated by the redesigned side wings,
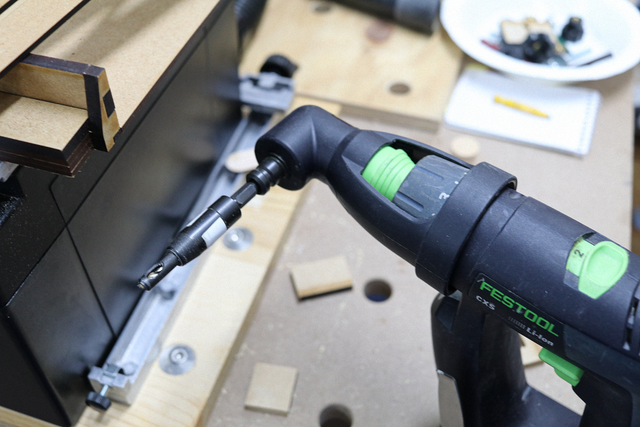
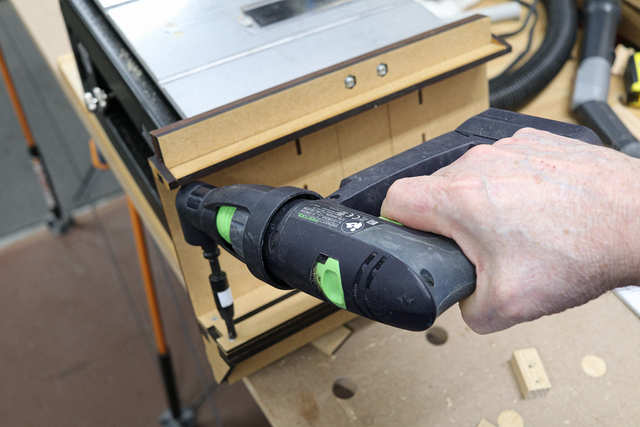
I had a few issues attaching the skin as the front fence impeded access to drill (for tapping) screw holes in the back fence. Fortunately one of my drills had a 90° elbow and small enough to accept and fit a Snappy guide drill,
For ease, if I build another sled, the holes need to be drilled (and the first skin mounted) prior to glue-up. Once the crews have been fit, any replacement skin is easier to mount.
All the files are available from my cloud storage and here is the Sketchup 3D Warehouse view,
If anyone want's to make it in imperial,
The thickness (only of the tenons need to be extended from 6mm to 1/4" sideways from the centre.
4mm dowel holes changed to your preference.
Change the 6mm hardware holes to your preference (extended from the centre). Note that nut sizes can change dramatically (OD) depending on supplier.
Make sure you use the CorelDraw dimensions for the runners. CorelDraw files can be read by freebie Inkscape to generate SVG files that can be processed by most laser software. (I think I have fixed the SU... should be 8.15mm wide allowing for my laser's kerf). Basically the only dimension you need to play with.
Alternatively mill some 3mm and 6mm timber if not available. Everything was cut from 1 each of 300mm x 600mm sized 3mm and 6mm MDF.
There are also 3 YouTubes. The first two are about the sled without the replaceable ZCI
and this one with the ZCI,
It’s now time to let the tung oil cure and sometime in the future make the first cut… as I’ve already done that exercise with the first sled,
Customising the original Stop-block making it safer.
Boys and Girls,
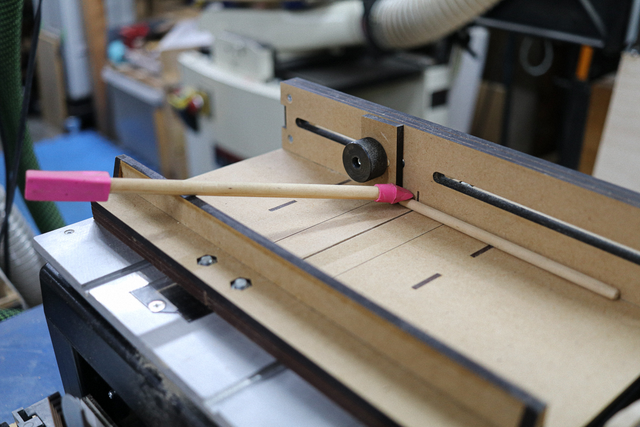
I had the need to make some 15mm lengths of 4mm dowels and thought this sled would be an ideal vehicle.
I must have had a brain freeze as after loading the dowel onto the sled, the first cut created a missile that was immediately duplicated by my second cut. Unsoiling my pants for the next cut, I tracked down my small parts holder (pencil rubbers on a dowel),
and managed to keep the 3rd cut “grounded”.
Regaining my composure, I remembered how on the full sized tablesaw, I always use some sort of dimensioned “block” (40mm) against the fence when using the mitre gauge,
that gets the stock cleared and free of binding against the fence as I proceed through the cut.
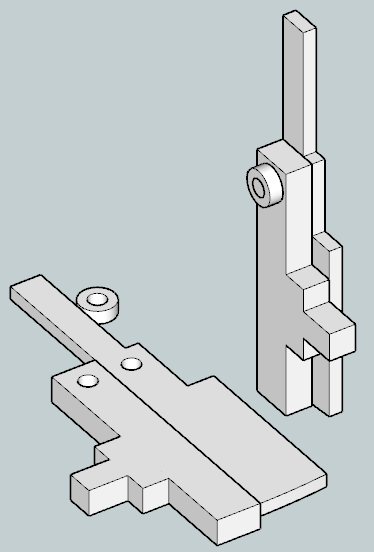
How can I incorporate this into my shop made stop block?
Having my "track" for the stop block being mounted on the face of the fence raised a challenge.
Got into SketchUp and after a few attempts came up with the following design,
The revised full sleds SketchUp model is available from the 3DW,
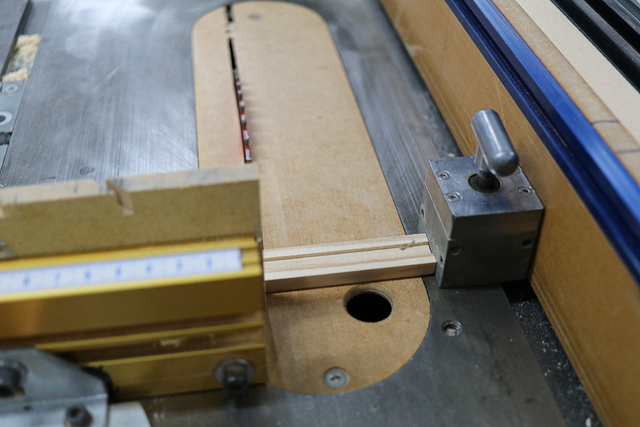
Loaded the new stop block on the sled at the required 15mm measurement and butted the dowel against it,
While holding the dowel and pushing the sled forward with my left hand, I tripper the lever with my right,
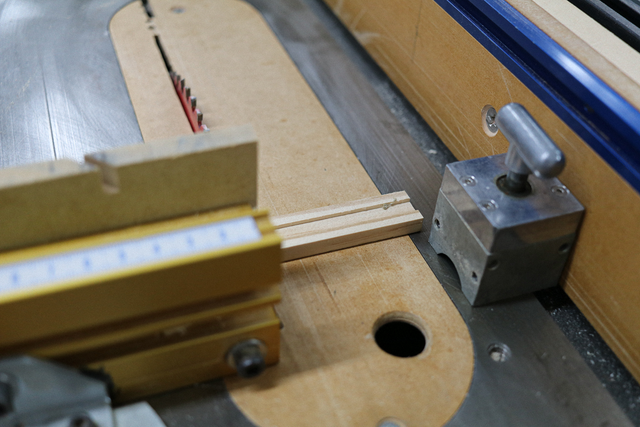
and now the dowle was no longer jammed up against the stop block, proceeded through the cut,
I made several passes and while the spinning blade still moved the offcut around on the sled, it did not turn them into a potentially hazardous missiles... all the pieces stayed on the sled and I didn’t need to kiss the floor looking for missing dowels.
Because of the block's unique profile a different one needed to be made for the left side of the fence,
For anyone interested I have made a video of this issue and solution,
If your first cut is too short... Take the second cut from the longer end... LBD
Postage would kill you Pottzy... the materials would be less than $10 (except for the button nut), however, USPS is like Francis of Assisi compared to Aussie Post. The files are available and there are local people with cutting lasers that could make and post for less than a cask of vino.
If your first cut is too short... Take the second cut from the longer end... LBD
Rubbish 987... if your laser can cut up to 6mm, you could take the SVG files and cut on your laser. You might have to dress down imperial 1/8" and 1/4" to 3mm and 6mm respectively. I can make SVGs available. Max dimension is 301mm x <301mm
If your first cut is too short... Take the second cut from the longer end... LBD
I know that your laser method keeps the tolerances up to your 6-Sigma standards, but is there any allowances for tweaking the fence angle if (ahem) the saw miter slots are not quite parallel to the blade?
I was going to also say that maybe you should use a harder/slicker type material for the runners, but given the saw size and use, plus all the consumable inserts, that sled will last a long time until the termites arrive.
Big plus is the ability to flat-pack ship the thing. You could send a demo to WoodPeckers with a royalty contract. They'd lawyer up and find a way to void your claim and put one out, anodized red of course, for a tidy profit.
As to dropping tools and hardware, I often find it best to just let it go. Eventually the hidey-holes will fill and all your dropped stuff will be easy to find just cowering on the floor below your feet.
Thought and planning into the construction is A1 👍
Splinter, I'm no engineer and my slide rule is in my moth's balls, I can't vouch for the exact precision, however, I am unscientifically guessing that a 1° (or so) inaccuracy will not be significant in small pieces.
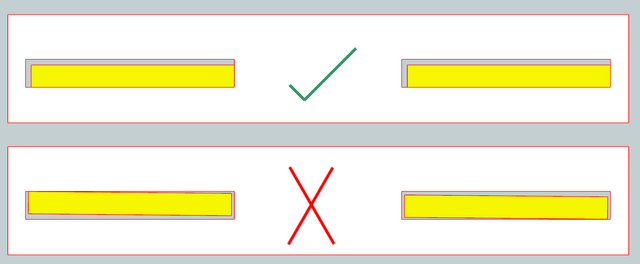
Having tried to crawl out of that corner (and stepping over those lost nuts/screws)... If one insists on perfection, consider the laser's kerf (potential source of inaccuracy). During glue up/assembly, ensure that "sides" of the mortice and tenons kiss on the same oriented long side and not twisted. This exaggerates the concept, however, it sort of demonstrates the right and the wrong method, and I hope you're not colour blind or dyslexic.
If push comes to shove, the addition of the fence's "skin" would permit shimming, however, if the wood is bowed you're snafu'ed.
********************** Thanks eRasmus.
********************** Thanks Mokey... the devil called pottz.
If your first cut is too short... Take the second cut from the longer end... LBD
Good looking project. I like the way you always detail everything with pictures and print so us slower thinking guys like myself, can also understand how you do it. Excellent job.
mel52 commented about 3 hours ago new Good looking project. I like the way you always detail everything with pictures and print so us slower thinking guys like myself, can also understand how you do it. Excellent job.
Thanks '52... I never expect anyone to make the same or even similar, however, I hope that with enough pictures and crapola, others might get ideas for their diversified projects.
Kinda like pictures of workshops... I may never buy/use the same equipment, but I may get inspired if only by the layout.
If your first cut is too short... Take the second cut from the longer end... LBD
This was my introduction into the micro world and it's like discovering a new species of humans. You are working at scales that I disregard as a furniture maker. If it's less than 1/32", I ignore it, lol. Thank you for documenting such a wonderful build for my virgin experience.
Thanks Bertha... While I knew of the micro worlds, I never embraced it. It was a comment about the saw (before the review... and that's why I treasure reviews) that made me venture.
Yet to put it into scale production, however, the trial cuts made have got me enthusiastic about resuming my model making... which I always cringed at with the very small pieces in the past.
If your first cut is too short... Take the second cut from the longer end... LBD


.png)
.skp%20-%20SketchUp%20Pro%202018-003183.png)
.skp%20-%20SketchUp%20Pro%202018-003163.png)
.skp%20-%20SketchUp%20Pro%202018-003164.png)
.skp%20-%20SketchUp%20Pro%202018-003165.png)
.skp%20-%20SketchUp%20Pro%202018-003182.png)
.skp%20-%20SketchUp%20Pro%202018-003160.png)
.skp%20-%20SketchUp%20Pro%202018-003180.png)
.skp%20-%20SketchUp%20Pro%202018-003179.png)
.png)