A few years ago my son went to China for training. It lasted a few weeks. He was able to buy a set of prints at a local market. In 2019 I built a set of frames for 3 of them.
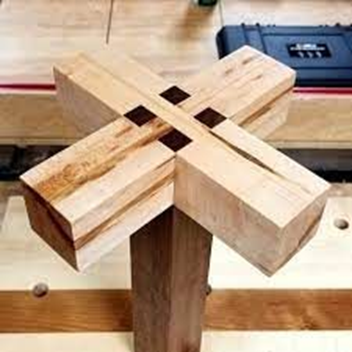
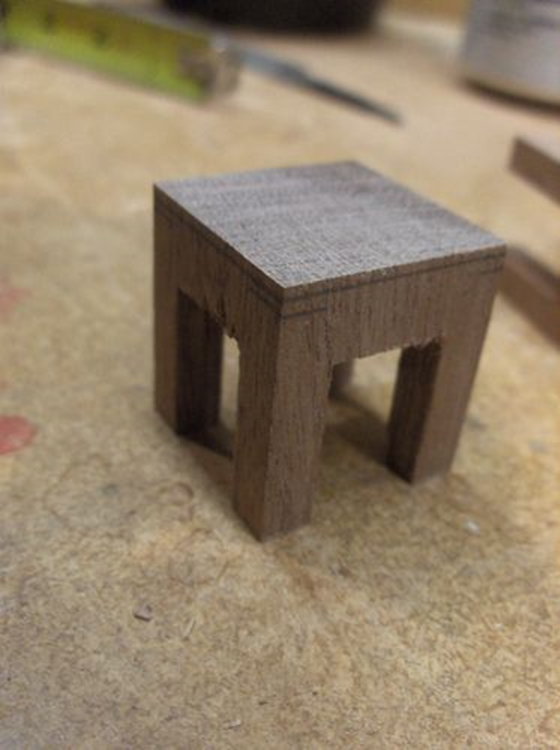
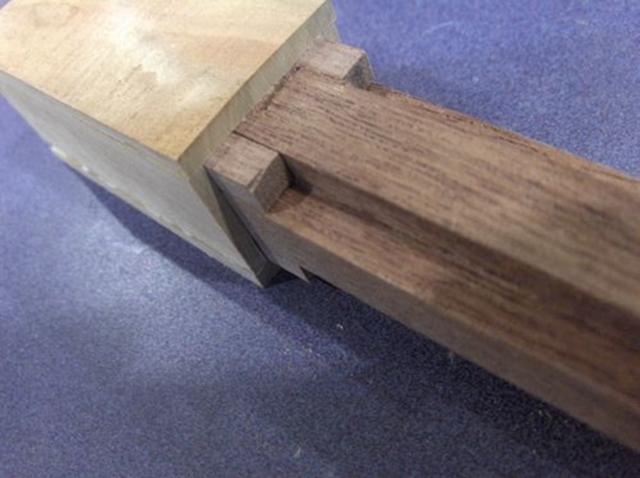
I chose Asian style joinery and mahogany for the construction. After some searching I found the Japanese Shiro Joint - also known as a castle joint. This was a first for me and I really enjoyed the challenge.
I turned the joint upside down to make it work for a frame. I also made the "castle" block oversize relative to the frame pieces.
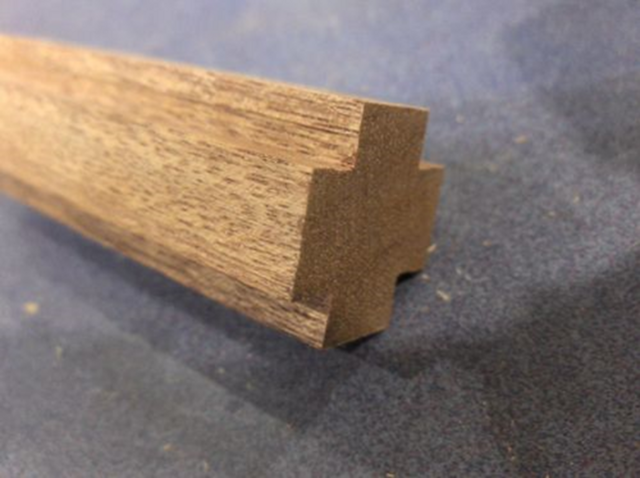
The frames consist of half lap joints with extra space for a corner block. All the cuts need to be very accurate.
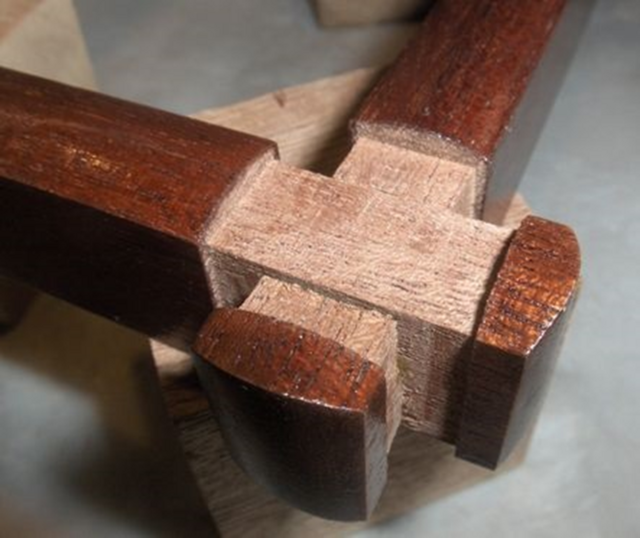
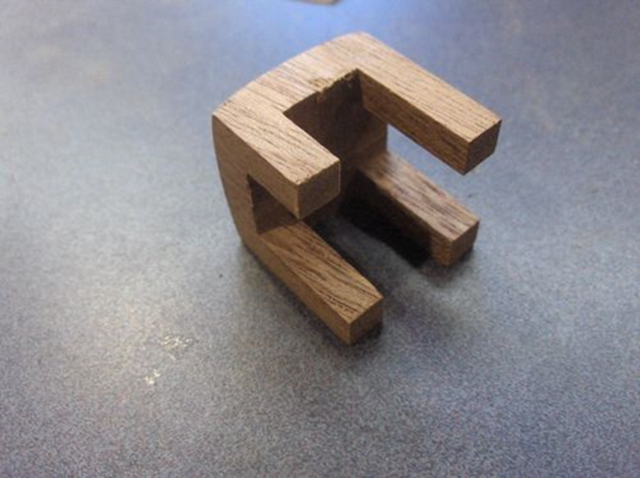
The main challenge was the corner blocks - I needed 12 of them. They are basically the shape of little tables.
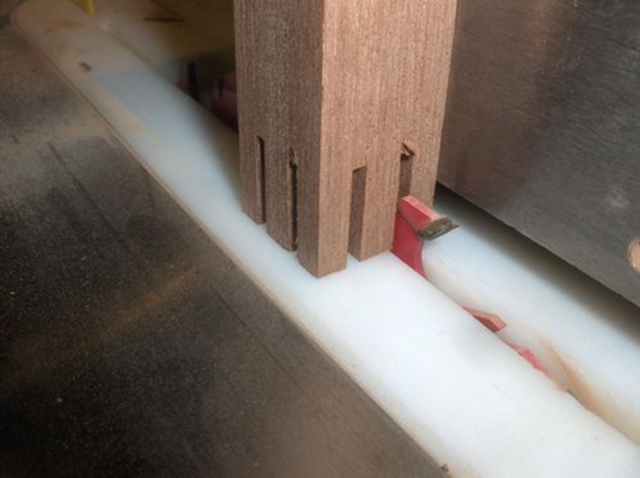
I started forming the legs with my tenon jig.
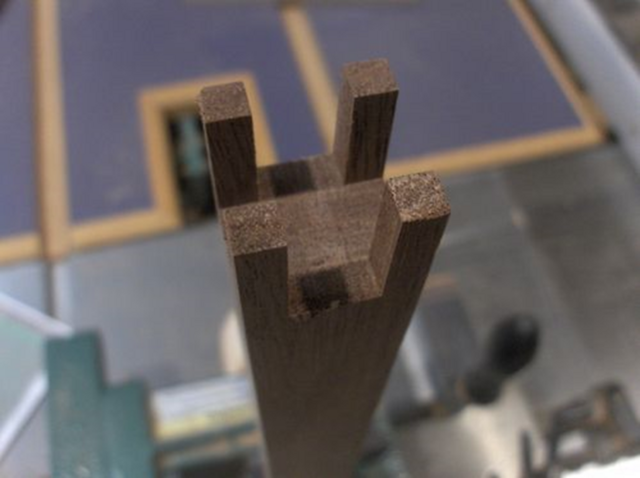
After these initial cuts I cleaned out the center portions.
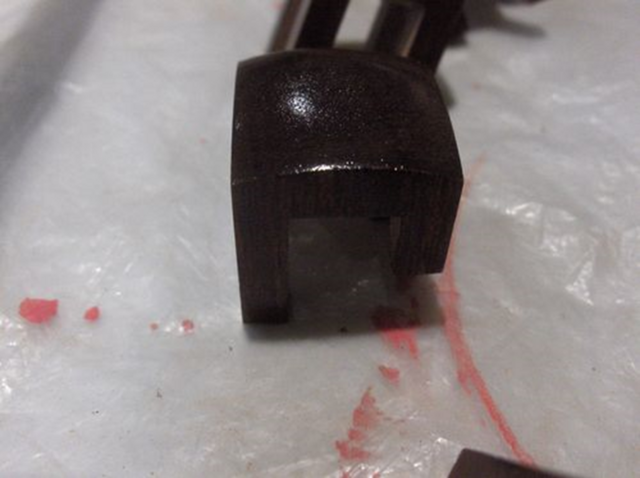
The sides and corners were marked with guide lines to achieve a uniform curve on the top. The curves shaped with my disc sander. The sides were formed to the upper line and then the corners were curved to the lower marks.
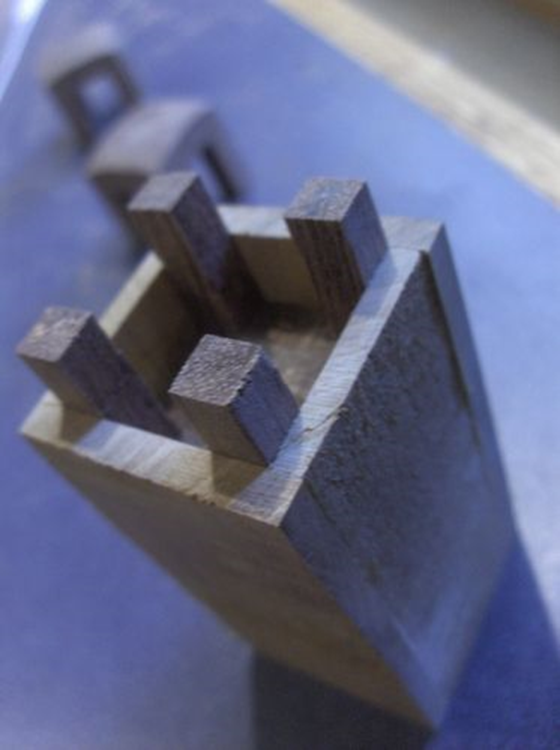
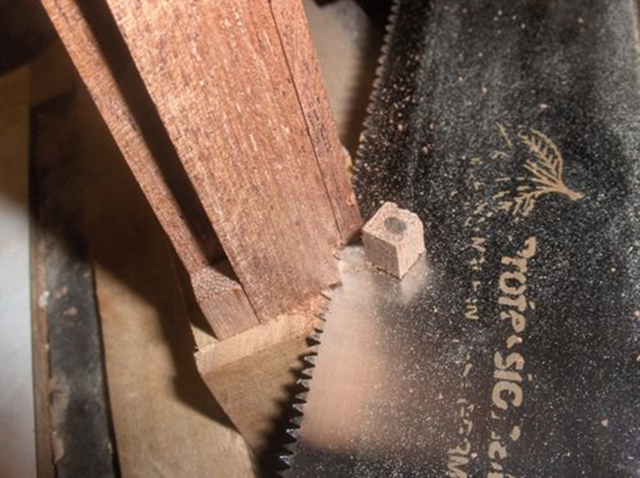
Three of the "table legs" reach all the way to the bottom of the frame. However the 4th leg reaches only to the glass. To get an accurate cut and support the leg during the cut I built a jig.
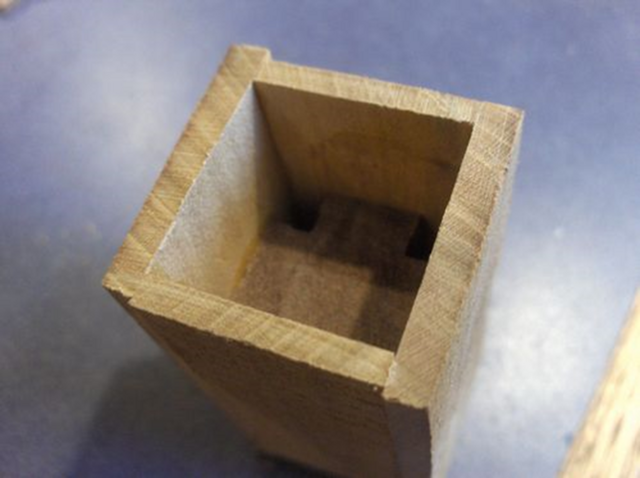
The first step was to create a blank that would fit between the legs.
Then I used part of that blank to create a box to hold the "table". The blank forms the floor of the box.
The depth of the box sets the length of the 4th leg. I can cut the leg flush with the bottom of the box.
Then the center blank is installed to prevent any tear-out from the cuts.
And the leg is cut.
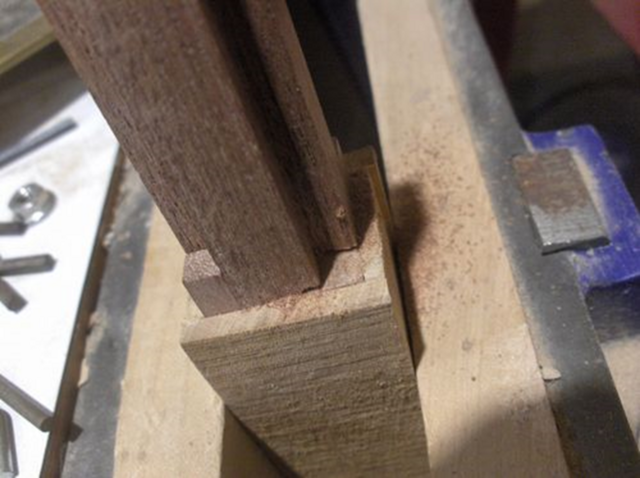
The open corners in the bottom of the box allowed me to push the table out.
Here is the finished block (table) with the top curves formed.
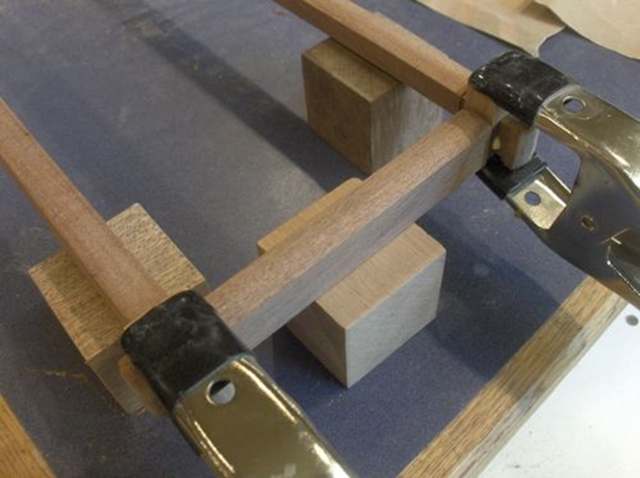
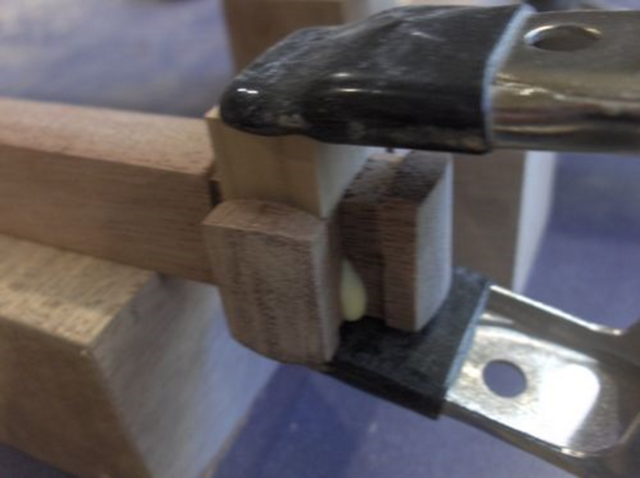
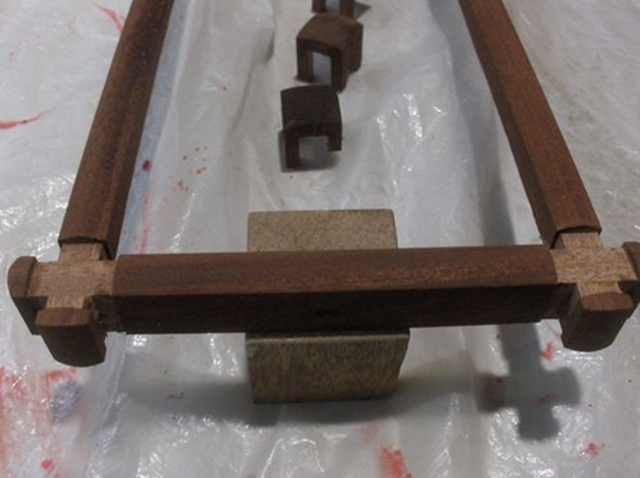
Then I can start some glue up. The frame half lap joints were glued up first.
I used a clamping block to get the pressure where I wanted.
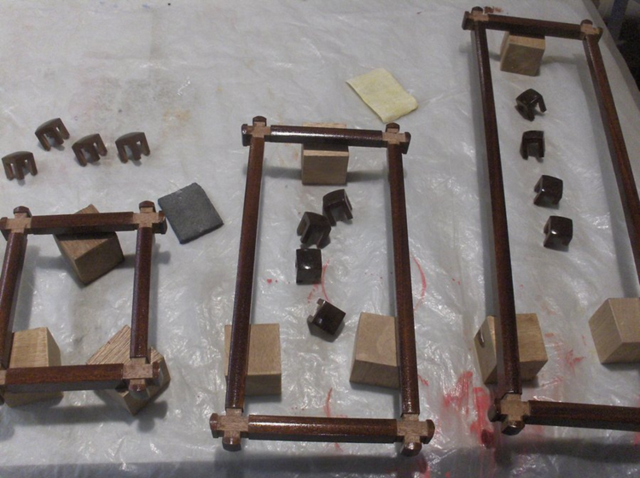
Then the parts were treated with potassium dichromate.
I then finished the parts with polyurethane.
The new (to me) joinery made this a very interesting project and an enjoyable build. The build/finish time was about 24 hours (8 hours per frame).
The frame members are 5/8" wide by 7/8" tall. The castle blocks are 1" square and 1 1/16" tall. The small frame is 6x7" and the medium frame is 14x7". I'll update with the large frame size when I can measure it.
Beautiful joinery, and finished product. In the whole they look just shy of fragile, but your close up shots of the caps look like a full sized table almost. What are the actual dimensions?
Cool, cool, cool! It's nice to see what one can do, but in my opinion, it's just about nicer to see how it can be done. I appreciate the effort you put in explaining your method.
From my experience with the "made in China", I'll probably only frame them for the quality of their manufacturing crap, however I've picked up quite a few concepts into other projects. Would never have thought of that "crown molding" using an upright length on a tablesaw... sure beats handtools.
Thanks again eRasmus for the great writeup.
If your first cut is too short... Take the second cut from the longer end... LBD
Nice joinery and I like the color, too. The deep reddish color really go well with Chinese prints. Great project!! Maybe you should try Kawai Tsugite! haha, I get headache every time I see it.


 - Project by Steve Rasmussen")