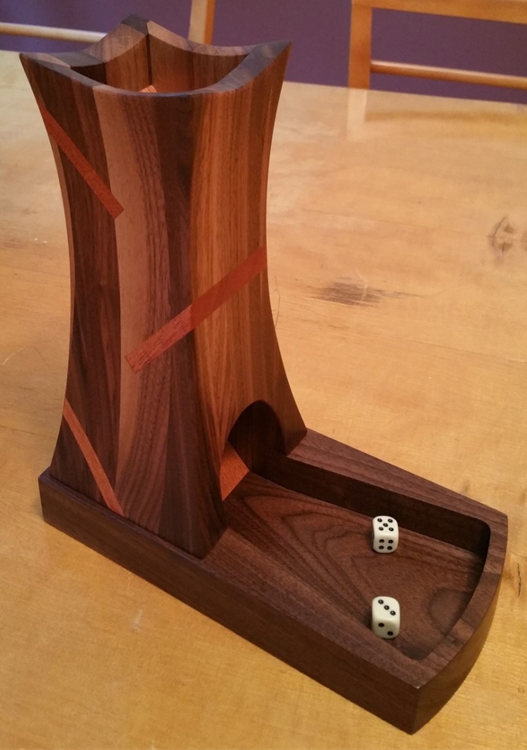
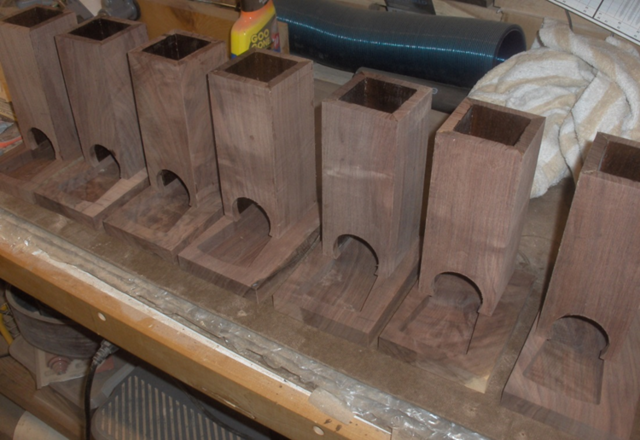
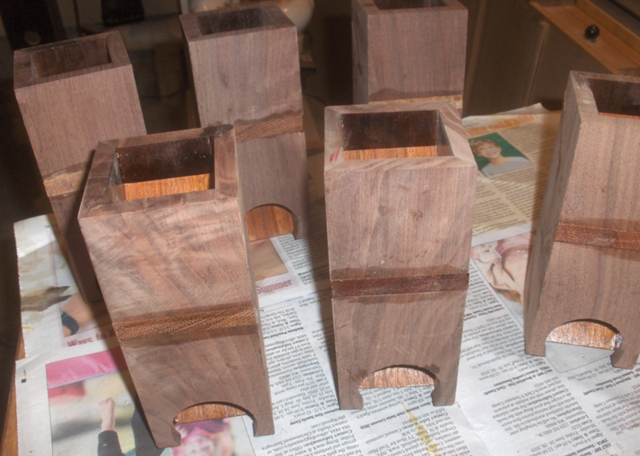
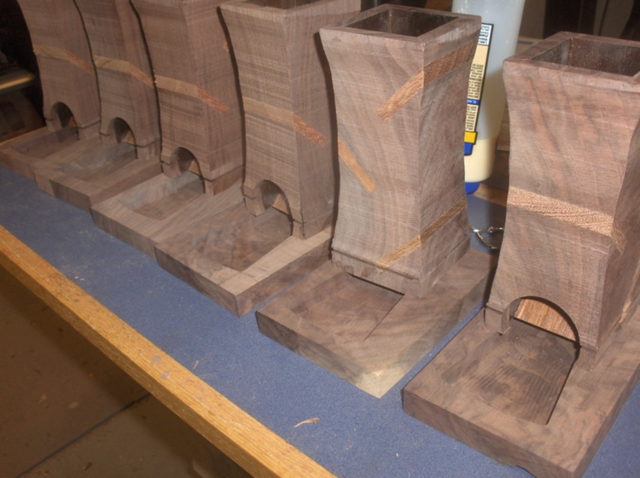
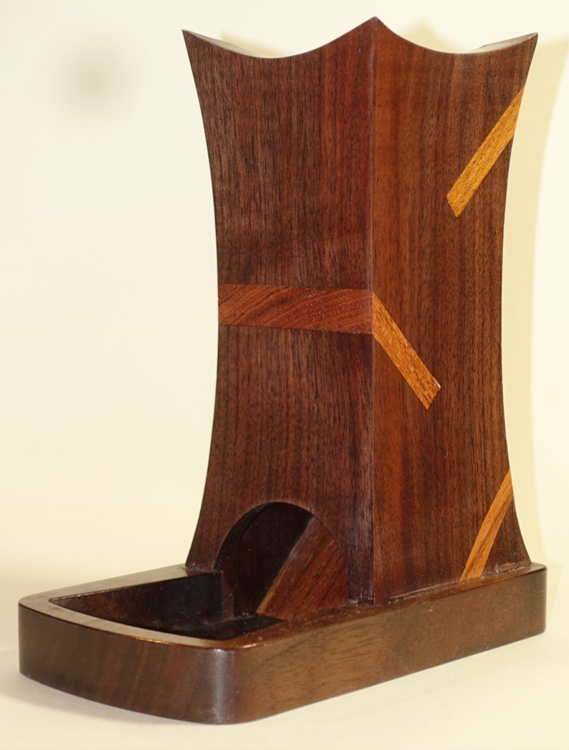
I made a set of 6 of these for this Christmas (2023). I had been searching for a gift idea and when this was suggested by my DIL I thought it was a great idea. All my recipients play games using dice. The towers are used to provide a fair roll.
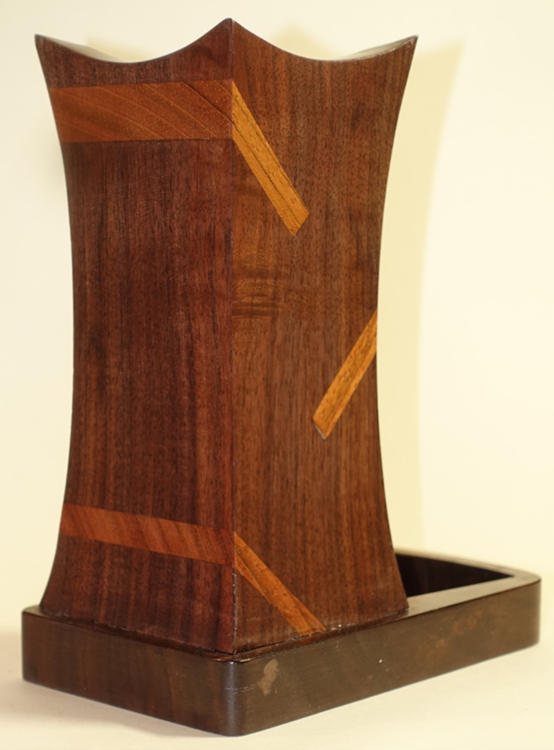
I did some internet searches for dice towers and settled on this style. I liked the curved sides & top.
If the dice were a standard size, I felt tower was a bit large. I created my own design that was smaller.
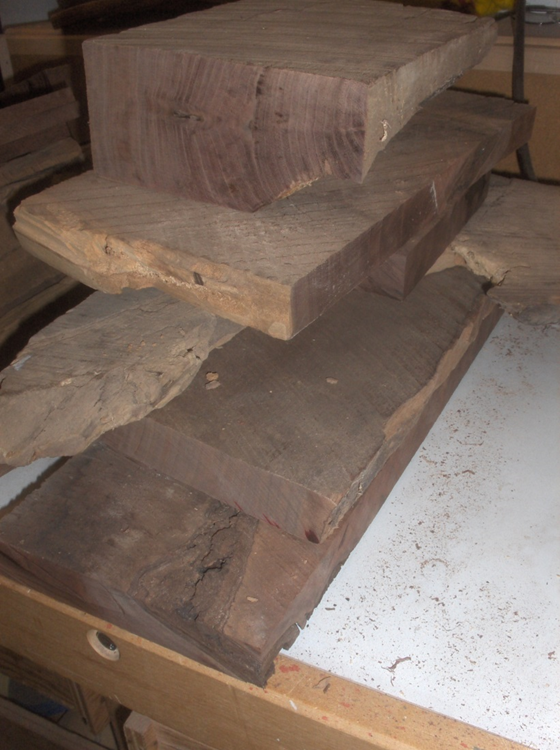
I started by cutting board blanks out of some rough cut walnut. These are left over pieces from other projects. It took a bit of work to get enough material.
Once the blanks were roughed out I cut them to width with angled edges. When possible I kept track of the pieces that could be bookmatched. Notice the fir practice pieces in the back.
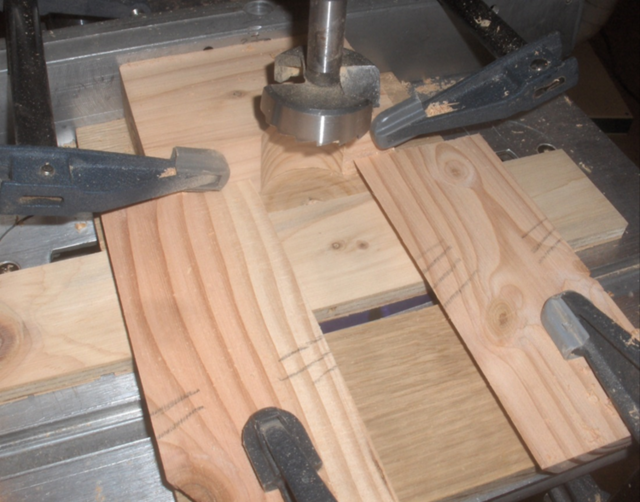
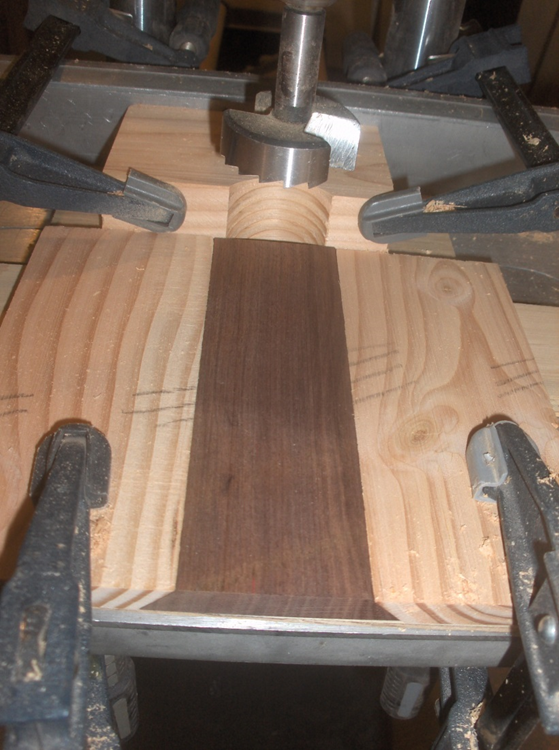
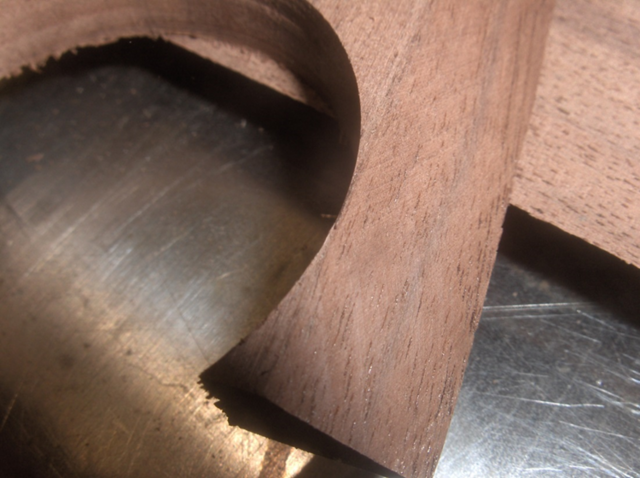
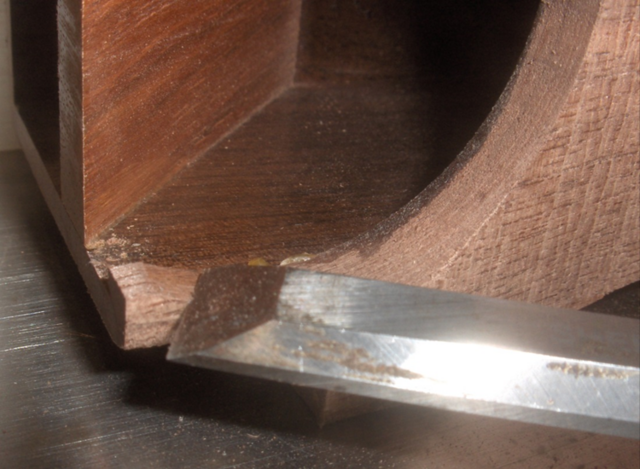
My next step was to cut the arch on the front. The arch is cut with 2 1/8 inch forstner bit. In order to get accurate and consistent location I set up a jig. I used 2 of the fir practice pieces to locate the walnut blank
I can slide the walnut blank in place and drill a 2 1/8 inch hole.
I managed to get the hole located right at the edge of the bevel.
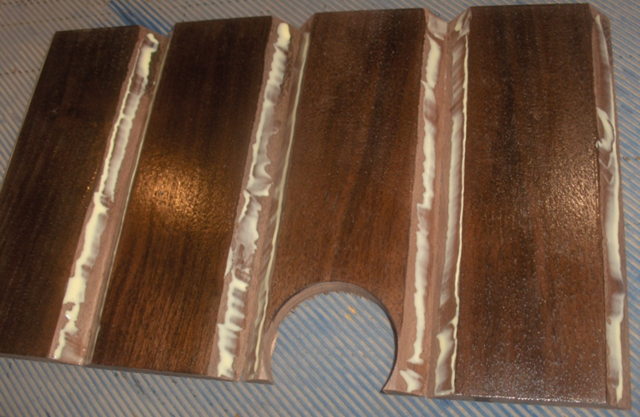
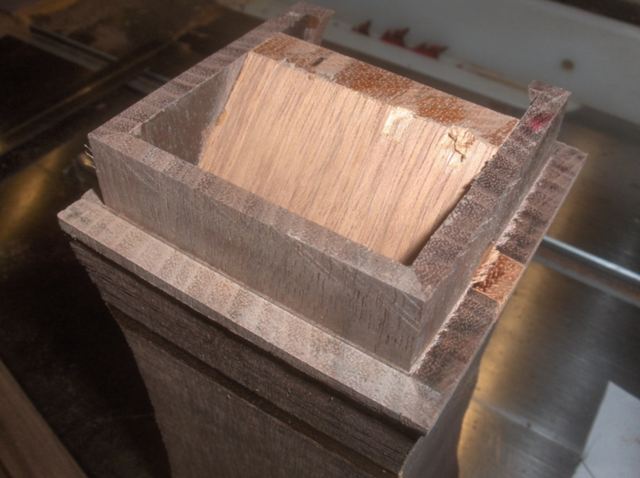
I prefinished the inside faces with a few coats of shellac and used tape to line up the sides for gluing.
I tried using my right angle blocks to square up the assemblies.
It didn’t work as well as I had hoped – the misalignments were only about 1/32 of an inch but I had to deal with it later. Next time I’ll probably make a form that has a square hole of the correct size (3 inches in this case).
While I was doing all the cutting, holes, and glue ups I had my CNC cutting the pockets in the bases.
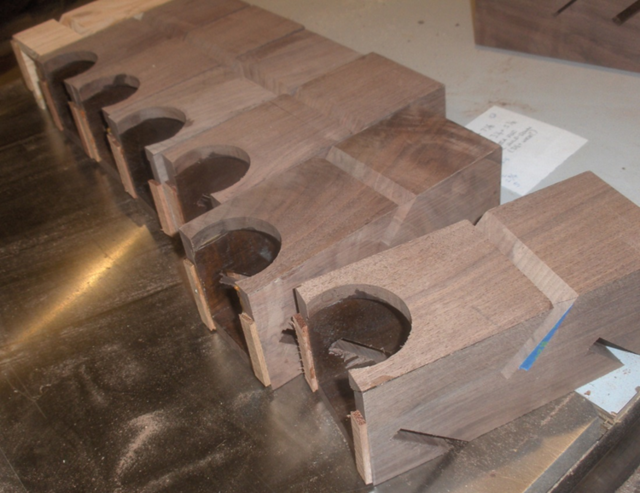
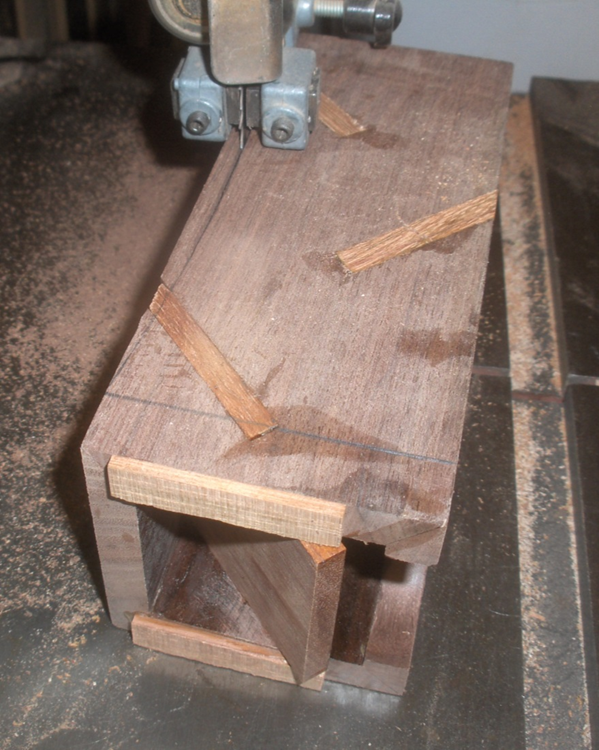
Next, I cut the slots for the ramps. I got concerned that the bottom slot would make the box a bit fragile so I added support strips on each side.
You might notice that I now have 6 boxes and until now I had 7. I messed up a cut that ruined one of them.
I cut the ramps from some leftover scraps of Brazilian cherry flooring. The bottom ramp needs to extend past the slots and the bottom of the box.
I put shellac on each ramp once they were glued in place.
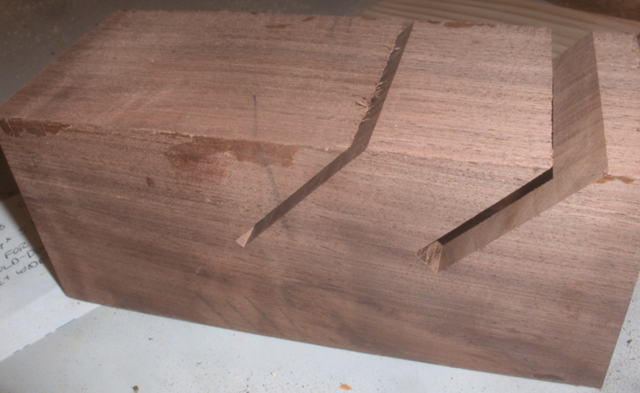
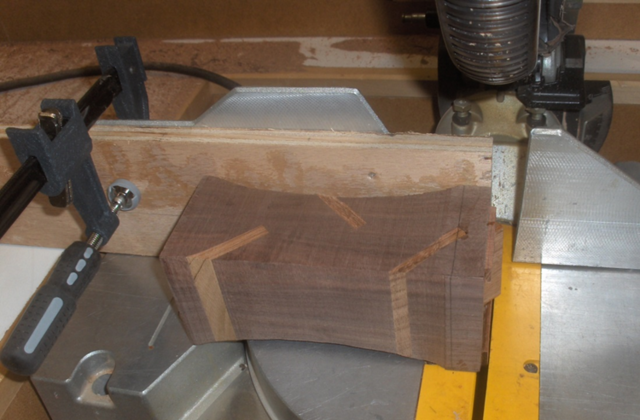
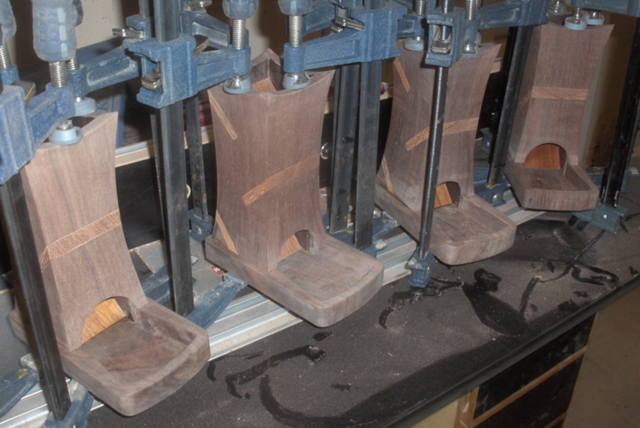
Next, I cut the curves in each side. This gave me a way to get rid of the ramp portions that extended past the face of the box. The curves are ¼ of an inch deep in the center. The cuts are not that deep. That way I have a flat on each end of the side for future cuts. I’ll get to the final shape with the spindle sander.
I made a trim cut on the bottom. This cut removed the reinforcing strips and the extra ramp as well as gave me a face square to the sides.
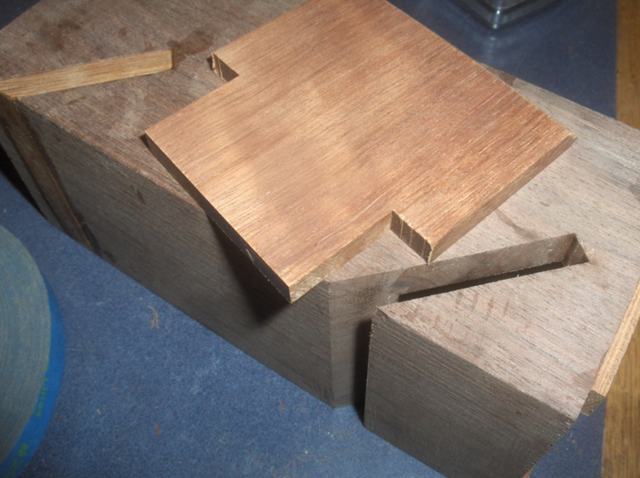
Then I formed the tenon on the bottom to fit into the base.. The first set of cuts established the height of the shoulder.
After the first set of cuts I snuck up on the final size to fit into the bases. I had to shim some of them to compensate for the misalignments of the original glue up.
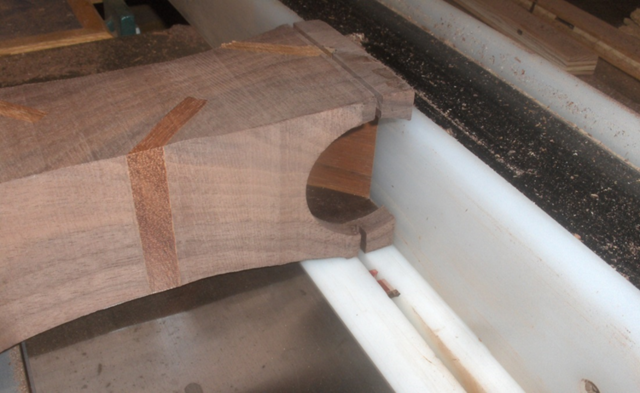
I chose this point to clean up the arch at the front. I had less material to remove once the sides were trimmed.
I trimmed the bases to size and sanded everything smooth. The final step before finishing was to glue the 2 parts together.
I used General Finishes semi-gloss varnish.
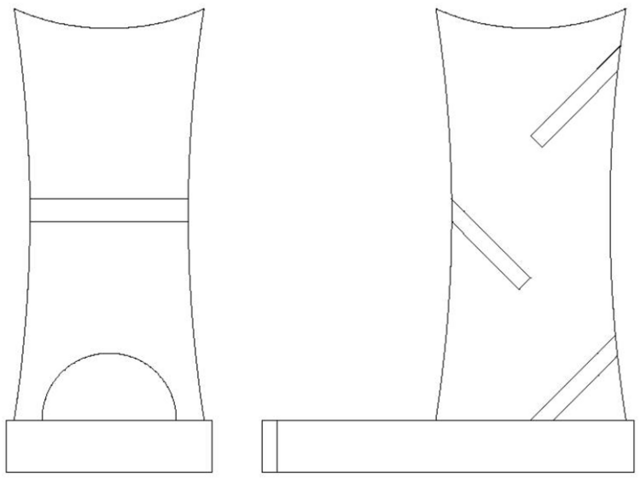
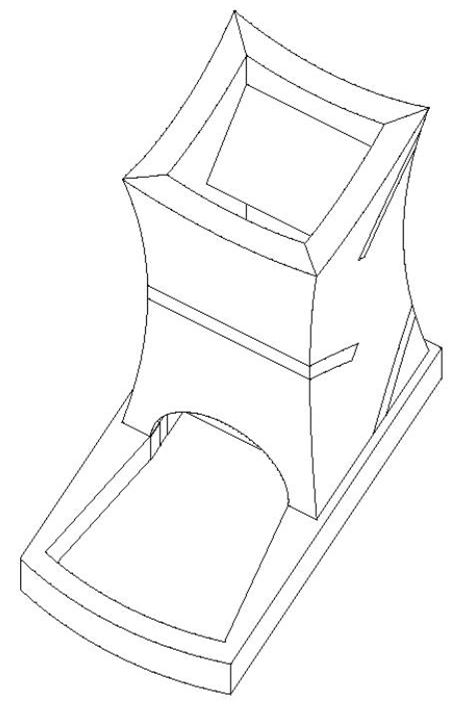
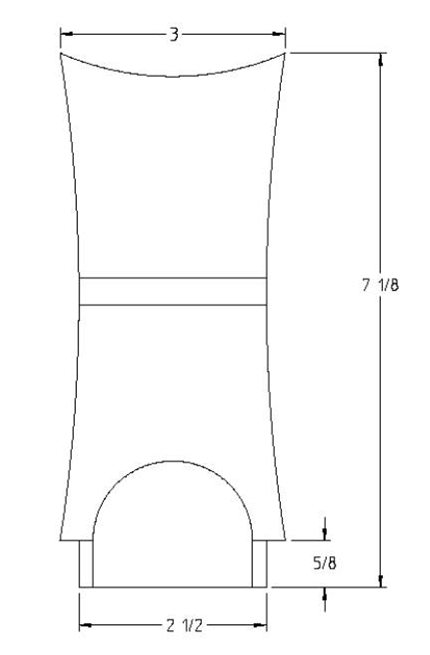
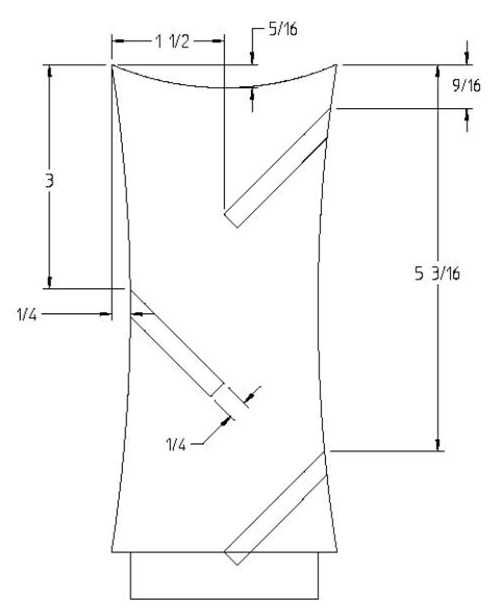
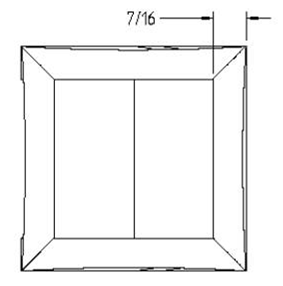
Here are some dimensioned views for reference. Everyone was very happy with their gift. The total project time took about 48 hours or about 8 hours per tower.
UPDATE: The recipients gave me a report after their first session with the towers. They really enjoyed using them. One issue was that lighter dice when played with some “enthusiasm” can bounce out of the catch basin. Another was sometimes a die could end up under the arch against the last ramp and be hard to read.
If I were to do a second version the catch basin would be ¼ inch deeper and ½ inch longer. Also, the exit ramp would be right at the inside border of the tower.
Some beautiful towers! The shaping and exposed ramp sides are a great touch and a nice trick to prevent possible cracking during construction with the support piece.
Those are awesome Steve! Thanks for the write up. I’ve contemplated carving one if just the right stump or limb comes along and I’ve 3D printed a couple. Never thought about crafting one this way but now I am 😎
In my limited experience, you’ll probably never get one that works right for any nimber of any type of any size dice. Too many variables. The exit seems to be the trickiest part along with making the basin deep enough to catch them all but not so deep they’re hard to pick up.
Ken - That's a really good point about trying to find a perfect solution. I like the size of these as they don't take up too much space. I just had a thought while typing this - one could make a tower with a drawer at the bottom. The player would have to open the drawer to see the result. Then the dice could be dumped out of the drawer.
Never seen one with a drawer but that’s a great idea Steve. There are lots of deaigns for compact,collapsible ones though and that would fit in that camp too.
That is a really good idea for rolling dice Steve. You have a great write-up about the process. I think your idea of a larger catch basin might solve some problems experienced.
"Duck and Bob would be out doin some farming with funny hats on." chrisstef
Maybe add some height to the front of the tray, and curved inside radius on the inside lower corners of it? That way, the dice bounce into the higher front end, but are easy to dig out of the tray from the sides?
Ryan/// ~sigh~ I blew up another bowl. Moke told me "I made the inside bigger than the outside".


 - Project by Steve Rasmussen")