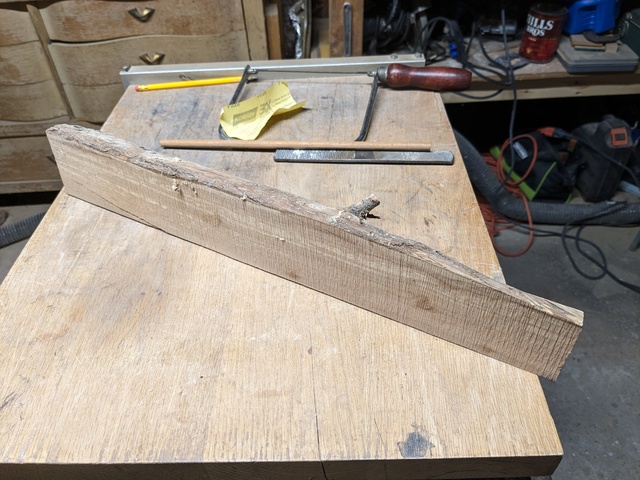
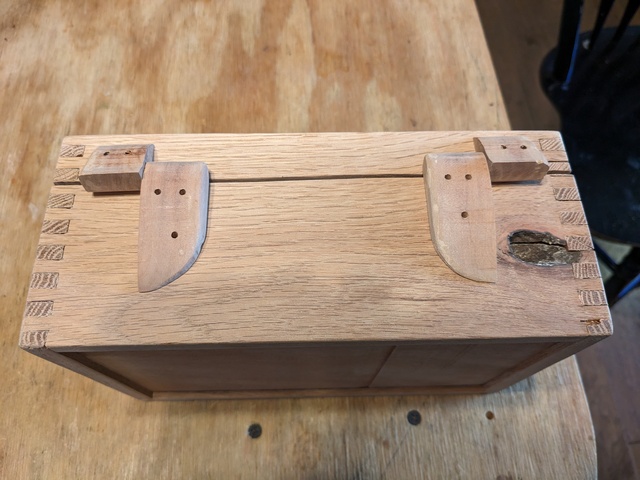
Felt like starting 2024 on the right foot, by making something... For some unknown reason, misfits and bad actors were chosen for Woods The Red Oak for the sides is close to a hundred years old, brash and splintery, with a large knot in it The Mahogany for the top and bottom panels didn't get re-sawn well enough, and had a big gouge even the planer couldn't get out (Still quite visible, on the bottom) The Pear wood for the "Hardware" was genuine windfall, from a neighbor's yard over 10 years ago, but since then it has been disintegrating and was difficult to work with The Scraps themselves set the dimensions, just under 9"x 6"x 4" (It's a nice 'tween size, with real good proportions)
Was thinking of using it as a Valet, even enlarged the Knothole in the back of the box to accommodate a charger cable for a cell phone, but I haven't used a valet in twenty years, and I'm not clear on why I need one anymore??? Lol
Anyway, Thanks for your Time! Comments are always Welcome :) I
Mike, in Concord, NH - A candle loses none of its flame by lighting another candle...
Shop time is always good! I like that you kept the knot on the front panel. The hinges are interesting - could you give more details? I would like to try to incorporate wooden hinges in a project.
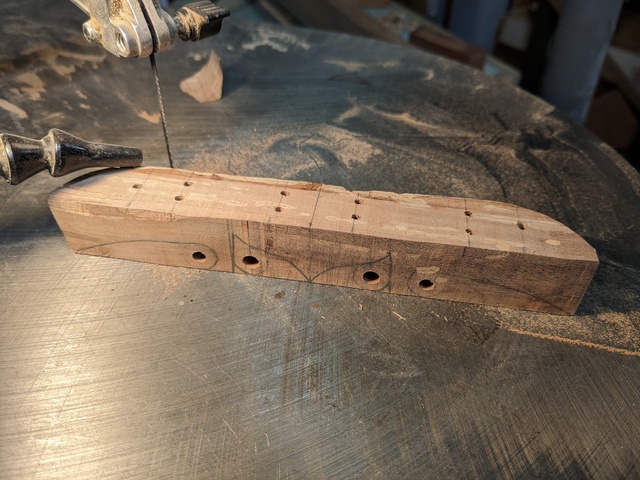
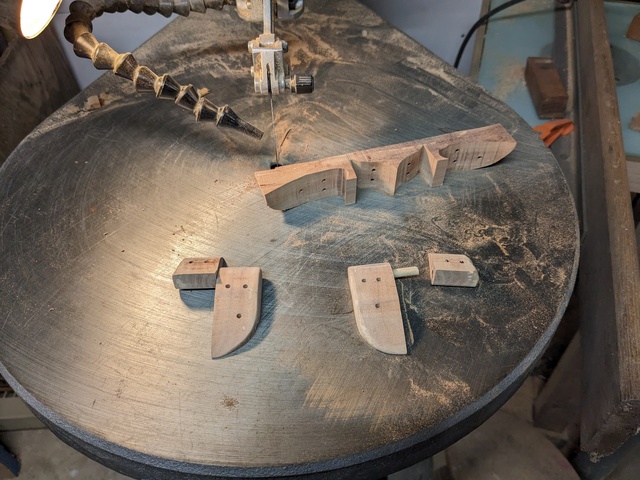
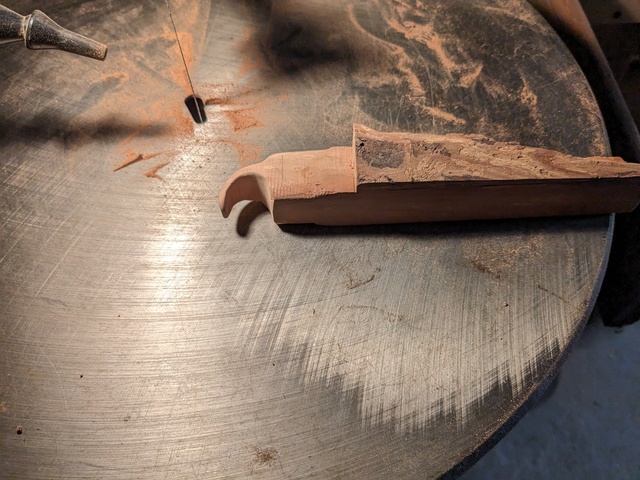
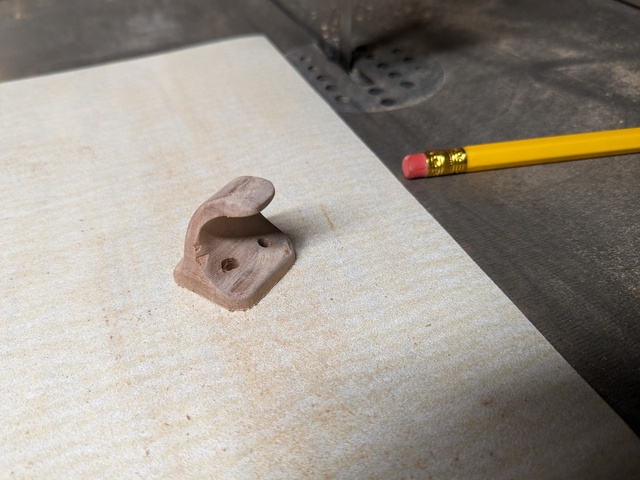
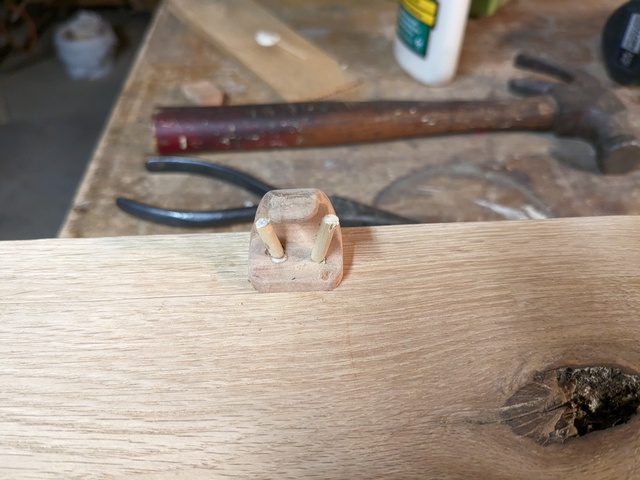
Thank You BB1! Yes, I have details... This Pair of Hinges started in a Neighbor's yard This Branch from a Pear Tree, looks alright in the picture, but has large splits end to end on the other side... It took a good deal of finagling to get even a small piece! I got this... These are cut and drilled from two directions... Holes first Two different size holes for the cheek side to fit the hinge pin (one to fit, the other loose-fit, so it turns freely, both, not completely through!) I use wooden dowel for not only the Hinge Pin but also for the "Pins" that attach the hinge to the box... The top holes are undersized pilot holes for that... The hinge profiles are cut next and a Hinge Pin is Tapped into the bottom half... The hinges are set in place, and the bottom halves are glued on... The holes are re-drilled to the correct size next... (Pre-drilling holes is a lot less likely to split these small parts, than boring the whole hole at once!) Dowels are glued and tapped in next, one by one... The bottom halves first, then the top halves, same way (glue first, dowels after...) As I've said before, these take a lot of time and effort, but they do add a nice touch, are surprisingly strong and durable, and cost Nothing! :)
Mike, in Concord, NH - A candle loses none of its flame by lighting another candle...
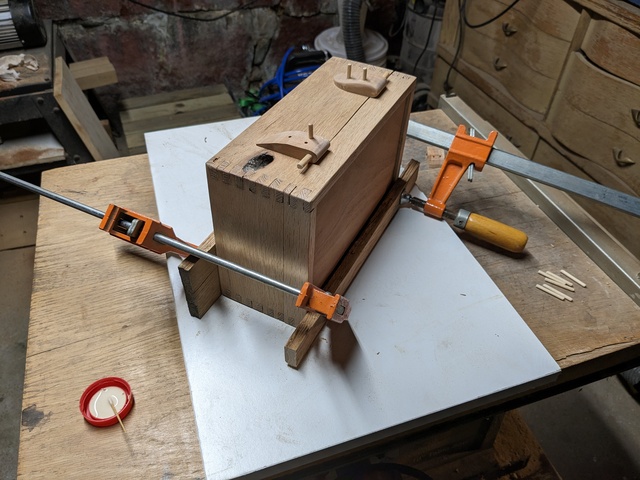
Thank You Ryan... The integrated stops were designed because I don't like "flop-over" lids... but I also don't personally like to use small chain or ribbon as a lid stop either... There's nothing wrong with doing that! I just don't care for it...
Mike, in Concord, NH - A candle loses none of its flame by lighting another candle...
Thanks for the hinge design info and pictures. I hadn't thought of a dowel for the pin. When my shop warms up, I want to try this. Appreciate all the details!
Thanks Pete! If the box wants one, a finger tug/pull is usually cut while the glue is drying on the hinges... It's another "two-direction cutting" exercise with the Scroll Saw... Before it was cut free from the larger piece, undersized holes were hand drilled through the lift, with this result... This is attached to the box, same as the hinges, glue first, then glued pins after to make sure... The final shaping and sanding of these small parts is best achieved when they're firmly on the box and a couple of decent files and rasps make short work of it BB1: You're Welcome... I tried brass rod a couple of times and it works, and is nice... But these are wooden boxes, aren't they??! Lol Wood does many things, but it doesn't shear very well, which is what the lid half of the hinge would be trying to do to the hinge's pin... I submit, that any wooden hinge will fail, long before it's hinge pin does! Ron: Thank You too Sir
Mike, in Concord, NH - A candle loses none of its flame by lighting another candle...
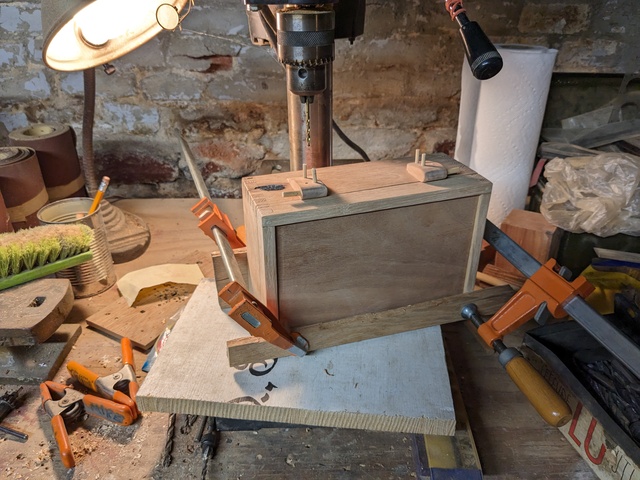
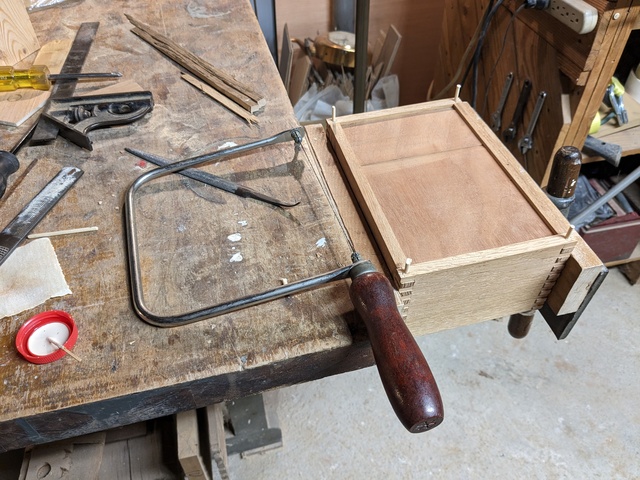
Thanks Pottz... Good to "see" you too! Not a lot of the older, veteran members left, sadly Thank You both, Dan B. & MikeB_UK Splinter Group: And Thanks to You as well... Yes, the corners are all pinned, down through the top and also up through the bottoms, with Pins nearly half-way through the box... Here, the excess is being trimmed off... The parting cut, that removes top from bottom, cuts through these small dowels as well, and helps to keep the top from racking or changing position
Mike, in Concord, NH - A candle loses none of its flame by lighting another candle...