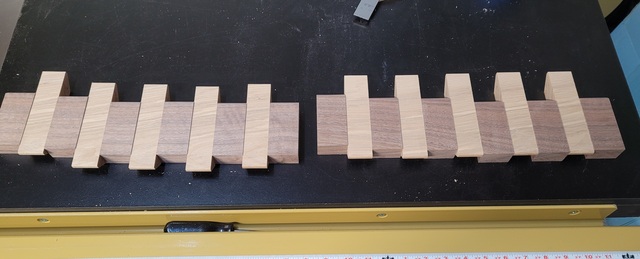
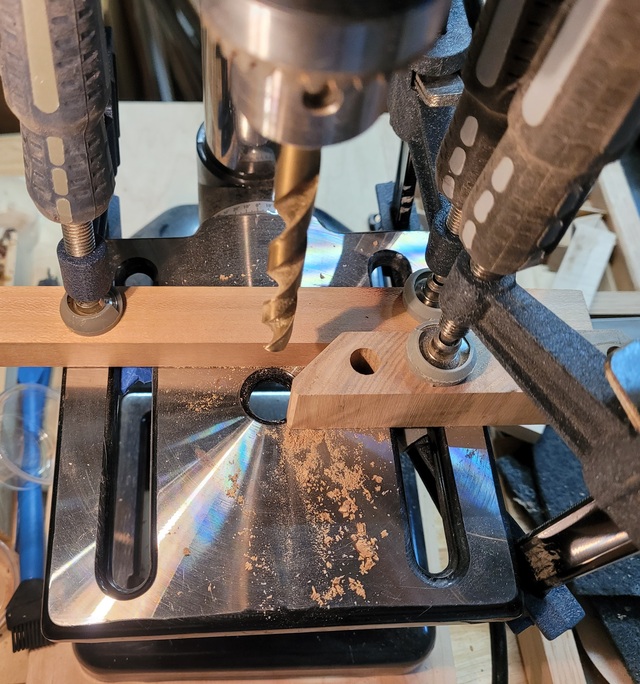
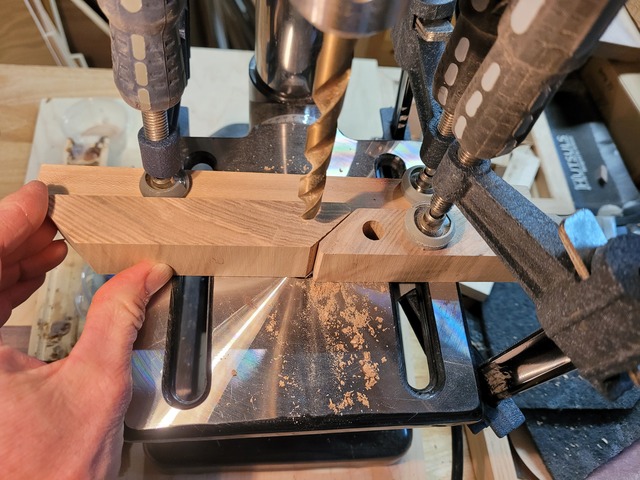
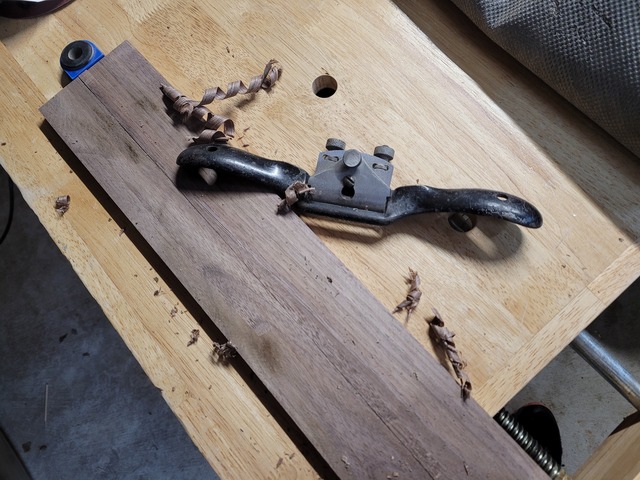
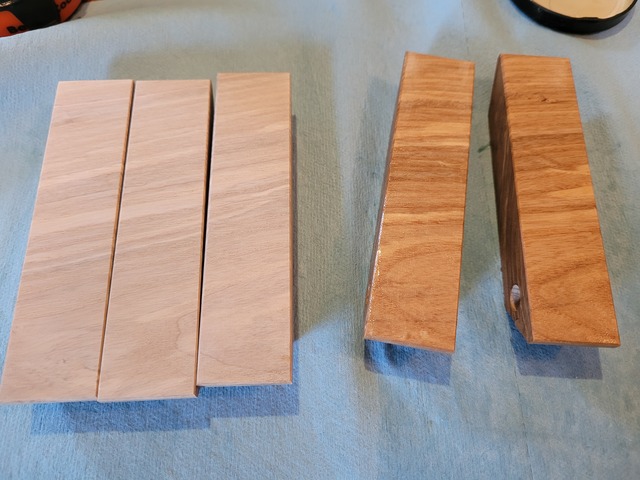
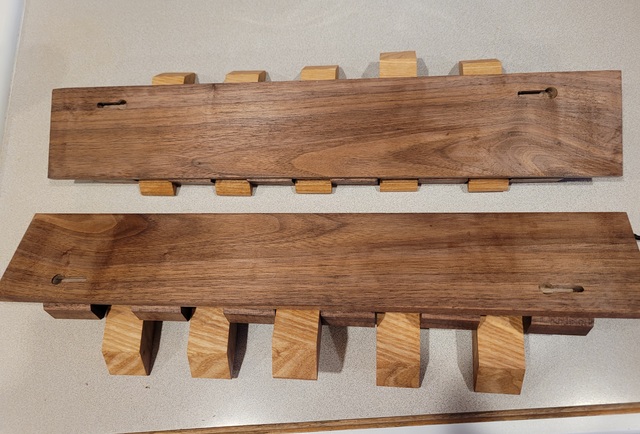
Was tired of our caps taking up space on the coat hooks so decided to try a piano coat rack (thank you Corelz125 for the tips and encouragement). I didn't have one board that was long enough for two racks (to fit a narrow wall area) so I decided to do alternating walnut and ash - at least that's what I think the lighter color wood is. Each part is continuous grain. This plan also allowed me to simply put a bevel on the longer ash board and then cut it into sections for the movable parts. I used some scrap wood as "guides" on my little HF drill press to drill the holes.
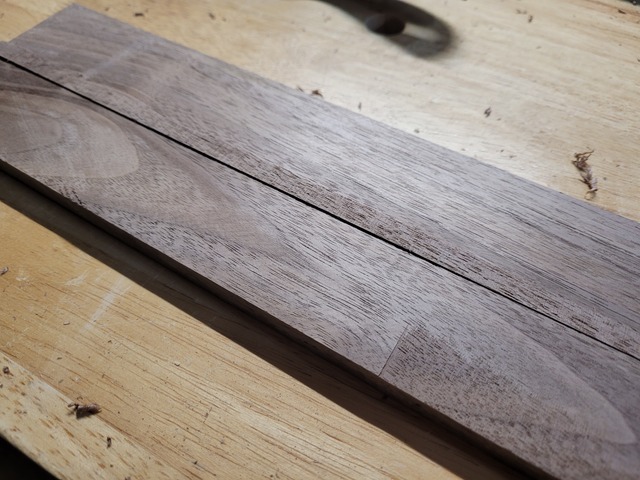
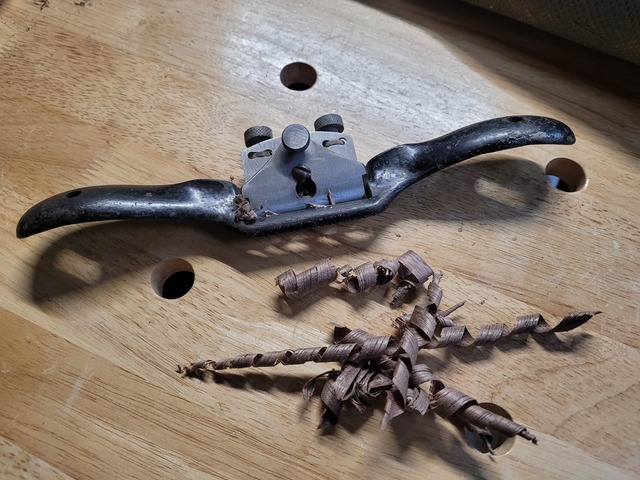
Not all holes were perfectly aligned, but OK enough that it all went together. I used a 3/8 inch dowel for my pivot and a resawn walnut board for my backer. I did the resaw at my table saw and then made the final separating cut at the bandsaw. This left a section that I removed using my grandpa's spokeshave that my dad gave me. That was particularly satisfying (and makes me want to learn more about hand tools).
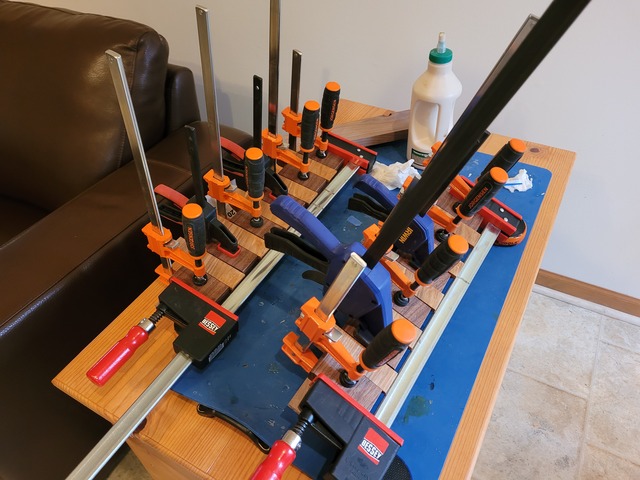
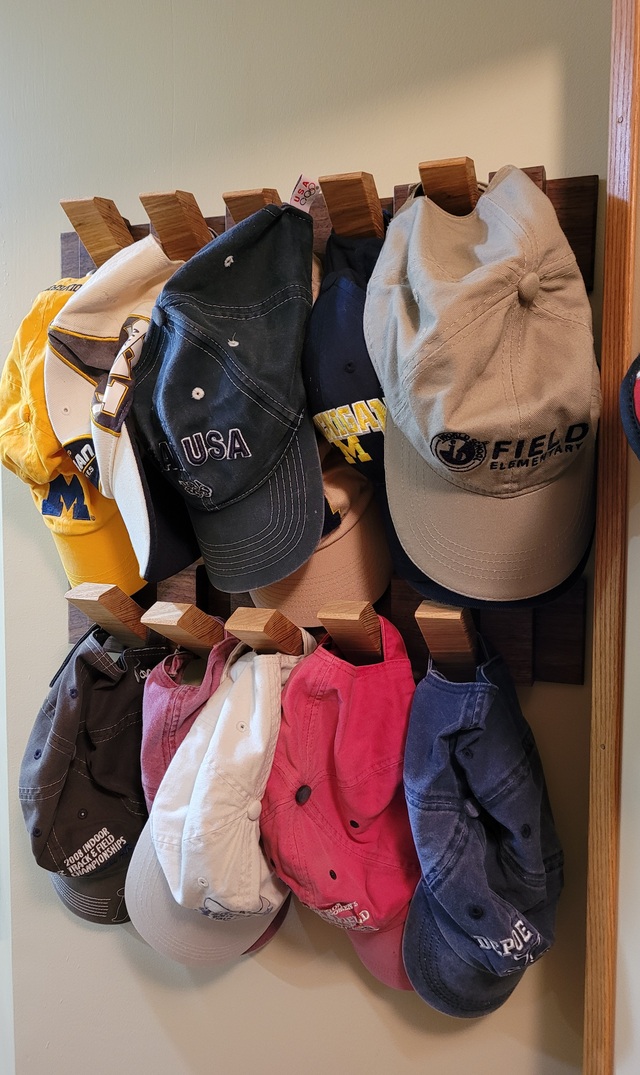
I pre-finished the sections, other than the back of the walnut stationary pieces that needed to be glued to the backer board. It all went together pretty smoothly (at least for me). Glue up inside as it was still pretty cold in my shop. I then applied finish to what was visible of the backer. Definitely glad I had pre-finished all the other parts. I had thought I was going to use a removable adhesive strip to attach to the wall in our mudroom, but then didn't feel that would be stable so headed back to the shop to make keyhole slots. Bit stressful as I was in the homestretch on this and needed to center these on the stationary sections, but thankfully didn't mess that step. Made a template for getting the drywall hangers in place and both racks are already full! Was a fun little project and helps organize in the house so a win-win. My plans for this were typically detailed 😉
Petey- thanks! There are a lot of versions of this. I had already cut the 45 on the movable pieces, but I also saw one that appeared to put the bevel on the backer board so all the pieces were squared off. That would be easier I would think for aligning the pieces but "might" make getting the pivot point more challenging. I may try another at some point using that method.
sharp looking cap hooks. that's a money maker for those out there looking for ideas. It looks a whole lot nicer than the black hooks I have by the back door.
Earl - thanks! Funny, I said that it sure would have been easier to attach some hooks to a board! This was a fun project with opportunities to learn along the way.
Looks good, Barb! I've always liked the looks of those piano key racks, but I've never seen one in person. I like your wood choice, and the finish looks nice.
A few questions...
How do you determine where to position the dowel holes? (Or is their position not overly critical as long as they're in the same place in every key?)
Do you have to do anything to prevent unused keys from flopping open? I realize that's not a problem for you given that you've already filled both racks.
Why did you cut the keyholes horizontally instead of vertically?
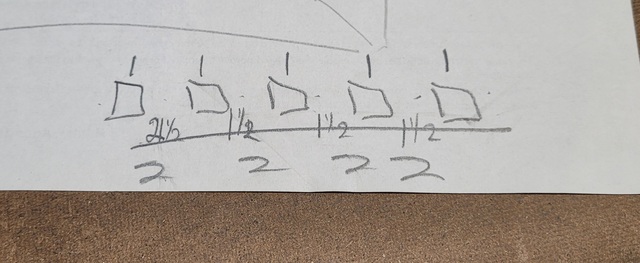
The dowel hole placement was a bit of trial and error. I looked at various YouTube but the explanations weren't totally clear to me. I cut an extra piece of the ash and the walnut so I could experiment with the placement. I found the hole needed to be in line with the start of the 45 degree angle, centered on the piece. If it was too far up, the pivot action wasn't possible.
I do my keyhole slots on a small table top router setup so I'm using a fence. The only way to do that is horizontal. I guess handheld with a jig would be an option for vertical. I've always used my router table with fence so was just VERY careful to mark the start and stop so I didn't cut outside the stationary walnut pieces.
To prevent the movable pieces from falling, I clamped everything tightly from the ends so there would be a friction fit (or at least as much as possible with the alignment issues) when I glued the stationary pieces to my backer board. Plus my dowel fit relatively well (not too loose). This seemed to work so they stay upright until needed. I saw one video where the person used small magnets so I guess that would be an option if the pieces are too loose or for added security.
John - thanks! The selection factored in the length I needed, and the desire for the two to match. By alternating, I could get two racks out of the boards I had. I love walnut and the ash ended up being a nice contrast.