My oldest daughter moved into a little 1940's house last spring after we fixed it up a bit. Last summer, she wanted a coffee table and a couple of end tables. Of course the first place she looked was on-line. Fortunately, she asked me what I thought of a couple of her choices. I told her I could make them for her with one condition: the were not going to be painted. She didn't want cherry though. After showing her some walnut she decided that I could make them for her.
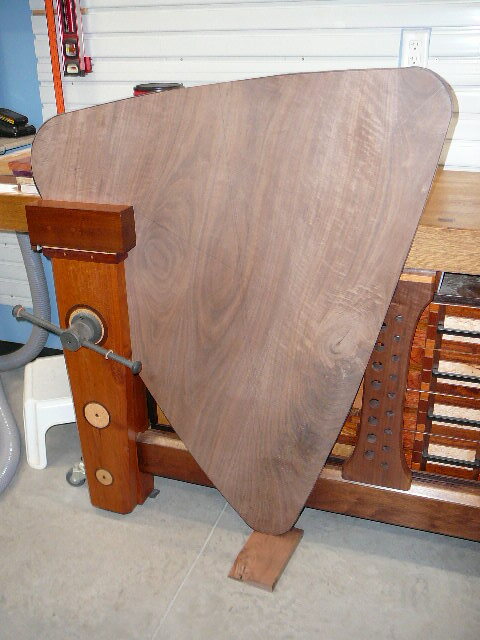
She sent me a picture of a mid-century coffee table and end table that she liked. We discussed what features she liked and what she didn't like. The tops of the end tables are equilateral triangles with slightly curved sides. The coffee table was an off-centered long triangle with curved sides. She also liked the floating top look and arched legs that were slightly tapered down the the floor. The legs were splayed out for stability since it is essentially a tripod. The bottom edge of the top is a relaxed round over to give the top a soft tapered edge.
The tops were the first order of business. I had a flitch of 3-4 boards that allowed me to match up grain and some really nice patterning for the glue-ups. I was able to cut the end tables out on the band saw. The coffee table was cut out with a jig saw. Getting the bottom edge round over routered was challenging with the coffee table since it was so large it didn't fit on the router table. The corners were especially challenging and burned quite a bit. Sanding the edges was also a challenge.
Prior to cutting the tops, I also laid out the locations for the cleats and drilled a couple of pilot holes for screws in case the pencil marks were messed up. The cleats are 7/8" thick and have a 1/2" deep dado for the legs. The cleats extend all the way to the center of the table and are attached to the top with screws and glue.
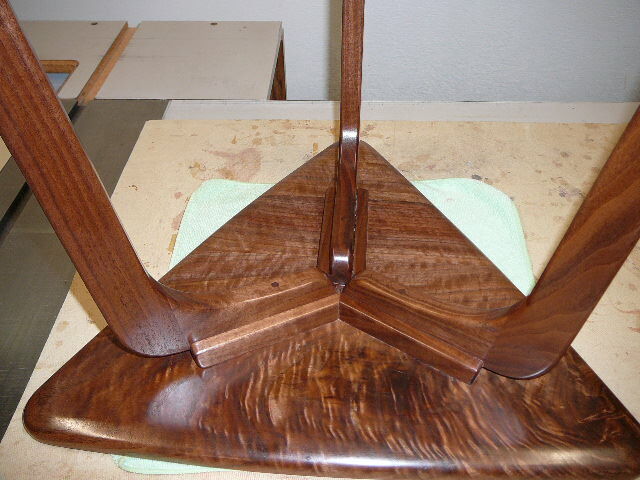
As you can see from the picture, the legs are made of two pieces, one vertical and one horizontal. The horizontal portion of the leg also provides a stiffening rib for the top. All of the end table legs are the same. The coffee table leg horizontal piece are different lengths.
After gluing the leg pieces together, the rough outline was cut out on the bandsaw then I used a pattern bit on the router to finish them. The edges were eased with a roundover bit.
The top and legs were sanded and finished with semi-gloss Arm-R-Seal.
Now for the rest of the story:
I received a call from my daughter a couple weeks ago telling me the coffee table legs broke. She sat on the coffee table and one leg broke which caused the table to shift breaking the other two legs. The first leg broke where there was some wild looking grain that obviously didn't have the necessary strength right along the joint. The other two snapped off at the joint.
I originally was going to make the coffee table legs thicker as all of the legs are 3/4". The thin legs probably aren't a problem for the end tables but it was inevitable that this would happen with the coffee table. They need to be heavier. I'm in the process of making a variation on the leg that will still have most of the look but a lot more strength and stability. The leg will be 2" thick where it connects to the rib and table and taper to 1-/1/2" at the floor. Rather than free floating, it will also connect with the top and the rib. I'll post some pictures in the comments when the coffee table is finished
nice job earl. sorry to hear that coffee table failure though. just one of those learning experiences. looking forward to seeing the revision. that walnut is beautiful.
working with my hands is a joy,it gives me a sense of fulfillment,somthing so many seek and so few find.-SAM MALOOF.
Grain is killer Earl. Generally I don't like Mid Century anything, but these are more retro than mid Century to me, kinda from the cool years.
Send her a picture of a chair, with a note that this is what ya sit on, and a table with a few magazines on top, and suggest these tables be used like that. At least she wasn't on the table dancing. The legs are done like I would have too, but with that changing grain probably wouldn't be the strongest sticks in the world.
Some great grain Earl. Nice work on the design and keepin' the girl off the disposable junk you can buy online! That crap would probably break the first time she sat on it 😉