Share your craft projects
Make new craft buddies
Ask craft questions
Blog your craft journey

LIttleBlackDuck
5483 posts
and
55 followers
in over 3 years
in over 3 years
More from LIttleBlackDuck
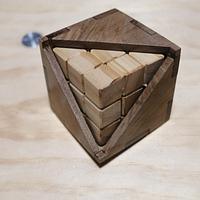
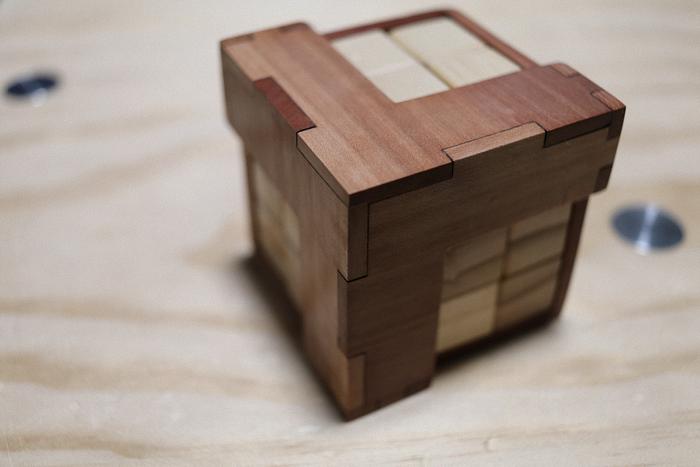
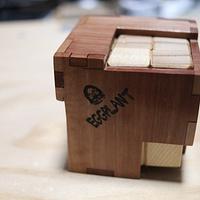
Eggplant Puzzle.
Boys and Girls,
I’m starting to get a tad complacent about my puzzles… not about content, but more so about my latest swing away from MDF. I haven’t abandoned my laser, as it makes repeatability a breeze, but the packing puzzles help use up all those bits of timber I bought years ago to make those boxes that never eventuated. I just hate dressing down 12mm (good stuff, as I never know/remember the species) to 4-6mm thickness… my dusty bin swells.
I’m starting to get a tad complacent about my puzzles… not about content, but more so about my latest swing away from MDF. I haven’t abandoned my laser, as it makes repeatability a breeze, but the packing puzzles help use up all those bits of timber I bought years ago to make those boxes that never eventuated. I just hate dressing down 12mm (good stuff, as I never know/remember the species) to 4-6mm thickness… my dusty bin swells.
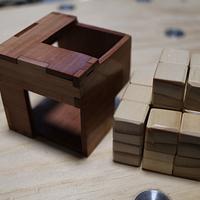
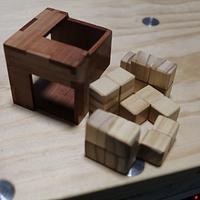
Before I make my 360° about face to MDF, let me post this Egplant Puzzle I discovered and made out of solids.
Making the change from fully laser cut MDF to machinery cut timber, I have used processes that many would consider questionable and while I’m not spruiking the methods I use, I’m just showing what I did and worked for me… if anyone is to duplicate, please take appropriate safe practices for your environment/equipment.
Not prepared to fully abandon my now MDF heritage, I opted to leave the option of MDF fall back and settled on 18mm³ cubes (3 x 6mm MDF laminated).
Reverse engineering in SketchUp, I came up with the following designs for the cubed pieces,
.skp%20-%20SketchUp%20Pro%202018-007833.png)
the box,
.skp%20-%20SketchUp%20Pro%202018-007838.png)
and the MDF laminates
.skp%20-%20SketchUp%20Pro%202018-007834.png)
just in case.
For past puzzles, I found cutting the cubes safely anchored on the mitre saw, cumbersome and somewhat intimidating,

and minor changes were only a tad less intimidating,

but in this configuration, I was able to use my non-dodgy arm on the saw.
My TS sled too big to download/mount

and it’s high front fence hides the work.
Finally I opted for a reverse mitre gauge operation on the TS.
I set up an easily accessed remote control
and chose a pull motion towards me standing behind the blade with the mitre gauge, rather than the traditional push approach,

This way I can keep a close eye on the fingers and the blade which would normally be hidden by the “standard” stance. Using this method I can minimise gauge movement,

and keep better track of proximity of the blade when the stock gets short,

Out of the 110+ cubes I cut (21 per puzzle), I only lost 2 to the blade and they were tossed dislodged away from where I stood.
The cut cubes were bevelled on all 12 edges on my lathe disc sander,
The cut cubes were bevelled on all 12 edges on my lathe disc sander,
and the pieces assembled/built,

using a small dab of medium thick CA between 2 adjacent cubes. The pieces were each run through the buffer and stored

waiting for the tung oil on the boxes to dry for 1 week before they line up for buffing.
Gluing the individual cubes for the puzzle pieces is nowhere as accurate as dowel aligned MDF laminations so tolerances needed to be tweaked.
The first box I made… again no idea what wood it is, however. It was salvaged from some firewood and hard as hell… was out of 4mm thick boards,


and was a tad too tight for the assembled pieces… or maybe the pieces were too big for the box. I finished up hitting the belt sander with the pieces

Unfortunately this removed some of the bevels on the cubes which I thought was unsightly, however, I managed to touch the bevels up a tad with a block sanding pad,

Nevertheless I managed to get a presentable working puzzle out of it,

The above box was tung oiled and buffed.
With the use of SketchUp, I expanded the internal dimensions of the box and extended the “finger joins”

so that the box can be cut out of 3-6mm thick boards or MDF (trust me, it works)… the thinner the board, the more of the “fingers”

which need to be sanded off… a relatively easy process using my inverted belt sander,

Sanding off the “fingers” also removes the laser burn marks from the outside,

however, I must add that these “extended fingers” add an extra level of inconvenience during glue up... resulting in a few loose joins and wider seams.
For you statisticians, the internal dimensions of the box is 56.5mm with double the wood thickness to make up the final dimension. As the thickness can vary, the dimensions can range from 62.5mm x 62.5mm x62.5mm to 66.5mm x 66.5mm x 66.5mm.
Unfortunately, the thicker the timber, the slower the laser cutting speed, which will make the kerf bigger and more burning.
Marked the sides

to keep track of the sanding and over to the inverted ROS to reduce the 180G belt sander residue to 240G,

Eventually ready for finishing,

Took more of a shine to a coat of tung oil

than I did in cleaning the brush.
Then it happened, the option to use MDF kept tapping me on the shoulder,

and as I already had a box out of MDF (you can’t take the MDF outta this LBMDFD), I made a set of the puzzle pieces out of laminated 6mm MDF
.skp%20-%20SketchUp%20Pro%202018-007840.png)
Try as I might, I couldn’t assemble the puzzle using the MDF pieces. Even though I was totally sober, I couldn’t comprehend why I couldn’t even insert the first piece into the box. I thought it might have been the missing bevels (which eased cornering), or lack of buffing… I tried both and some of the bevels were a tad over generous ,

but the sucker still wouldn’t fit. I took measurements and they were all the same… I was just about to concede that this puzzle WILL NOT be presented in an MDF version, and then I saw it… a corner on the piece that should not be there,

Rigged up my inverted jigsaw and de-cornered it,
Corrected in SketchUp,
.skp%20-%20SketchUp%20Pro%202018-007840a.png)
Yay… I have redeemed myself… I now have a full MDF version,

tranquillity restored…
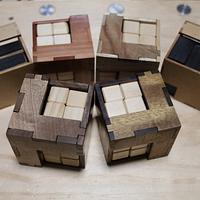
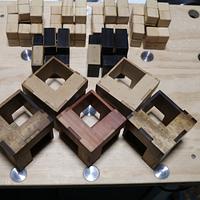
In wrapping up, I finished up with 6 puzzles. For the timber ones the pieces were made out of pine and the boxes out of various timbers. Not being great at identifying species, this is my pathetic attempt:
1. One walnut,

2. One out of camphor laurel (right) and fire wood (??? left),

3. No idea what this is… it is not walnut and has a deep yellowish tint,

4. Boxes made out of 3mm MDF and the pieces laminated out of 6mm MDF,

The 3DW model can be viewed/downloaded from here,
This puzzle is reputed to take 19 moves to solve… while that sounds daunting, it is complicated by a “single move” that may change directions during the execution, would be sub-divided into multiple steps.
This is the link to the A4 PDF solution.
Anyone interested in my puzzles (or other authors), you can see them all here in my “Puzzle Collection” .
If interested in any of mine (LBD), measurements can be made available for anyone not familiar with SketchUp.
.png)
Don’t be crafty Craftisians,... SHARE your craft!
If your first cut is too short... Take the second cut from the longer end... LBD
9 Comments
Quite the write up ducky!! I like it.
Ryan/// ~sigh~ I blew up another bowl. Moke told me "I made the inside bigger than the outside".
I think the real wood looks better in the sense it's more decorative, but the MDF does have great functionality for the purpose. Stability being the prime benefit given your quest for the perfect fit up.
Wow - the details on this are way beyond me! Great puzzles.
Quite a write up. Full semester course, but fun, interesting and fun.
Ron
Nice work, Ducky. Those littel buggers are multiplying!!!
Cheers, Jim ........................ Variety is the spice of life...............Learn something new every day
Thanks all for looking.
I do crap on a tad... ok
TAD,
however, the intention is not as much to convince others to make puzzles (have just about given up on that), but moreso to maybe give ideas or a glimpse at a tool/feature some may not have seen.
Don't undersell yourself BB1 (I've seen your work)... puzzles are not everyone's cuppa tea, however, rather than for yourself, there are many recipients that love them as presents (free or sold).... talking about sold! Though the effort is never/seldom returned... but that's woodworking.
Splinter, (whispering so the MDF gods don't hear) I prefer the look of solids and I'm hoping that the sizes give them a hall pass for stability... and while I still cut the box on the laser, it's the preparation to a consistent thickness that is a pain.
The beauty of MDF is that I can churn off any number of copies and glue them up in the comfort of my office on my portable mini-workbech... for freebies, that is the economy.
When I tell/show visitors of the work involved, they confirm I'm crazy,

JJ, I remember making a post about my increasing puzzle menagerie, I think I labelled it as "Rabbit...".
If your first cut is too short... Take the second cut from the longer end... LBD
You could almost write a puzzle book, Alex.
Thanks for the vote of "confidence" Dutchy, all be it a bit of a mystery... I've got about another 30 puzzles to post before I think about booking a book... which would be a simple case of combining all the solution PDFs into one whopper.
If your first cut is too short... Take the second cut from the longer end... LBD
LIttleBlackDuck
commented about 2 hours ago
Thanks for the vote of "confidence" Dutchy, all be it a bit of a mystery... I've got about another 30 puzzles to post before I think about booking a book... which would be a simple case of combining all the solution PDFs into one whopper.
Almost.


