Share your craft projects
Make new craft buddies
Ask craft questions
Blog your craft journey
awsum55
1038 posts
and
24 followers
in about 3 years
in about 3 years
More from awsum55
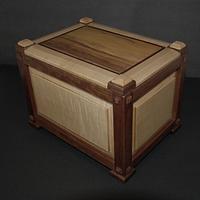
My Brother-In-Law's Urn
This is from 5 years ago brought over from another site.
I'd like to get all my projects I care about in one place. I find it very interesting to read my comments on the build. I've learned a lot since then and have forgotten a whole bunch of stuff I used to know. Can't win.🥴 I also realized how well my brain and hands used to function compared to now. Hard to get used to.
I lost my Brother-In-Law to cancer a couple of months ago just short of his 65th birthday. He was a good guy and I'll miss him. My sister asked me if I would airbrush a design on a metal urn if she were to buy one, because I had done some airbrushing art on one of his vehicles and he really liked it. I told her I would rather build his urn and she agreed.
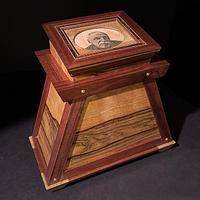
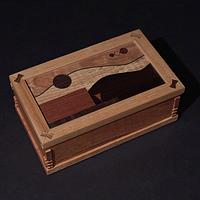
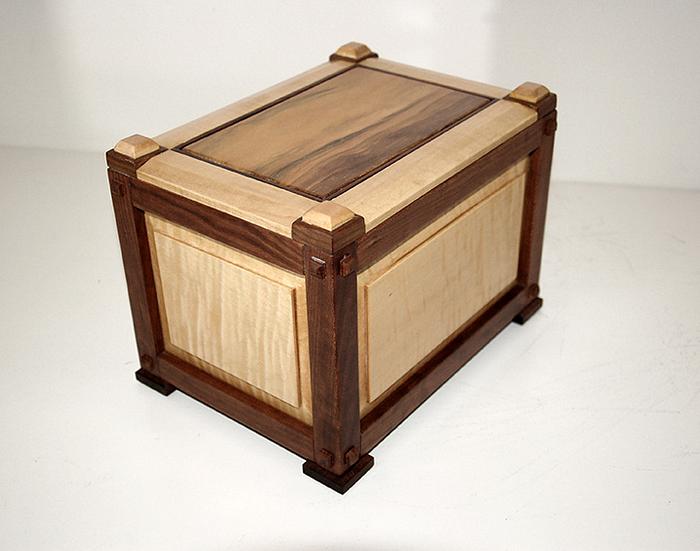
I used tiger maple and cherry for the urn. Once I told her the design I had in mind, she also asked if I could find a special piece of wood for the top. I started this build and was very aware of what I was building and there were days it took a toll. I thought this piece of wood looked like a beach with waves and a few clouds. It seemed very peaceful to me , so the selection was made and I chose the section I thought would represent that.

I learned a lot while I was doing this project. One of the things I learned is how fast regular 10% ammonia can age cherry. I read on line that cherry doesn't fume very well because it doesn't have an abundance of tannins. I tried it anyway and the results were fantastic. This is what it looked like after 4 or 5 days.

I was very particular when fitting the M&T's and there were so many parts that fit perfectly only in one spot, so I found it helpful to label each joint to remind me how it all goes together. Tape wasn't working for me so I pulled out my wood burning pen and labeled each piece with a design like used on playing cards. It was the only way I could keep everything organized so the fit and orientation of each piece was as perfect as I could make it. I also added a strip of foam in each groove to keep the panels from rattling.

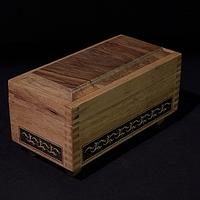
I used mortise and tenon joinery on the corners and I wanted it to look masculine if possible. I liked the proud tenon look, but I didn't like the way things looked when I dry fitted the piece with only one set of tenons poking through. I decided to miter the frames and use fake tenon plugs to get the look I wanted.

I started to glue the frame together and I realized I didn't like the way the joint looked, so I made another prototype to see if I was able to save what I had already glued up. I used a fine blade saw to cut into the joint and then some files to get the joint to look like it was slightly beveled before glue-up. I was pretty happy with the new look, so I went back and did the same thing to all the frame sections I had already glued up.

Knowing the tablesaw wouldn't be the right tool to make these plugs I first tried the bandsaw but it would shoot the plug off the table at the end of the cut. I have this tool from an old Christmas gift. It is a kit from X-Acto that included this little miter box. It was the perfect tool for cutting these plugs.

The bottom was probably not done the best way, but through this entire project I was worried about how this was assembled knowing it might have to last for a very long time. I have no experience with urns or cremation so it had me wondering how long this would be passed through generations. I used glue and screws to make sure it will stay together.

Keeping the grain pattern in tact, I wrapped the insert and was able to achieve a piston fit for the bottom.

I beveled and put leather on the feet, burned my logo w/date and waxed. The feel of the wood is the best finish I have ever achieved. I fumed the cherry, used Danish oil on everything, I sanded everything to 400 grit and then 0000 steel wool and then used Briwax.

This was the most stressful project I have ever done. Mostly because it was for my sister who I love very much, but also because my B-I-L would have done the same for me.
I'm sure there are better ways to do what I have done, so feel free to comment if you know of a better way of doing something. This project was different from anything I've done before and I'm so glad it is over so I can go back to making things that don't have such a profound meaning. Once I had it packaged and ready to go I felt such a weight had been lifted. I'm proud of my results, but I'm so glad it is finished.
.................. John D....................
11 Comments
wow what beautiful work showing real care as to the end of life ! this can be something of great pride and love my friend. thank you for bringing this here and sharimg with us once more your craft !
working with my hands is a joy,it gives me a sense of fulfillment,somthing so many seek and so few find.-SAM MALOOF.
Beautiful.
Nice tribute.
Nice tribute.
Petey
Very nice, a lot of love and respect.
Ron
This is beautiful. The care you took in each detail and the high level of craftsmanship creates a special outcome. Although difficult, you should be very pleased with the urn. Lovely memorial.
Very nicely done.
Ryan/// ~sigh~ I blew up another bowl. Moke told me "I made the inside bigger than the outside".
Beautiful work under the circumstances. Urns are emotionallty difficult. You did your BIL proud. Nice job...
First of all John, I'm sorry for your loss and hope your sister is okay or getting there. Your brother in law will be missed I'm sure.
Next....
The urn box is very well done. Nice design and elegant. I like the sort of Greene and Greene technique on the corners, the paneling, and the posts. We'll done! Befitting for someone who is truly missed.
Next....
The urn box is very well done. Nice design and elegant. I like the sort of Greene and Greene technique on the corners, the paneling, and the posts. We'll done! Befitting for someone who is truly missed.
Magnificant details and joynery
...woodicted
John, your attention to details is remarkable. What a beautiful piece to commemorate a special person.
L/W
L/W
“Those who would give up essential Liberty, to purchase a little temporary Safety, deserve neither Liberty nor Safety.” Benjamin Franklin
Very nice urn, John,. That is a very detailed build!!!
Cheers, Jim ........................ Variety is the spice of life...............Learn something new every day
Thanks Lefty, I had never made anything that important and I was concerned so I guess I was over careful.
Thank you Jim, I'm sure I made it a lot harder than it needed to be.
Thank you Jim, I'm sure I made it a lot harder than it needed to be.
.................. John D....................


