


Share your craft projects
Make new craft buddies
Ask craft questions
Blog your craft journey

kdc68
373 posts
and
22 followers
in over 12 years
in over 12 years
More from kdc68


Chatoyance


This jewelry box is a birthday present for my mother. I’m confident this will be a welcomed addition to her collection of lacquered boxes. I chose the name chatoyance for two reasons. One is for all the shimmer the grain displays, but mainly because this has been one of her favorite catchy words as of late.
The primary wood is Primavera, also known as white mahogany. I found it in the back of the bin at my local supplier. It was a piece of 4/4 S2S that had a significant twist and crook. I will assume that this is why it was buried behind everything else. I chose it because I could see all the ribbon and curl and figured I could flatten it with a little work. All the interlocking grain made me proficient using a card scrapper once I got it to a uniform thickness and flat. My first experience using Primavera and I will assume a less figured piece would be easy to work
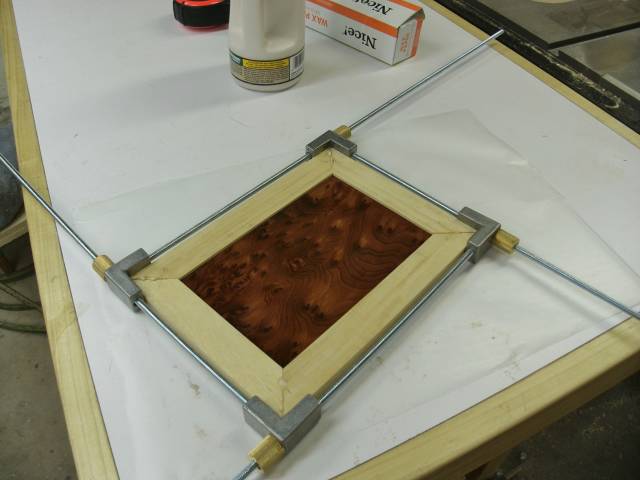
I used stop hinges for the lid. The lid stays open at 95 degrees without any assistance. The panel in the lid is Redwood Burl. It is veneer I had found stored away in a box of college text books from many years ago. I found several pieces of three species in good condition. They came from the IWF (International Woodworking Machinery & Furniture Supply Fair) held in Atlanta Georgia that I attended back in 1988. I grabbed these veneer pieces from a booth of Chester B. Stem Inc. whom had them as samples. I used 1/4” MDF as the substrate and the veneered panel is fitted in the mitered frame of the lid in a centered groove. I used coats of lacquer on the veneered panel as grain filler. Sanding back and recoating until satisfied, all prior to assembly. I posted a photo of the assembly below.
The keys (or splines) in the miters are made of Bloodwood. My first time using this wood because it is very expensive in my area and read it was difficult to work. The limited use in this project resolved those issues. I think they complement the Redwood Burl and contrast the Primavera very well.
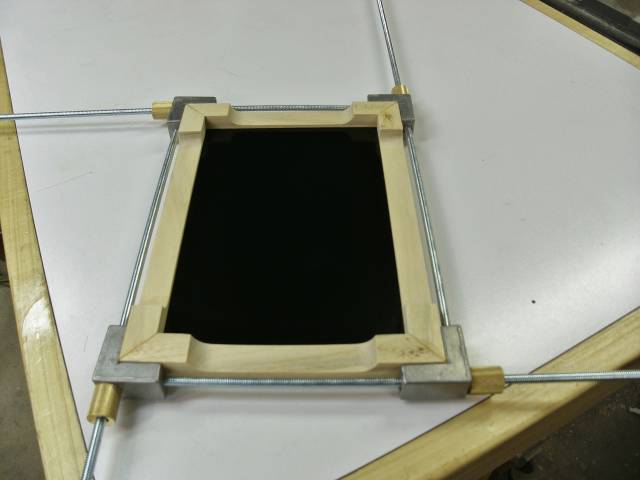
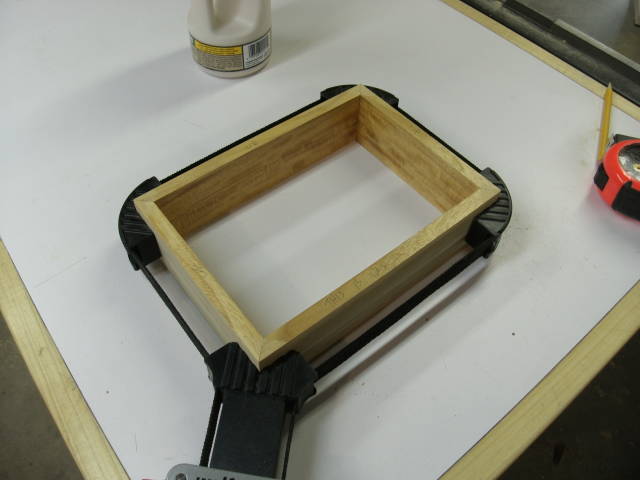
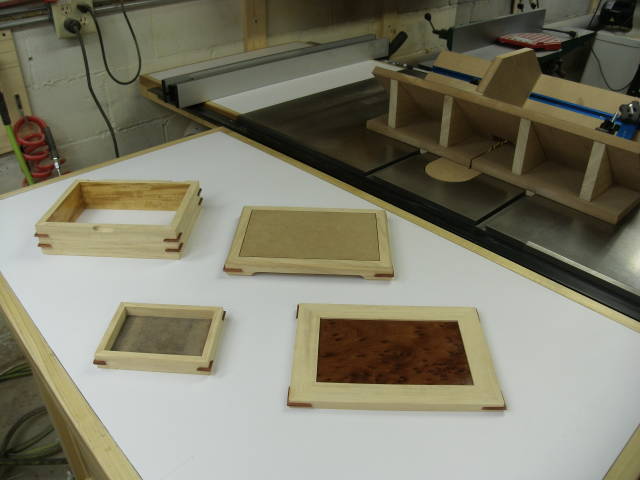
The base and small tray both have a MDF panel. I used 1/2” for the base and 1/4” for the small tray. I rabbeted the panels and fitted them into grooves as the joinery. The undersides of both the base and small tray panels were painted black and lacquered prior to assembly. The topside of the panels (which later would become the inside of the box and tray) were sealed with lacquer. Once the base was assembled, I then glued the base to the box assembly. I posted photos of the joinery and assembly of the box, base, and small tray below. At the very end of the construction and finishing, I lined the insides of both the box and small tray with black felt.
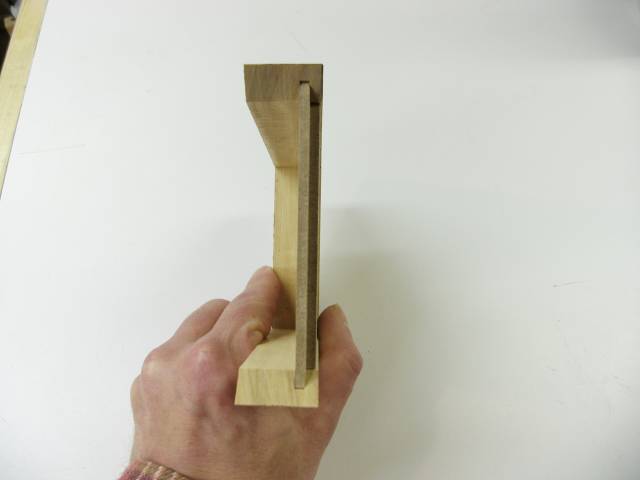
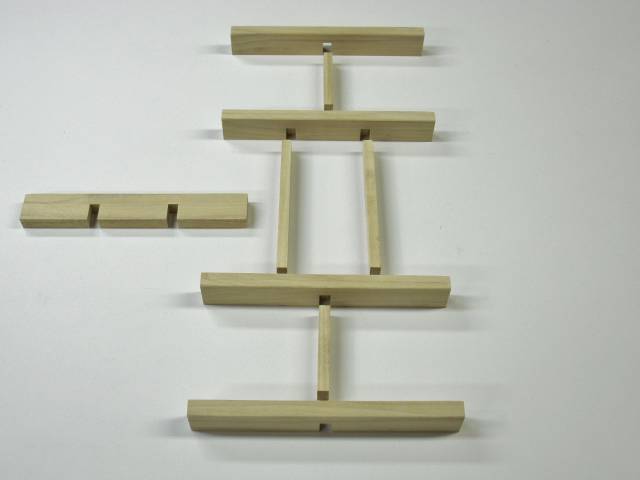
The divider is made from 3/8” x 1” and 1/4” x 5/8” pieces. I cut notches to except the smaller 1/4” members. Some of the notches in the 3/8” pieces go all the way through while some do not. For those that do not, I made these from 3/16” pieces with notches offset and cut through. I then face glued them together to get to that 3/8” thickness of the others. The two heights and thicknesses give this an interesting look. The divisions are intentional. When in the box, the tray can sit in the middle or to either side and be fully supported by the taller 3/8” x 1” pieces. A photo is below to better explain the assembly.
I did a little experimenting in regards to finishing the Primavera. Unfinished it was a cream color and the figure didn’t pop enough when I applied just lacquer by itself. I found the look I was going for with the help of a dye and distilled water mixture to pop the ribbon and curl, then the lacquer amplified it further. The dye was rather diluted as I didn’t want to add too much color. The intent was to enhance the ribbon and curl while adding a little color. For simplicity, I prefinished the inside of the box prior to assembly. Once all the assembly was done, I applied the dye mixture and four coats of gloss to the remainder of the box, lid, divider, and small tray.
The overall size:
3-3/4” H x 7-1/4” D x 10” L.
Materials used:
4/4 Primavera
4/4 Bloodwood
Redwood Burl veneer
1/4” and 1/2” MDF
1” Stop hinges, #2 × 1/4” screws (Craft Inc.)
Self-Adhesive Black Felt (Rocklers)
Gloss Lacquer (Behlens)
Flat Black Prime/Paint (Rust-Oleum 2X)
Measure "at least" twice and cut once
15 Comments
Nice box and wood

Looks really nice. Very clean work.
Abbas, Castro Valley, CA

Beautiful. You did an awesome job.
Jeff Vandenberg aka "Woodsconsin"

Very beautiful. The build story and photos are fantastic, thank you so much for sharing. You do great work!
CHRIS, Charlottetown PEI Canada. Anytime you can repurpose, reuse, or recycle, everyone wins!
Mike, lanwater, Jeff, and Thorreain…. thank you all for the compliments ! They are much appreciated !
Measure "at least" twice and cut once

Beautiful! Love the color/wood combination.
Keith "Shin" Schindler
Thanks Shin for the compliment !
Measure "at least" twice and cut once

Turned out real nice . lot of detail which most people don’t understand . They think you go out in your shop and nail some wood together and varnish it . But we all know there is a tremendous amount of work involved .
Wheaties

Sweet, love the contrasting timbers and wedged mitres !
wood wolf
Bruce….Absolutely right !….and thanks for the compliment !
Measure "at least" twice and cut once
William…. thanks for the compliment !
Measure "at least" twice and cut once

Very well done, really nice!
steve66
Thank you Steve !
Measure "at least" twice and cut once

Super build I like it big time
woodworking classes, custom furniture maker
Thank you Jim for the compliment !
Measure "at least" twice and cut once
More from kdc68