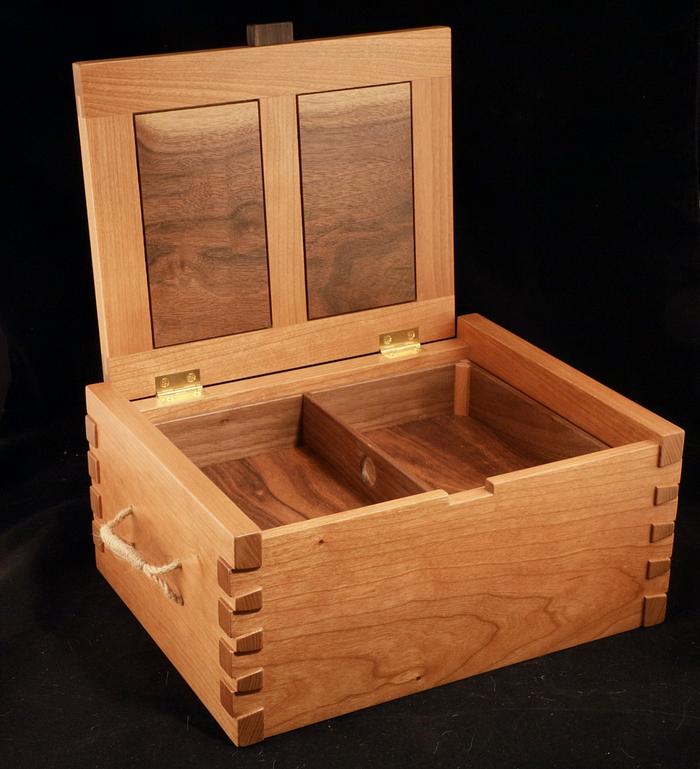
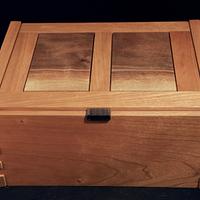
Was feeling a bit uninspired in creating "new" stuff so I pulled out a few WW magazines to see what might be fun to make. Had this jewelry chest bookmarked for a while now (FWW Oct. Nov. 2025). Michael Pekovich is one of my favorite editors as his stuff fits my likes and is relatively easy. The magazine has an exploded view with the basic dimensions so easy enough to follow, but having been burned in the past, I carefully verified the dimensions as there always seems to be a few that are off (and there were some!). Anyhoo, he also has a video on doing the handle wrapping which is something I wanted to try out.
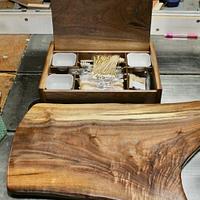
Primary wood is cherry, walnut panels from the same slab as my previous charcuterie board. Lid lift is ebony. About 11" x 8" x 5".
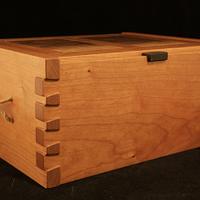
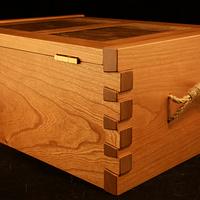
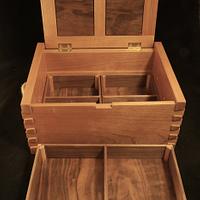
Lid and bottom are framw/panel with the bottom using just cherry. DTs were cut with my Leigh D4, first time using it for through DTs and much easier than previous uses for blind DT setups! It can be tweaked for "perfect" fits, but I opted to leave the pin boards (sides) a tad over and drum sanded the inside faces until the pins were just right. They also protrude about 1/16" which I like, but a lot more work with finishing!
The hinges are Brusso JB-103 with 95 degree stops. I stocked up many moons ago when they had bi-annual sales at 50% off. Paid about $19 back then, now they are ~$70! (ouch!).
I made a simple router jig for the hinge mortises. Just some miter bar on the table saw cuts with a FTG blade.
For the back panel I just DS taped it to the edge and used the router table with a short 3/8" mortise bit/bearing. Mortise corners were squared up with the template still attached. The lid used the template DS taped to the back. Fit was spot on.
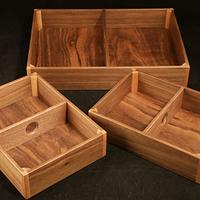
The interior has three trays. Michael's design called for string wrapped handles, but by this time I was just wanting to finish up so I went with simple lift holes. He also just had mitered corners which are fine, but I worry about the small joint surface and someone dropping the tray. I went with some cherry corner blocks for some contrast and "Beef" Bottom panels are 1/8" BB veneered with walnut.
Anyway, fun "simple" build so I tried to go for best fits of all the bits.
Everything was pre-finished so masking was also a PITA. Sealed with spray can shellac, then several coats of spray can satin lacquer.
Wow Splint! That is awesome....extremely well done. I love the design and of course the execution is flawless.....you continue to make the rest of us look likes shit!!!
love it my friend. really love how you left the dovetails proud, a nice look. the only thing i dont like is the handles, sorry but i think it cheapens the beauty of the chest. but it's still a 10 !
working with my hands is a joy,it gives me a sense of fulfillment,somthing so many seek and so few find.-SAM MALOOF.
I like to proud dovetails. I bet a lot of work to get that look.
I have the brusso routing templates (2 for several sizes) and dedicate a router that was set up to the JB hinges. I like your template is that double sided tape holding it? The templates are finicky to set up.
Those corner blocks look to be one piece? How the heck did you make those?!
Another beauty, Bruce. Your work is always so detailed and beautifully finished. I'm not sure I've ever seen corner blocks, very interesting. BTW, I agree with Mike.😠
Moke, who is this "us" you are berating so much? 🤠
Ron, I had to go back and look, you really did go crazy with making 4 of these! Nice work, glad to see you also did the rope handles. Even Mr. Pekovich comments on how other style handles clash with the "look" (ahem Pottz!)
Your simplifications like the flush DTs are what I'd do next time. Really would be nice to finish after assembly. You did the rope wind for the trays, that's where I figured too much work would happen so 👍 for your get up and go!
Thanks Petey! Yes, DS tape to hold the template. It was super easy, just had to remember to flip the template so the locations are exact top/bottom. It is the same width as the lid so alignment was simple. The corner blocks are one piece, tray sides are 3/16" thick. Looking back, I probably should have rotated the grain 90. They were simple, just used a board 1/2" thick, cut the 45 on the router table with a 45 bit after calculating the needed width of the bevel (came out to be 0.33"), then used my box joint blade to cut the tray side dados (3/16" deep, about 3/8" wide) on one edge and face, inset 1/4" for the corner doohicky. Rip off 1/2" from the edge of the board leaving a 1/2" sq. stick with the dados turned into rabbets. I have them running the full depth of the sides and the bottom panel is fit into a groove so when I cut the panel grooves in the tray sides, I also cut a groove in the corner block. This meant I had to cut 45's on the panel corners, but everything fit up and no grooves/gaps showing anywhere.
I like to proud dovetails. I bet a lot of work to get that look.
Thanks agin Petey!
I though of several ways, but it was easy by just making the DTs flush with the D4, then onto the drum sander to remove 1/16" from the outside surfaces of the sides after my mention of tweaking the pin boards by sanding the inside surface. I did what you suggested to avoid squeeze out, just a dab of epoxy on the inside surfaces on the pins. Pushing the parts together just forced any excess epoxy into the interior of the joint. Not enough excess to then squeeze out the sides, careful balance of too much to too little.
This is an awesome piece of work, Mr. Splinter. The details are superb, with the extensions out of each side they look exquisite to say the least. With the tails and pins gently rounded over on the corners this looks like an improvement over a 300 plus year old technique. I do believe you've started a new trend in woodworking. The corner blocks are also really nice, add strength and a nice appearance, as well as the cherry and walnut contrast. Nice and detailed write-up, makes a nice reading. Overall, I'd say this is a two thumbs up piece of craftsmanship.
Sweet box Bruce. This one absolutely scratches all of my itches. Nice work.
The corner blocks remind me of the table leg stabilizers you see in use so often. With them they lag them into place, yours are much more gently "adhered" save the slot anchoring the bottom. Haven't seem that done that I remember. Of course memory has been found to be dodgy this last year.
Love that populated interior, proud DTs, wood choices, truly is a winner adaptation of an already well done design.
As always fellows, thanks for the encouraging comments!
Petey, I do make a long stick then slice it to bits of the needed length plus a tiny fraction. They are slightly "proud" of the tray top, but get sanded down flush after assembly. At least with the long strip, they are all the same and I only need to feed against the fence to cut the panel slot, bandsaw the bit off, trim the stick end flat, then push up to the fence to cut another slot. Boring but efficient.