


Share your craft projects
Make new craft buddies
Ask craft questions
Blog your craft journey

Brian
2030 posts
and
31 followers
in over 12 years
in over 12 years
More from Brian


14 months to make a door (and still not done)
")
I’ve been slowly (extremely slowly) making doors to replace the junky hollow ones in my house. I’m about half done with that project, but this one door has taken a lot longer than any of the others for many reasons – mainly because its a pocket door and a there were a lot of home remodel construction items to sort out before it could be finished; but also because I’ve been supremely lazy about getting it done. I made and painted the door in Nov 2013. I hung the door not long after and its been sitting there waiting for glass for nearly a year.
This door is a pocket door. The swing replacement doors I’m making are 5 panel shaker doors. I designed this door with 4 panels because I thought it suited the lights better. Its very simple construction – the same as my other doors: very common douglas fir from the home despot, which is just fine as they’re all painted.
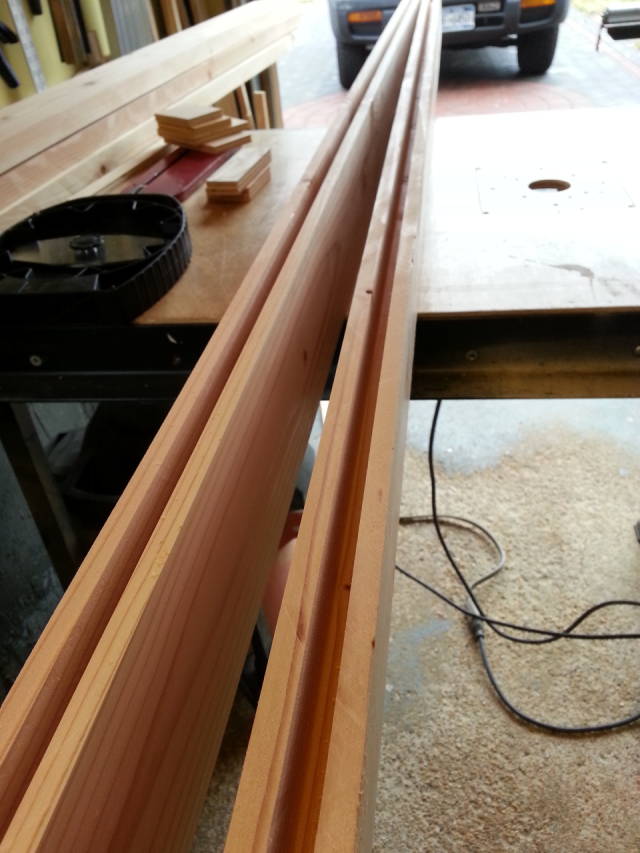
I start by choosing the straightest lumber I can find in the store. Then I plane it down to 1-3/8. Then I joint one edge using a sled I made for the table saw. Then I cut the rails to size with a 2" tenon on each side. Then, I switch to a dado blade with 1/2" width and hog out a 2" mortise on each stile and the 1/2" grooves on the rails to accept the panels. Then finally, I cut the tenons on the rails.
With the swing doors, the rails have a groove to accept 1/2" plywood panels. This door gets glass, so there is no groove, but rather a rabbet so that I can get the glass in after the door I assembled. The glass will be held in with strips that are about 1/2" deep that can be nailed in and removed in case the glass breaks later. Because there is a continuous mortise in the stiles, I filled in the gaps between rails with plywood so the glass couldn’t slip left or right. On my swing doors, I just cut the plywood panels to the same width as the rails so they just fit in and take up the whole space. That may seem a little wasteful compared to other methods, but it is very simple and easy to hog out a continuous mortise on the tablesaw vs cutting (in this case) 10 individual mortises.
Because the doors are made of knotty douglas fir construction lumber, I have to fill them before painting. For that I use plaster. I use the word plaster fairly interchangeably with joint compound, but on the doors, I fill the knots and imperfections with plaster of paris. It dries quickly (hardens, actually, not dries) and sands easily. Then I prime with Zinsser BIN. This is ESSENTIAL because of the knots. No other product that I"m aware of will cover knots and prevent them from darkening later like BIN. It is the best primer on God’s green Earth and its totally natural.
Here are a few pictures of the construction of the door.
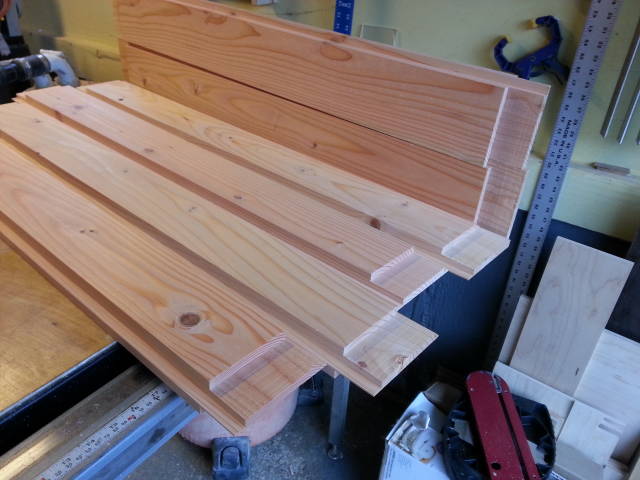
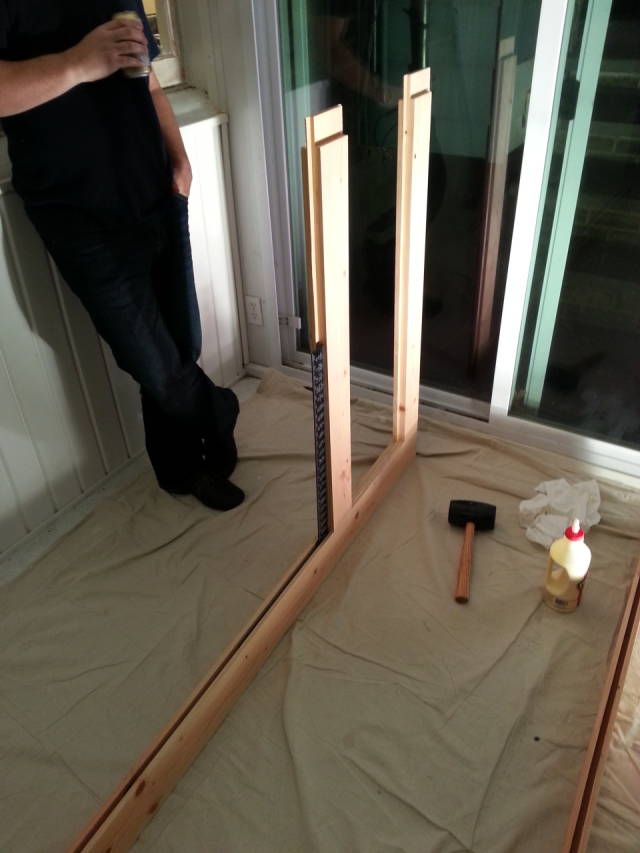
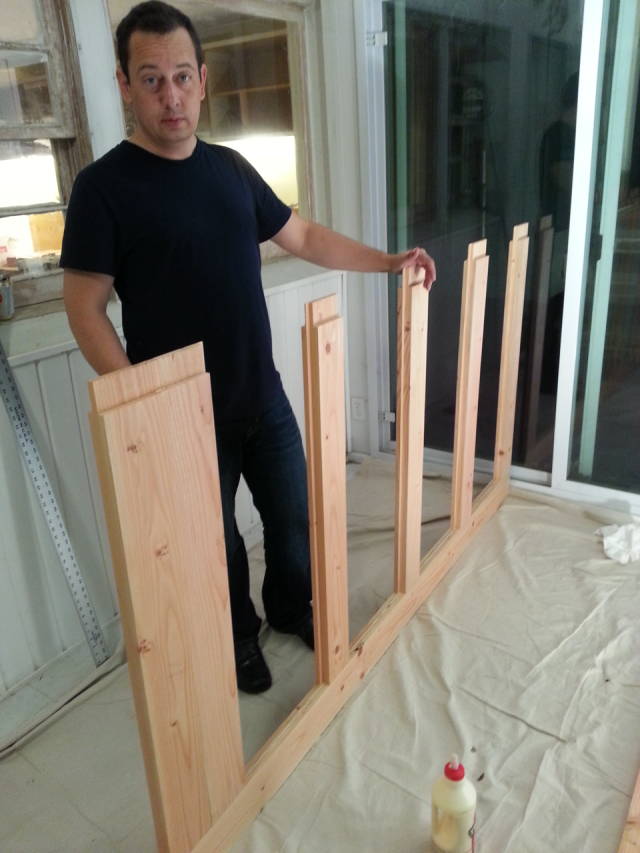
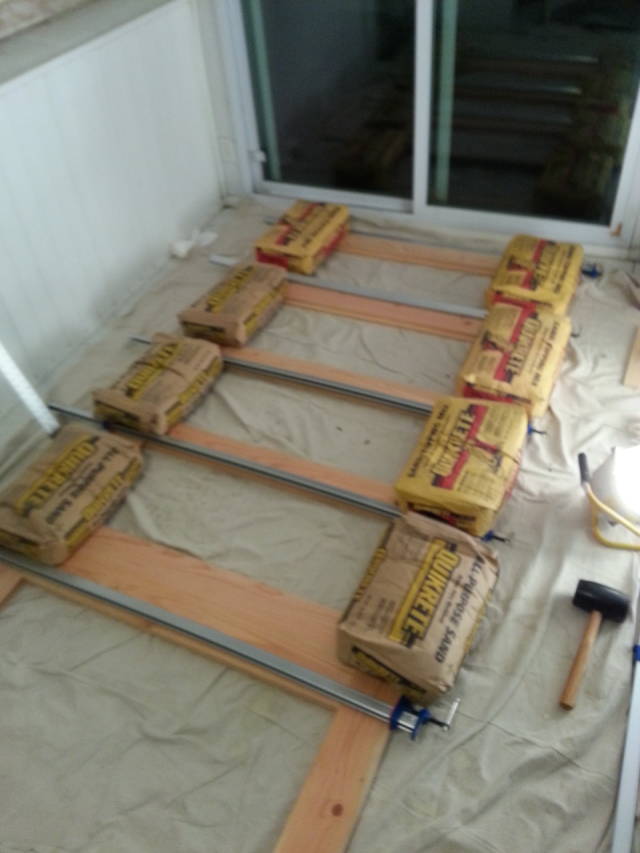
This door is very large. About 4′ × 7′. I needed my buddy to come help out. Usually I strap my doors down to my saw table using cauls after gluing up to keep them straight. This door was way too big for that so I found a fairly flat spot in my house and weighted it down with bags of concrete. It worked pretty well. There is an itsy bitsy warp, but not so bad that I can’t live with it. Its not really noticeable.
I live in a split level house. If anyone is from Long Island, you’ll know the layout just from that short description because there are thousands of them built around the same time in 1950s. Yep. Developer special! Anyway, you enter the house on grade and either walk up a few steps to the “main” level with the kitchen, dining and living rooms; or you turn right and go into the den (also on grade with the bedrooms on the floor above). I decided that I wanted the TV in the den with a door to keep the living room peaceful. I tore out the entry closet and completely reconfigured it for this sliding pocket door.
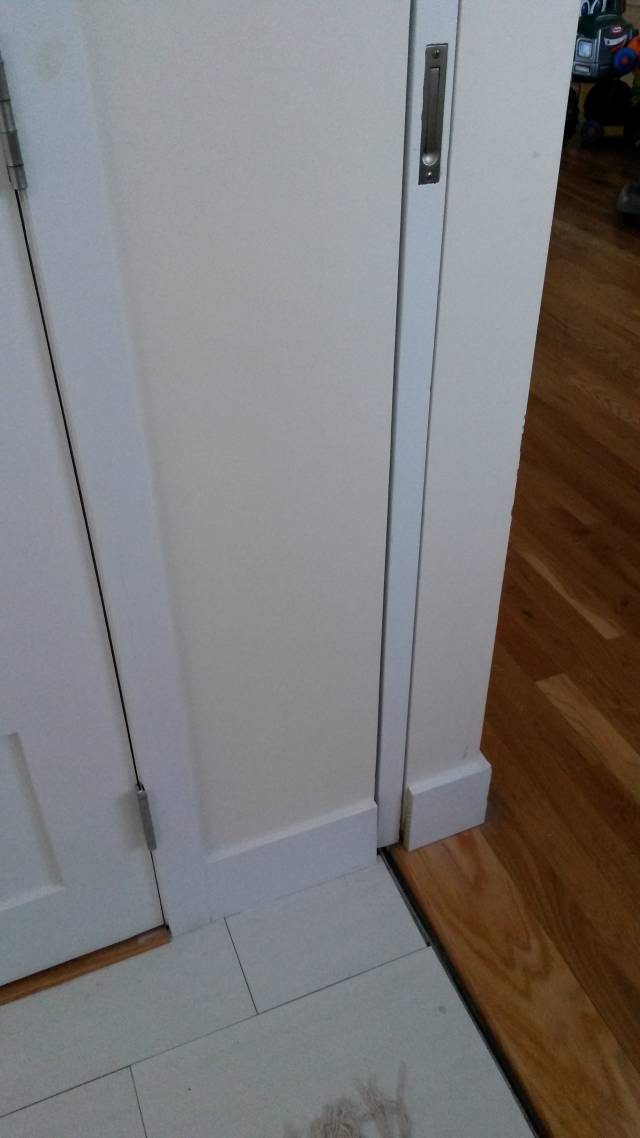
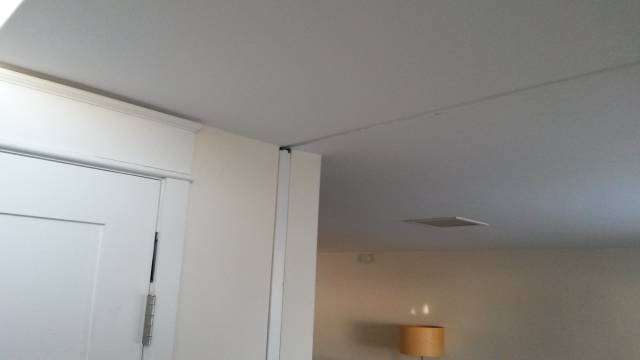
The den is only about 7’ ceiling height and the joists above run perpendicular to the direction I wanted the door. So traditional pocket door hardware was a non-starter. Instead, I embedded a steel angle in the floor when I laid the tile at the entranceway. I also cut out a strip of sheetrock in the ceiling and embedded an aluminum U shaped channel to act as a guide. I plastered around the aluminum and painted it white to completely conceal it in the ceiling. Both the ceiling guide and the track are barely noticeable thanks to the track being located at a transition between tile and wood floor.
The top of the door is cut to fit within the guide and there are 2 concave sheaves mortised into the bottom of the door that ride on the track. The whole contraption has very tight tolerances with little room for error. There is one massive error, though. The dang thing is not plumb. I did not discover that until I actually hung the door. I mis-measured something when I installed the guide or the track. You can’t see it when the door is in the pocket, but its noticeable when its closed up against the door stop that I haven’t made yet.
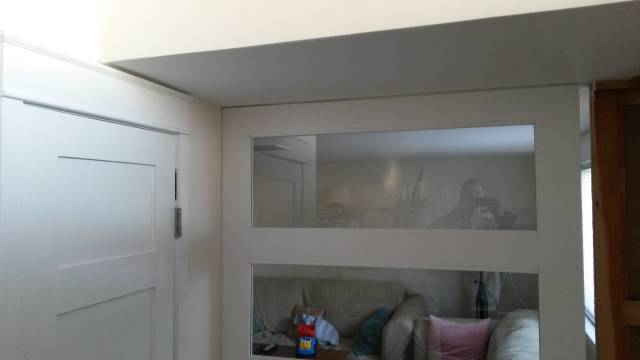
Here are some pictures of the door installed. I’m posting this project now because I finally got the glass installed. Woohoo! Boris the glazier came through in spades. He cut exactly to the dimensions I gave him. Its 1/4" tempered clear glass. This week I’m going to put a film on the glass to make it frosted. I’ve done that before at work and its held up very well, so I guess its good enough for my own home.
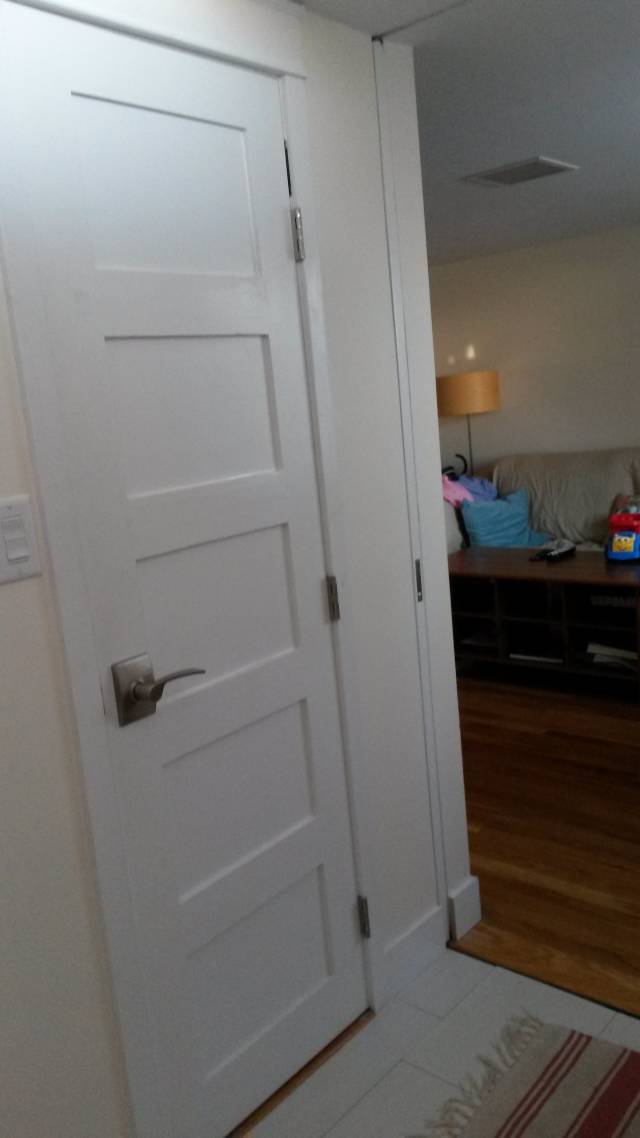
The door to the left of the pocket door is for the entry closet. I made that door, the frame, the oak saddle and all the trim. To finish off the pocket opening, I used a strip of plywood on each side of opening and plastered up and over it to make it appear as part of the wall. Very minimal and it worked well – no cracking after a full year of season changing. If I fix the plumb issue, this would have to be ripped out and redone – one reason I’ve decided to live with the door out of plumb.
The next project to finally finish off the entrance is to make the door stop, which will actually be part of a larger thing with a mirror and a place for keys, etc. I haven’t finished designing it yet. That’s on my to-do list. If nothing else, I should get it designed so that I can start working in my garage when it warms up (long cuts require the door to be open – brrrrrr). And of course, I’ll call back my friend, Boris, to make the mirror. :-)
Losing fingers since 1969
6 Comments

Very well done. Their is a great bunch tips in your explanations. Great pictures too. Thank you very much for sharing this with us. It’s great to see what people come up with for solutions, great informative teachings. Keep up your fantastic work. Sooner or later you will have the house done enough to spend more time in the shop just creating. Thanks Brian!
CHRIS, Charlottetown PEI Canada. Anytime you can repurpose, reuse, or recycle, everyone wins!

Very nicely done Brian. A really great addition to your house and giving it a real quality appearance. Great work description too. How long it takes isn’t so important if you will be living there a long time and well worth the time and effort.
Mike, an American living in Norway
Awesome job!!
Thanks for the kind comments. By the way, I have a couple of observations after making a few of these doors. First, I haven’t had a single one rack. I think the 2″ × 3″ tenons have a lot to do with that. Also because the doors are 1-3/8 and not particularly wide. The widest ones are only 30". Also, when you start one, you must finish it straight through to priming at least. I cut pieces for one and left it for a few weeks before trying assemble. Big mistake. I was able to save the rails but the stiles has to be remade. Also, the last pair of doors I made say in the shop unfinished for a few months. They racked a little. I haven’t installed them yet so I’m not sure whether they’re firewood or not. By looking at them, they’re iffy a at best. Well, I guess that serves me right for being lazy and bored and moving on to other things before finishing the first.
Losing fingers since 1969

good job , it looks great .
Wheaties

Good build nice work.
woodworking classes, custom furniture maker
More from Brian