


Share your craft projects
Make new craft buddies
Ask craft questions
Blog your craft journey
Kelly
1012 posts
and
19 followers
in over 12 years
in over 12 years
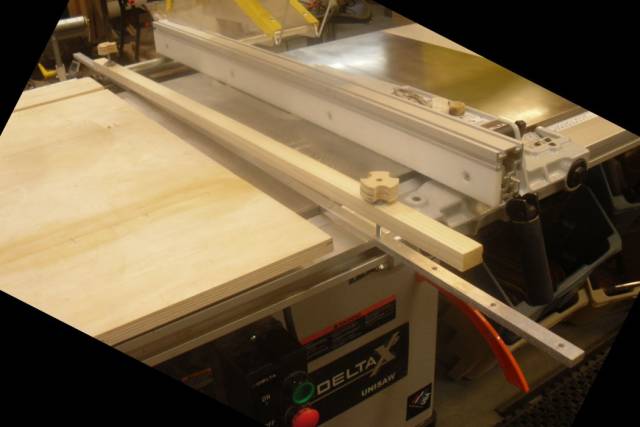
TABLE SAW LONG PIECE CUTTING JIG
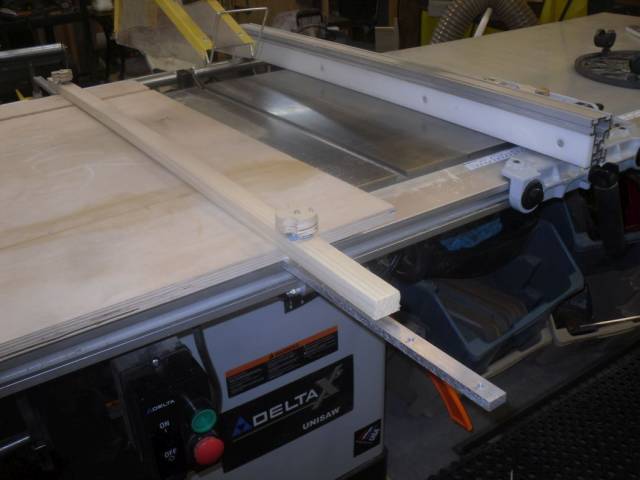
I have a Unisaw with a 52" fence. Needless to say, cutting a forty-five on 3/4" stock longer than its capabilities is a challenge.
I could run against a sacrificial fence, but that requires me to rely on the cut portion, in back of the blade, to keep the cut straight. Experience will, more likely than not, shift and give a less than perfect cut.
I was working a piece of flat stock 36" wide by 60" long. I had to put 45’s on the 36" ends.
I could have built a sled, but it would have been huge. Instead, I made an absurdly simple jig, which relies on the miter slot and the piece being cut to perform the task.
[CONSTRUCTING THE JIG]
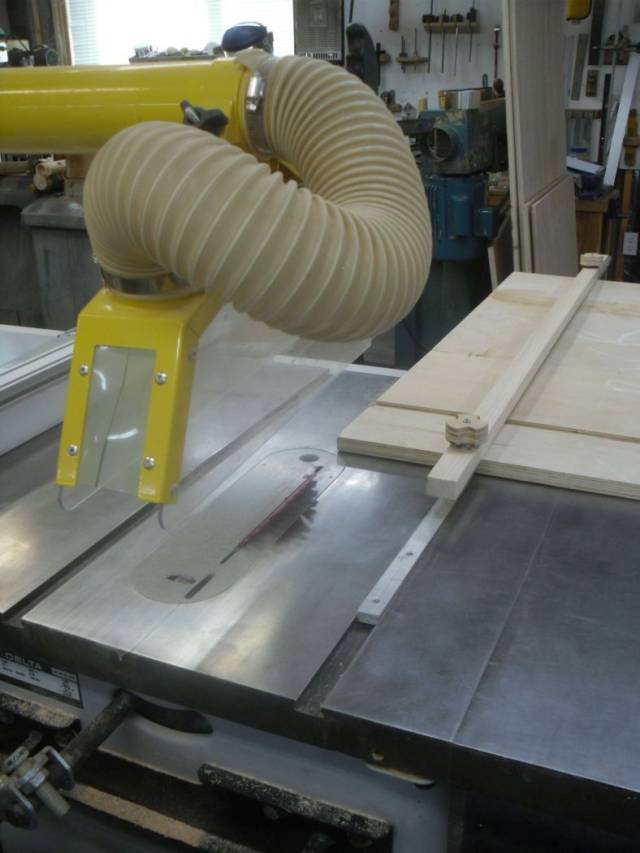
The jig can be constructed from wood, aluminum, iron or a combination of any of those things. At the least, a hard wood should be used for the rail that follows the miter track.
I keep 3/8" aluminum flat stock on hand and cut it into rails for jigs that rely on the miter slots of my band saw, table saw, or sanders. Since cutting aluminum on a table saw is not the most fun I’ve had, I try to cut extras, when cutting a rail. As such, I had one 3/8″×3/4″×48″ rail already cut, so I used it for the guide rail, which will ride the table saw miter slot. For the top, I just used a strip of poplar I had in my odds-and-ends collection.
I drilled holes about three inches apart and just big enough to allow me to thread them to take 1/4 × 20 screws. I didn’t bother with the six or so inches to the left and right of center, since cuts that small could be done on my miter, and narrow pieces would be better done on a sled.
Once the holes were threaded, I counter sunk the side that will ride on the miter track. This allowed me to run 1/4 × 20 flat head screw flush with the bottom of the jig, to avoid having the screws hang up going in the miter slot, or holding the material up, off of the table.
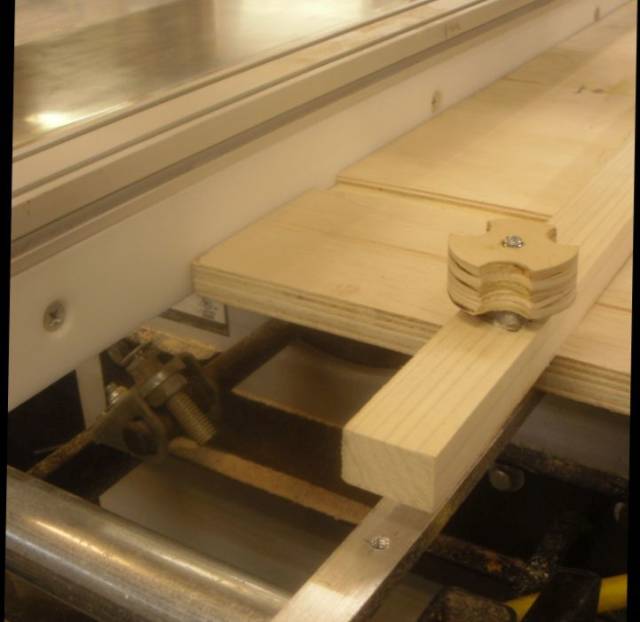
I used a piece of poplar for the top. I cut it to the same length as the aluminum bar, but left it at about 1-1/2" wide and 1" thick, since its dimensions were not as critical as the guide bar.
I drilled holes in the poplar that matched the holes in the aluminum stock. This allows it to drop down over the screws mounted in the guide bar.
The different holes allow me to move the screws closer together or farther apart to accommodate different wood dimensions. For example, my project required me to use two holes about forty inches apart, to hold a pieces of plywood five feet long and three feet wide.
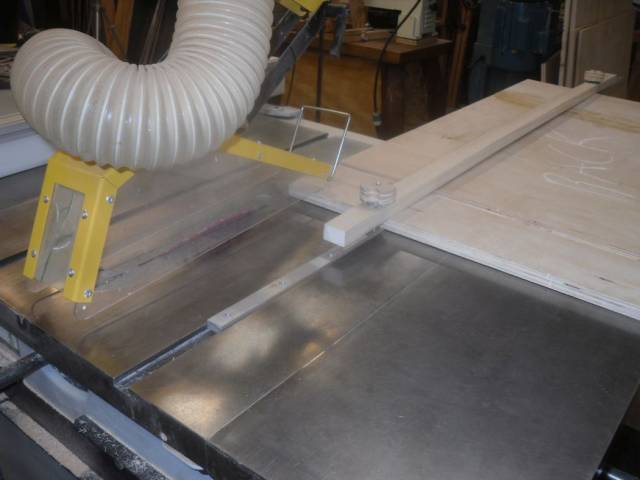
I used 3" long 1/4″ × 20 (threads per inch [TPI]) flat head screws, mounted from the underside of the bottom rail (previously countersunk). With the screws in position for the piece I was cutting, I installed the top piece and two locking knobs.
When positioning my jig guide rails, I like to leave a little bit of the rail sticking out the front of my jigs, so they start tracking the miter slot before the wood contacts the blade.
[JIG SET UP and USE]
This set up is for cutting forty-five degree cuts on the end of an already squared piece of stock. The jig can also be used for cutting pieces not already cut to size. In those situations you would adjust the position of your fence away from the blade according to need.
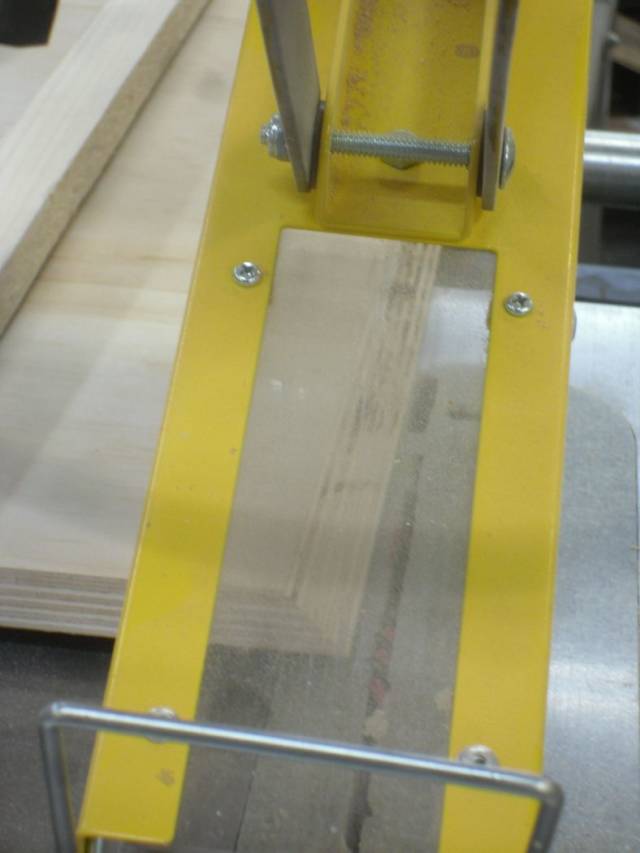
When in use, the jig clamps to the piece being cut and forces it to follow the path of the miter track. How closely it follows depends on how tightly your guide bar rides in the track.
To set the jig up for the cut:
1) Set the blade to forty-five degrees;
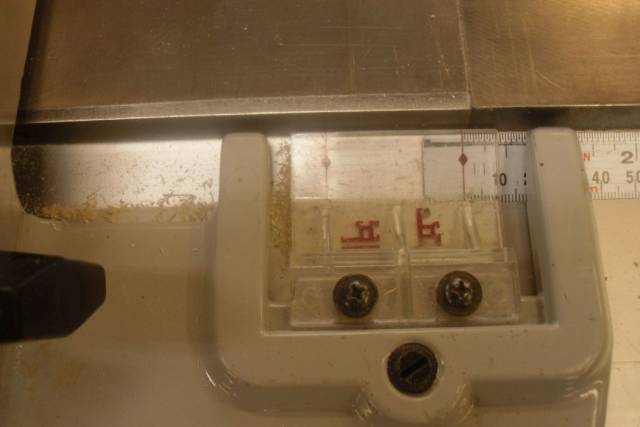
2) Set the fence to zero (so the blade is just touching the fence);
3) Drop the blade below the table;
4) Drop the jig in the miter slot;
5) Slide the stock into the jig and, with it pressed against the fence, lock it in the jig;
6) Move the fence well back from the blade. Regardless of the cut, the fence is only used for setup;
7) Slide the stock back from the blade;
8) Raise the blade;
9) Turn the table saw on;
10) Run the stock using the miter guide and rail to guide it.
6 Replies

Kelly,
I really like this idea. I had an awful time mitering the bedposts for my platform bed. Thanks for sharing your solution.
L/W
“Those who would give up essential Liberty, to purchase a little temporary Safety, deserve neither Liberty nor Safety.” Benjamin Franklin

Looks like a good jig.
woodworking classes, custom furniture maker

This is a great idea. I have a right tilt blade and one of my gripes is cutting mitres on parallel sides. The first cut is fine, but when I turn it around to cut the other side the first mitre – now against the fence – has a tendency to slide under the fence resulting in an uneven cut.
Now that you have me thinking about it, maybe an even simpler solution (for pieces that will for on the table – not like your problem where it doesn’t fit on the table) is to tack a piece of scrap underneath so the first mitre rides higher on the fence and has no chance of slipping underneath. Thanks for pushing me to use my head. :-) And I’ll definitely keep your jig in mind if I have to cut a piece larger than the fence can handle.
Losing fingers since 1969
I used to have a right tilt and had the same problem you do, Brian. In a pinch, having a nice piece of ninety degree flashing solved the problem.
The thin material only put the fence off a little under 1/16th, which I compensated for on the set up.
If applicable, it’s not a bad idea to hang a tag or something on the set up end of the fence to remind you of the 1/16th off, especially if you reset your gauge to compensate for it.
To keep the piece from sliding with the wood, cut the piece longer than the fence and glue a block on the bottom of each end.

Smart idea.
—Madts.
Tor and Odin are the greatest of gods.

good thinking
Wheaties