


Share your craft projects
Make new craft buddies
Ask craft questions
Blog your craft journey

Thorreain
1908 posts
and
47 followers
in almost 12 years
in almost 12 years
Cross Cut Sled #2: Carcass assembly
This is
part 2
in a
2 part
series:
Cross Cut Sled
-
Cut and stock
-
Carcass assembly
- Cut and stock
- Carcass assembly
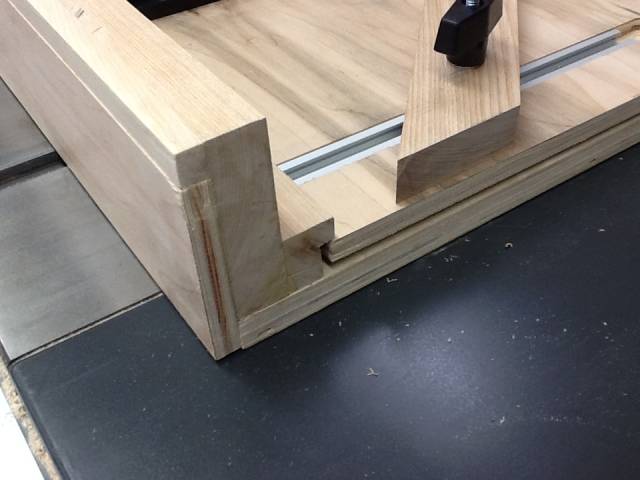
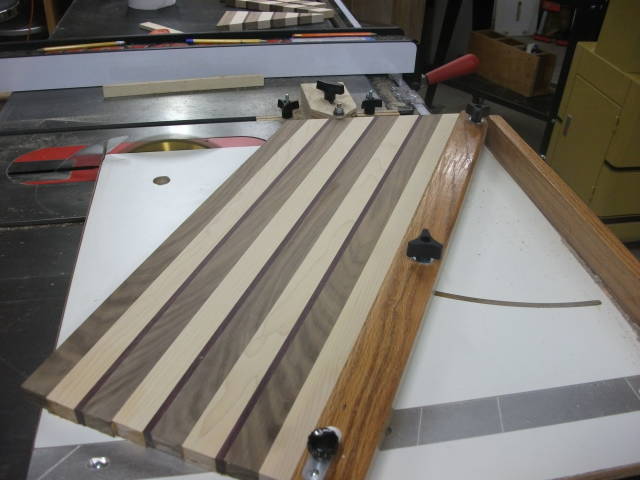
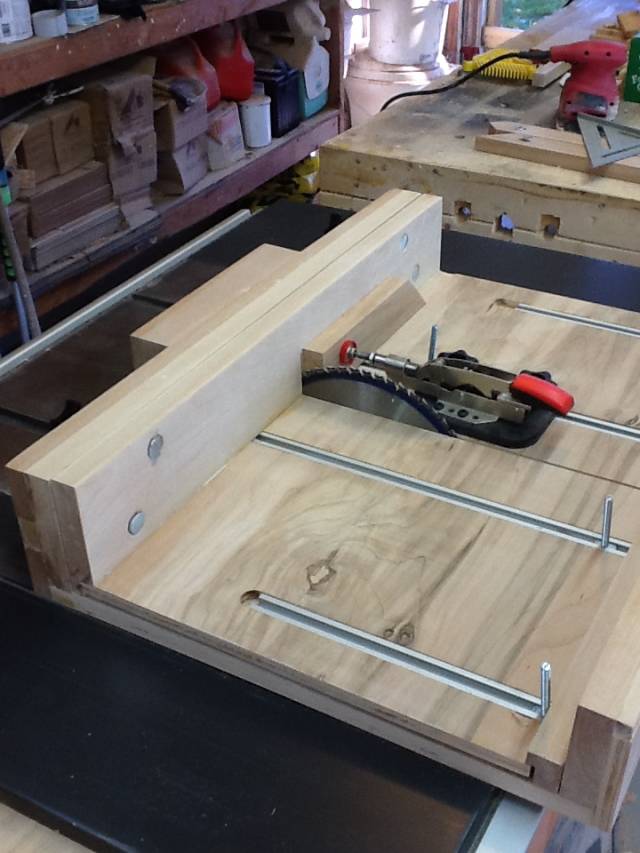
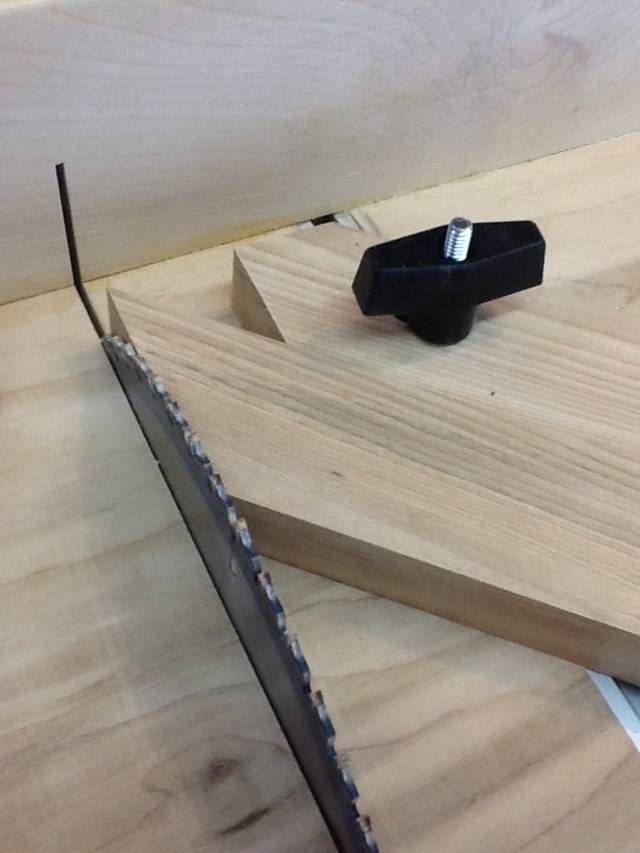
With returning to town from the summer camping experience the wifey is asking me to get at the coffees (2), table build. I have had the birch racked and stored over the summer but a final bit of mill work left to do. Also, I want to complete the cross cut sled before starting. I started with the 3/4" sub base and runners last spring and ordered hardware to have all my supplies on hand before the rest of the build. To begin with the false bottom and false fence were glued up staggering boards to maintain a rock solid perfectly square and straight foundation to begin with. The front side that would contain the secondary bottom was next. It included a dado that the bottom would move under to allow for making adjustments of the base/fence to achieve perfectly accurate 90deg cuts. Next was to cut a piece for the floating base attached to the floating fence via a dado rabbet cut. With all the carcasses cuts made I glued up all the various pieces. Next was to drill holes in the moving fence to allow for adjusting hardware to be used. In between the false fence and the adjustable fence were springs and washers that allowed the new fence to move in any direction under control and be locked into position. I cut a rabbet into it to allow the moveable bottom to be attached later. The false bottom has been cut 1/4" less longer than the inside dimensions of the bottom that allows it to be rotated for a precise perpendicular cut. Next was to cut it to allow for the tracks, they hold the 45deg guides in place, as well as the work holding track clamp.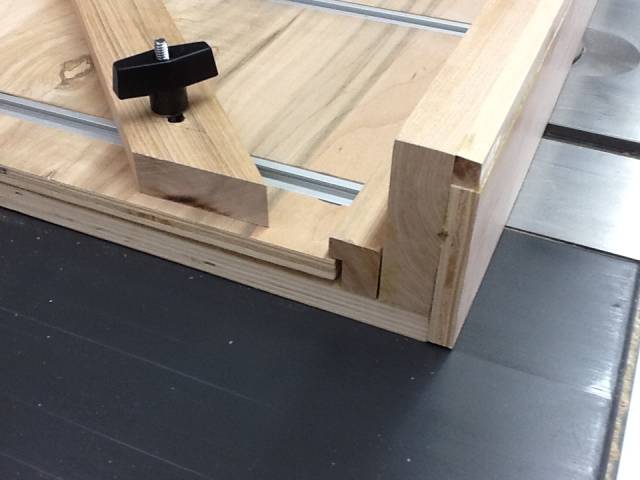
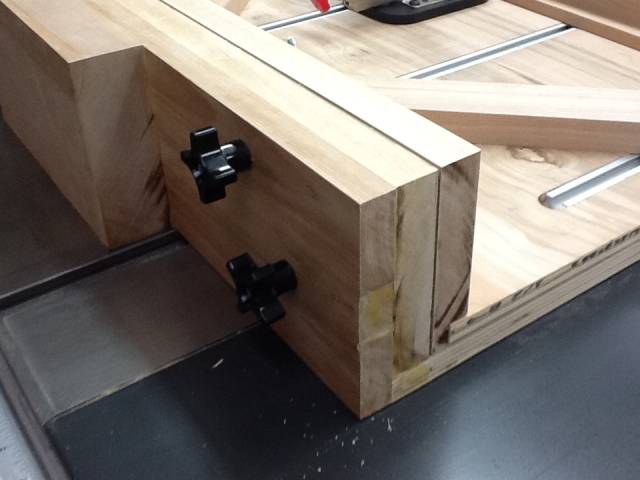
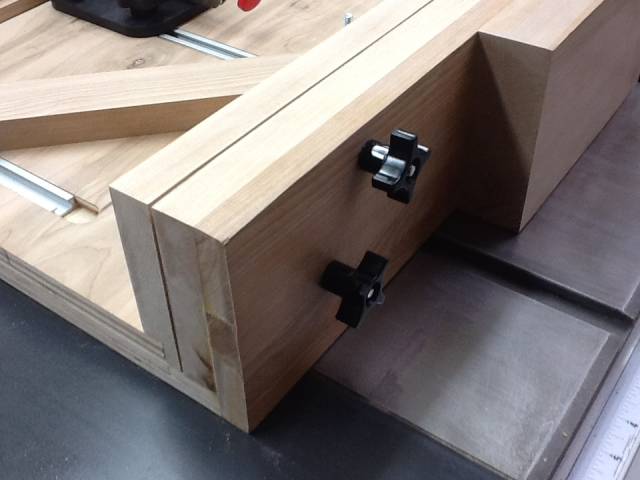
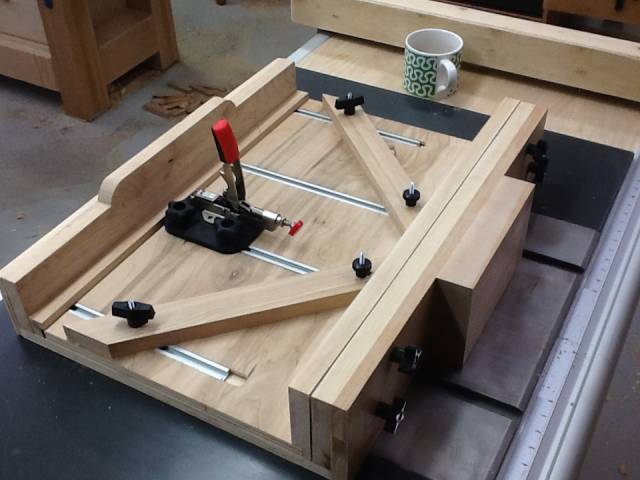
The two pieces of the movable bottom/Fence have yet to be glued together. It still needs a complete sanding and finishing as well as some lexan safety cover over the cut line. It slides with next to no effort. The bottom is treated with just lemon oil. As usual any questions, fire away and I will try to answer as best I can. Thanks for looking in.
CHRIS, Charlottetown PEI Canada. Anytime you can repurpose, reuse, or recycle, everyone wins!
13 Comments

nice
jim

That’s a nice build. I don’t even have room to store one like that.
I always wondered with these sleds that have moveable fences, how do you lock it into the angle you want? For example, is there something preset to give you a 45° angle, and do you have to fiddle with it every time you use it to get it precise?
Losing fingers since 1969

Great build Chris.
That’s a heavy duty one.
It will save you a lot of headaches with some the cuts.
Brian: My old sled has pre-marked angles on an aluminum bar. It worked great. The one Chris is making is much safer and more precise as the lumber is supported on both side
Abbas, Castro Valley, CA
Ah.. The reason I asked is because I made a dedicated 45° sled and messed with it for hours until I was happy with the results. 2 sleds, actually. The first one cut a perfect angle (the 2 fences were 90° from each other), but neither were 45° exactly from the blade, which I didn’t discover until I made a picture frame. LOL I scrapped it and started over. So I invested a lot of time getting it right and I just can’t imagine it could work as well with a fence that’s moveable without a lot of fiddling. But then again,I may just be neurotic.
Losing fingers since 1969
To set mine I gust drop the raised side of my 45deg square into the cut line of the base then move the fence in and lock it down.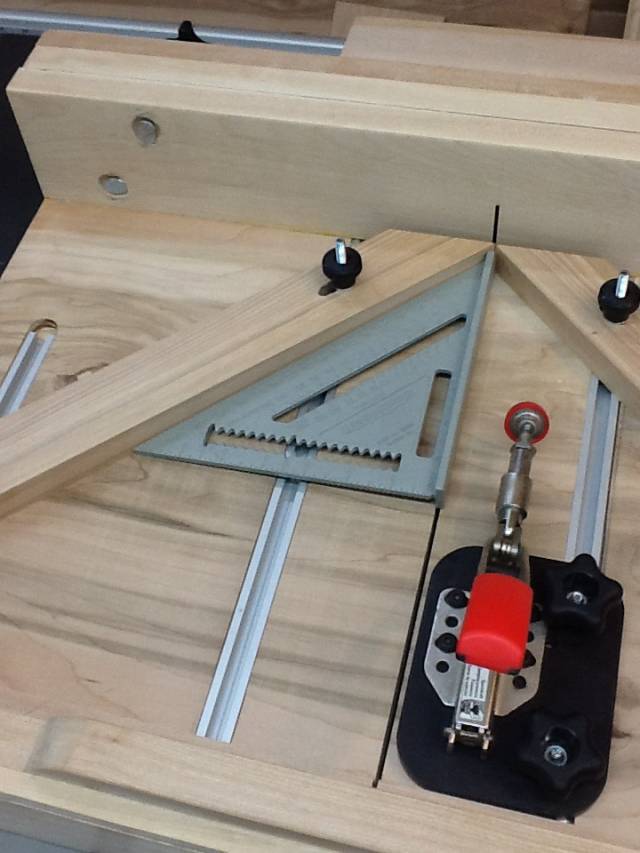
I still have some finishing cuts to make on the angled fence pieces before finishing. As yet I also have to attach a piece of lexan to give it safety.
CHRIS, Charlottetown PEI Canada. Anytime you can repurpose, reuse, or recycle, everyone wins!
FYI, I did not get plans for this from anywhere. I borrowed a couple of ideas but mostly it’s my own design. Any suggestions are welcome.
CHRIS, Charlottetown PEI Canada. Anytime you can repurpose, reuse, or recycle, everyone wins!

Well created and will definitively provide an awesome experience.
Jamesw

This turned out GGGGrrreeaat .Fantastic sled where even the bells and whistles have bells and whistles . super job Chris.
woodworking classes, custom furniture maker
Thanks Jim that means a lot. Thanks for all the positive comments all, I have been away from the shop most of the summer and it’s great to get back into the shop and online. I have found another couple of pics from assembly of the springs in the fences. Enjoy!

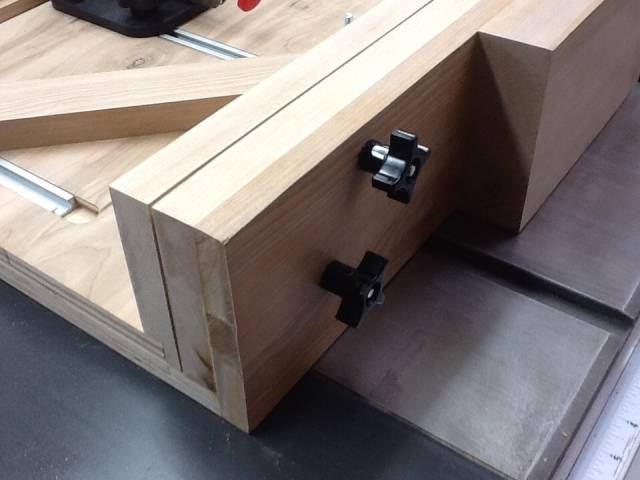
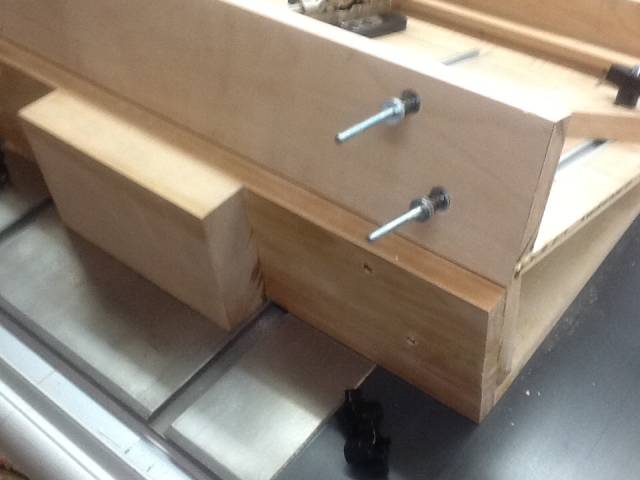
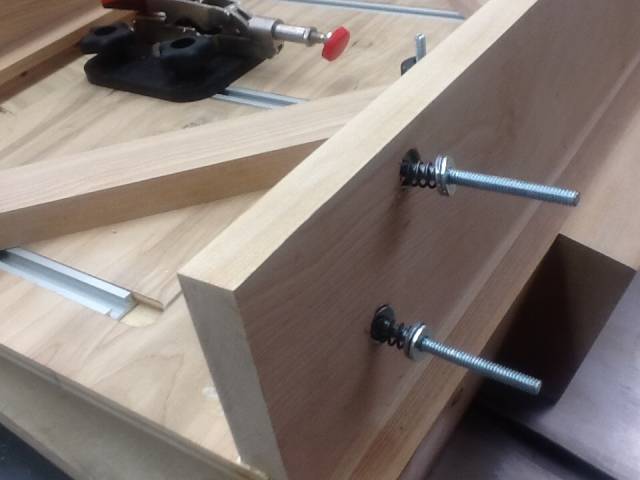
CHRIS, Charlottetown PEI Canada. Anytime you can repurpose, reuse, or recycle, everyone wins!
Here’s a few of how it cuts

CHRIS, Charlottetown PEI Canada. Anytime you can repurpose, reuse, or recycle, everyone wins!

Wow!! Those are impressive!!!
Keith "Shin" Schindler
Nice photos. Shows how it really works, very nice.
Jamesw

Nice and clean, like this a lot, my big saw has no dovetail slide but has a sliding table, wondering if anybody has come up with a solution for this type, at the moment I set and clamp every piece, very time consuming.
wood wolf