


Share your craft projects
Make new craft buddies
Ask craft questions
Blog your craft journey
Blog Series
A Pair of Side Tables

Part 5: Last of the pieces separated from the tree
[IMG_9010.jpeg]
With the legs mortised for the bottom cross brace, the top cross brace needs to be dealt with.
Doing the ol' dovetail half lap bo...
Part 6: Finished the framework!
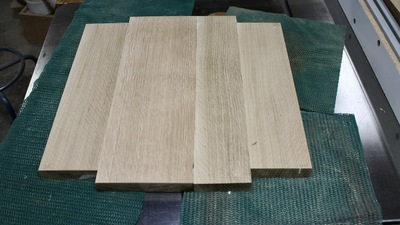
Finally. Got the wood prep all done 🤠
Table tops came out of the clamps aok, no drama or glue blobs to deal with thanks to the extensive taping.
[...

Part 7: The Fumigator
Ok. Here is the primary reason I'm building these side tables.
Plans were to keep the tables stupid-simple to avoid any drama. I violated my goal ...
A collection of Clamps.
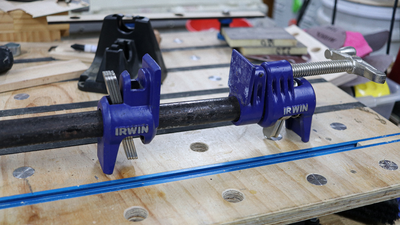
Part 26: Pipe Clamps.
[IMG_1081.png]
Boy and Girls,
[Woo-Hoo.png]
… finally got to them.
While many love them and swear by them, some like me swear at them an...
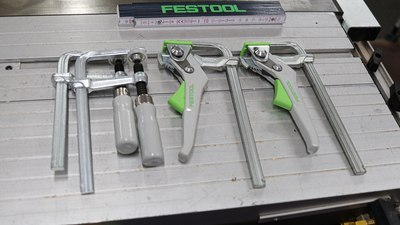
Part 27: Dovetail Clamps.
[IMG_0720.png]
Boy and Girls,
I primarily use these type of clamps with my tracksaw, however, before yazall mutiny and accuse me of Fe$too...

Part 28: Stanley quick Clamp/Vise.
[Untitled-1.png]
Boy and Girls,
I’m quickly running out of clamps (that I own), however, while many may refer to this as a vise, I often ...
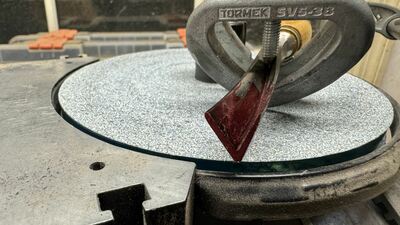
How I Sharpen
Part 3: Carving V Tool - Part 1
V Tools are a special case so I've decided to divide this entry into two parts. In this part I'll review the tool geometry and the goals I have fo...
Part 4: V Tool - Part 2
I intended to do this all in one entry but I ran into a bit of a dilemma. The tool I'm working with is an Ashley Iles 60 degree, 1/2" inch tool wi...
Part 5: A Hook Knife for Spoon Carving
This one isn't exactly on sharpening but it does have to do with using abrasives on a tool blade so I thought I'd throw it in here. This is a copy...
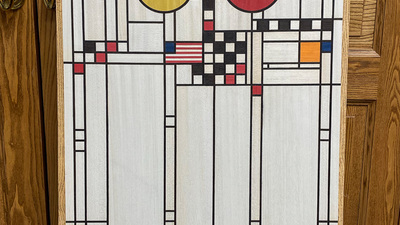
Parquetry in a Stained Glass Pattern
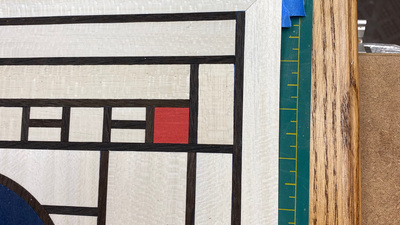
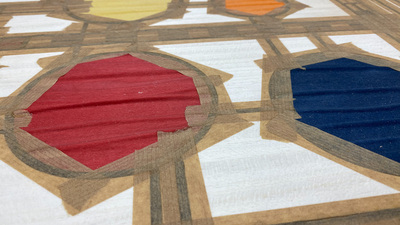
Part 10: Hot off the Press
After 4.5 hrs in the press, this is what greeted me when I pulled-out the panel. At first I thought the ripples were the result of too much glue, ...
Sliding Modular Display Shelf
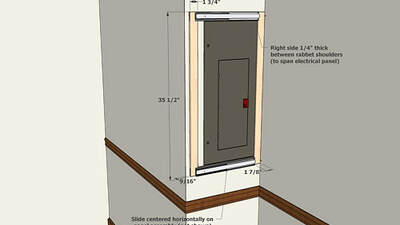
Part 7: Building the Mounting Bracket and Attaching the Drawer Slides
[03.05 Design - Mounting Bracket.jpg]
Theoretically, I could mount the drawer slides directly to the wall above and below the breaker box and attac...
Part 8: Adding a Stiffening Brace
When I “finished” the project two months ago, I noticed that the panel face was very slightly concave. Here, I’ve placed a 36” long straight edge ...
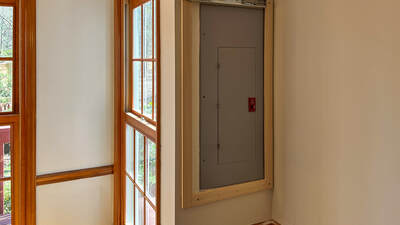
Part 9: Installation
I installed the shelf in my daughter’s house last week. I knew I had measured, and re-measured the wall and electrical panel the last time I was t...
Military Retirement Shadowbox

Part 5: Making Progress
When I left off, I had the case members cut, box joints cut and the case dry fit. Next up was the plywood back. I cut it the first piece to lengt...
Part 6: Running Down to the Wire... As Usual
Seems like no matter when I start a project it never gets done before it has to... Progress has been slow the past couple weeks. One weekend we h...
Part 7: Final Stages
I got the bulk of the work finished up this weekend. I started with a dry fit of the case and then used it to cut the door members to length. The...
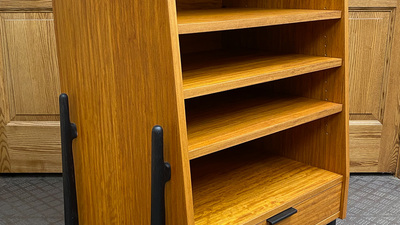
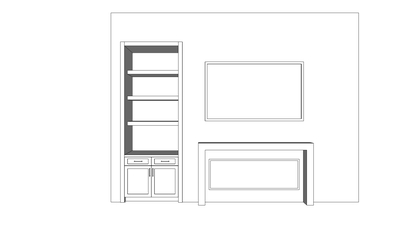
Media Cabinet
Part 16: Odds and Ends
Here are some progress photos on some miscellaneous bits.
I did do a test with edge-to-edge magnets. They did pretty well self-aligning, and they...
Part 17: Drawer Pull
For the drawer pull, I decided on a simple edge-mounted design. I wanted it to be black to match the legs, and to avoid another round of ebonizing...
Spinnekop
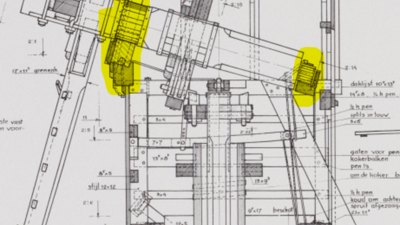
Part 30: Kap (part 2)
For the head of the mill i will make the beams that support th mail axel.
[image.png]
The surface on the "windpeluw" is on a angle to allow the til...
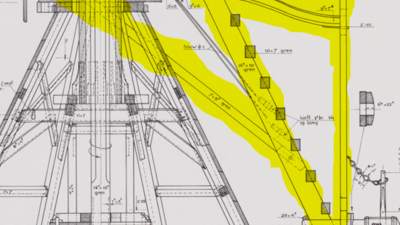
Part 31: Staart, trap en spruiten
[image.png]
To turn the head of the mill into the wind the windmill has a "tail"
It is strengthen this construction there are braces to transfer th...
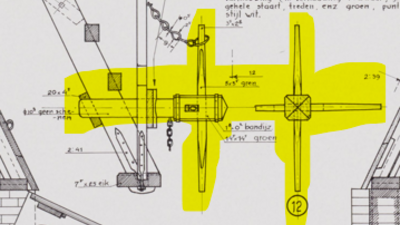
Part 32: Kruihaspel
To turn the windmill there is a little winder at the tail of the mill.
In this short blog entry i will be making this.
[image.png]
To bevel the fro...
Typical Stuff In The Shop
Part 14: Making trim for some doors
I have 4 doors and 4 drawer fronts that have a recessed panel with trim molding on the inside of the stile and rails.
I don't know what the name of...
Part 15: Big Cabinets
I'm only helping a buddy out on this one. It's his job.
Like the title says, these are 2 big cabinets that are going to be built in 1 piece. Ju...
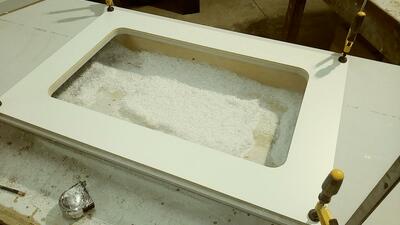
Part 16: Solid Surface Top
Not a whole lot on this one.
I'm building a small melamine kitchen for my sales rep at the lumber store.
Along with the cabinets I'm going to mak...
Hints and tips that some may not have heard of.
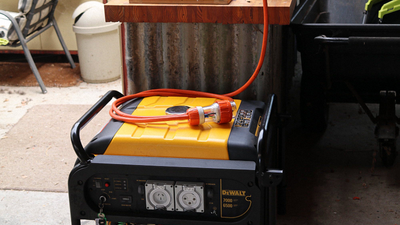
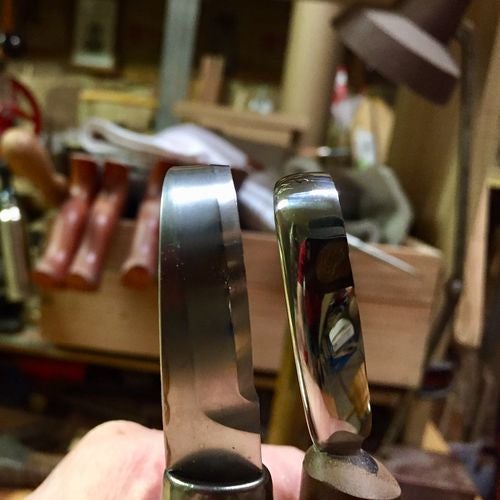
Part 45: I See the Light
Boys and Girls,
Downtown Churchill happens to suffer a disproportionate amount of blackouts and a generous amount of brownouts that has compelle...
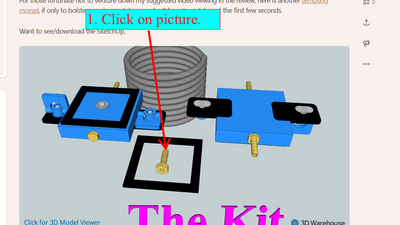
Part 46: Watching SketchUp animation from 3D Warehouse "Picture" in a thread.
Boys and Girls,
If you happen to have a moment of weakness and wish to view the scenes of any SketchUp 3D Warehouse model presented in a Craftisia...

Part 47: Safer Stop-Block for my Mico-Mark mini tablesaw sled.
[image.png]
Boys and Girls,
I was tossing up whether to make this a project, hint blog or just append to my Micro-Mark Sled.
However, after cons...