I was tossing up whether to make this a project, hint blog or just append to my Micro-Mark Sled.
However, after considering that this may be incorporated into shop made stop blocks outside the scope of the Micro-Mark tablesaw(a thread not too many would follow), the blog won... with an appropriate amendment to the sled project to follow.
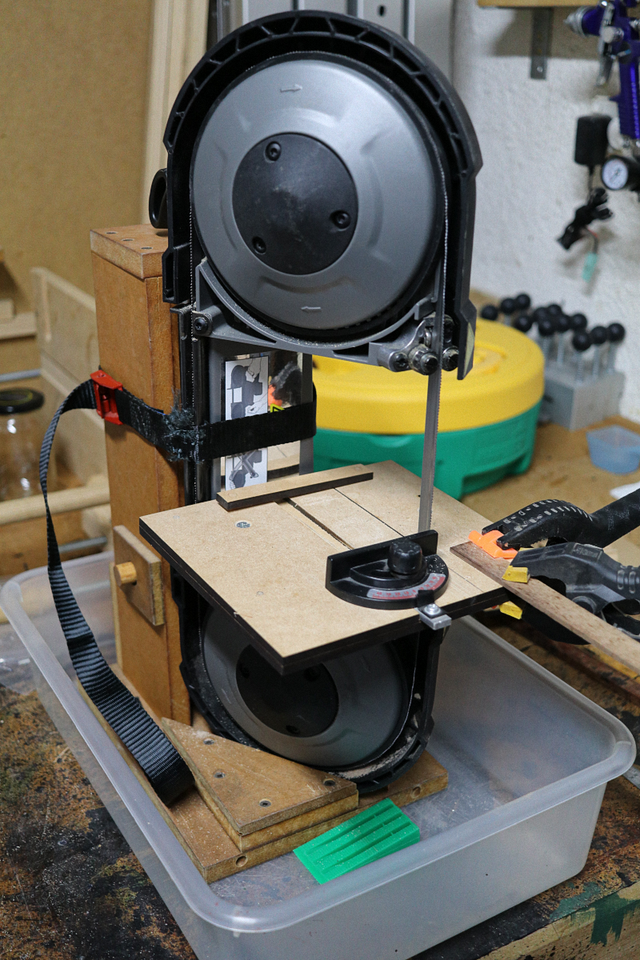
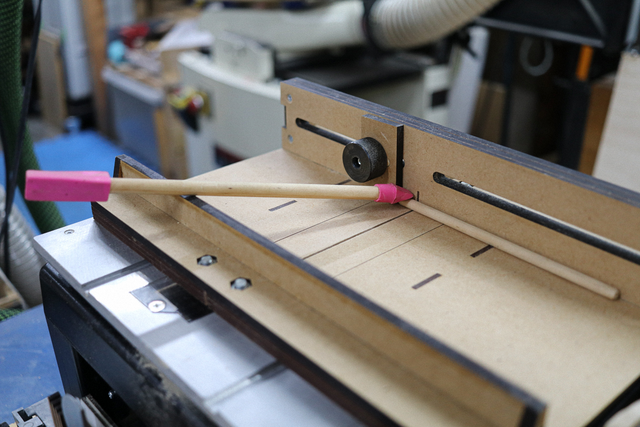
When making my puzzles, I often have the need to cut quite a few 15mm lengths of 4mm dia. dowels. In the past I fired up my cordless bandsaw
and scare the crap out of me when I consider how close my right hand get (braces that end) to the moving blade,
Then it dawned on me that I now have a sled for my Micro-Mark tablesaw (pottzy's review of the saw), which would be ideal and safer for these dowels.
I must have had a brain freeze as after loading the dowel onto the sled, the first cut created a missile that was immediately duplicated by my second cut. Unsoiling my pants for the next cut, I tracked down my small parts holder (pencil rubbers on a dowel),
and managed to keep the 3rd cut “grounded”.
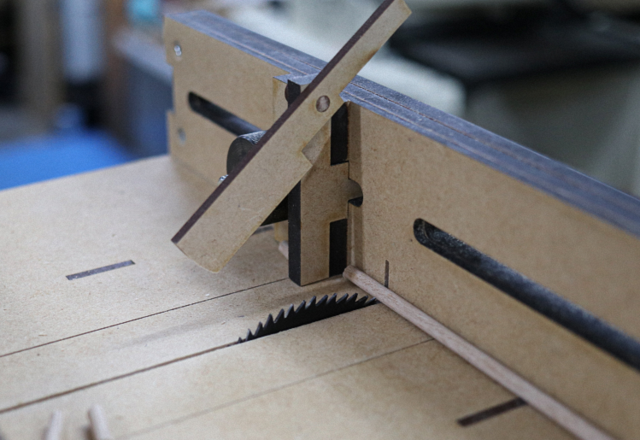
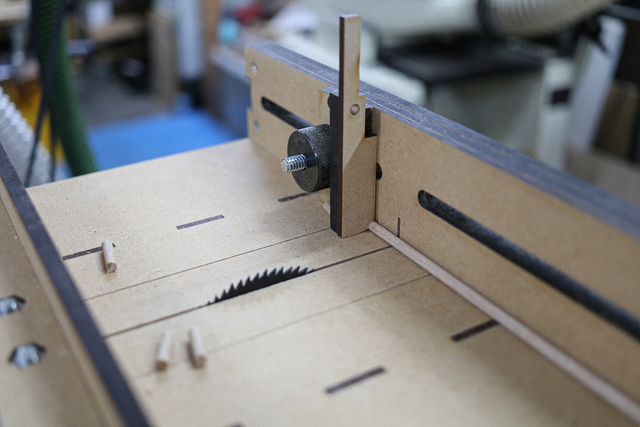
Regaining my composure, I remembered how on the full sized tablesaw, I always use some sort of dimensioned “block” (40mm) against the fence when using the mitre gauge,
that gets the stock cleared and free of binding against the fence as I proceed through the cut.
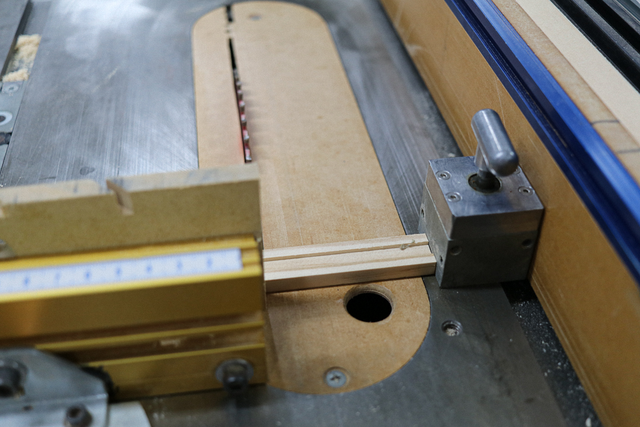
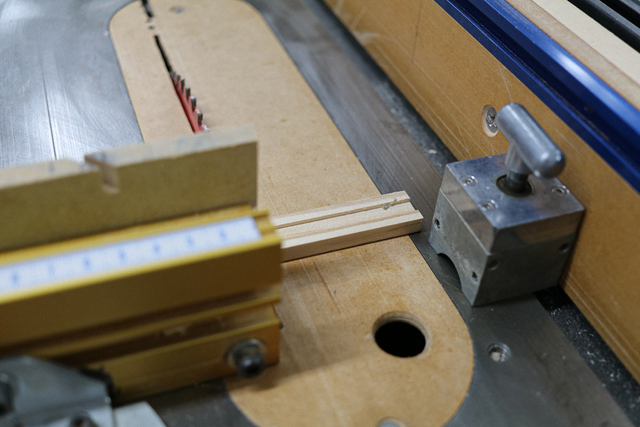
How can I incorporate this into my shop made stop block?
If you happen to have the stop block's "mounting track" on top of the fence this would be easy and many bought stop blocks already incorporate a flip-stop, but having it mounted on the side of the fence raised a challenge.
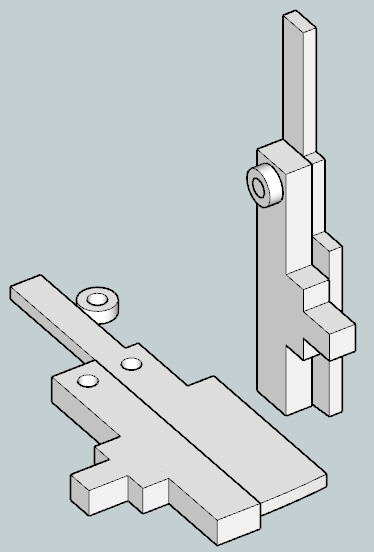
Got into SketchUp and after a few attempts came up with the following design,
The revised full sleds SketchUp model is available from the 3DW,
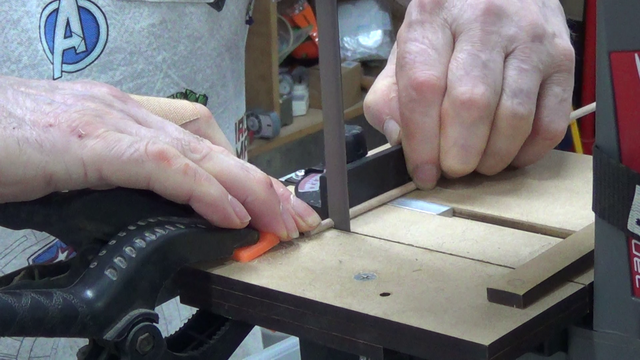
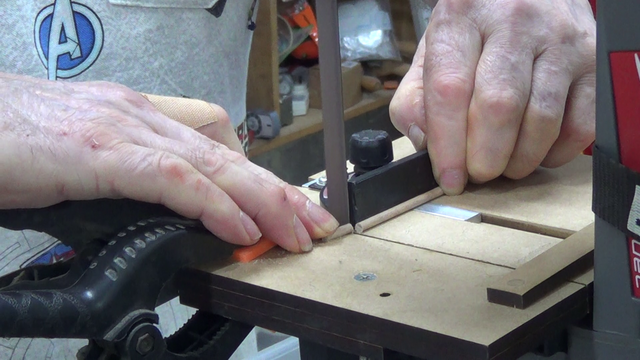
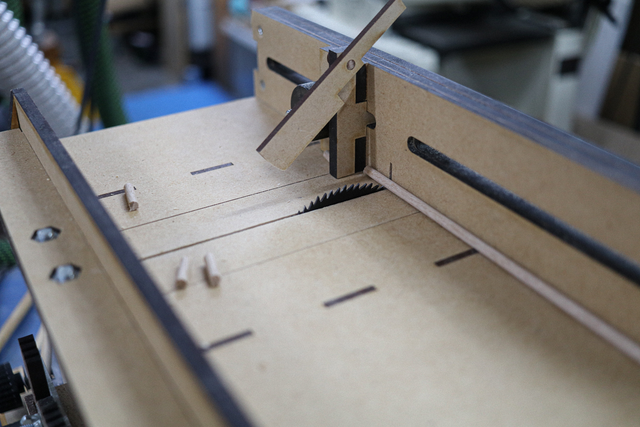
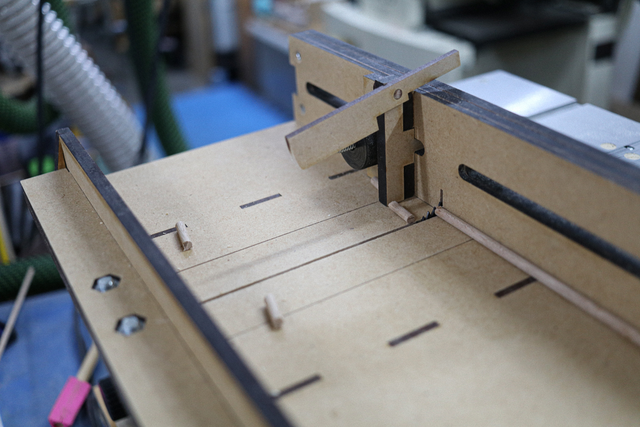
Loaded the new stop block on the sled at the required 15mm measurement and butted the dowel against it,
While holding the dowel and pushing the sled forward with my left hand, I tripper the lever with my right,
and now the dowle was no longer jammed up against the stop block, proceeded through the cut,
I made several passes and while the spinning blade still moved the offcut around on the sled, it did not turn them into a potentially hazardous missiles... all the pieces stayed on the sled and I didn’t need to kiss the floor looking for missing dowels.
For anyone interested I have made a video of this issue and solution,
Thanks for looking
If your first cut is too short... Take the second cut from the longer end... LBD
Thanks R'Gi and 987... at least the laser makes all my hair brained ideas testable with little effort. Like with the sled... I didn't have to bugger around with WiNng's 5 cut method... the precision of the laser made a perfect 90°.
I'm wondering why you would not just use that Filip up stop to hold down the small part cut off?
Never considered that Petey, however, your suggestion got me excited and after reading I rushed down to the workshop at 2:00am to test it out... By the time I got back upstairs my internet had dropped out so I couldn't pass on my revelation and had to wait till after breakfast.
The concept worked, unfortunately it also held the piece jammed up against the fence and it had to be manually pushed out of the way. For non repetition that seems to be a viable option, however, for repeated cuts it's "handy" to have the spinning blade push the cut piece out of the way (not missile launch), so the next piece can be cut uninterrupted.
Better to have and not need than Murphy's sister Miss Viky Verka.
JJ, the pieces still get moved around, but no longer jammed and thrown across the room out of sight/reach. Occasionally with mass production I have pushed a cut piece into the blade, however, being just alignment dowels, slight blemishes are no issue. The main benefit is the lack of missiles... and that embarrassing (and back breaking) floor crawling.
If your first cut is too short... Take the second cut from the longer end... LBD
Tis a nice solution, I could see some form of spring loading so it snaps back up on its own after you release.
I've also seem "small parts" jigs where the cutting platform is raised a small amount on the cutoff side of the blade.
Set your stop, move the stock over to the stop and hold it down, release the stop and cut (like you have it). Except now the cutoff is riding on the raised platform (< 1/2 the width of the cutoff) and it tops off the platform and away from the blade.
SplinterGroup .... I've also seem "small parts" jigs where the cutting platform is raised a small amount on the cutoff side of the blade.
Set your stop, move the stock over to the stop and hold it down, release the stop and cut (like you have it). Except now the cutoff is riding on the raised platform (< 1/2 the width of the cutoff) and it tops off the platform and away from the blade.
A "jam free" (maybe vegemite) stop-block is only required for really small pieces when there is insufficient space for a few fingers each side of the blade. I did think of cannibalising a small light safety pin, as a standard spring compression/expansion would became too bulky and there was a limit to over engineering. Normally I would use that small rubber on a narrow dowel (can imagine SWMBO cackling in the background) to hold it down, but no matter how well I plan, it's always on the other side of this lazy ducks workshop.
Not sure I can accurately picture your raised platform setup... someone needs to learn SketchUp.
If your first cut is too short... Take the second cut from the longer end... LBD
SplinterGroup .... Since my embeding skills for videos still sucks...
SWMBO has been known to complain about my embedding skills.... surprised I'm not better with handtools.... I'll ignore the other skill for now.
Thanks for that link Splinter, unfortunately even with the laser, those small parts (can't get away from embedding) on a small sled could become a very "compact" platform... could see benefits on my full sized sled Even with that tray, noticed the small dowels came close to jamming just before they dropped. Unless they're clamped down like Petey's suggestion, with the spinning blade, the option for oopsies are always present. Probably the rubber hold down might be the safest/easiest solution (to push the cut piece clear of the fence), however, I've decapitated a few rubbers from mishandling in a moment of complacency.
If your first cut is too short... Take the second cut from the longer end... LBD