


Share your craft projects
Make new craft buddies
Ask craft questions
Blog your craft journey

Mike40
1074 posts
and
35 followers
in about 12 years
in about 12 years
Horn Speakers #2: Time for the rubber to hit the road
This is
part 2
in a
4 part
series:
Horn Speakers
-
First Steps
-
Time for the rubber to hit the road
-
Cutting the Wedges to fit the pattern
- First Steps
- Time for the rubber to hit the road
- Cutting the Wedges to fit the pattern
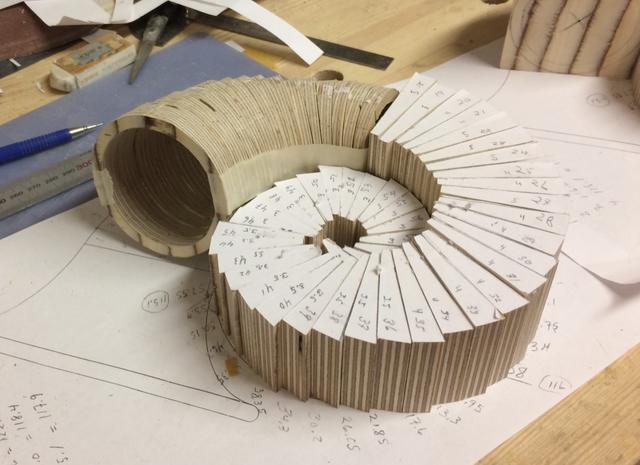
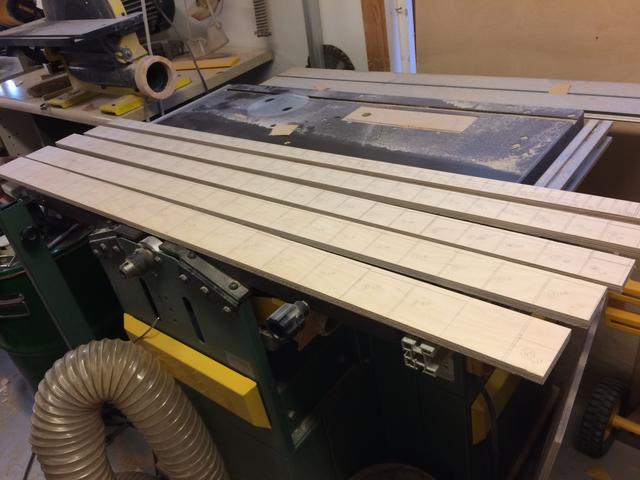
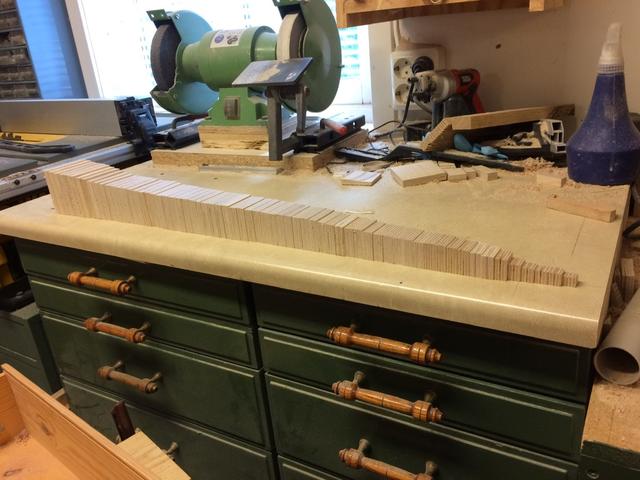
After figuring out that I needed about 56 square pieces of 3/4" plywood all cut to different sizes I marked them out on a baltic birch platter. I had some half of full size platters in the right dimension. Unfortunately I didn’t have room to cut the marked out strips on the table saw so I had to use my circle saw instead. These formed a 47" long thin wedge shaped strip with the individually marked pieces becoming smaller towards the end.
This is how I had to cut the strips with the platter on top of my combi machine:

Critical to these strips was that the outboard edge was perfectly straight and the inboard edge was perfectly parallel with the outside edge. The dimensions of each square were determined by taking measurements directly from the pattern. You might notice that the same nos. appear on the strip together. This is because I am marking out the pieces for two horns at once.
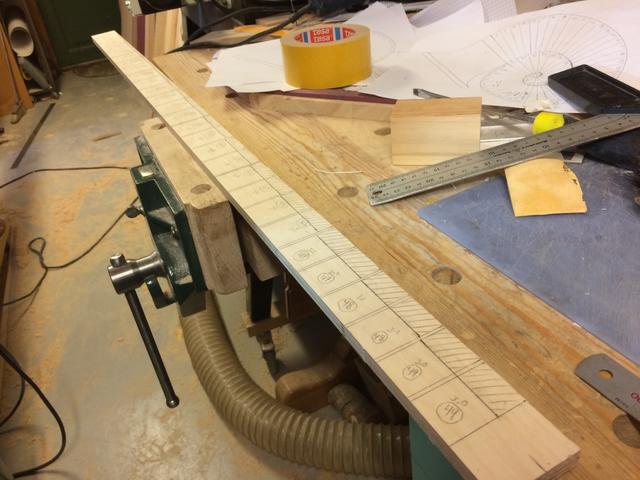
The individual pieces for each strip were marked off and numbered to help keep track of their position on the pattern. The width of each piece was based on it’s length to create a square. I cut each strip a little wider than necessary so I could could cut to final width on my tablesaw. This was to make sure the cut was nice and straight. The outside edges that I cut with my circle saw were routed straight prior to marking out.
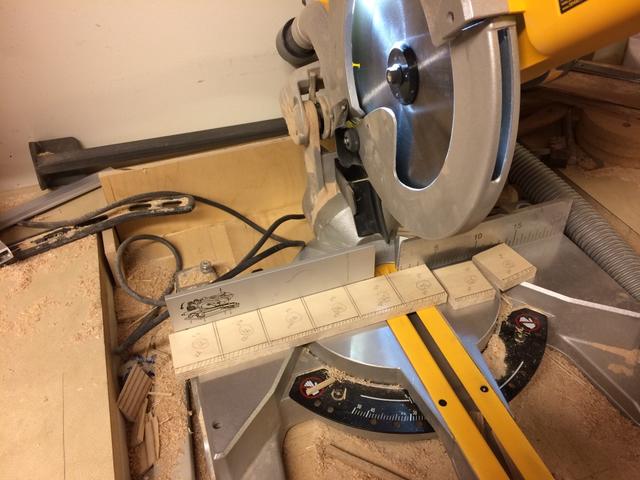
I sawed the strips into squares using my miter saw.
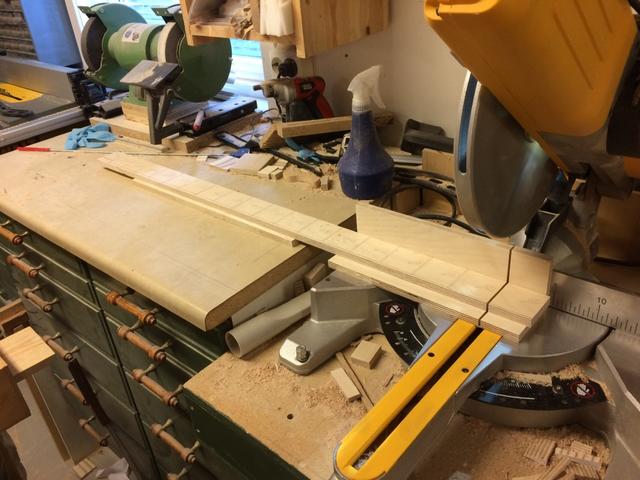
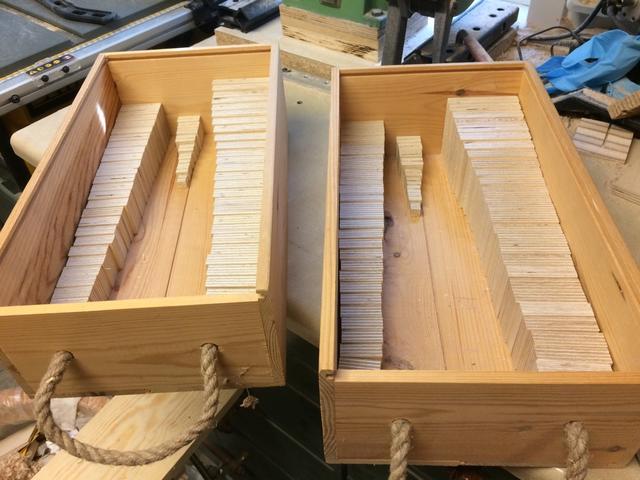
The individual pieces lined up then the pieces for 2 horns were boxed to prevent losing them.
Problems encountered with the marking and cutting were numerous. Keeping in mind that what I have shown you here is after doing this 4 times incorrectly. Here is a list of what I did wrong on those failed operations.
- I used my circle saw exclusively for cutting the strips lengthwise* resulting in less that straight lines that made the eventual squares not so square and also making them a slightly smaller width after sanding to straighten edges. They weren’t out by much, but as I found out underway, they have to be almost perfect to fit the pattern. If they don’t the result will not be the desired horn! When cutting the individual pieces on my miter saw I found that I had not allowed enough space between each square resulting in the cut being wider and making the pieces a bit shorter than intended. Better to have a little too much space and trim them as necessary!
I take full credit for not being focussed enough on marking out and cutting accuracy and being generally complacent. This was only the first cutting process and I resolved those problems after my first failure. However, there are are other operations that failed on subsequent attempts and it seemed that I was only able to solve one problem per iteration. So I hope you will stay with me and learn more silly stuff from the next blog in this series! The next steps will cover the marking and cutting of the wedges to create the curve of the horn as seen in the first photo.
Thanks for reading and please let me know if my explanations are not clear enough to be understandable.
Mike, an American living in Norway
5 Comments

I am intrigued by this. Can’t wait to see it finished.
—Madts.
Tor and Odin are the greatest of gods.

This is the coolest and most challenging project I could imagine, your approach is most fascinating ,can’t wait to see more.
woodworking classes, custom furniture maker

Mike,
It’s challenging for us just to follow such a brilliant mind!
L/W
“Those who would give up essential Liberty, to purchase a little temporary Safety, deserve neither Liberty nor Safety.” Benjamin Franklin
L/W can I repeat that to my wife?
Mike, an American living in Norway
Sure, Mike, if it will convince her!!
L/W
“Those who would give up essential Liberty, to purchase a little temporary Safety, deserve neither Liberty nor Safety.” Benjamin Franklin