I only put his concept into practice just a few days ago and was so impressed that I have spruiked it at every opportunity.
As I was preparing a reply to another project post with the intention of making a reference to the above, I vaguely remembered a covering video (which I hope I'm correct in saying was also by keifer). I tried like hell to find it but couldn't and rather than succumbing to any further reading in trying to find it, I thought a couple of pictures would be easier.
Well the duck got carried away and took more photos than there was film in his camera.
Armed with all these "G" rated photos, I thought that as there's many a posts about cutting boards, another post about holesaws may not be overboard. Furthermore, there may be newbies here at LJ that hate reading as much as I do and have not been exposed to all of kiefer's vintage presentations in their research backlog.
Two more disclaimers:
I only used drill press(es) and did not try a hand held.
My primary drill press has great torque under low speed and high load.
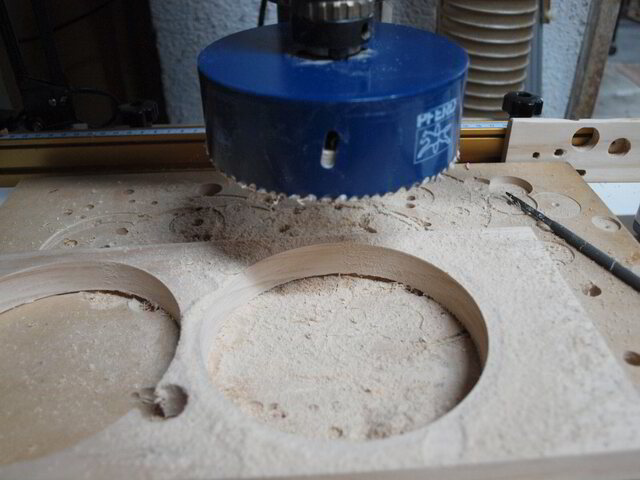
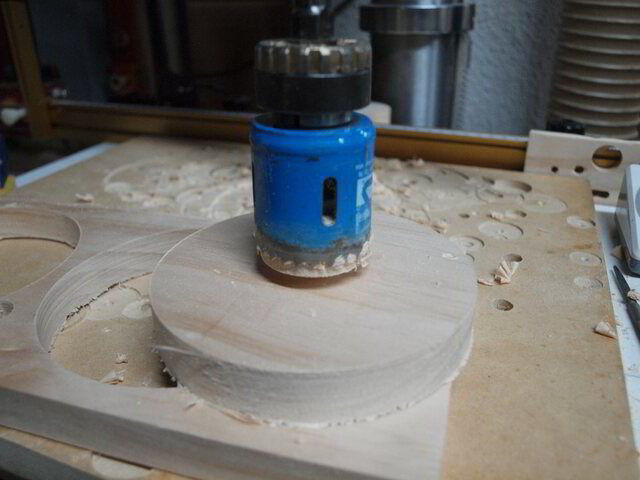
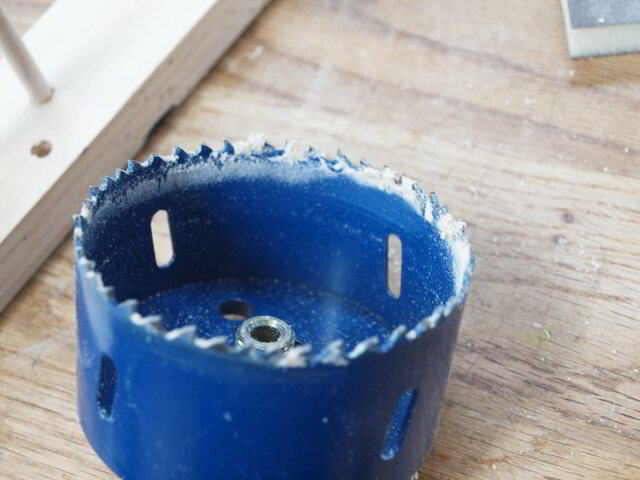
I picked a new 111mm holesaw as I could not find my 110mm (which was hiding behind the 112mm one). Once mounted I cut 2 shallow kerfs to demonstrate internal and external circles (pic #3). Went over to my tabletop press and drilled 3/4" forstner bit holes just kissing the outside of the kerf (actually didn't kiss… just met it half way and then simply held hands), pic #4.
Back at the biggie press I started drilling the inside circle (at 150RPM) first… only because I could see the relief hole fill up with saw dust (pic #5). At that speed, the process using the 111mm saw took about 30secs (single pass… give or take a few minutes). I will add that the circle/plug was still a bit too squeezy to extract, however, it should be a tad easier as there was no build up of burnt resin/sawdust on the inside of the saw (more on this further on). Now I do recall that the presenter of that phantom video, demonstrated a neat way of popping out the plugs which I have managed to unintentionally forget… so no pass-on with that snippet…
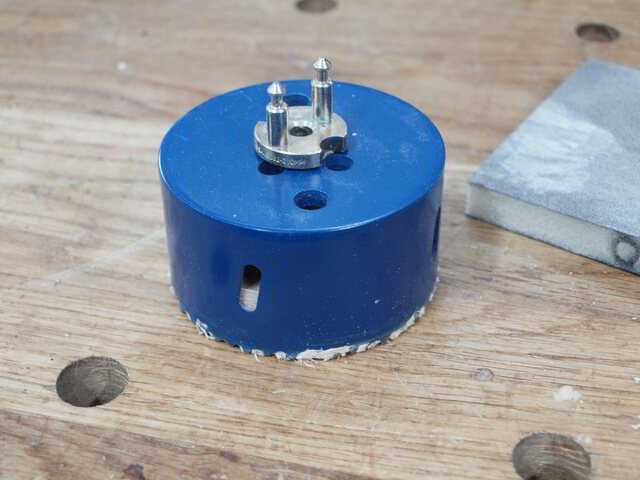
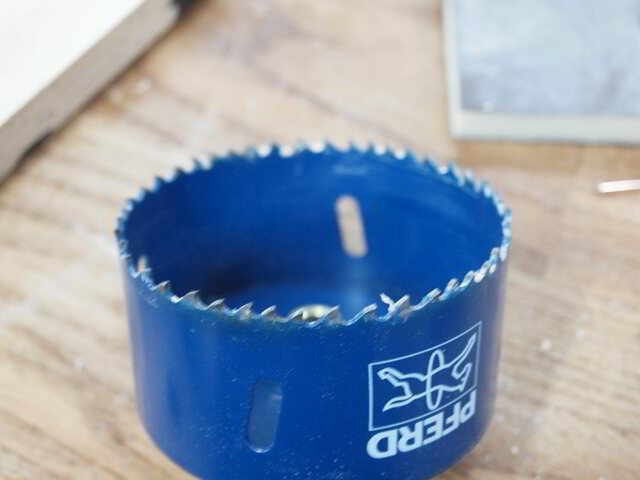
Hit the other circle and that executed just as quickly and successfully. I will add here that there was absolutely no residual build-up on the saw and no telltale smoking during the process. This picture demonstrates the state of the saw after 2 cuts with no preliminary clean up,
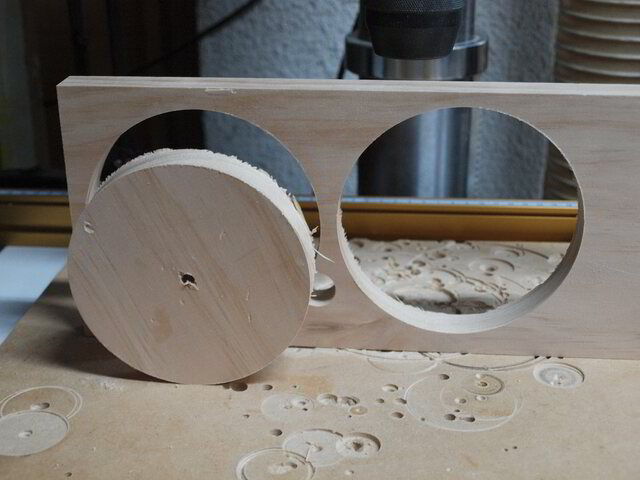
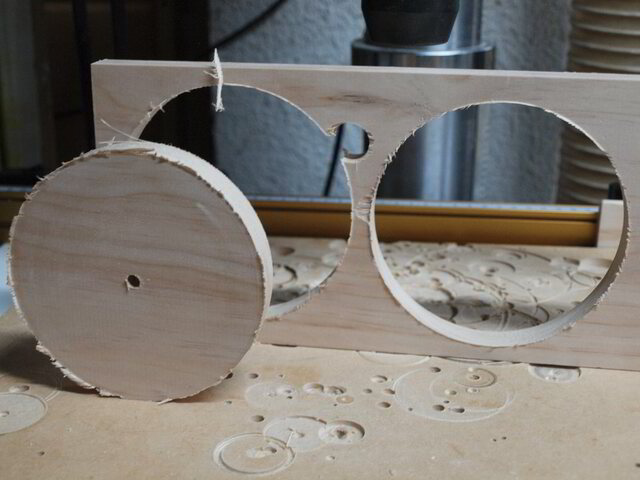
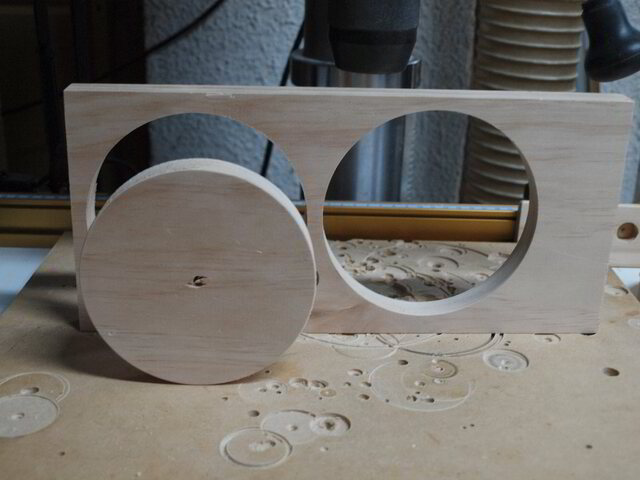
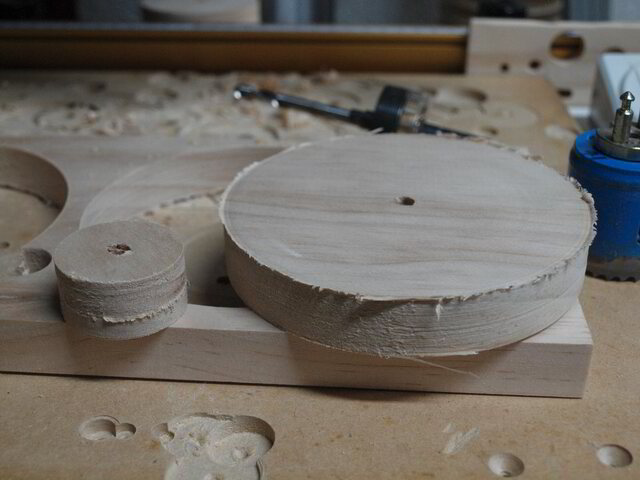
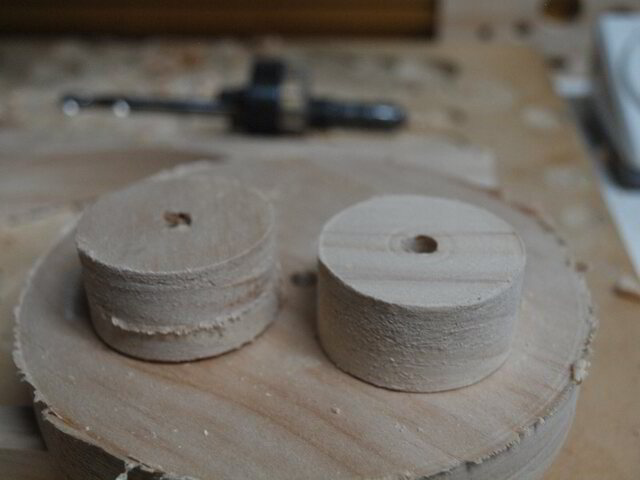
The following are the resultant hole and circle in their respective transformation stage:
Entry side,
Exit side,
Exit side lightly hand sanded,
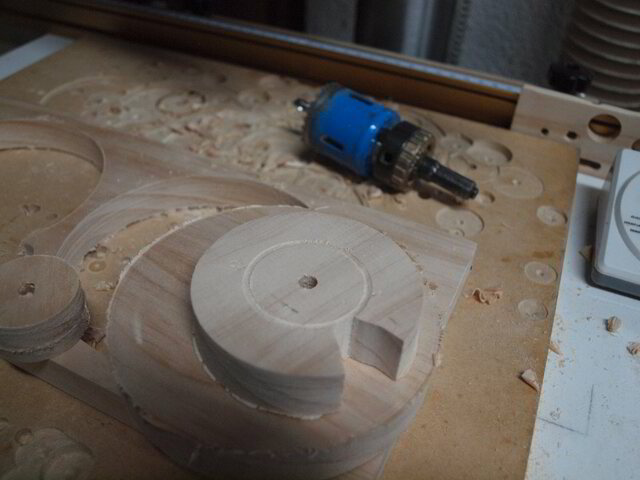
I then put a girdle on the holesaw and shrunk it down to a slim 41mm. I bypassed my 40mm aw as it had a lot of "pre-new-technique" uncleaned build-up. Rather than waste timber I took one of the previous plugs and after the relief hole, ran the cut on my low-end tabletop drill at a neat and even 507RPM.
To undertake the process with a more traditional approach I tried the circle with two passes… 1/2 through, flip and the rest from other side.
It may have been the holesaw, play in the cheap press or just bad woodworking practices, I was not impressed with the seam that I have found tends to be associated with the two pass method,
(small wheel compared to the one pass large one).
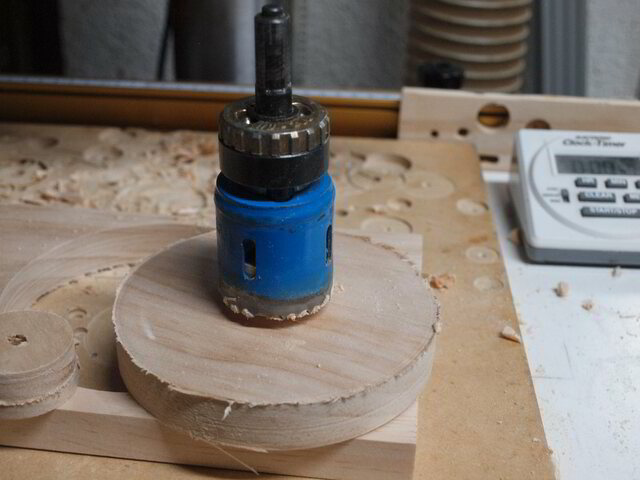
I then decided to repeat the small wheel, however, this time I cut the relief hole using the scroll saw… which is another option if layout may prevent the use of a forstner bit… a forstner bit is easier, however, the relief hole can be any shape or size as long as you don't allow too much sawdust buildup in it
Again no resin build up on the saw (ran at 900RPM… forgot to change speed),
The single pass (small on right with light exit side hand sand) was much neater than the two pass next to it,
I was more than satisfied with the results from both single pass executions.
I would recommend the single pass method and to eliminate tearout on the exit side ensure you have a good, unblemished flat surface (not a well used sacrificial drilling board) and endure the outer piece cannot lift up on exit.
As promised I will mention how I eject the plugs from the saw seeing I have forgotten the other method (remember the talk about the phantom video) and screwdrivers through the slot tends to damage the plugs which is not desirable if it is the hero piece.
The plug was cut using a 75mm holesaw at 900RPM.
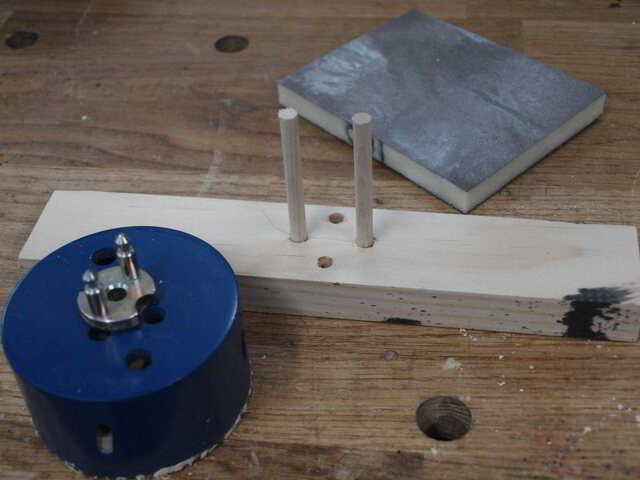
I made one of these simple jigs using 1/4" dowel,
Note the two holes for the saws connector plugs… I cut the dowels too short and here in Australia 1/4" dowels is in scarce supply.
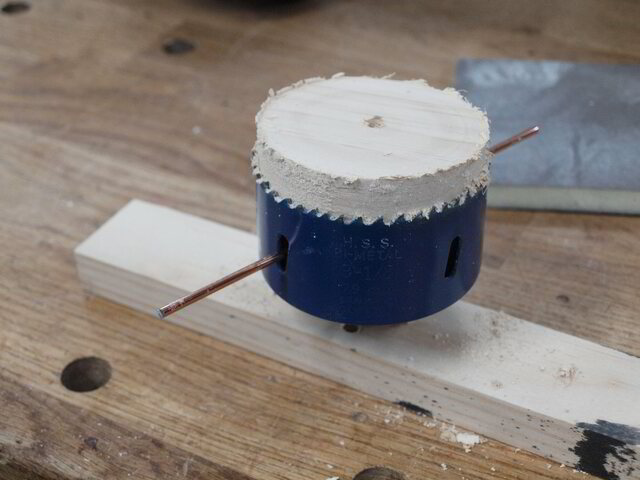
Position the saw with the plug over the dowels and with slight pressure using a steel rod (coat hanger piece) the plug ejection is easily started. As there is no resin build up inside the saw, once the plug starts to move there should be enough outhang to easily remove.
Again notice the cleanliness inside,
With gentle rubbing between the thumb and forefinger (unless you have dexterous toes) the residual sawdust and wood chips are easily removed leaving a clean saw blade ready to be put away.
One thing I will leave this exercise with is…. you have a greater drilling speed tolerance and there is no need to clean any bloody resin off the holesaw after use. OK… two things… Hey ducks can't count.. they don't have toes just webs (and long before the Internet was invented… so don't call me backward).
Sorry all, I wanted to make a video but unfortunately my legs are not shapely enough and the missus wont let me show my face.
Addendum:
Fortunately keifer read this article and generously offered a link to the phantom video I was referring to. He must have been much younger then, as he had the time to write his longer unabbreviated name of woodkiefer1 on YouTube (no wonder I couldn't find it here at LJ). Anyway, before you read the next paragraph and take the appropriate action, I have retrospectively included the link to that phantom video here... <- click on the blue text, well worth the watch (better than reading all the above).
And as always, if you already know this and/or find it boring… stop reading any further!
If your first cut is too short... Take the second cut from the longer end... LBD
I recognize this article and have corresponded with kiefer (pine in english) about it. The actual problem here is that these drills are not designed for use in wood, but metal. The best solution is therefore to use drills suitable for wood such as e.g. this one.
I know that the one you use are sold as being suitable for wood, but they are not designed for it. They simply have too many teeth. And yes I know that there are more people who use this drill bit in wood than the ones that use a wood drill bit.
You are right Dutchy... I remember you correcting me a while back and you haven't changed your story... and I have been enlightened since. Unforunately I haven't had to buy a size I haven't got as I would buy those yellow ones in the future .
Maybe my hint should be to not get those "metal", and buy the TCT tipped one.
Unfortunately I'm one of those most people that bought the wrong bit for wood often only because most shops only sell the metal ones (or a very small selection of the right ones) or the tradies some of us (me) try to imitate have the wrong ones to start with..
At least this tip will help all the other ducks and bunnies that have bought the wrong ones
If your first cut is too short... Take the second cut from the longer end... LBD
Thanks Baggy... though I must admit I never too notice of subscribers... 1001 (includes me) twisted minds on this earth is something for authorities to worry about.
Now Dutchy... Hello Dutchy... should post a video of his suggestion, which would negate the need for my video... YouTube doesn't pay me, so I'm not dependent on video audience to top op my vino cask supply.
If your first cut is too short... Take the second cut from the longer end... LBD