


Share your craft projects
Make new craft buddies
Ask craft questions
Blog your craft journey
kiefer
470 posts
and
61 followers
in over 12 years
in over 12 years
52-36 piano box part one #1: 52-36 piano box part one
This is
part 1
in a
2 part
series:
52-36 piano box part one
-
52-36 piano box part one
-
52-36 piano box part two
- 52-36 piano box part one
- 52-36 piano box part two
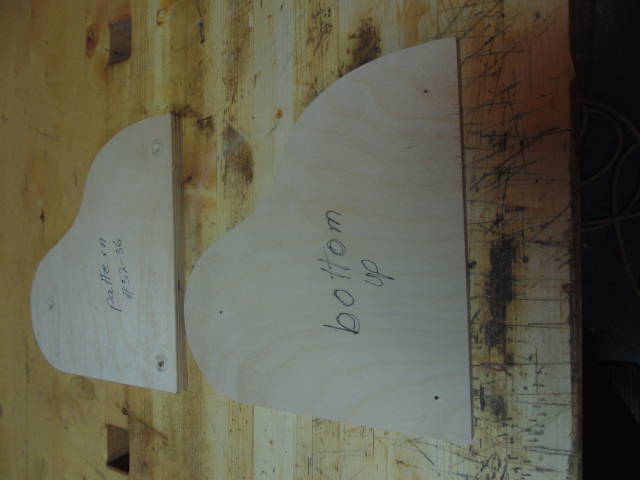
Here is the start of how I made the piano box .
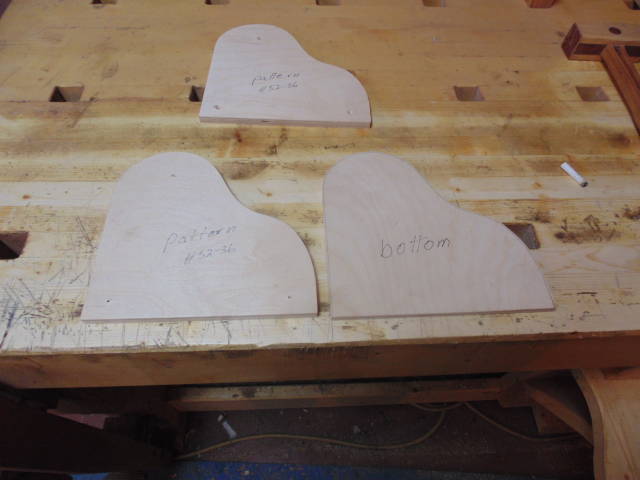
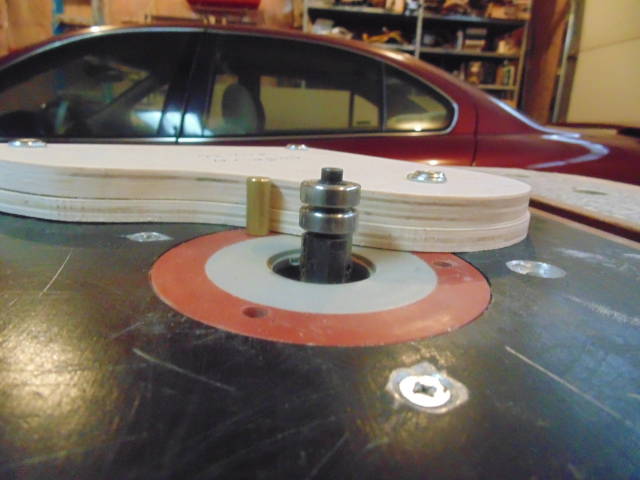
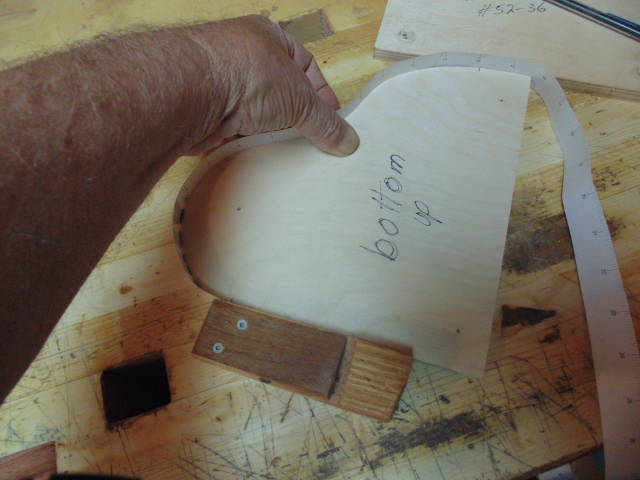
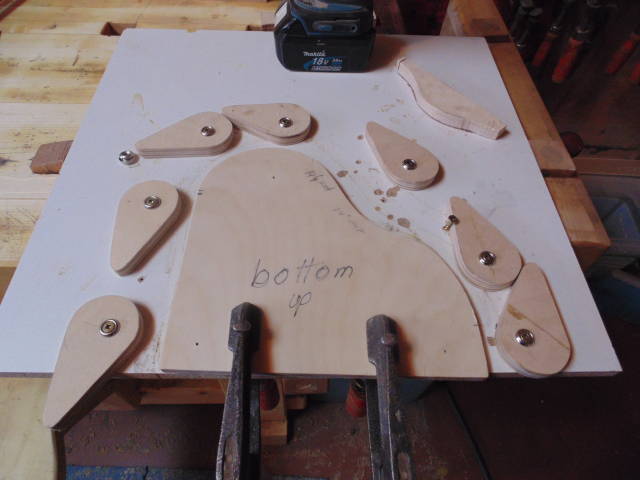
This is the pattern which I simply transfer to the work piece and then cut out the piece on the bandsaw and then trim it with a panel pilot bit to make a exact copy . 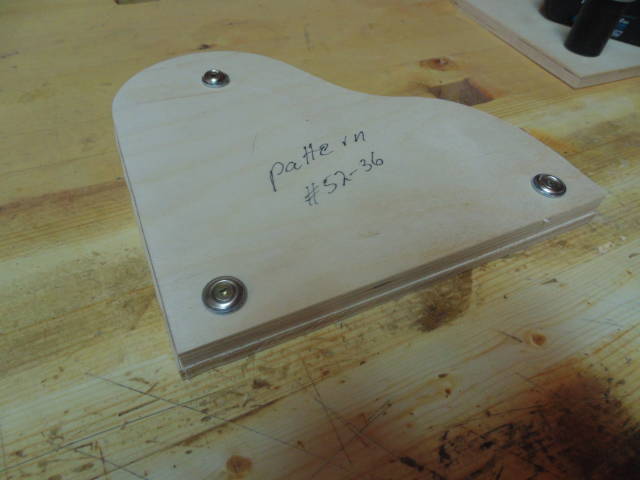
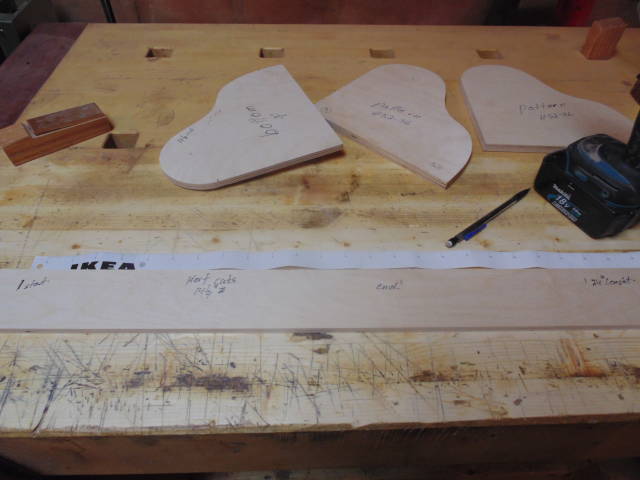
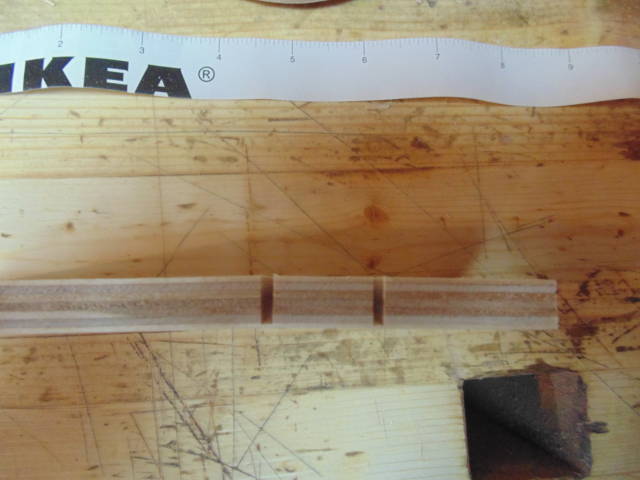
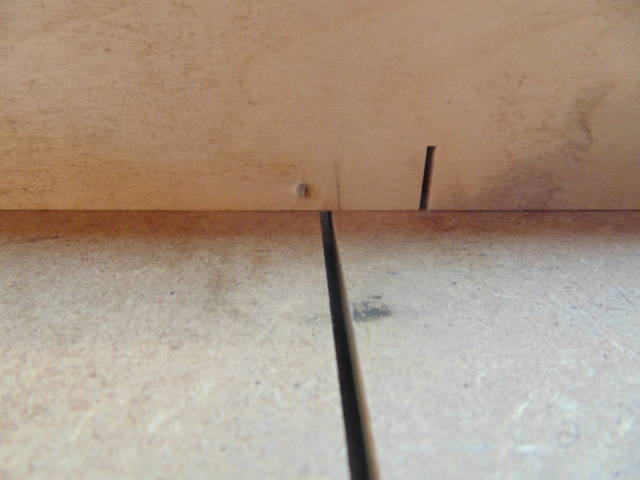
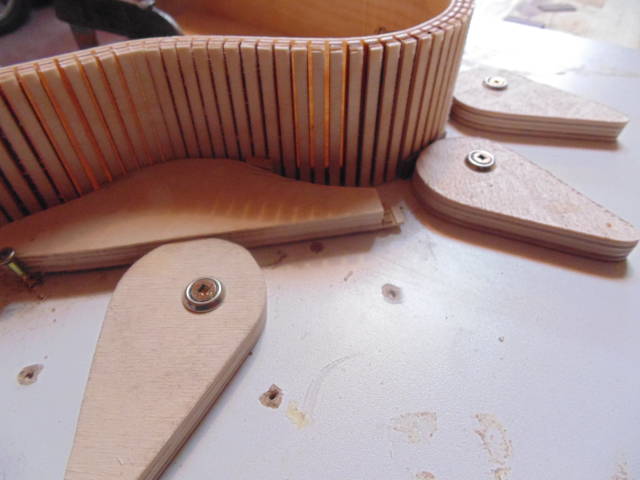
Once this is done I make up the kerfed strip first laying out where the kerfs have to be located on the strip with my special measuring tool ( IKEA ) .
If you look closely you will notice the pencil marks for the start and end of the kerfing cuts which I then transfer to the strip .
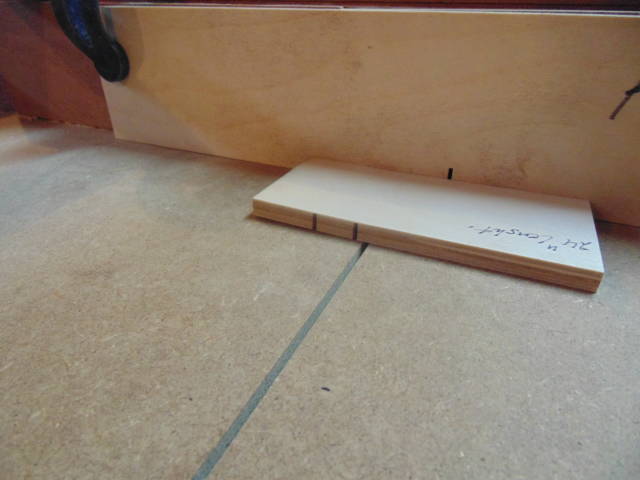
The next step is to set up my T/S sled by setting the blade hight and doing a couple test cuts on a srap piece ,the cut is set to just leave the top veneer layer intact .
For this I use a 7 14" 40 tooth narrow blade .
Next I use a plywood jig that is fastened to the sled fence ,just a strip of plywood with a screw which has the head cut off and the sides filed down to nicely fit into the saw kerf .
The width in between the saw kerf is set by moving the jig sideways and then clamping it tight to the fence when the desired distance is set .
I could use my finger joint jig for this but I dont need to be super accuarte here and it makes it faster to cut the kerfs .
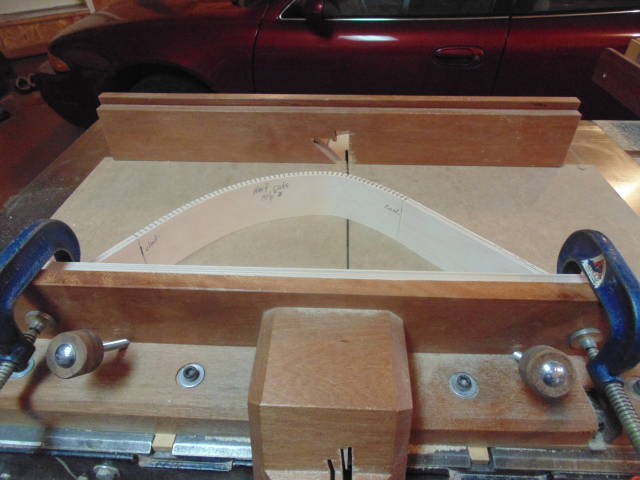
Now here is the form I made ,very simple by clamping a piece of melamine board to the bench by using my end vise and a bench dog ,some cam clamps made from plywood scraps and screws with trim washers and that is it .
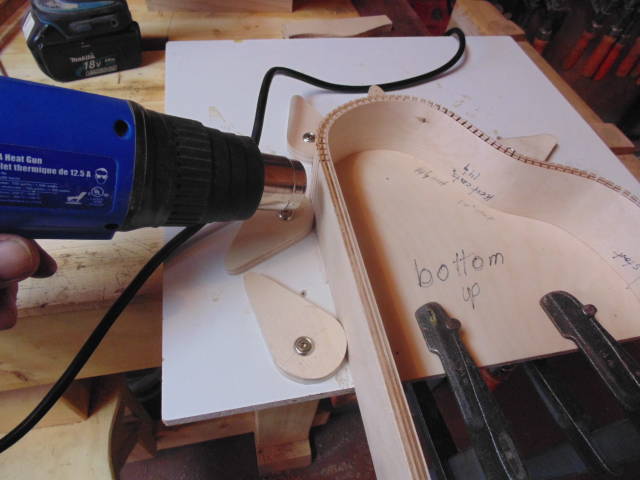
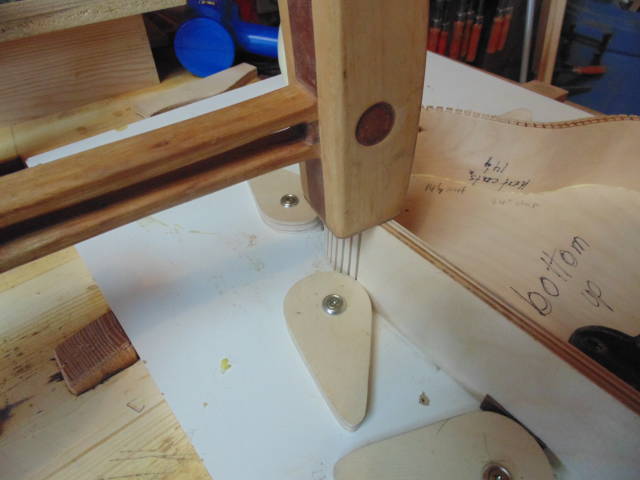
The next step is wetting the kerfed strip with hot water and clamping it in the form to make sure everything lines up properly with the marks and drying it with a hot air gun to somewhat set the shape and remove the moisture .I start the bending at the inside curve by inserting a shaped plywood block and then complete the clamping process using a small pice of veneer between the camclamp and the kerfed strip wherever the kerfs are located to prevent damage to the kerfed strip and a little pull at the end of the strip helps to get it tight to the form .

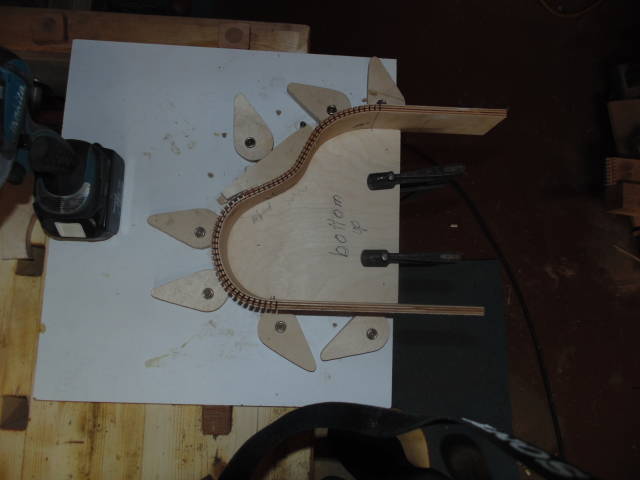
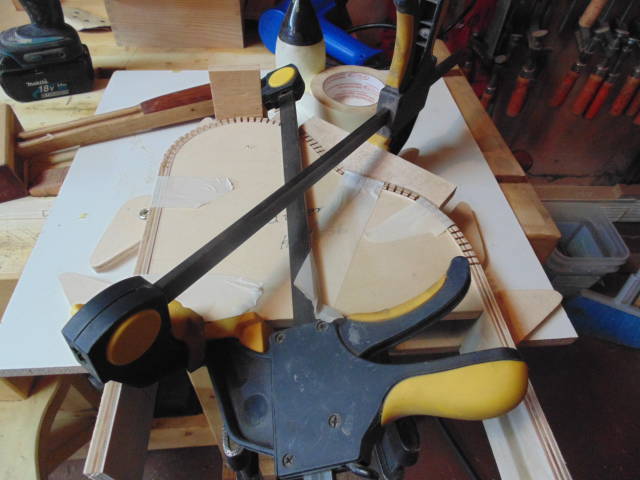
The next step is remove the strip and dry of what will be the glueing surfaces and apply glue and reinsert the strip into the form and repeat the clamping process with the addional step of clamping the original pattern in the top section to get a uniform shape from bottom to top and also using my little bench buddy mallet to tap the sides down tight to the clamping base .The last pictures wont upload so I will try to catch that in the next part of the blog .
Now I will let it dry over night and continue in the morning .
Part 2 will be cutting the veneer from a single piece of walnut to have all the same colour and grain for the sides and lid and bottom and laminating the veneer to all the surfaces .
4 Comments

I like how you mark all you piece Kiefer. You have a “production” marking system.
Question: When I pattern route plywood and have a 90 degree or so corner, I always lose a tiny piece of the core of the ply. I tried cutting close to the line less than 1/16. It helped a little.
I even tried climb cut on the corner.
I don’t notice that on you pieces. What’s the secret?:)
Abbas, Castro Valley, CA

I never saw cam clamps before. Very ingenious. I’ll have to remember that.
Losing fingers since 1969

I’m loving this blog Klaus (I’m fond of pianos in any form). Very well shown and explained.
Mike, an American living in Norway
Ian
Backing blocks work and baltic birch ply like I am using here also makes a difference and the new type router bits with replaceable carbide blades work much better , more like a shaper cutter .
Brian
Cam clamps are easy to make and are a great shop project making them inexpensive but don’t expect the same clamping pressure as you would get from a F clamp they are lite duty but have many uses .
Mike
I am glad you are following along and enjoying the blog .
The read is not that good but I try to make it up with lots of pictures and let them tell the story .