Share your craft projects
Make new craft buddies
Ask craft questions
Blog your craft journey

Brit
474 posts
and
40 followers
in over 11 years
in over 11 years
More from Brit
YouTube makes me laugh
Beginner's Guide to Sharpening Western Saws
The Humble Hand Brace - A Beginner's Guide to Restoring, Buying and Using #8: Part 8 - Tips and Tricks on Using a Hand Brace
The Humble Hand Brace - A Beginner's Guide to Restoring, Buying and Using #7: Part 7 - Sharpening an Auger Bit
The Humble Hand Brace - A Beginner's Guide to Restoring, Buying and Using #6: Part 6 - What to Look for when Buying a Secondhand Brace and more
Carving a Welsh Love Spoon #4: Carving the Chain Section
This is
part 4
in a
5 part
series:
Carving a Welsh Love Spoon
...
-
The Heart-Shaped Bowl
-
Carving the Chain Section
-
The Twisted Stems and Padlock
...
- The Heart-Shaped Bowl
- Carving the Chain Section
- The Twisted Stems and Padlock
I was going to do the padlock next after roughing out the chain, but once I started on the chain I was enjoying myself so much that I just kept right on going. If you remember, this is how the spoon looked at the end of the last session.

Work on the chain section began by paring down each of the four surfaces to the finished width of the links. Then I drew the edges of the links on each of the four faces.

Next I removed the four corners leaving me with a '+' cross-section and drew in the links on the newly exposed surfaces.

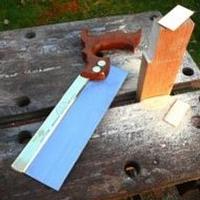
Then using a small gent's saw, I sawed either side of the waste between each link taking care not to go too deep. This step could be omitted, but it makes the next step go a lot faster…

…which was shaping the ends of the links with my knife. Now for the first time it was starting to look like a chain, albeit a very rigid one.

After that it was just a case of carefully slicing away at the waste until the first link was free to move. The sharp point of the Mora 106 knife really came into its own here. I also used a 1/16" 60 degree V-tool which you can see in one of the photos below.

As each link was released, I took the opportunity to sand any rough edges so they wouldn't catch and possibly break the chain.

Below you can see the small Peter Benson V-tool I used to help excavate the waste in the direction of the grain. Again, it could all have been done with the knife alone, but the gouge made things go a little quicker. I took great care not to slice into (and therefore weaken) any of the links. Lindenwood is quite brittle and will easily split if you exert too much pressure. I was very conscious of this fact and only used light strokes, stropping my knife to keep it razor sharp as I went along.

By the time I'd released the third link I had established a process and I thought you might be interested to see what that method was. You have to bear in mind that all of the stages involved both hands, but in the photos below I can only show one hand at a time since the other one is holding the camera. Whatever tool I was using to do the cutting, my free hand was pinching the next link as shown below. This was to both steady the work and help prevent the brittle wood from splitting as I cut.

With my other hand I either used the V-Tool to remove the waste at the side of the links…

...or used my knife to sever the grain between the links. For this step, I pushed the point in and just pulled it back slightly a few times then rotated the chain 90 degrees and repeated the action. I kept turning and cutting until the next link was free. Although I couldn't see what the knife was doing, I could feel the fibers being severed.

Here's a better photo of how I held my knife for maximum control. As you can see I really choked up on the blade, but with the handle resting on the back of my hand it was actually a very safe grip because there was no way the sharp edge could cut me. So far on this project I haven't drawn blood, but having said that I'll probably cut my finger off next week. LOL.

Eventually all the links were free and rough sanded. There is still some refining work to do on the links to shape them and equalize them, but the finish sanding will all be done in one session at the end of the project so I don't make it dirty again whilst handling it.

So there you have it, my first ever carved chain and I'm pretty relieved that I got through it without incident. Next, I will DEFINITELY be doing the padlock and hopefully the twisted stems if I don't have to work late.

Thanks for following my hotel woodworking exploits. I hope you're finding it interesting.
Andy -- Old Chinese proverb say: If you think something can't be done, don't interrupt man who is doing it.
2 Comments
Very interesting, and that is turning out great, a job well done.
Main Street to the Mountains
Ah, the chain, I've been looking for this part, got my curiosity satisfied - it's a flexible chain - Amazing!
Fantastic work, and for a first time too. Very nice indeed.
Fantastic work, and for a first time too. Very nice indeed.
More from Brit
YouTube makes me laugh
Beginner's Guide to Sharpening Western Saws
The Humble Hand Brace - A Beginner's Guide to Restoring, Buying and Using #8: Part 8 - Tips and Tricks on Using a Hand Brace
The Humble Hand Brace - A Beginner's Guide to Restoring, Buying and Using #7: Part 7 - Sharpening an Auger Bit
The Humble Hand Brace - A Beginner's Guide to Restoring, Buying and Using #6: Part 6 - What to Look for when Buying a Secondhand Brace and more


