


Share your craft projects
Make new craft buddies
Ask craft questions
Blog your craft journey

Brit
594 posts
and
41 followers
in almost 12 years
in almost 12 years
More from Brit
YouTube makes me laugh
Beginner's Guide to Sharpening Western Saws
The Humble Hand Brace - A Beginner's Guide to Restoring, Buying and Using #8: Part 8 - Tips and Tricks on Using a Hand Brace
The Humble Hand Brace - A Beginner's Guide to Restoring, Buying and Using #7: Part 7 - Sharpening an Auger Bit
The Humble Hand Brace - A Beginner's Guide to Restoring, Buying and Using #6: Part 6 - What to Look for when Buying a Secondhand Brace and more
Carving a Welsh Love Spoon #5: The Twisted Stems and Padlock
This is
part 5
in a
5 part
series:
Carving a Welsh Love Spoon
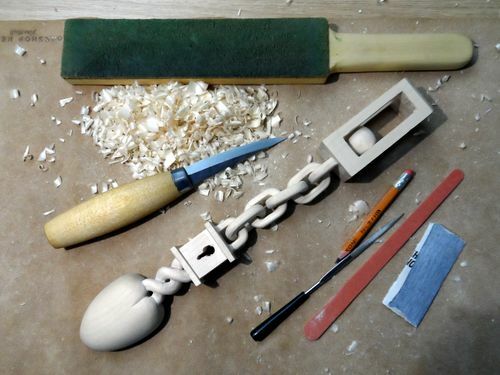
I decided to tackle the twisted stem section in parallel with the padlock and I kind of jumped between the two as I progressed.
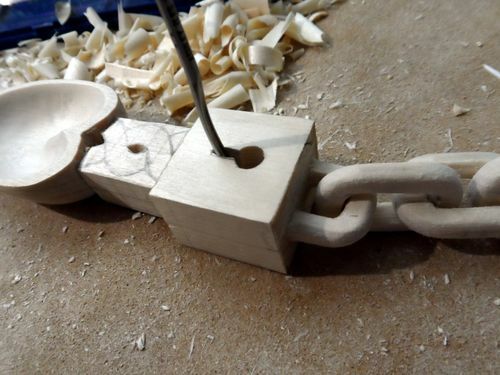
First off, I drilled a hole all the way through the padlock.
First off, I drilled a hole all the way through the padlock.
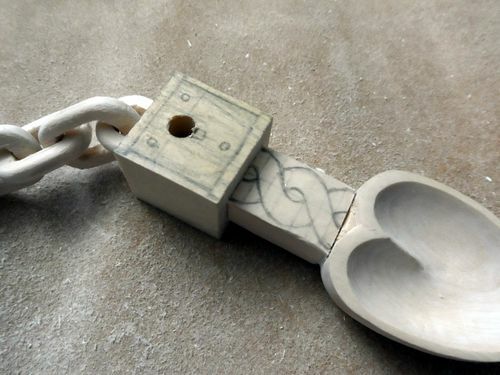
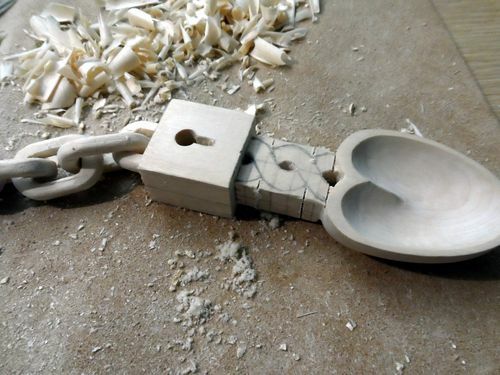
Then I pared down the thickness of the padlock to make it less of a cube and more of a rectangle when viewed from the side elevation. I probably removed about 3/16" from the front and back faces.

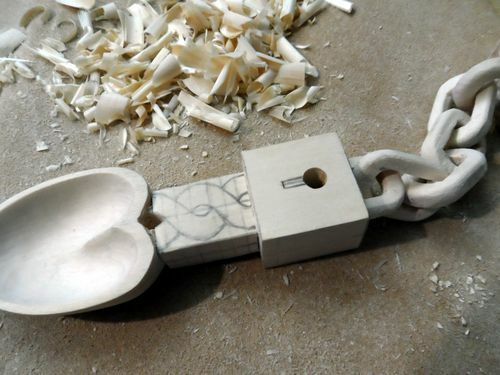
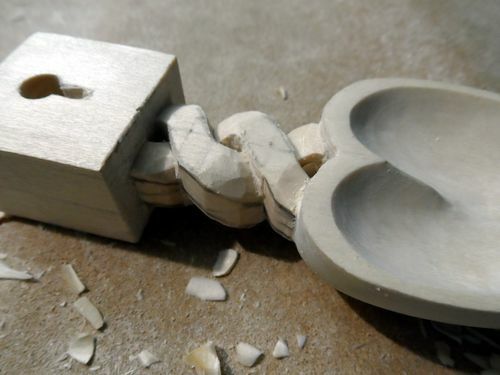
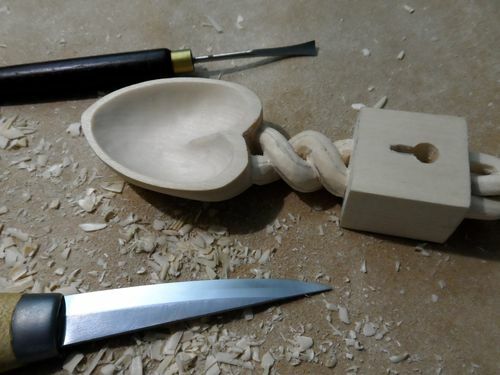
After defining the keyhole slot on the front and back faces of the padlock, I started to excavate the slot and also the three middle holes in the twisted stem.
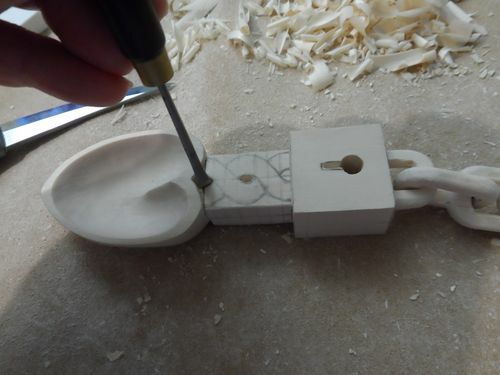
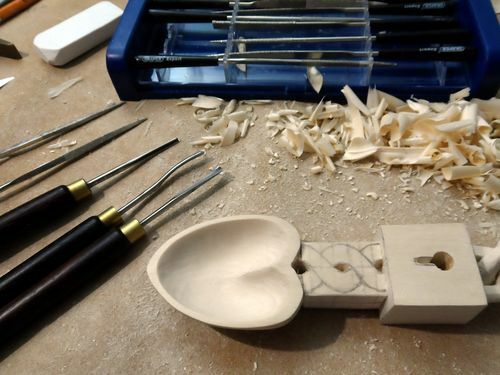
I used various straight and bent gouges to work on the stem. Here you can see me using a ¼" No.3 fishtail gouge.
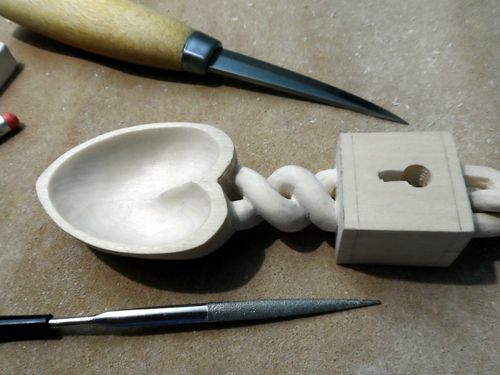
Along with my Peter Benson chisels I also used a set of diamond needle files in places.
A 1/16th No 18 Curved Gouge (No.9 Sweep) was a good fit for the keyhole slot.
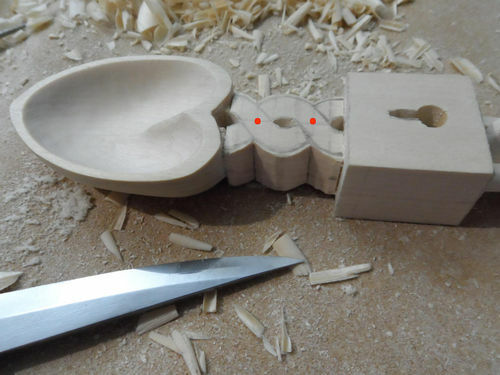
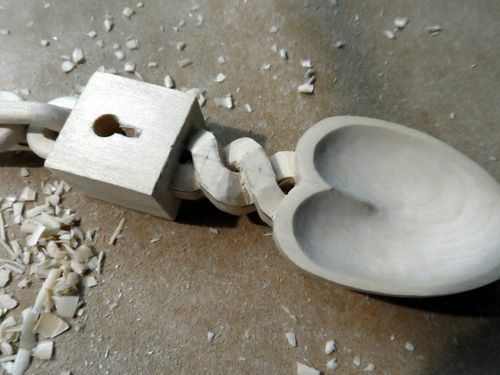
Once I was all the way through the stem and the keyhole, I turned my attention to the outside of the stems. First I made four saw cuts into the two sides as shown.
Then I sliced away the waste either side leaving me with the rough shape of the stems. The two red dots that you see in the following photo are the only points where wood won't be removed from the top surface.
I must be honest here and say that I sat there for ages staring at this before I plucked up the courage to start turning it into a spiral. In the last episode, Todd jokingly commented "Now - don't mess it up." and that phrase kept replaying in my head. BUT after two cups of coffee, an episode of NCIS and half a packet of Oreo cookies, I was ready for the challenge. I sketched the shape of the helix on the side elevations and started to remove the wood that had no place being there.
Check from all sides…
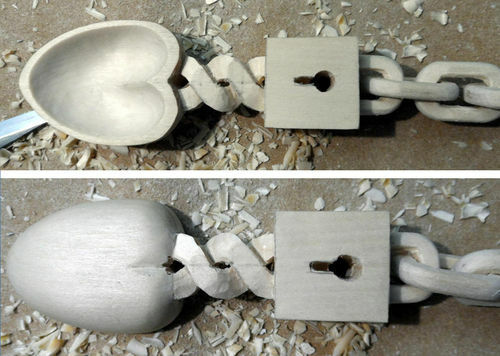
Once I felt I had gone deep enough everywhere, I started to knock off the corners around the spiral. I thought it would be easy to lose the shape at this point, so I drew some center lines around the stems to keep me on track.
I found out that remembering to pay attention to grain direction on a complex shape like this is a lesson quickly learned. Since it was difficult to see which direction I should be carving, I had to just feel my way as I went along and keep turning the work end to end with each twist of the stems. The last thing I needed now was to hear that terrifying splitting sound that every carver instantly recognizes when they've carved against the grain.
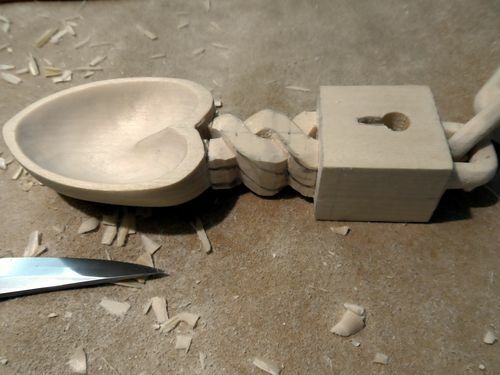
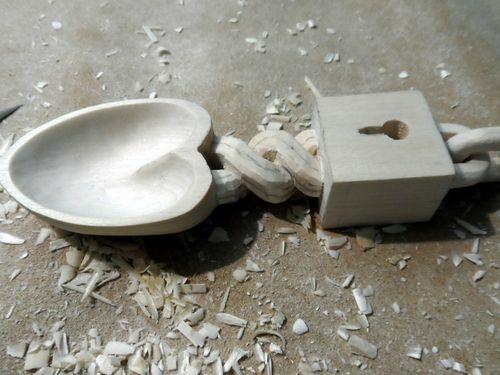
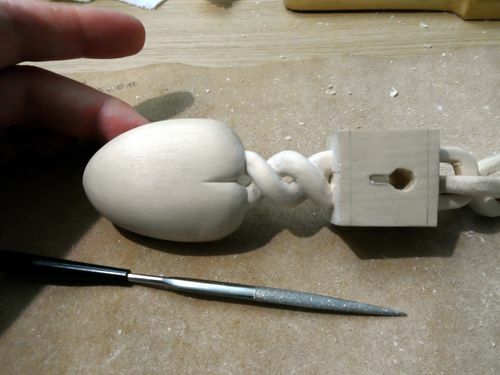
Finally I was happy with the shape of the twisted stems.
Just a bit of clean up needed to blend the transition between the spoon bowl and the stems.
Now back to the padlock. The more astute among you will remember that I drew three rivets on the front face of the padlock. Don't ask me why I drew 3 and not 4 because I don't have a clue. It just seemed like a good idea at the time I guess. Anyhow it's irrelevant because I decided the rivets didn't really add anything to the overall design, so I didn't bother with them. All I needed to do to the padlock was create the illusion that there was a top and bottom cover plate by recessing all the faces. This was relatively easy to do with my knife. I just had to be careful to arrest my knife before it sliced off something it shouldn't.
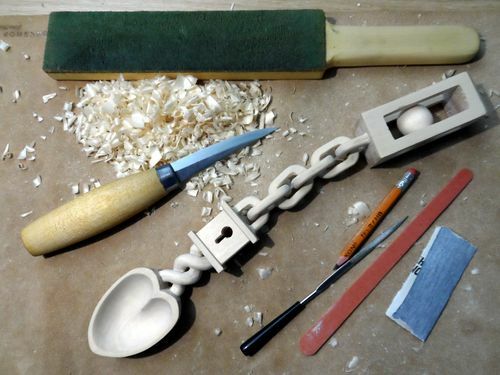
The spoon still needs to be finish sanded all over and I might add a bit more detail in one or two places before applying a finish and posting it as a project, but the carving is done now. Since this blog was all about how I went about the carving, I'm calling it a 'wrap' with this episode.
I've really enjoyed this one. There have been lots of firsts for me and I'm quite pleased with how it turned out. I hope you've enjoyed the journey too. Thanks for tagging along.
EDIT: Here's a link to the finished project: Welsh Love Spoon (hand carved) - Woodworking Project by Brit - Craftisian
I've really enjoyed this one. There have been lots of firsts for me and I'm quite pleased with how it turned out. I hope you've enjoyed the journey too. Thanks for tagging along.
EDIT: Here's a link to the finished project: Welsh Love Spoon (hand carved) - Woodworking Project by Brit - Craftisian
Andy -- Old Chinese proverb say: If you think something can't be done, don't interrupt man who is doing it.
7 Comments

I sketched the shape of the helix on the side elevations and started to remove the wood that had no place being there.
Love it. The proverbial "carve anything away that doesn't look like a *****." I might have missed the key you were carving for that lock. :)
Darrel

Nicely done a good interesting write up. They are some fine details in the carving.
Main Street to the Mountains

Excellent tutorial on your methodology for carving these intricate shapes, fantastic final piece of work.
I enjoyed the process of following, thanks for posting, very inspirational. Now I feel I must go and make something.
I enjoyed the process of following, thanks for posting, very inspirational. Now I feel I must go and make something.

Get to the last steps of the carving and the stress of not breaking something or messing up would do me in.. Nicely done work.
Ron

Amazing work and great blog !

You really thought through the entire process to make this masterpiece without any blunders. Well done!
L/W
L/W
“Those who would give up essential Liberty, to purchase a little temporary Safety, deserve neither Liberty nor Safety.” Benjamin Franklin
I really appreciate the comments. Thanks everyone.
Andy -- Old Chinese proverb say: If you think something can't be done, don't interrupt man who is doing it.
More from Brit
YouTube makes me laugh
Beginner's Guide to Sharpening Western Saws
The Humble Hand Brace - A Beginner's Guide to Restoring, Buying and Using #8: Part 8 - Tips and Tricks on Using a Hand Brace
The Humble Hand Brace - A Beginner's Guide to Restoring, Buying and Using #7: Part 7 - Sharpening an Auger Bit
The Humble Hand Brace - A Beginner's Guide to Restoring, Buying and Using #6: Part 6 - What to Look for when Buying a Secondhand Brace and more