


Share your craft projects
Make new craft buddies
Ask craft questions
Blog your craft journey

Brian
2030 posts
and
31 followers
in about 12 years
in about 12 years
New mitre sled
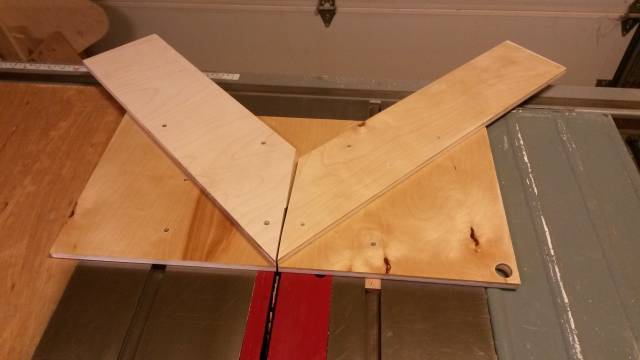
Today I made a new mitre sled. I made one a while back and used it this morning. To my great disappointment, the small triangles I cut were not perfect right triangles. I’ve used this sled to make nice picture frames with good, tight mitres, so the 2 sides of the old sled seem to have been 90° to each other, but not 45° to the blade. So I decided to start from scratch and make a new one. The purpose of this blog is to go through the steps and maybe someone has a better way of building a sled like this.
First I cut the runners from some oak scraps. Then I picked out a piece of scrap 1/2 plywood. This piece was a cutoff from a shelf I built and it was finished with shellac. That forced me to reconsider using glue. It also slides nicely on the saw table. I decided to use no glue at all, which means adjustments can be made just by backing out screws and slapping it into position.
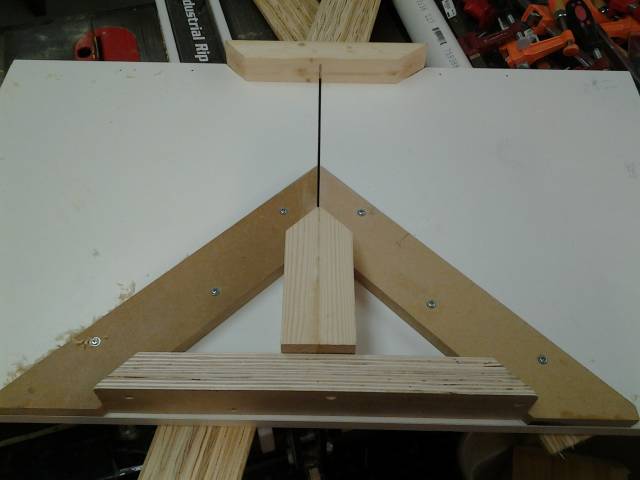
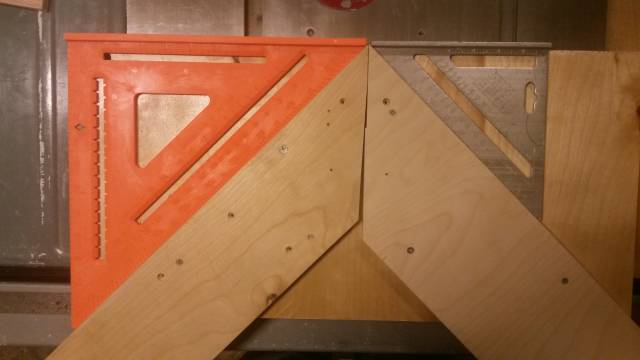
Next I squared up the plywood. I trimmed one side to make sure it was parallel. Then I squared it using a large triangle sled I made. Then I trimmed the opposite side to make every corner square.
Then I laid the runners into the mitre tracks and set the plywood overtop. Then I used my saw fence to line up the plywood squarely over the runners. This also ensured the front of the sled is perpendicular to the blade. Then I drilled countersink holes and screwed the runners to the plywood.
Next I picked out some more scraps for the mitre fences. I rough cut them using a mitre guage at something a little more than 45° which allowed me to swing the fences a little during adjustment.
Next I attached the fences to the sled with one screw near the front of the sled. Then I used a speed square to align the fence, then clamped it to the sled and put 2 more screws to hold it permanently. Then I did the same with the other fence.
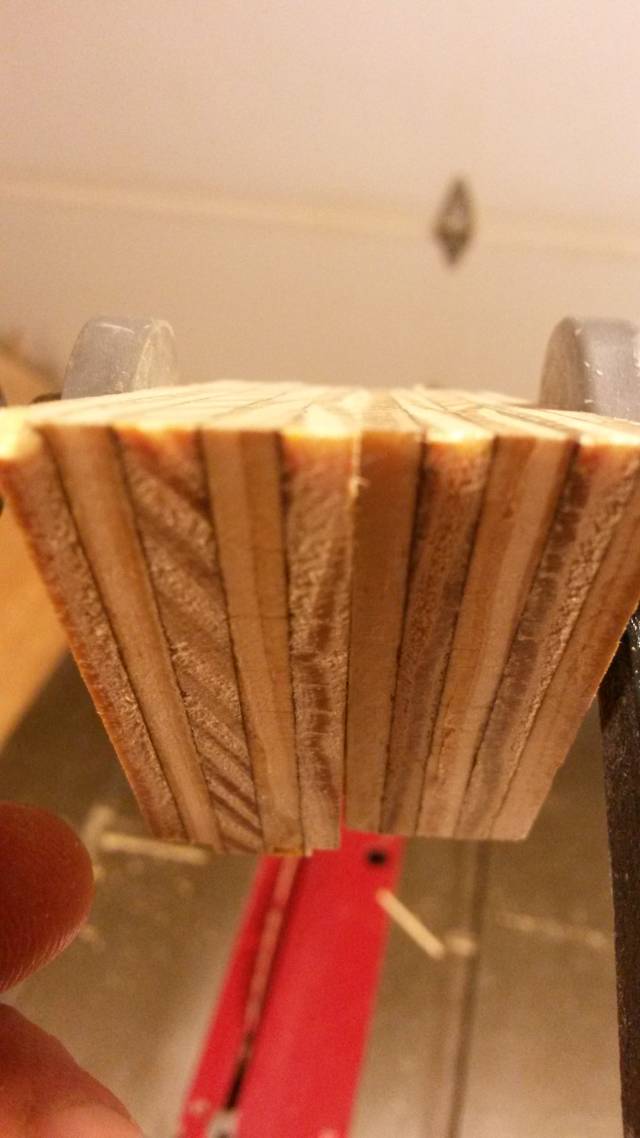
That’s it. It’s the best way I could think of and the results are pretty darned good but not perfect. I checked a cut against the speed square, a 12" one, and it’s out maybe 1/64 over 12". I think I am incapable of getting it any closer, and that’s why I’m asking if anyone has a better way to make perfection. Perfection is always the goal.
Losing fingers since 1969
17 Comments

I will be following with interest as I wish to build one as well for my new table saw. I just made a sacrificial cover for my rip fence. I also just made a spline jig for that fence and I will follow it up with pictures later on. Thanks for posting what you’ve already done Brian.
CHRIS, Charlottetown PEI Canada. Anytime you can repurpose, reuse, or recycle, everyone wins!

Thanks Brian for the step by step. I’m going to make one tonight after dinner. 1/64 of an inch over 12" is perfection for me. I’m hoping to get that close.
Jack

you lay the frames in the back side I am going to try one thanks for the idea
jim
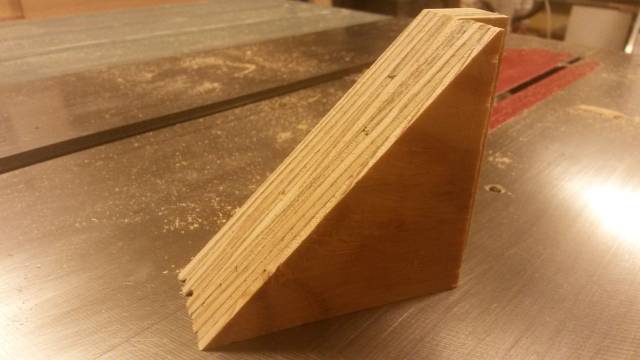
I just tried a small test. I cut 2 small triangles, one from each fence, then lined then up next to each other. I aligned then so the bottom of the triangle lined up that pushing your finger across resulted in a smooth joint. However at the top of the triangle I could feel one of them was taller than the other. Not perfect. I don’t know if I’m asking for too much. The triangles are only about 2-1/2" tall. Again, it’s very close but I want to know if there is a way to build the sled perfectly.
Losing fingers since 1969
Take a look at this sled I built some time ago and it may help you also take a look at the stops I made .
https://woodworkingweb.com/creations/217-sidewinder-mitre-sled
Maybe I am asking too much. Here’s a picture of the top of the triangles that i mentioned in the last post. I can’t see any difference in the photo, but you can feel it with your finger.
Losing fingers since 1969
Keifer, thanks for the suggestion, but I’m looking for a fixed mitre. Your sled it’s pretty awesome, though. I’d love for you to expand on how to get a perfect 45. I understand the aspect of having the perfect 90, which is why my last sled worked well for picture frames, but I’m struggling with the perfect 45. When making triangles for jigs, that perfect 45 is important.
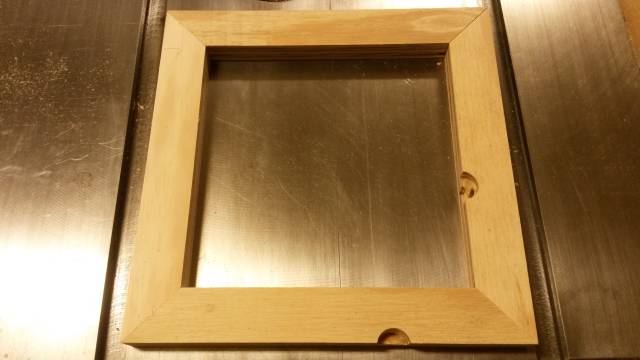
By the way, i tested for a picture frame and it came out nice. The 2 lower corners are glued. The top piece is loose just to see how it would fit.
Losing fingers since 1969

Enjoyed the right up. It’s a booger getting the 45’s to line up, isn’t it? Ah, the joys of Wooding. Looking forward to more of your posts!
Keith "Shin" Schindler


Ok here is what i did. I bought two miter bars from rockler. I’ve made all the miter bars in the past out of hardwood but, with a shop that goes throught to many humidity changes I’ve had to many offs. So i picked my ply shimed up the miterbars 1/32 above the table. put two very small pieces of carpet tape on bars to aid in holding the bars to attached them to the sled ply. (You want clearence under the bars so theres no drag on bars to miter slot) I squared the ply up to the rip fence of which is parallel to the miter slot. Then i laid the ply down onto the table, slid the ply back of which the bars should come with it because of the tape. Then fasten miter bars. Next, i made up my front & back support and fastened them from underneath with screws. Use carpet tape to hold them into place. Do long edge to long edge line up.
NOW the important stuff. What i did is square up two pieces of wood and do a half lap joint on one end. Its very important that this be precise and square. Glue up your half lap check it for square on the outside since this is the side you will be using for your miters. Now let that dry. Next, pull your sled back turn the saw on and make a cut with the blade you are going to use for your miters. Cut only to about11/2" from back fence. Dont go through. Now this is what i did.. i took my machinist 45° angle and set it along the saw groove just cut in the ply then i placed carpet tape on the underside of my 90° wood with the half lap and lightly put it on the ply and aligned it with the 45°trued it up with the outside & inside corners in the center of the saw kerf and pressed it down. I trippled checked it then slid the ply back added two clamps to hold the 90° wood to the ply rechecked it to make sure it was 45°to my saw kerf then screwed it down. Now you can use a bevel square to do this but you needto make sure you set a true 45.
after the 90°is screwed down run it through the saw again. Now you have a left zero clearance cut and a right zero clearance cut from the blade that is your mark. Put your pencil marks on the edge of the saw kerf a it will be exact.
Jeff Vandenberg aka "Woodsconsin"
Brian
The issue is that both fences are off 45 DEG. your frame mitres work good and that indicates that the fences make up 90 DEG.
On my sled I can compensate in two ways I can set the fences to a perfect 90 DEG. by loosening the bolts and adjusting it and also rotate the complete fence assembly to get a perfect 45 DEG.on both sides .
I would make the fences on yours movable and use a good drafting square to align them to the blade body not the teeth .Also a stop with a dowel attached may help you to get better precision as you are not aligning on the tip of the mitre but somewhere on the face of the mitre .

I would second the movable fences so you can dial it in.
Abbas, Castro Valley, CA
Jeff and Kiefer, both excellent advice. I especially like the idea of aligning to the kerf.
Now I need a new combination square. I found out yesterday that the mitre side of body is not machined flat. When I laid it on the saw table without the rule, it wobbled! The square side seemed to be very flat. I’ve compared the squareness to other squares and it seems fine but I never scrutinized the mitre accuracy of it before yesterday. Are there any options between the $10 empire and the $110 starett?
Losing fingers since 1969

I have found that the miter slot varies in parallelism from one saw’s arbor to the next, thus compounding error by using both sides of the blade.
steve66
Steve, that seems to be a matter of proper setup on the saw. I’m sure that would be a frustrating experience for me and I hope I never have to do it. Mine seems to be in pretty good shape.
Tonight I tried to make a right angle fence using a half lap like Jeff said. That failed. After gluing up what seemed to be a perfect fight angle, when I took the clamp off it was out of square. I didn’t try that again.
Instead, I went back to my original idea. First I checked to make sure the kerf was square to the front of the sled. It’s good. Then I set up one fence with one screw to act as a pivot, squared it up using a speed square against the front of the sled and then screwed it in place. I checked for squareness with every measuring tool I have about 10 times each and decided finally it was good. Then I repeated the process for the other side. I think I paid a lot more attention tonight than yesterday. It is as perfect as I can make it. I used a framing square to make sure the fences are 90 to each other. That came out very nice.
Unfortunately I couldn’t test it because the baby is sleeping. I plan to do 2 tests. Make a picture frame is one. The other is cut a triangle from each side and compare them side by side. That should tell me that the fences are square to each other and to the blade. Fingers are crossed.
Losing fingers since 1969
OK I’m very happy about this. I just got a chance to do my 2 tests and they both passed with flying colors.
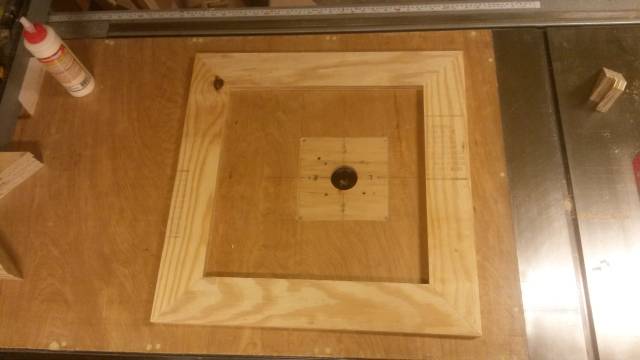
Picture frame is very tight. It’s scrap ply 3-1/4 × 16 or so. I figured this sort of larger test size would reveal any imperfection in the fit. I’d say it’s about as close to perfect as can be.
The triangles are cutoffs from the picture frame. One from each side of the sled. They also line up very very nicely. It passes the finger test – line up the bottoms and run your finger up to feel for a change in height between the 2.
So it looks like my idea of starting with a nice, square sled, squared up against the table saw fence while attaching the runners was a good one. This gets the front of the sled square to the blade and allows for use of the speed square to line up the mitre fences. I think that’s more accurate than most combination squares. I guess I got the idea right the first time, but just executed it poorly. This guy, on the other hand, makes me very satisfied.
Losing fingers since 1969
Tight miters. it’s a winner.
Abbas, Castro Valley, CA
Thanks. I’m very happy with the outcome.
I was thinking last night. The front of the sled doesn’t have to be square at all. I could have used the sides as a reference point to line up the 45.
Of course, it’s nice to have the front square as well in order to make quick cross cuts without swapping out sleds mid stream.
Losing fingers since 1969