Share your craft projects
Make new craft buddies
Ask craft questions
Blog your craft journey
Craftisian Blogs
view blog series
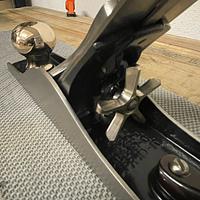
If I understand correctly, this cuts tenons.
I still need to get a dowel taper cone cutter which must be used before this tool. You first use a co...
You’re probably familiar with the time-saving modern invention, the countersink drill bit. They look like this:
[IMG_7418.jpeg]
I never knew such...
Welcome aboard! In this series, we’re going to explore the things that I acquire on my visits to meetups for the members-only PAST Tool Collectors ...
Someone asked me if this toolbox was a jewelry box and I don’t think so.
For $21 I found this box which, were it a jewelry box, would likely have ...
This is more of a come along with me, and be willing to offer suggestions type of blog (input is always appreciated). Not sure if I'll do this rig...
If you have questions about safety shoes see this video.
If you have questions about ear protection see this video.
If you have questions about eye...
Taking care of the other details now that the main assembly is complete.
Added the binding at the soundboard. Started out as 1 x 5mm Black Walnut. ...
Hello, dear friends and colleagues, I am going to show you the construction of the Sane Felipe 1690 ship. I hope you will enjoy seeing the construc...
With measurements in hand I now can enter them into a spreadsheet.
Then I can create curves that run vertically on the doors.
[image.png]
And ...
This is a project that started to take shape sometime in the mid 2010s. I’m going to hold back some of the details and let the story unfold on it...
Fitted the braces and reinforcing ring to the inside of the soundboard.
[IMG_2648.jpeg][IMG_2650.jpeg]
Fitted the soundboard to the body. I suppose...


