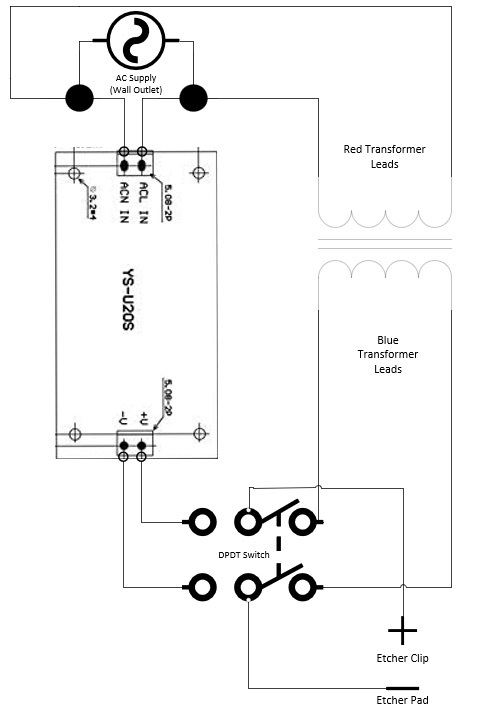
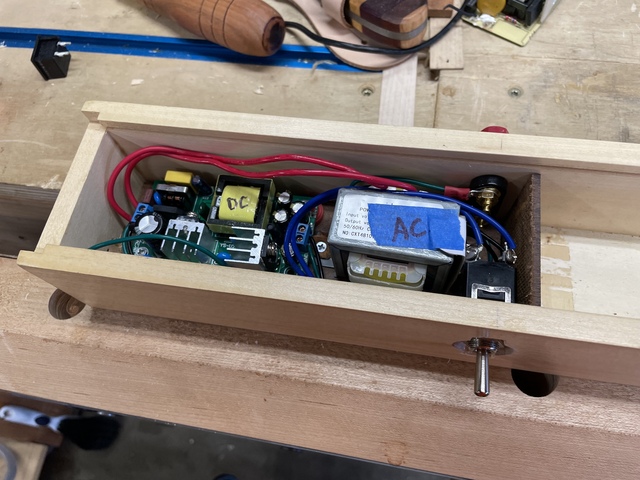
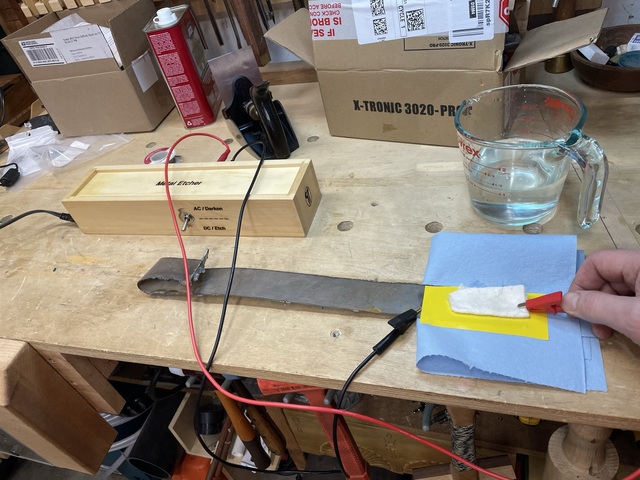
So the discussion came up about a maker’s mark that HokieKen had etched on a knife project he posted. He was nice enough to share the parts he used to make the homemade etcher. Seeing as how he’s much more savvy than myself, he was gracious enough to walk me through making it, including multiple clarification questions, as well as ‘whipping up’ a wiring diagram. The etcher is, essentially, two transformers and a switch. Both transformers step down power from 120V AC to 12V, but one provides 12V AC and the other 12V DC, the switch allows you to swap back and forth between the two. I am most assured that there are more proper names for each of these transformers, but I was able to get them off Amazon, including the switch, banana plugs and lead wires for about $40, so I see no need to squabble over proper names! For those uninitiated (as I was about 4 days ago), the DC power actually etches the metal, the AC power oxidizes the same area, causing it to darken and stand out a bit more. You clip the (+) lead to the project and clip a cloth pad to the (-) lead. The pad is dipped in a high salinity solution (lots of salt in water), then power is supplied across the wet pad while it lays on a masked section of the project. The resulting reaction etches the metal where it’s not masked.
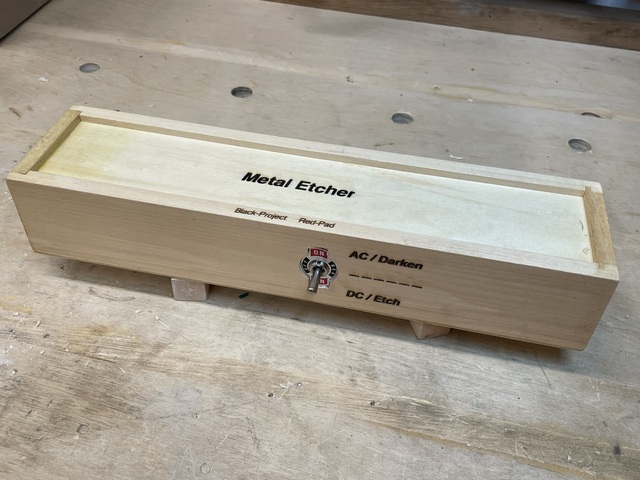
I had a vision in my head about what this was going to look like, all nicely nestled in a custom box with none of the ugly parts showing…well, this was v1 and, while it’s not awful, I might make a v2 in a more properly fit box. I used a wooden slide top box I just had hanging around…and it worked out ok!
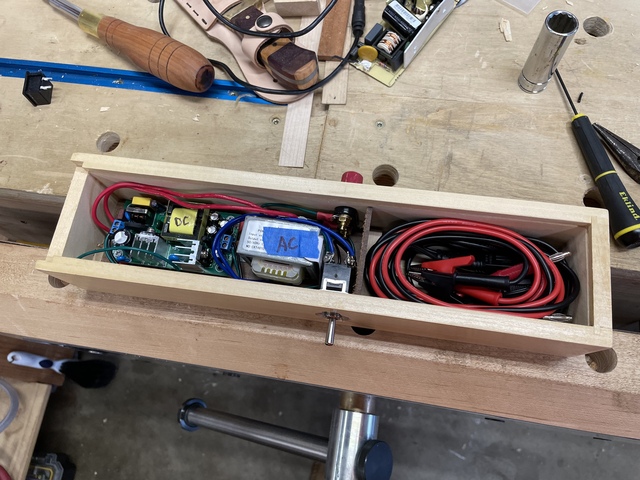
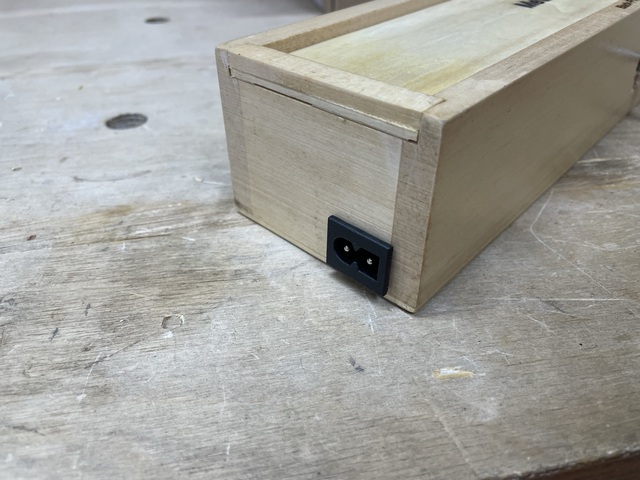
One of my caveats was that I wanted every thing to be stored neatly contained in the box when not in use. So I had to provide for storage of the power cable and work leads…which took up a lot of room, comparatively. I also didn’t want cables hanging out, so I scavenged a power cable and receiver out of an old power supply such that I can unplug the power cable and store it when not in use. The banana clips should be accessible, but the work leads removable (hence the use of banana plugs in the first place).
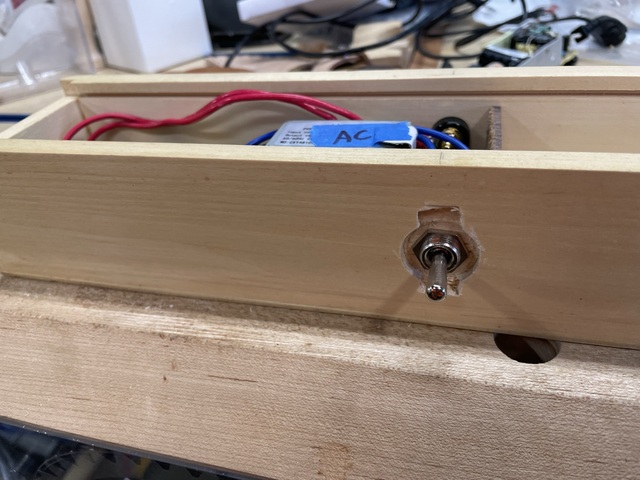
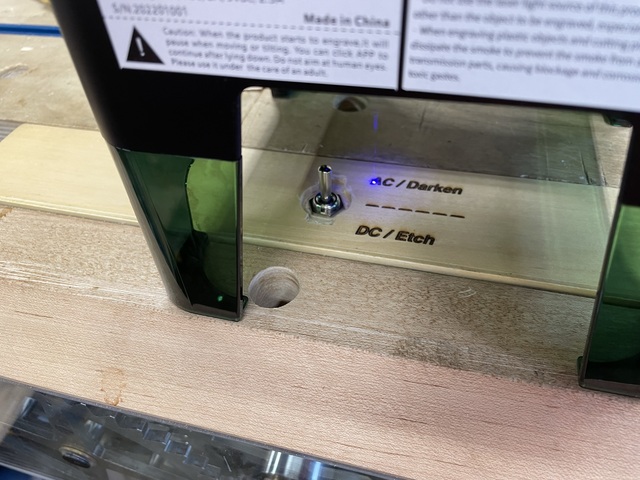
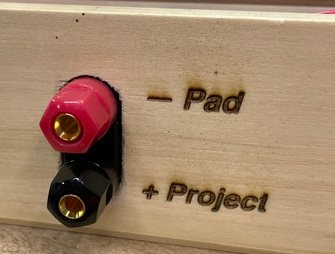
So I laid everything out inside the box and, while there was enough room, the AC/DC (🤘🏼) switch hangs out (so I cut down the toggle a bit) and the banana plugs hang out the side. My concern is that they are ‘warts’ on the side of the box and may get knocked around. If I make a v2, that is specifically what I want to change…
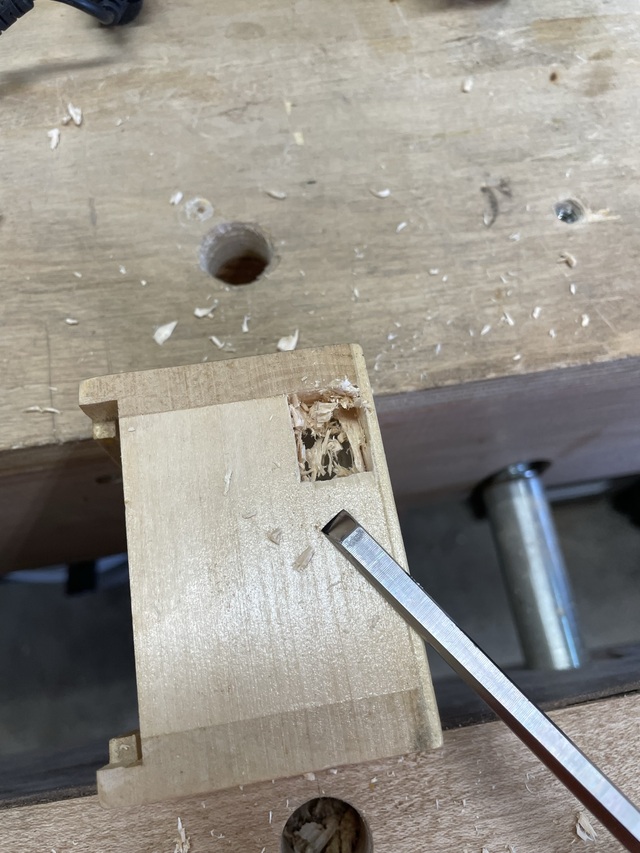
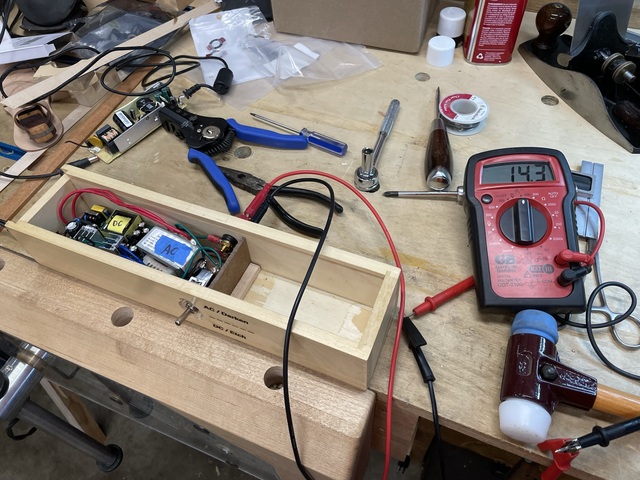
I mortised out a hole for the power cable receiver which is just a small block. I secured the two transformers on a piece of hard board so they could be secured yet removable if needed. Then I laid out and mortised in the banana plugs and the switch. After it was all wired up, using Ken’s description and his wiring diagram, I added a small interior ‘wall’ to compartmentalize the electronics away from the storage. From there it was just some continuity testing and then live testing..and of course I went all ham with the laser engraver.
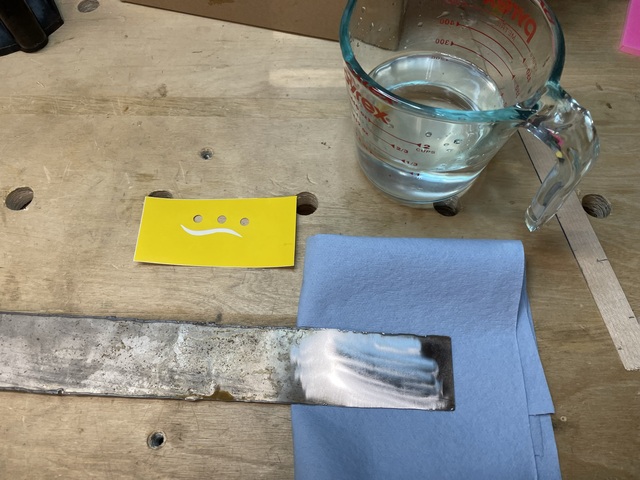
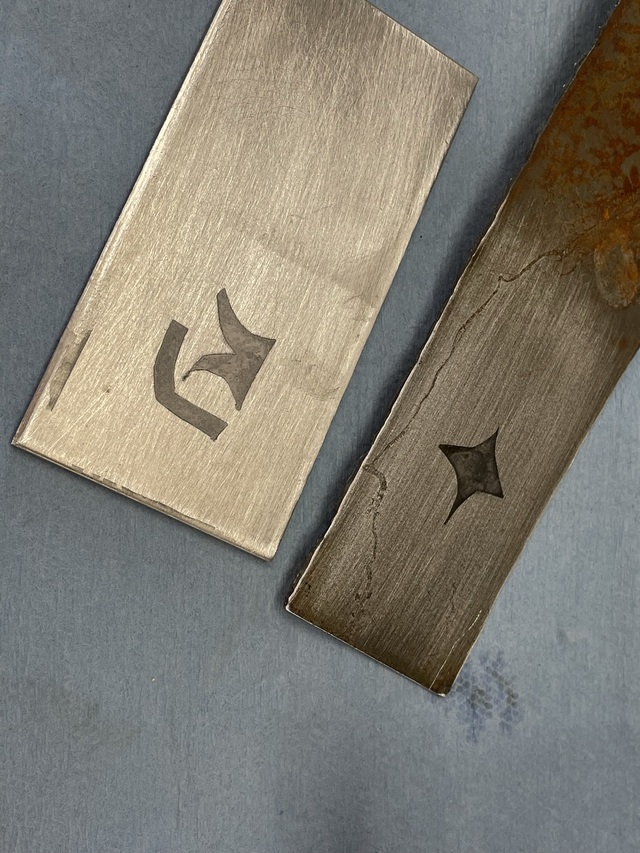
I’ve got some quality exterior adhesive vinyl for my Cricut cutter that works great for this sort of thing…I’ve used it before with a thrown together etcher. I hacked out some negative images in some scraps and started testing. I still want to do more testing to dial in the technique…specifically because I want to laser engrave the instructions on the side of the box so I’m consistent with my use. I make notes like this a lot, especially for tools I won’t use all the time. I hate reinventing the wheel each time I use a tool!
Anyway, much thanks to HokieKen. While I can’t come close to matching his metal work, at least I can’t etch like a (semi-) pro!
Ryan/// ~sigh~ I blew up another bowl. Moke told me "I made the inside bigger than the outside".
The gizmo is way above my paygrade, however, that laser job had me interested.
How deep is the engraving? Have you tried woodfiller filling and sanding. I reckon it adds that extra pizzazz to the engraving. Sanding it flush will also remove the charing (which personally you should remove anyway).
If your first cut is too short... Take the second cut from the longer end... LBD
The engraving isn’t that deep Ducky, but it might be deep enough to fill with some Timbermate. I haven’t tried that. Seeing as how this is v1, I might go back and try it as-is. I usually buff out the charring with some 220g. Not sure why I didn’t here. Maybe it’s because the box was already finished (since I was reusing surplus). Dunno. I need to do some more test work with that laser. I find if I turn the intensity up too high it gets a really dark char, which gets all over the place if you don’t seal it in with lacquer or shellac or something. Probably the foibles of a cheap laser…but it’s soooo easy to use! I wonder if running two passes with low power would avoid that and get more depth? I am a fan of the Timbermate…but I’ve only got a couple flavors of it…I should probably get a couple more if I’m gonna use it to backfill and sand, eh?
Ryan/// ~sigh~ I blew up another bowl. Moke told me "I made the inside bigger than the outside".
Thanks guys, I appreciate it! But it’s really Kenny’s work…I just packaged it.
Ducky, when you backfill and sand engravings with Timbermate, do you seal the wood first somehow to keep it from leaving the contrasting color in the pores around the engraving?
Ryan/// ~sigh~ I blew up another bowl. Moke told me "I made the inside bigger than the outside".
Ducky, when you backfill and sand engravings with Timbermate, do you seal the wood first somehow to keep it from leaving the contrasting color in the pores around the engraving?
Damn you RGi, I was gonna have a quiet night Polishing (hell no sarcasm intended) off some Black Russians and got sucked into one of my idiotic tangents.... Hopefully this blog may answer some of your questions.
If your first cut is too short... Take the second cut from the longer end... LBD
Great job Ryan! My new AC transformer showed up yesterday and I designed a new enclosure to print so hopefully I'll repackage mine this weekend.
From your pics, everything looks great. In some pics it looks like the blue (AC) wires are going to the top terminals on the switch. But in another it looks like there are green leads going to those terminals. It should be the output from the larger board (DC) that feeds the top terminals on the switch.
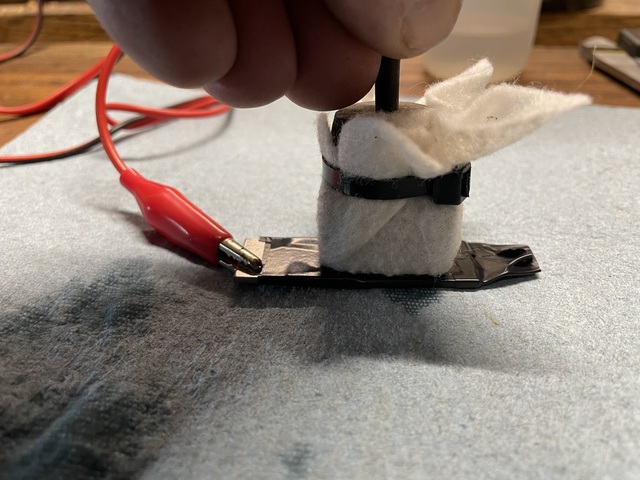
One issue I see is your pad. I think you'll have a hard time getting good results with no pressure on it. I keep a fair amount of force down on mine to ensure a consistent etch everywhere:
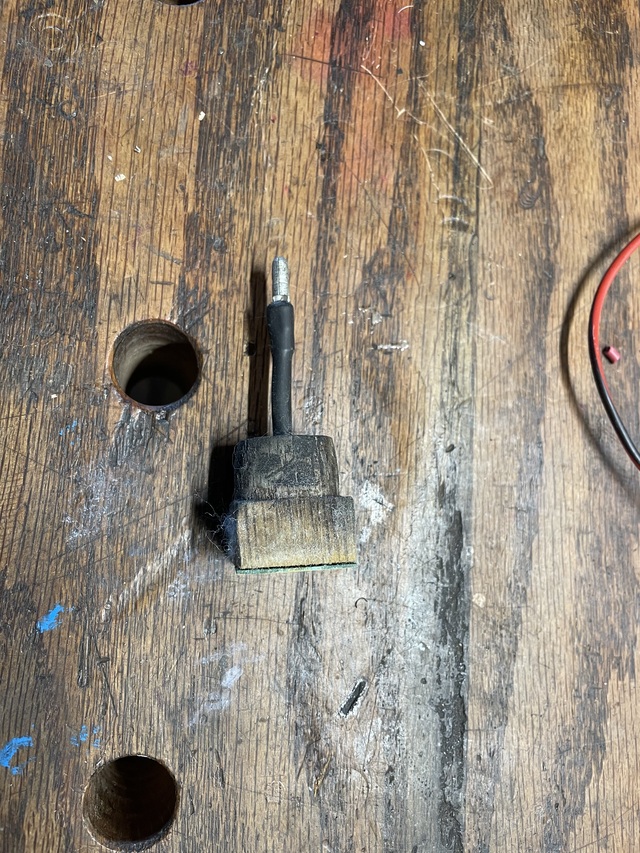
This is how mine is made:
Just a piece of solid copper wire soldered to a thin piece of brass plate. Then I made the wood "handle" and drilled a hole for the wire through the center. Crimped a terminal on the end and used some heat shrink to keep everything together. Then I just cut a piece of felt and wrap the wood and secure it with a cable tie. The brass plate keeps the current distributed evenly over the whole area.
The biggest thing I see though is that your DC voltage is backwards from the way you have the sockets labeled. Your meter is showing +14.7V from the red to the black. If that's the case, you should be clipping the lead from the red socket to the work and applying the lead from the black socket to the pad. It's hard to tell from the last picture but I suspect you are getting all marking and no etching and a backwards DC voltage would explain that. When you apply the pad with DC current you should be able to hear and smell it working and occasionally even see it smoke.
Looking back again, I see the switch in that picture is flipped to AC so nevermind. I would verify it though and make sure if you hook your meter up the same way (red-red, black-black) you get -12V with the toggle to DC.
Kenny, all your points are valid and we’re addressed during tasting. The pics don’t necessarily show all those alterations, however they’ve been made. I can hear and see the etching (bubbles) when on DC. And yeah, the wires were reversed originally but changed over before testing…remember the comment on your thread about switch direction?
I do like the applicator you made though, I’ll have to knock something up like that. In later tests I was balling up the pad a bit and applying manual pressure, which got better results. 👍🏼
Ryan/// ~sigh~ I blew up another bowl. Moke told me "I made the inside bigger than the outside".
Pottzy, it’s for etching metal. You cut out a shape in adhesive vinyl (or tape, whatever) and apply it to the metal, then use a small cloth pad soaked in salt water to pass the electricity into the metal which etches it.
Ryan/// ~sigh~ I blew up another bowl. Moke told me "I made the inside bigger than the outside".