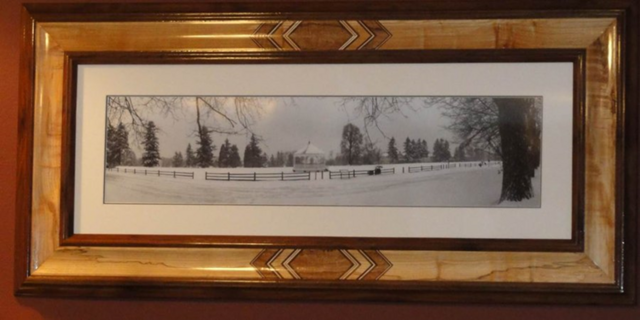
I enjoy making frames. I have several to share with you. I’ll begin with this one.
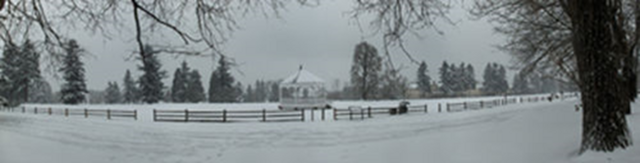
It all started with a picture. I took this shot in 2008.
It is of Officer's Row Park here in Vancouver WA. It doesn't snow here often and I happened to be able to get a picture of the park with several inches of snow. It was a fun shot to take and play with and I even printed out a nice sized 10×40 inch print. But the gray overcast made me set it aside.
Then in 2013 a friend of mine mentioned he had some maple harvested from trees that had to be removed - wait for it - from the same park! The row of trees on the right of the photo are the maples still standing. He wanted to know if I would like some to work with. Well - yeah I sure would!
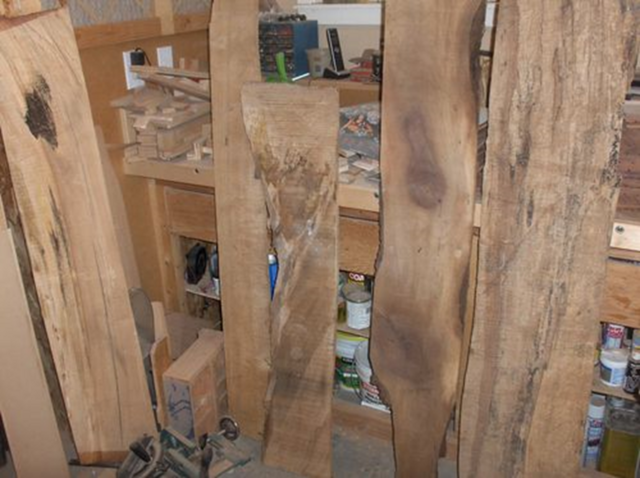
When I picked up the wood, I could see I had a challenge. The pieces were trim cuts from squaring up larger pieces. They tapered to zero thickness in some places, were very rough and not the color one expects when they think of maple.
But the biggest challenge was - they were shorter than my picture!
On the plus side, one of the pieces had some spalting (I think it is the one on the right). I just needed to figure out how to make these boards longer. I was definitely NOT going to try to just splice two pieces together - the color and grain variation would never look right.
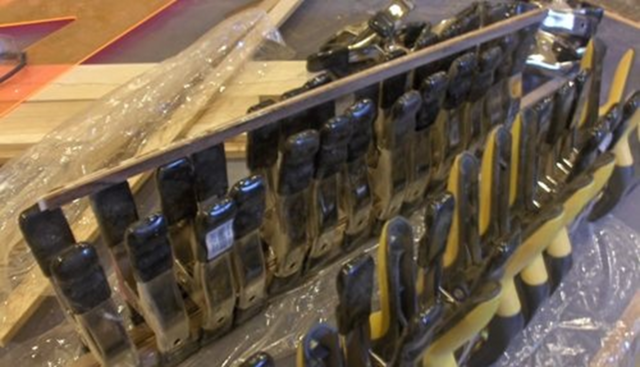
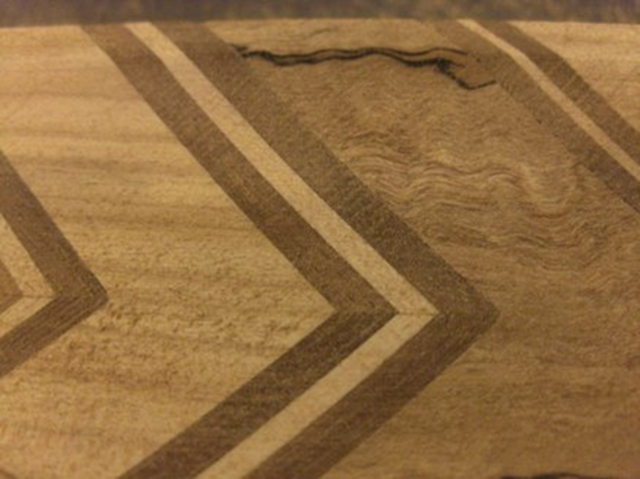
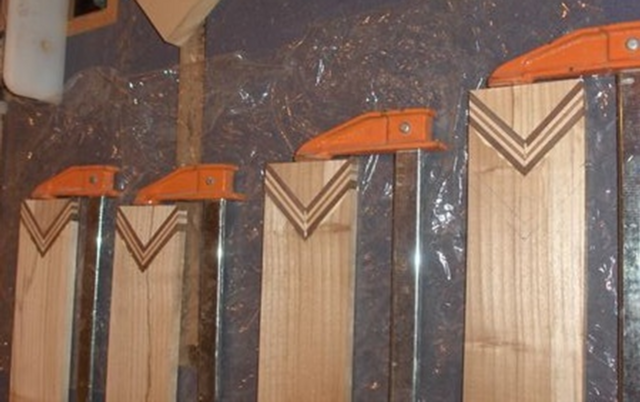
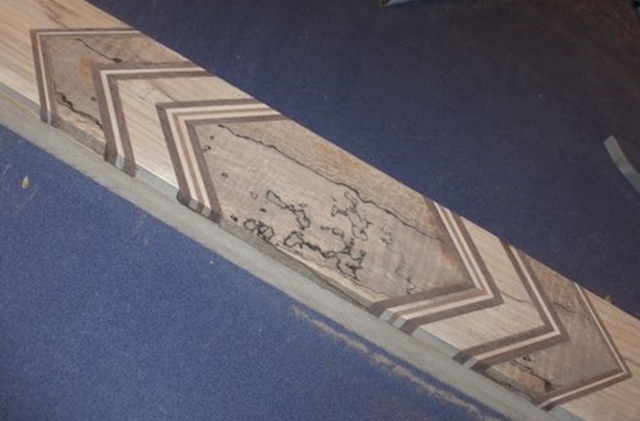
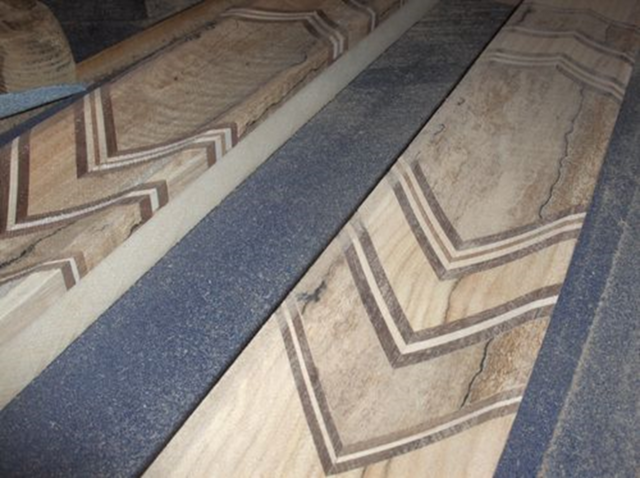
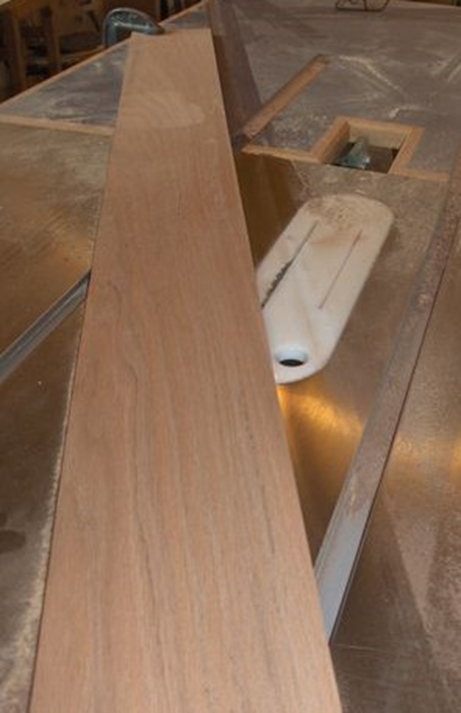
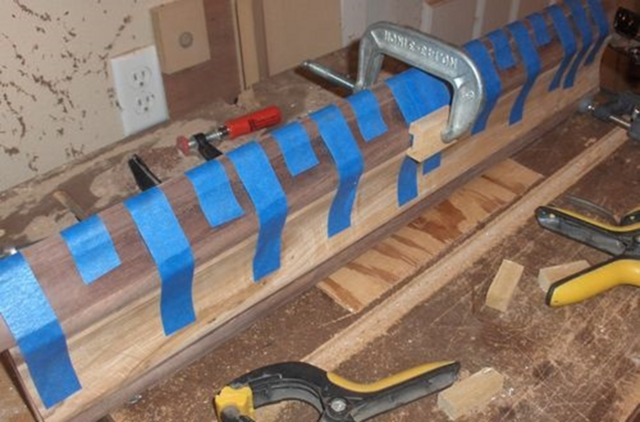
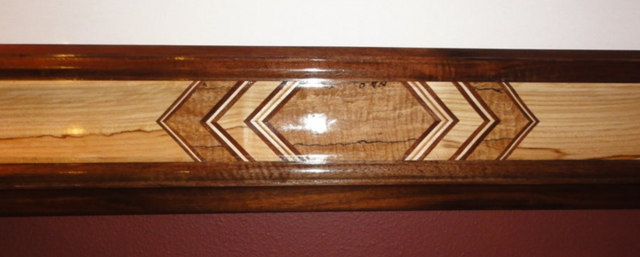
I ended up using the spalted wood as an inserts that I set off with a series walnut and maple bands. There are three different sets of bands - each one with unique patterns and/or widths. One of the glued up strips is balanced on top of the clamp handles.
I did some math to make sure I had made the strips long enough. I did, but two of the strips had exactly zero waste - sometimes lucky is good enough. The V-notches were cut with the band saw and a flat file was used to true them up.
I even managed to get the spalt lines to follow the color lines in the main boards.
I then ran the assemblies through a cove cut set up.
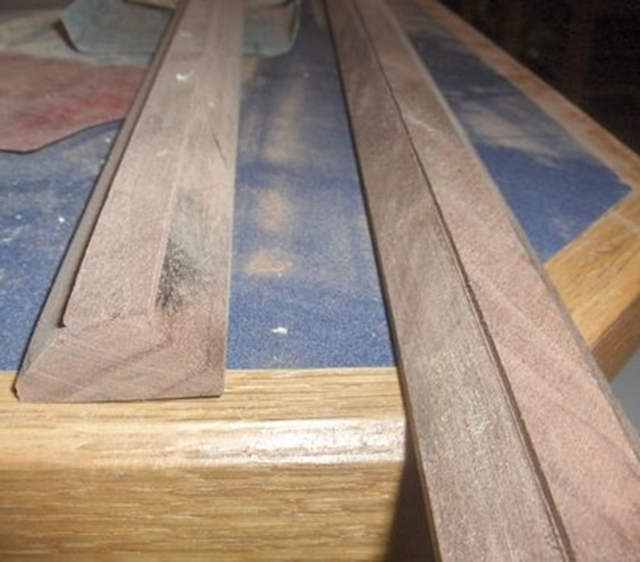
At the same time, another friend offered up some walnut that had been harvested in Silverton, OR. I built the rest of the frame with it. To start with, I used that to create a bead detail on each side of the maple strip.
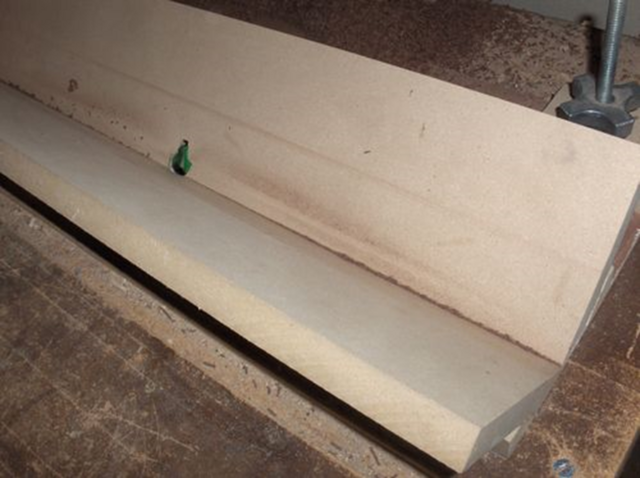
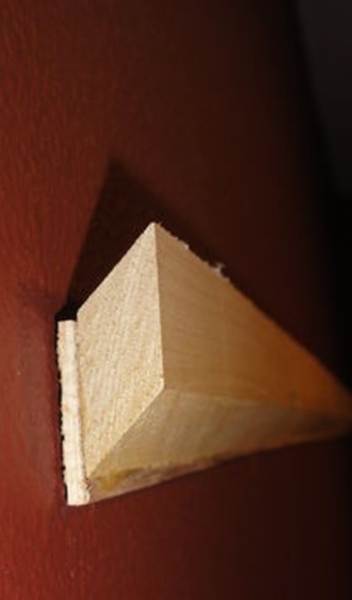
A beveled strip of walnut finished off the inside of the frame. The two strips shown here will make up the 4 final pieces.
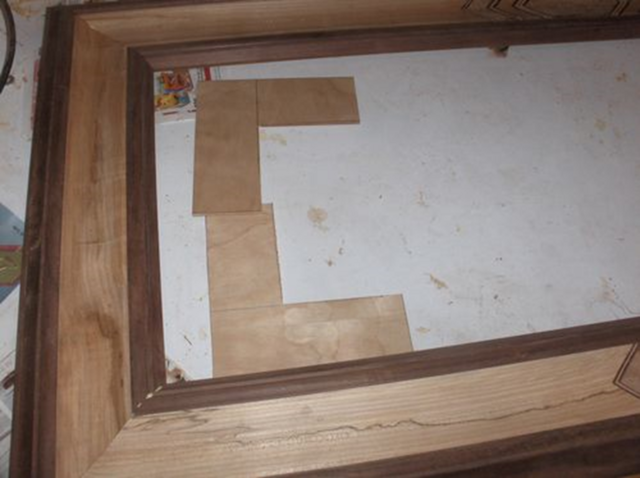
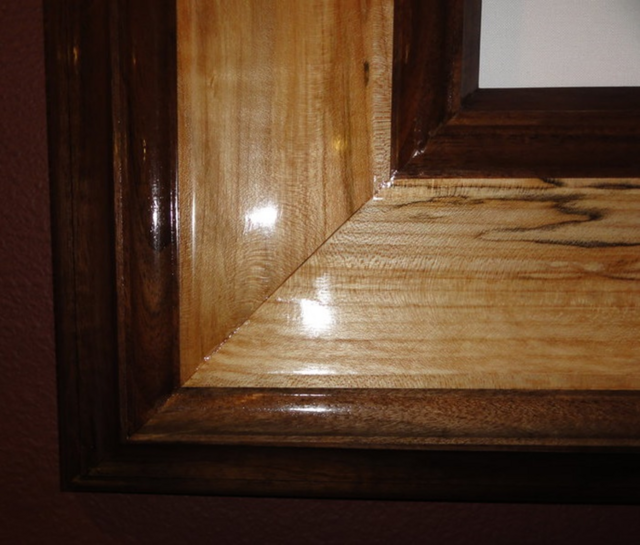
The outside was more of a challenge. This was a project where I had to design as I went along. This was my first large frame and I had trouble getting proportions balanced. I went through several attempts in CAD to get the final layout.
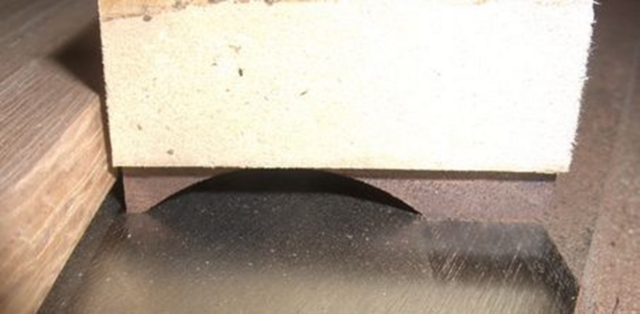
The outer strip is a combination of a cove cut and roundover. Here is the cove set up and resulting cut.
The round over cut took a 45 degree fence for my router table.
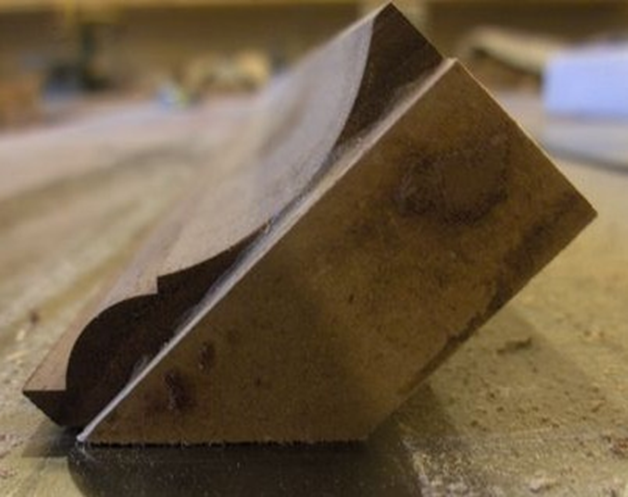
Here is a shot of the final profile. I am just getting started with the trim cuts to get the correct orientation for the frame.
Gluing these complex shapes together was another challenge. Each time, I tried a different combination of tape & spring clamps. More tape and fewer clamps seemed to work the best…
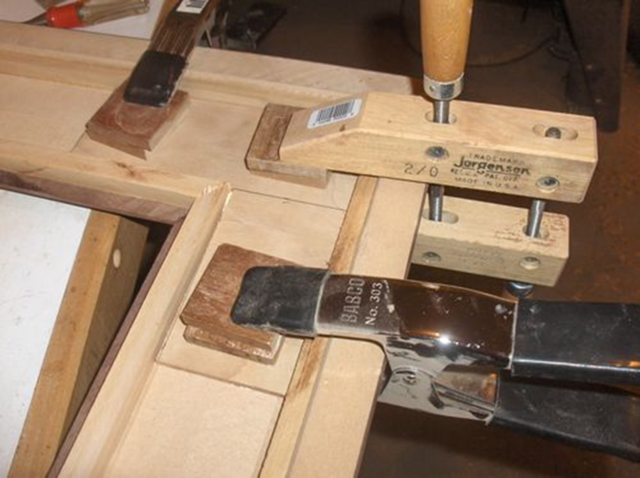
Inside border glue up.
Outside border glue up.
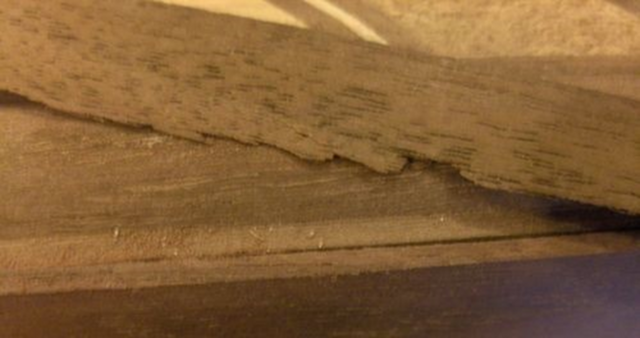
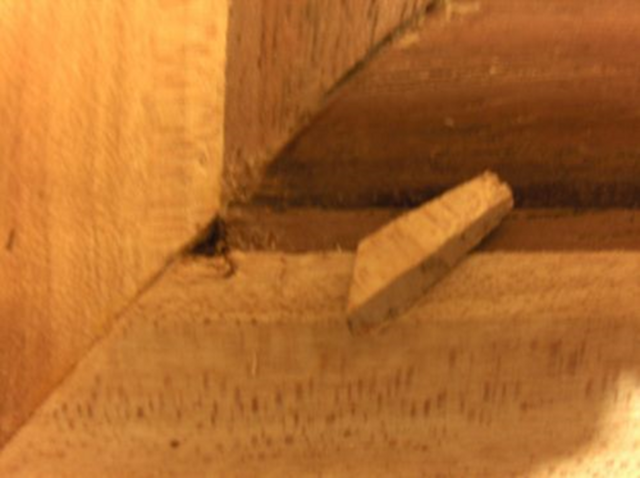
The difficulties with this glue up led to new challenges. I was not able to get a clean joint and had some gaps. I used paper thin strips of walnut to fill the gaps.
The next task was the miter cuts. I had to add blocking to the back to get the assemblies level. It took a few trim cuts to get the miters right. The glue up was the next challenge. There were no square edges to clamp against. The small lip on the outside just twisted the pieces up and out of alignment. I ended up smearing glue on the joint and holding the joint tight for a few minutes by hand. That gave me a strong enough joint to handle the frame. I then added plywood reinforcing to the corners. The result is a very strong and stable joint.
But wait! It turns out I am not done! One corner of my hand held joint had slipped just over 1/8 of an inch. I am at the point of no return, so it is time for some repair magic. I cut out the mismatched overlap and inserted the correct color. I also had to get out my carving tools at clean up the edge misalignments as well.
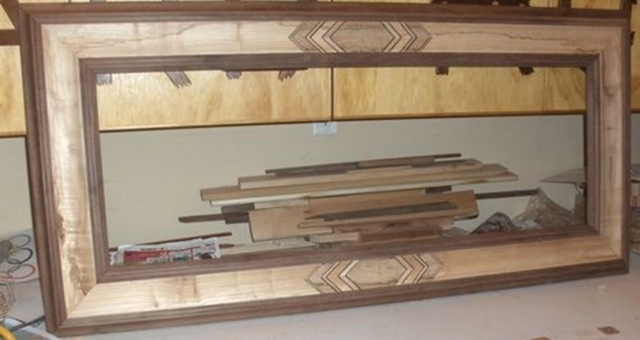
The final result was clean enough that most people can't find the problem corner. In fact, the last time I tried I couldn’t find it either.
I used a french cleat to hang the fairly heavy frame.
Although the project was a progression of one problem to solve after another, I am quite happy with the end result.
The final frame is 27×57. The frame itself is about 6 inches wide.
Excellent frame to go with a really great picture. The story of the wood makes the entire project more special than it already is. Really great woodworking.
As ALK (alias the Duck) would say, and great write up.
It all started with a picture. I took this shot in 2008.
....... Then in 2013 a friend of mine mentioned he had some maple harvested from trees that had to be removed - wait for it - from the same park! ......
What did you load your camera with, bullets?
If your first cut is too short... Take the second cut from the longer end... LBD
Nice frame Steve, the story of the trees in the photo being in the frame itself is great. A great job overcoming the challenges to make it all work. Well done.
Ron - people always notice the frame & picture and then I get to tell the story. Ryan - Thanks! Splinter - There have been times when I have cut it close, but this is the only time I had zero wood left over. That was with the pinstripe borders. Corelz - Thank you! Old rivers - I appreciate the comment LBD - do they use the term "shot" for taking a picture down under? Thanks for the comment pottz! Paul - last time you suggested hide glue - I still haven't tried that😁 Moke - thank you for the comment BB1 - I couldn't believe my luck when I was offered wood from the row of trees in the photo Eric - There were a few times when I had to back away and think things through


 - Project by Steve Rasmussen")

 - Project by Steve Rasmussen")
")
")
")