Share your craft projects
Make new craft buddies
Ask craft questions
Blog your craft journey

Eric - the "Loft"
4510 posts
and
70 followers
in over 3 years
in over 3 years
More from Eric - the "Loft"
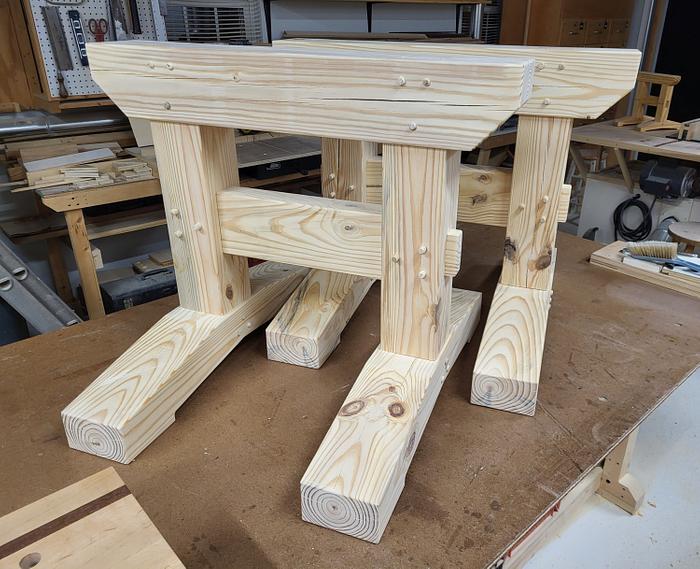
Timber Framed Sawhorses
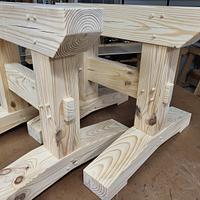
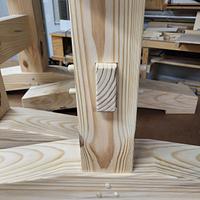
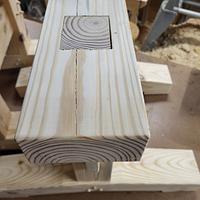
A busy week, but these are completed. All through tenons, the mortise were hogged out with a fostner bit, then chopped, from both sides. Took a bit getting through 6x6 SYP, laid out everything before getting started and drilled for the pins on the drill press so they would be square. Drilling tenons after the joints were put together, clamping the pasts square. I did not use any glue on these, all being held together with the joinery. I do have a few gaps on the top tenon, I can live with that.
They were copied from the Mini's I built a few weeks ago.
I built these for a project that I have been wanting to get started on. There is still a little prep work to do before I can really get it started. The plan to get started in building a Strip Planked Kayak, Sence I will be bending strips around forms for the build I needed something that will stay in place. These should do the trick, if I had to guess they are about 90# each, the cross brace will allow me to lace a temporary shelf between them.
When I get started on the build, I will start up a blog on the process. I am sure there will be some growing pains and testing of my skills building a kayak. A first for me.
Thanks for looking and comments are always welcome and appreciated.
Main Street to the Mountains
35 Comments
They certainly look sturdy. They should work out well for holding up your kayak parts.
May you have the day you deserve!
Hey Eric - Nice sawhorses. I have gone down the strip built kayak path before. Whose plan are you using? Internal or External strongback?
Dave, thanks. Sturdy was the name of the game. I have had sawhorses in the past that like to rock and move as one preforms work them.
Steve, thanks. Good to know you have been down that road. I will be using a plan out of "Nick Schade's" book. I will be using an internal frame set up. The next step for me is to build a box beam out of plywood, (at least a cross section). So I can devise a jig for my trim router, to be used to clean up the center of the forms. I have an idea for that, but it needs to be sized correctly, no play but able to slide along the strongback.
Steve, thanks. Good to know you have been down that road. I will be using a plan out of "Nick Schade's" book. I will be using an internal frame set up. The next step for me is to build a box beam out of plywood, (at least a cross section). So I can devise a jig for my trim router, to be used to clean up the center of the forms. I have an idea for that, but it needs to be sized correctly, no play but able to slide along the strongback.
Main Street to the Mountains
Are you going to apply any sort of finish? They are great looking and should last a long time.
David
David, thanks. Not sure about any finish, probably should apply a couple of quick coats of poly, at least to seal the grain. Then before doing any epoxy from the build coat the top surfaces with some paste wax, just for the ease of clean up.
Main Street to the Mountains
They look great, must be a big kayak you're building :)
Big, heavy, solid, wonder what you are going to use them for? Nicely done
Ron
cant hardly keep up with all your projects but that is a good thing are they for a work bench ?
*TONY ** Denver * ALWAYS REMEMBER TO HAVE FUN
Sturdy might be an understatement. They look really good though
-- There is nothing like the sound of a well tuned hand plane. - https://timetestedtools.net
Great build Eric. Can’t wait to see the Kayak.
Solid build!
I think the top tenon gap there is better than too tight. I intentionally cut there a little bit smaller usually so it won't cause the mortise side to split(I know it's just wood checking). For the other orientation of the tenon, I like to do Kigoroshi to compress the fiber and make it super tight or put a wedge but you did a nice drawbore:) Good looking, too.
Looking forward to seeing your kayak project!
No name noobie here
Those wi l hold up anything you can throw at them. They look good
Those look great, Eric! I think you could build a naval ship on those!
A fine pair of saw horses, nice attention to details - such as the tight fitting mortises & tenons.
Mike, thanks. looking at 17" but when bending the strips I don't want it to move causing more work.
Ron, thanks. Heavy, strong yes, should work well for the kayak build.
Tony, thanks. Yes, the shop has been busy. Funny you mentioned a bench. this would make a nice base for a bunch down the road.
Don, thanks. OK we will go with "Beefy".
WoodGuy, thanks. Yes, I am looking forward to getting that started.
Yrti, thanks. They are a little tight, but still a tad lose to allow for wood movement. The pins should keep everything in place. I started with the single one close to the cheek, then moved outwards. The tenons are turned 90* from the top to the bottom. If the tenons loosen up, I could use a cutoff tool and drive a wedge in there.
Corelz, thanks. They should hold up hopefully. I will need a hoist to get them up on the loft when not in use.
Ron, thanks. I see how this build goes, then maybe think about something a bit larger, in the neighborhood of 24".
OldTool, thanks. I drew the cheeks in as tight as I could, a few tenons have a tad bit of a gap.
Main Street to the Mountains
Eric,
You continue to crank out excellent projects.
Thanks for posting.
You continue to crank out excellent projects.
Thanks for posting.
Petey
Petey, thanks. And they have been getting larger. I have been enjoying the shop time lately.
Main Street to the Mountains
Sure, they will be used a lot...
...woodicted
Ivan, thanks. Yes, they will get used.
Main Street to the Mountains
I'm looking for plans for horses that can take up as little room as possible, it appears you've gone the other way. They do look like they'd hold up a firetruck though.


