SplinterGroup
in over 3 years
More from SplinterGroup
Cribbage Board Prototyping
Jim Jakosh made a cribbage board a while back that caught my attention.
Simple concept, a bunch of holes and some way to store a deck of cards and game pegs. I've never played but certainly can appreciate the fans wanting something cool to use.
So, off to the shop where the first thing I wanted to do was get a nice looking game surface.
Not wanting to "waste" a large figured chunk of wood on a prototype (and not having anything worthy), I decided on veneer.
Step One: Design
Make a design for the board track and create a program for the laser.
This also means I need a template to shape the piece for later.
Step Two: Game surface
Quite a few smaller steps involved to get to the next photo.
- Veneer the plywood with some mystery wood
- Tape the plywood
- Laser the pattern
- Fill the design with resin and mica
- Shape the plywood with the template

The laser was used to etch some borders and create a 1/16" "pit" for each of the almost 400 holes. Too much time to waste having the laser cut them through so I'll use a drill for that.
Step Three: The base
Seeing that I needed thickness for the game surface (1/4"), a deck of cards (3/4"). a slide out base (1/4"), associated lip and some wiggle room, 1-3/8" thick poplar was selected.
A template and pattern bit at the router table cut out the interior.

Added a channel for the sliding base to fit, entrance is tapered wider to make it all easier to get started.
I used a slot cutter router bit to get this done.

'nutter template to cut the slide and check the fit.

Step Four: Rabbet in the game surface
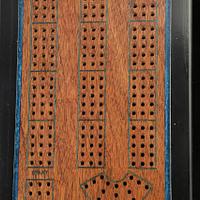
You can see that the peg holes have been drilled. The lasered "pits" acted as a center punch which
helped to keep the drill bit from wandering.

Rabbet slightly deeper that the surface so I can flush out the entire top at the drum sander.
A bit of a gap around the perimeter for more color fill.
Masking tape applied to keep the resin from staining the poplar and then deftly filled.

Drum sanding to level it all out.

Step Five: Everything else
Ok, the monkey in the room is that the poplar is not Scottish, so it looks like crap (old Monty Python reference)
I started to think of what to do on this step back when Mr. Rick was showing us some wood coloring ideas.
My problem is that any surface coloring done pre-assembled would get removed from the sanding to level the surface.
I could use stain or paint, opted for paint.
Masked the resin border, but that would never go perfectly and the finish kinda sucked.
Anyhoo,
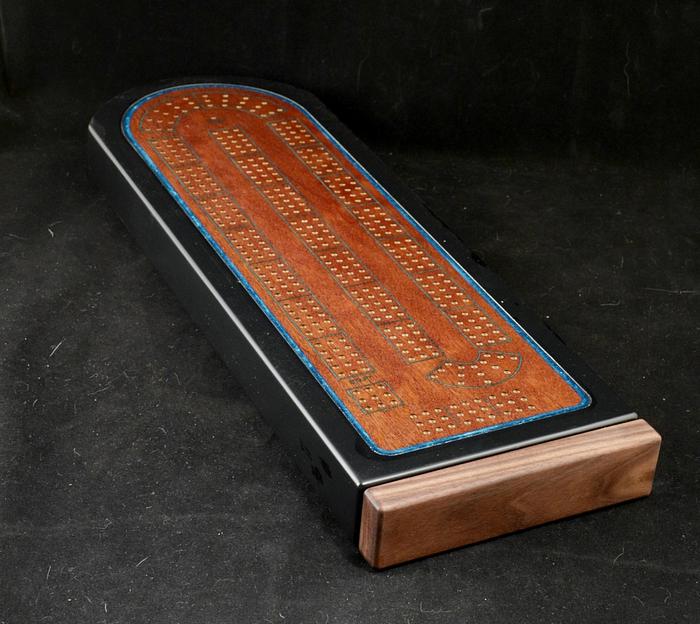
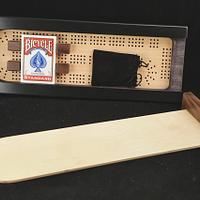
the final product with a magnetic catch for the drawer:

.jpeg)
So, what did I learn?
Don't do this!
Really. I checked prices for cribbage bards and they are surprisingly high, but this beast took a lot of time and to make it nice I'd need to use some thick 'n' nice hardwood which means budget busting. I could frame it out or laminate it but that is more time.
Need to go back and rethink, be back soon with version #2!
30 Comments
working with my hands is a joy,it gives me a sense of fulfillment,somthing so many seek and so few find.-SAM MALOOF.
May you have the day you deserve!
Excruciating enough on the DP moving the piece around. Maybe some brave 'n' burly ww'er will give it a try with a brace? 😱
Makes me want a CNC.
As you know Dave, "excuses" to get a new tool are always good excuses!
Version #2 is already done and a success (will post when I finish the last of the set of 4). Still high in the materials cost though, about $50 with everything except labor.
Mike
Ron
May still salvage it if I can strip the paint and clean it up.
Do away with the cards and everything gets way easier!

Great job Splint'... and also a great, comprehensive write up... many people, especially recipients, don't appreciate the amount of work that actually goes into it unless outlined... if you intend to sell, print this post and hang it on a board next to your gizmo... guaranteed to get quite a few extra shekels.
So, what did I learn?
Don't do this!
..... but this beast took a lot of time and .....
Need to go back and rethink, be back soon with version #2!
I could do all that in 1 step... buy it off Splinter!
That is why I backfill with Timbermate on MDF and just buff. If I sold my stuff, not saying there's a great demand, but to recoup material and moreso labour, it'd be cheaper to but a 3 story solid brick house with a Lamborghini in the driveway or two... 2 Lambo's.
..... I used a slot cutter router bit to get this done.....
Incredible how some idiots (like me) can miss the obvious. On boxes I've always routed the dado in the sides before glue up, which is a pain when dovetailing (I'm no hero, Leigh D4R is my hand(y) tool)... never considered this... on a square box it may require thinking at the closed end, however, worth a few brain storming.
If your first cut is too short... Take the second cut from the longer end... LBD
I always struggle with the curved corners when using the slot cutter. It worked well for this.
The timbermate fill is something I'm still itching to try. Still have problems with not enough mica in the resin to get a good saturation for visibility.
If your timber is pourous, sometimes the effect can be passable,

If your first cut is too short... Take the second cut from the longer end... LBD
working with my hands is a joy,it gives me a sense of fulfillment,somthing so many seek and so few find.-SAM MALOOF.
Ryan/// ~sigh~ I blew up another bowl. Moke told me "I made the inside bigger than the outside".
The way the number of holes keep increasing, your next one would require 5,000,000 plunges.
My final suggestion is to teach them all Canasta or 500 instead... before the 500 becomes 5,000.
If your first cut is too short... Take the second cut from the longer end... LBD
Nice Crib board & well documented.
That's a lot of holes to drill by hand.
daveg, SW Washington & AZ
I suck up the mix from my mixing cup into a small syringe and squirt it into the needed spaces. That part goes quick, maybe 10 minutes.
The holes are a lot easier with the lasered dents. When I tried to just hit the points on a paper template it took a lot more fiddling to align properly. Also found out (re-discovered) that coarse grain (oaks) could care less where you start drilling as they will force the bit around. The laser fixed that issue as well.
If I was going to actually laser the holes all the way through, even with multiple laminations, it would take hours. Best to have a CO2 or CNC for that.
With the drill press, good light, and comfy chair set to a good height I could do a hole every second.
This is about 7 minutes then getting the board done (and done before going cross-eyed).
cheers, Jim
Cheers, Jim ........................ Variety is the spice of life...............Learn something new every day


