


Share your craft projects
Make new craft buddies
Ask craft questions
Blog your craft journey
TonyCan
377 posts
and
19 followers
in over 11 years
in over 11 years
More from TonyCan


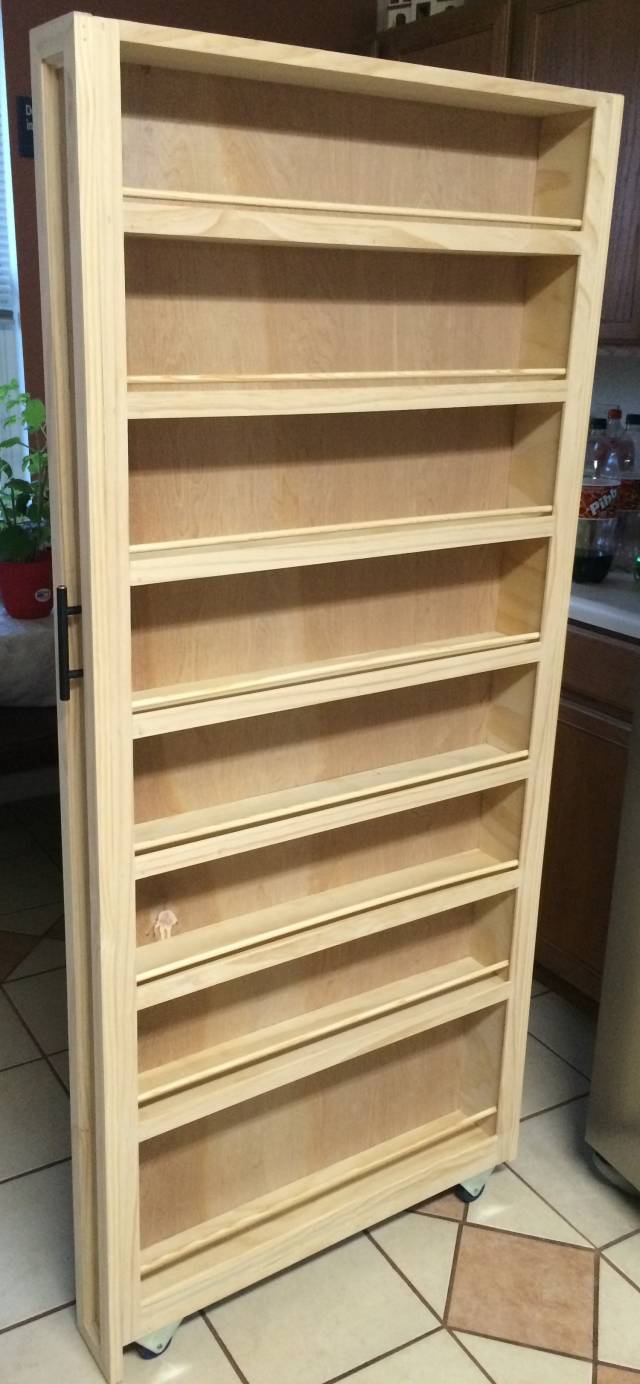
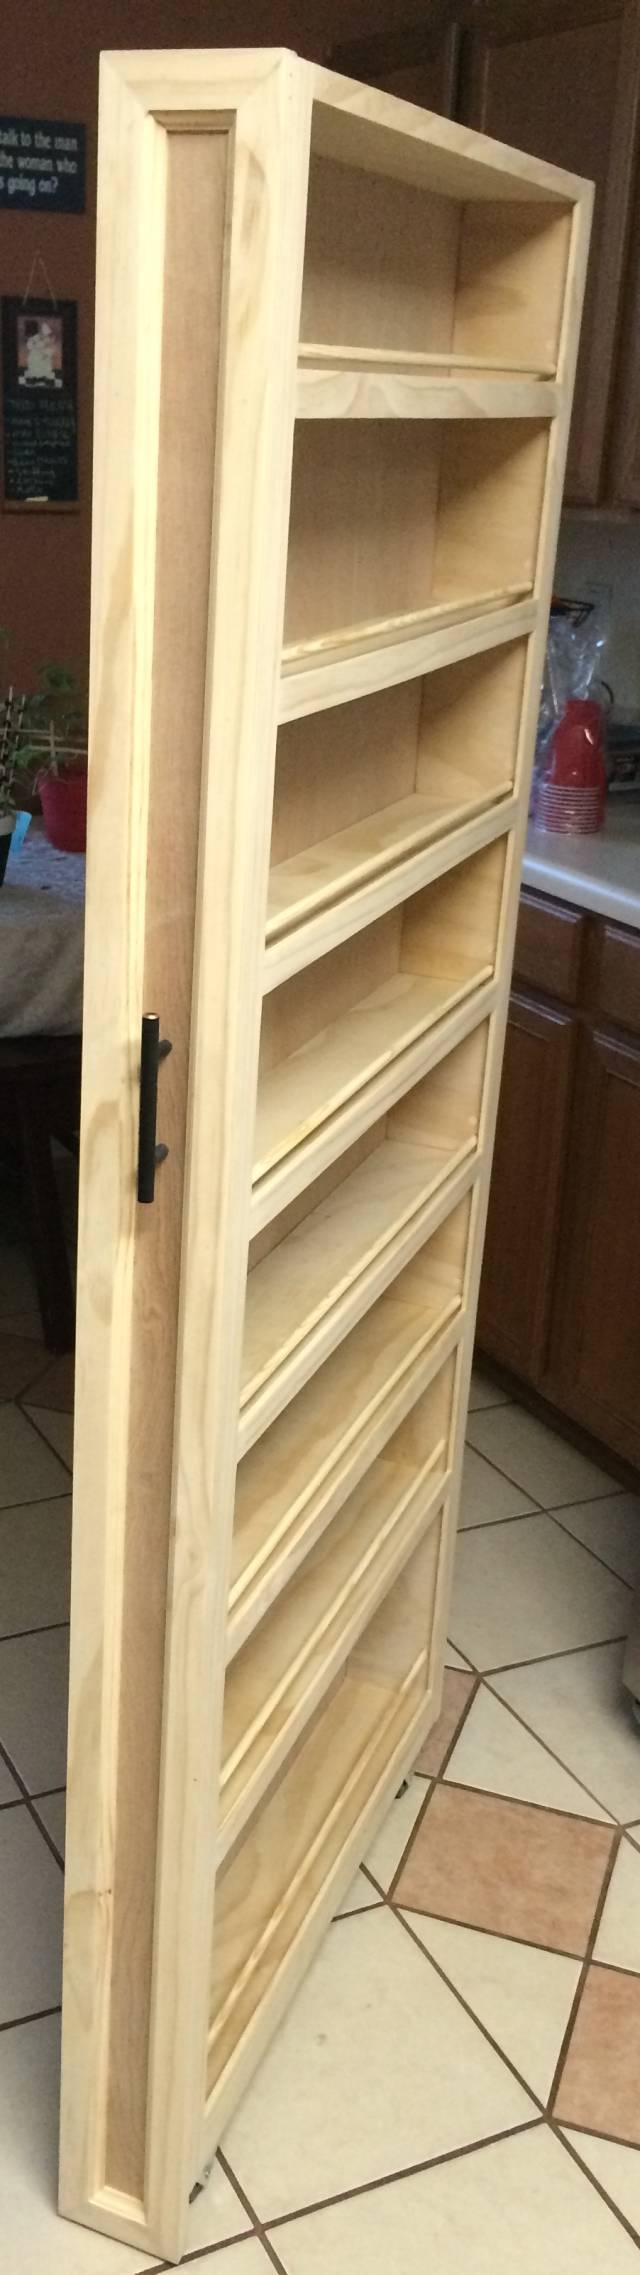
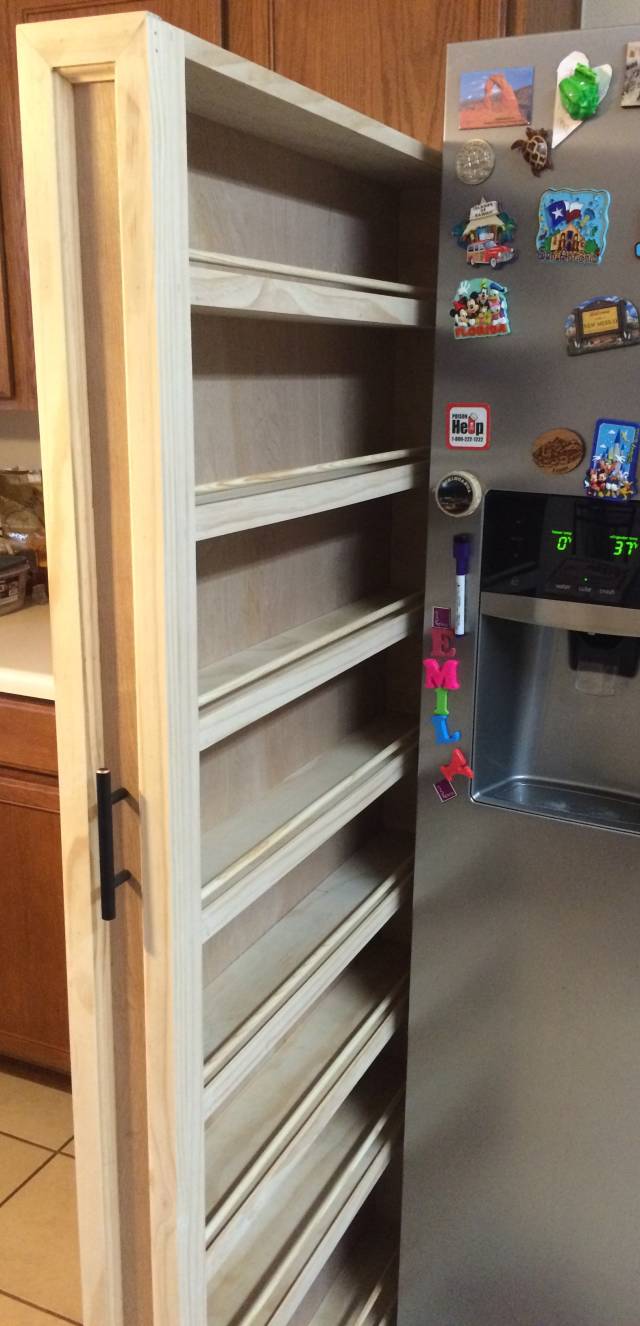
Pull Out Pantry

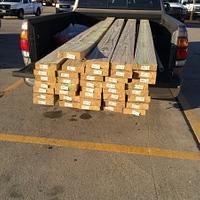
Well, some one asked me to build this for them, the picture they showed me was a lot simpler, i wanted to get a little fancy. I laid out my design, and went out to the shop and started cutting.
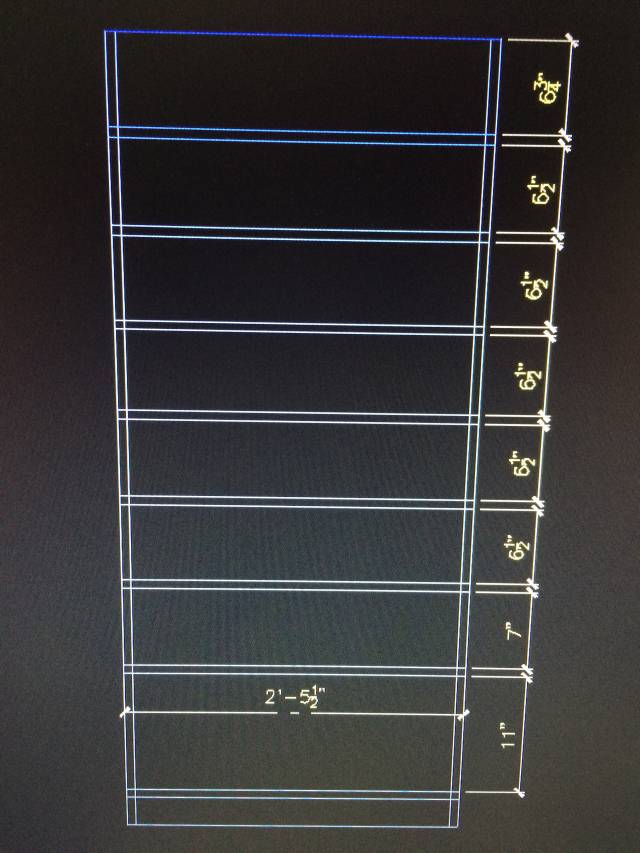
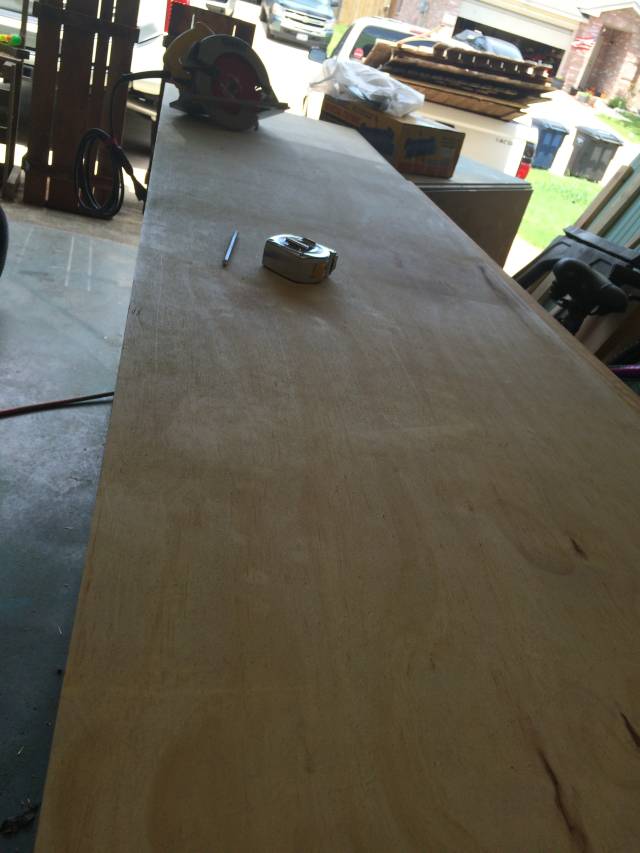
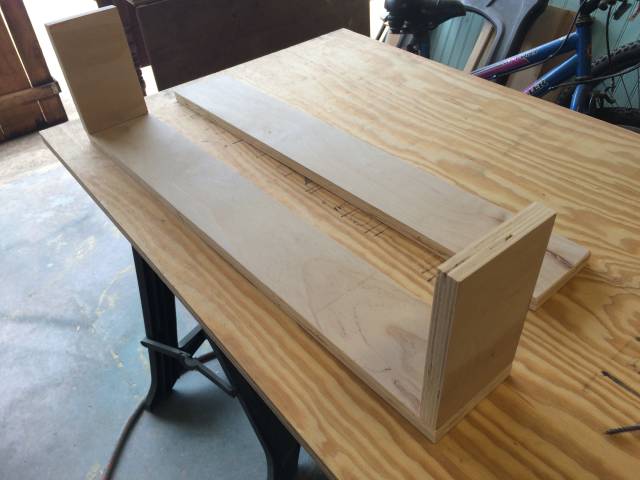
I set my table saw, and cut out all the shelves and spacers so everything would be the same thickness.
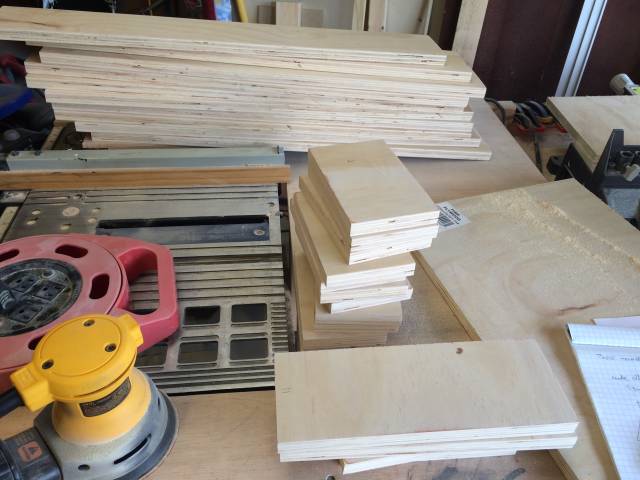
I started to build the frames.
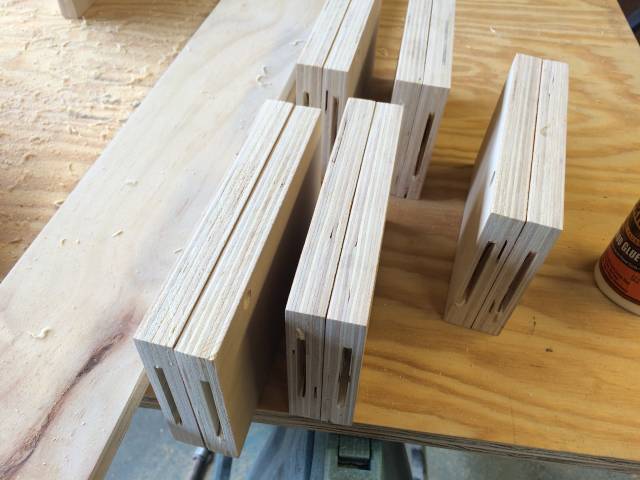
After building the first one i was not sure how i would attach the others to build it up, so then my neighbor comes over and he says use dowels, he was on the right track, but since i have a biscuit joiner, i used biscuits.
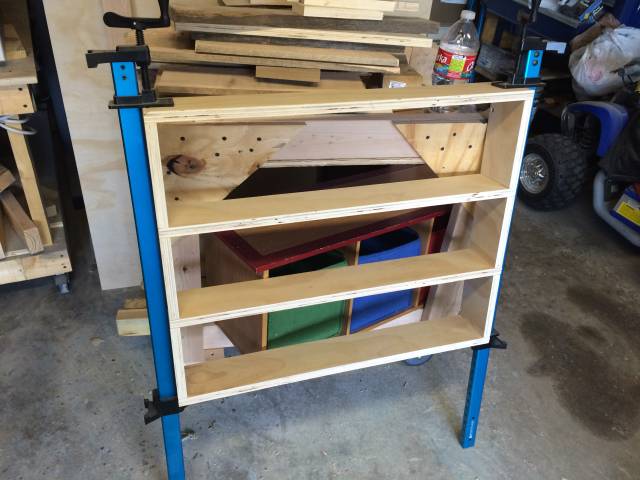
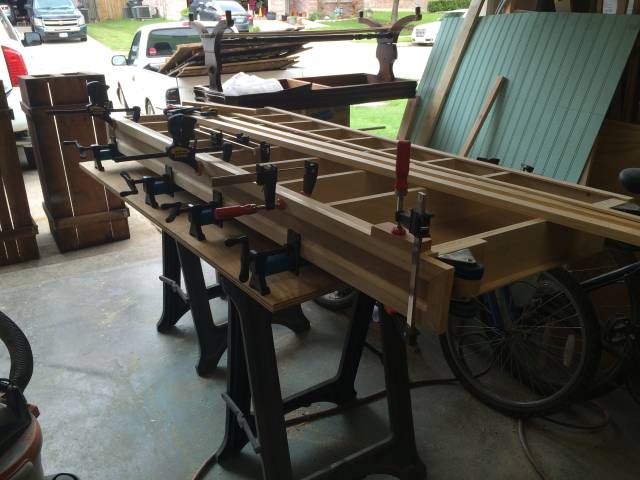
I built a section to be able to clamp it, and after it dries i built another section and added it on.
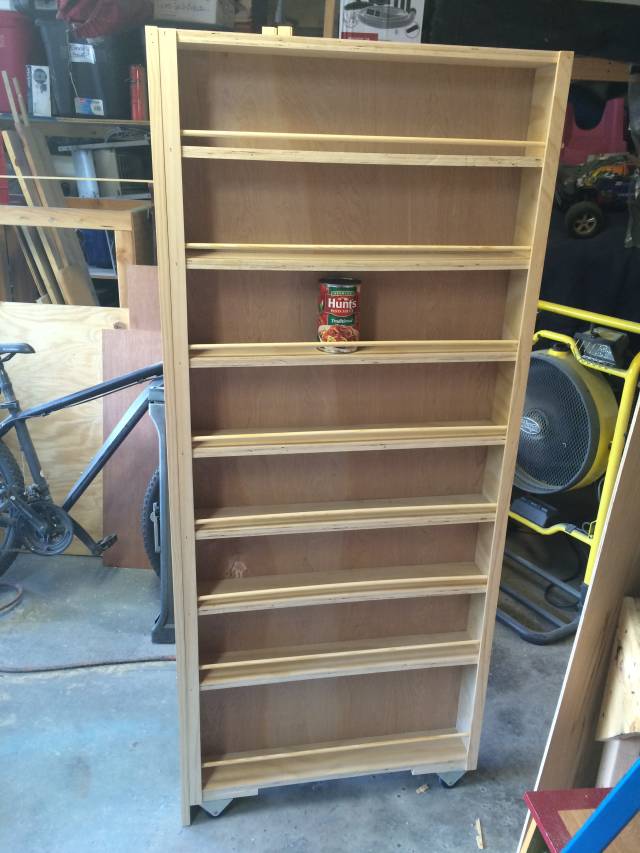
Once those dried, i added the wheels and stood it up to check the balance. At 4.5" thick it was surprisingly stable, i mean if you rock it it will topple, but pulling it back and forth was smooth.

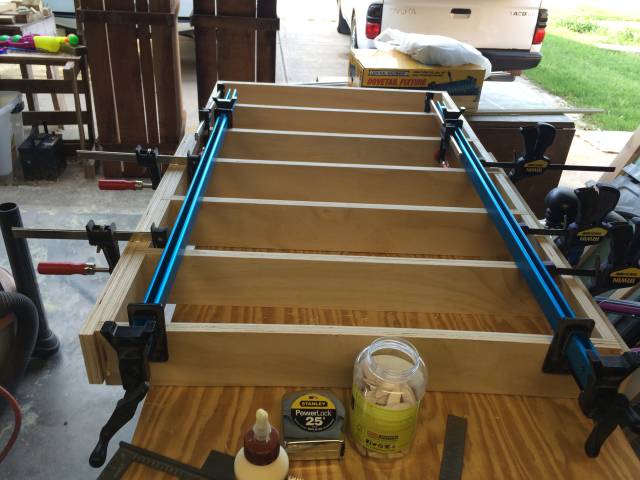
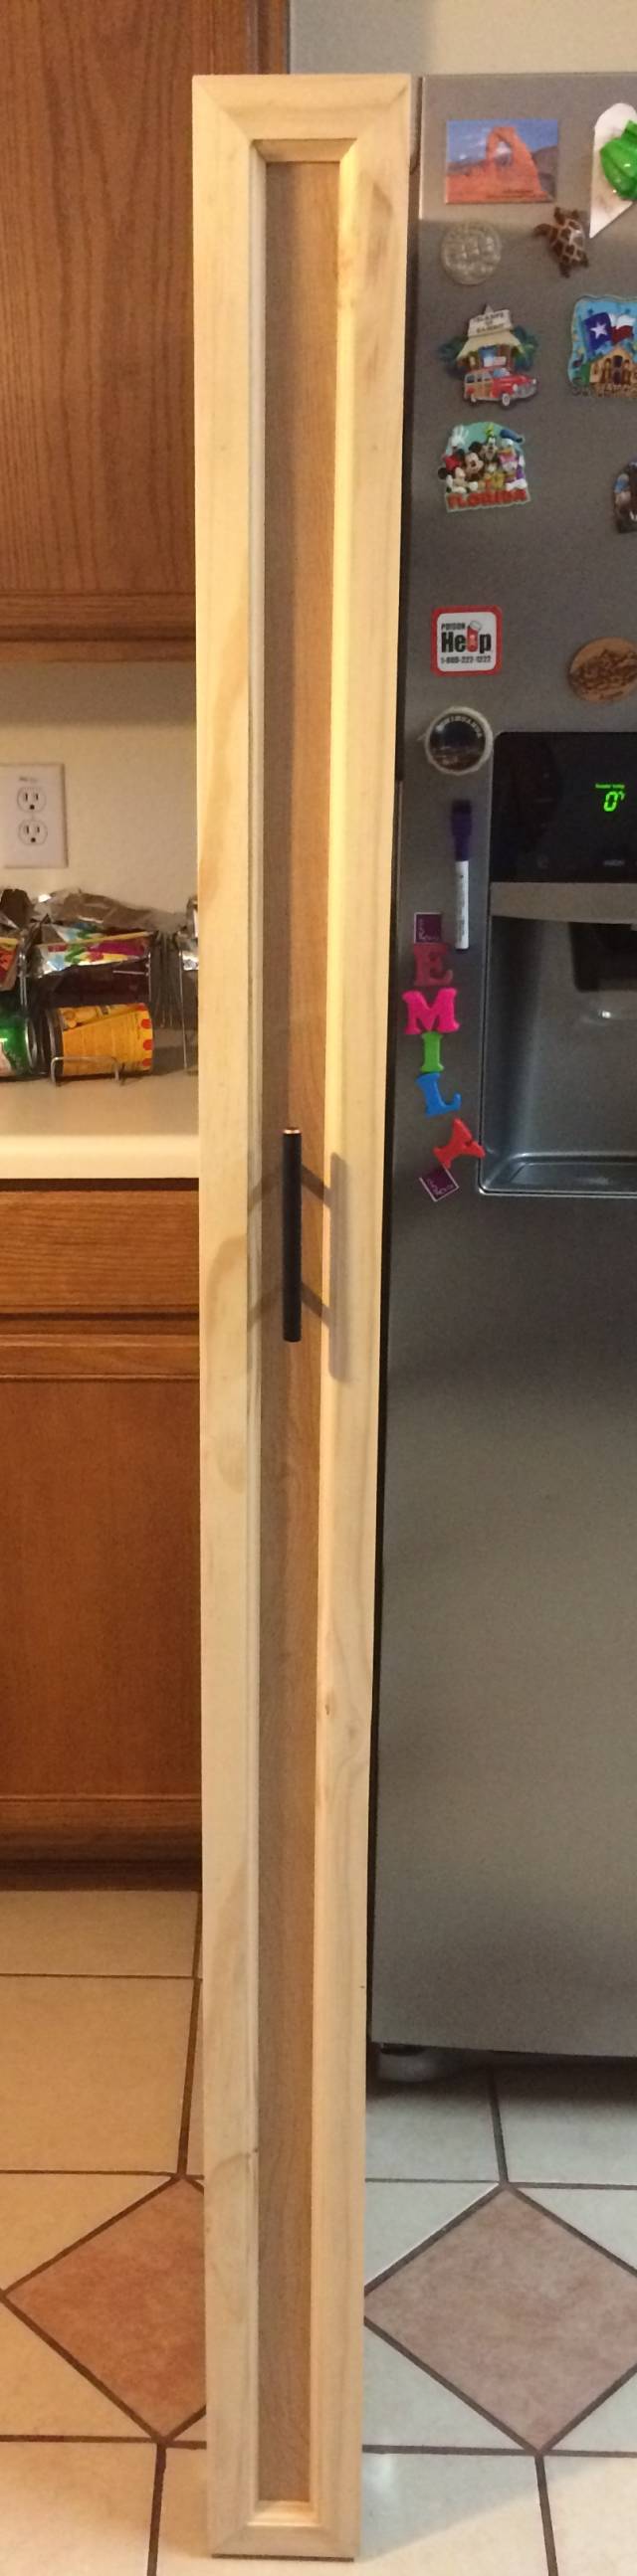
I then started on the front face I wanted it to flow in the kitchen, so i took the router to it.
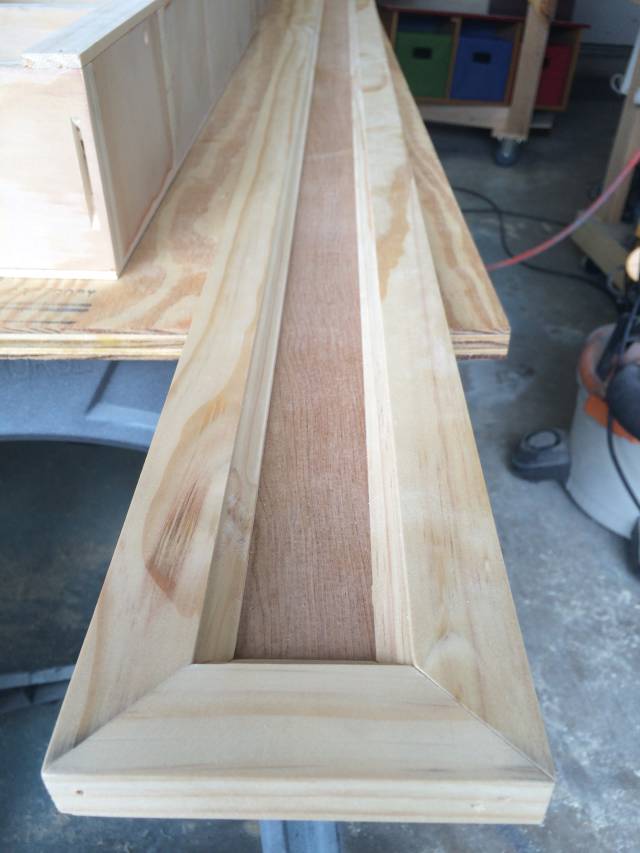
One the front face was complete, i glues and nailed it to the frame.
She was ready to go, i added plain flat trim to the fronts to hide the plywood edges of the shelves, puttied the holes, and sanded it, i was happy with the results, hopefully she will be also!
12 Comments

Tony,
That’s a nice-looking and practical kitchen addition.
L/W
“Those who would give up essential Liberty, to purchase a little temporary Safety, deserve neither Liberty nor Safety.” Benjamin Franklin

What a good idea to use this narrow space…well done!
-- Michal, http://WoodworkingWeb.com

very nice job
Wheaties

Great design Tony.
Jack

Great work tony! Fits the space well too.
CHRIS, Charlottetown PEI Canada. Anytime you can repurpose, reuse, or recycle, everyone wins!

Looks great and very practical. What could be better from a project?
Losing fingers since 1969

Hey Tony, you did a great job on it. You know a simular design was floating around on Facebook. I had two ladies message me about making them one both of the ladies wanted that pull out to match their existing kitchen cabinets. After looking at their kitchen and doing all the measurements. Each was a different width. One 8" the other 9 1/2" same depth and same height. I gave a cost of 400.00 on each for premium plywood and matching hardwood and delivery and they both said that was to much money. I just don’t get some people they want the best but dont want to pay.
So now that you built that how long did it take you? What was your overall cost of material?
Jeff Vandenberg aka "Woodsconsin"
Thanks everyone.
Thorreain, its an optical illusion, it does not fit the space at all, i have no room for it next to my fridge, but the pics makes it look like i do.
Jeff, i work for dirt cheap, i have come to realize that people dont want to pay what things are worth. Online the cheapest ones are in the 300-400 range, and we all know the quality of those products. For this one i charged the lady $70, as fas as cost, i dont really know, most of the wood was stuff i had laying around. I never keep track of my time. I would like to make money off this, but i have come to realize its hard. I mostly do it cause i enjoy it, if i can makes money great, but i don’t really charge much. I am going to market these in my area, hoping to get $125 painted, but who knows. If i had t guess at the time i spent about 15 hours, but i could be way off. I prob work 5 hours a day, and took me 3 days, but that does not exclude time i waste scratching my ass, or fooling around.

Very nice!!!! Nice way to use wasted space.
No what y’all mean about folks not willing to pay. Seems like we’ve become a society of cheapness. I probably won’t ever get what I’m worth.
Keith "Shin" Schindler

That’s great! I know people can be very cheap, I’ve got several projects that friends want, of course, I’ll never get much of my time out of it, if any….
But I do enjoy making wood chips!
So I have to look at it like practice!
Fantastic job, and I’m sure the person receiving it was thrilled!
Steve Tow

very neat good job
jim

Great thinking Tony super use of dead space,a very clean build.
woodworking classes, custom furniture maker
More from TonyCan