


Share your craft projects
Make new craft buddies
Ask craft questions
Blog your craft journey

Thorreain
1907 posts
and
47 followers
in almost 12 years
in almost 12 years
Work Bench Build #8: Bench Top Glue Up
This is
part 8
in a
16 part
series:
Work Bench Build
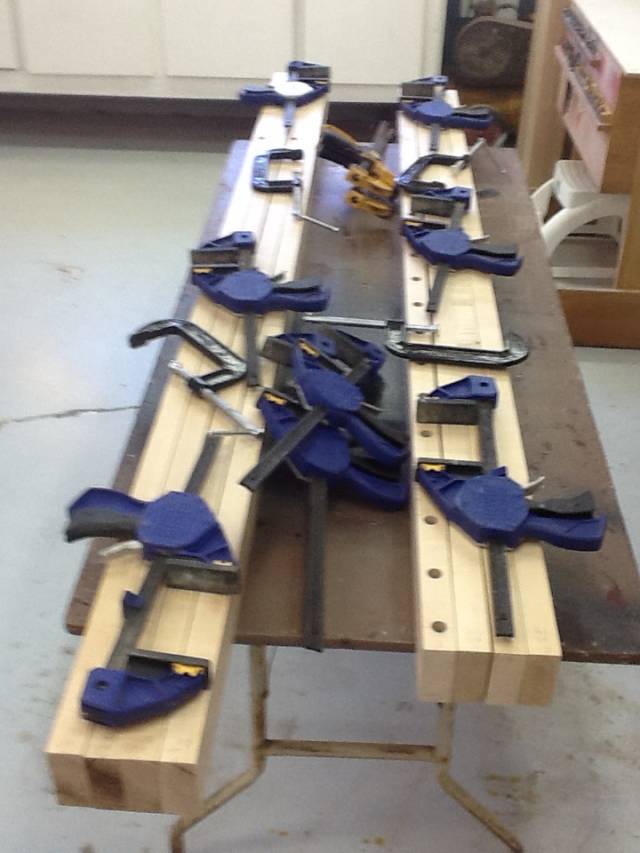
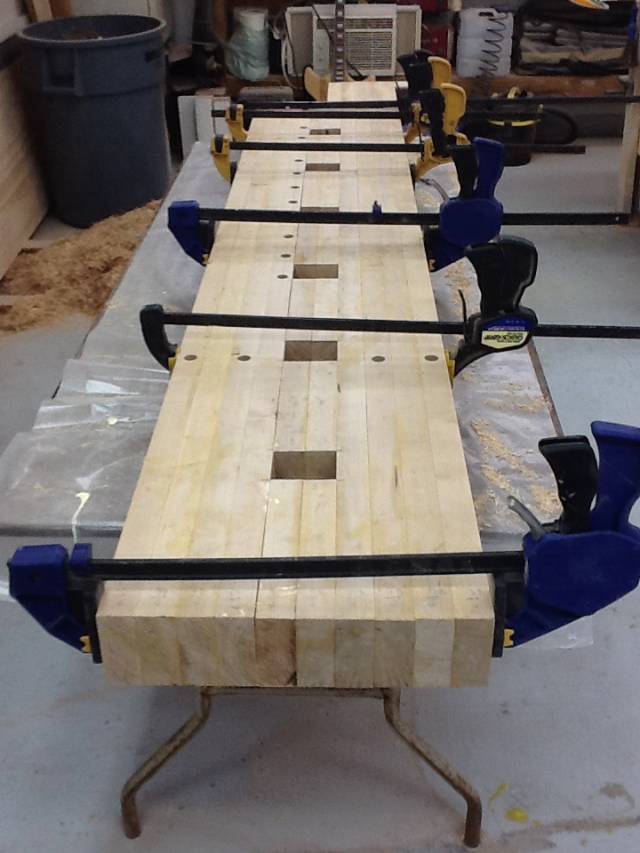
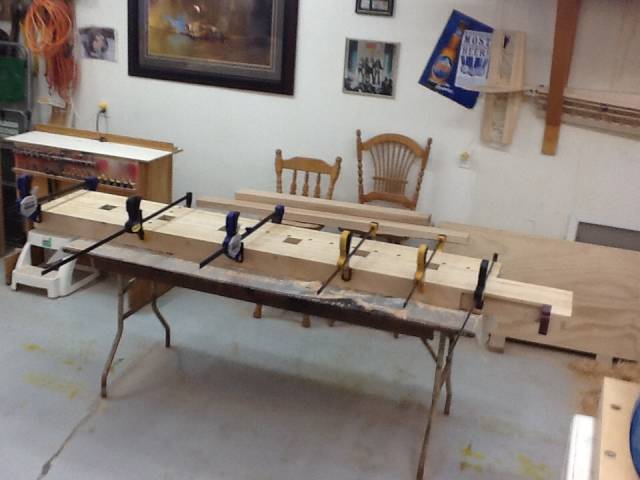
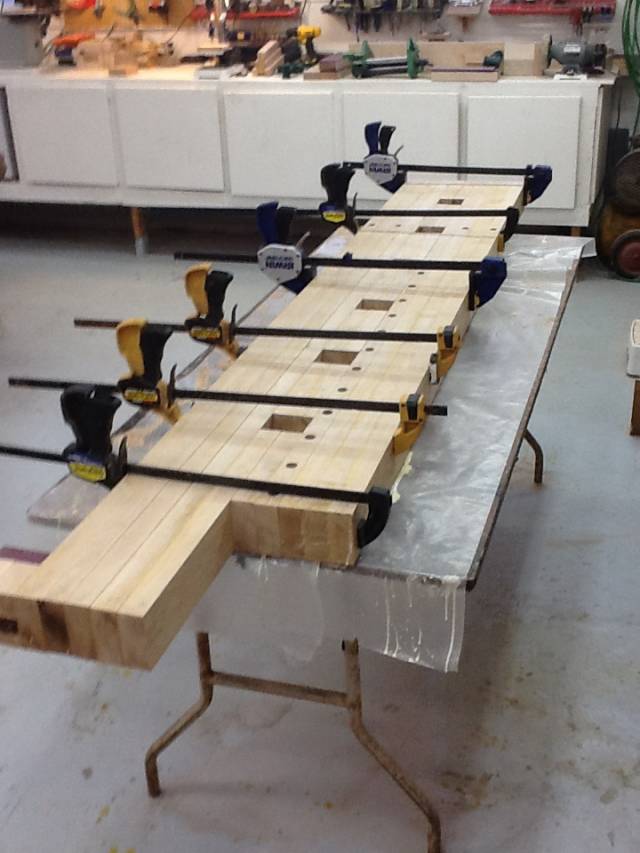
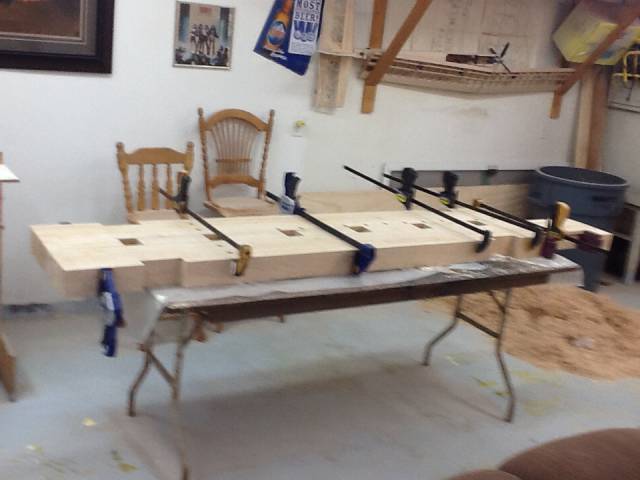
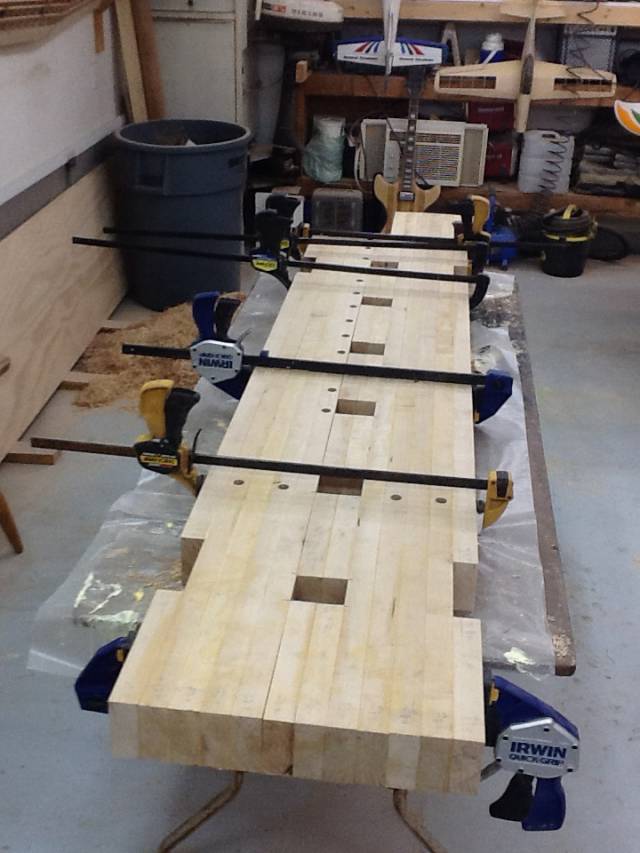
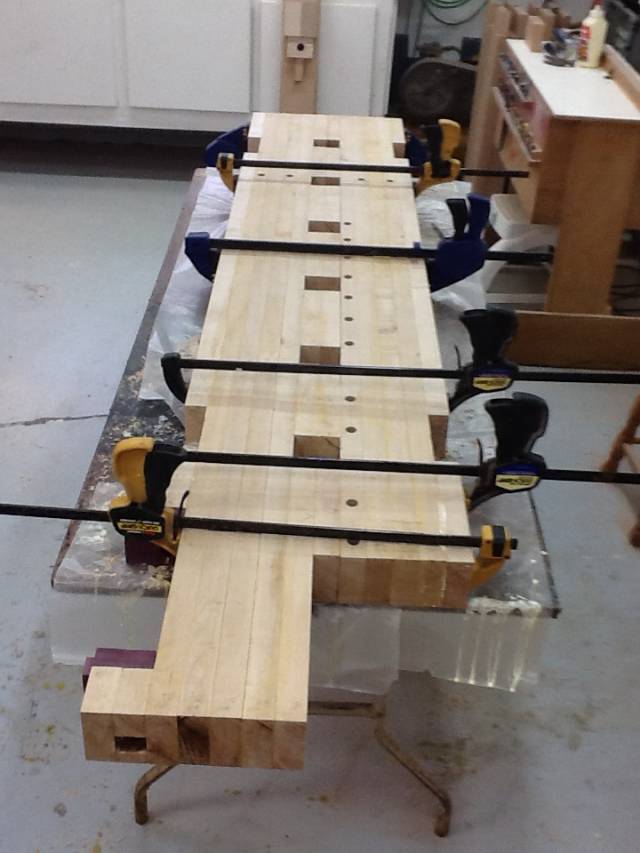
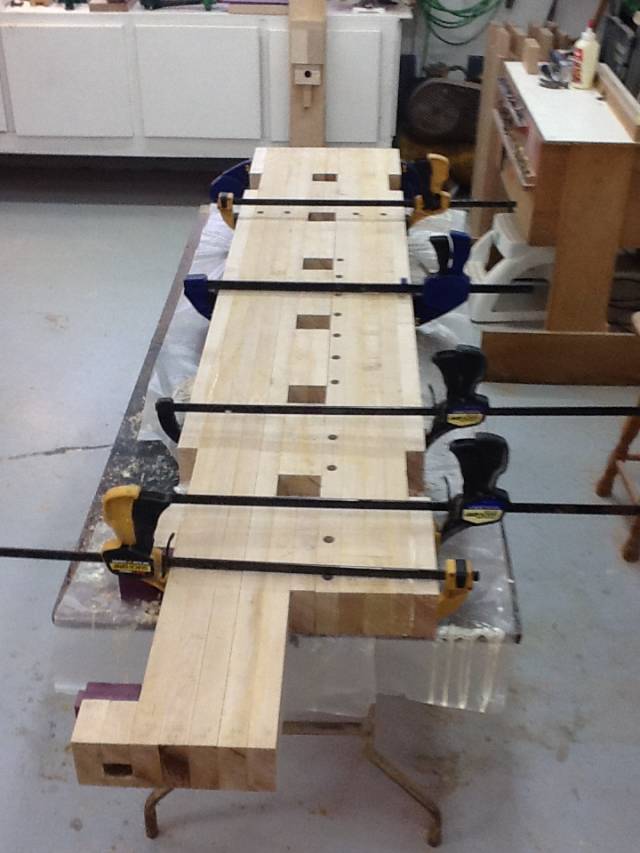
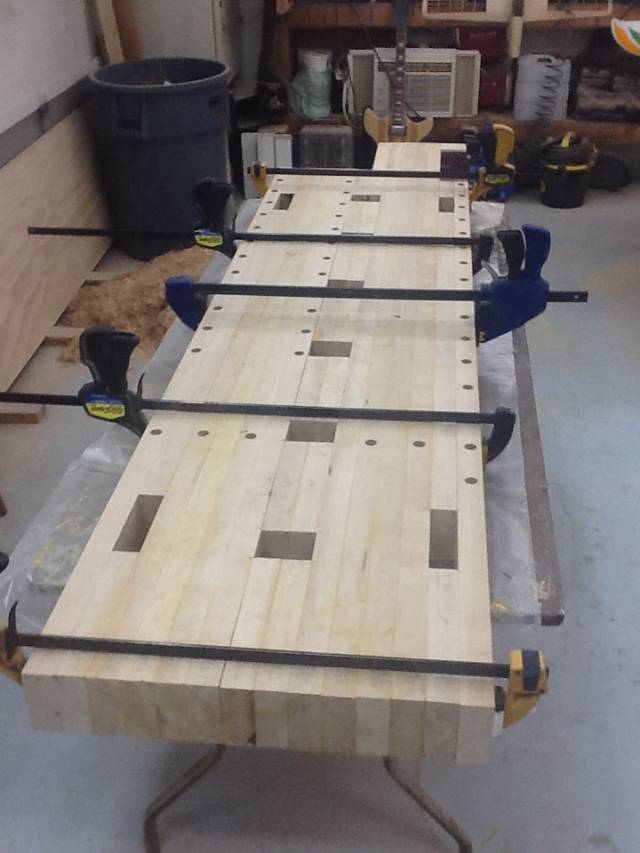
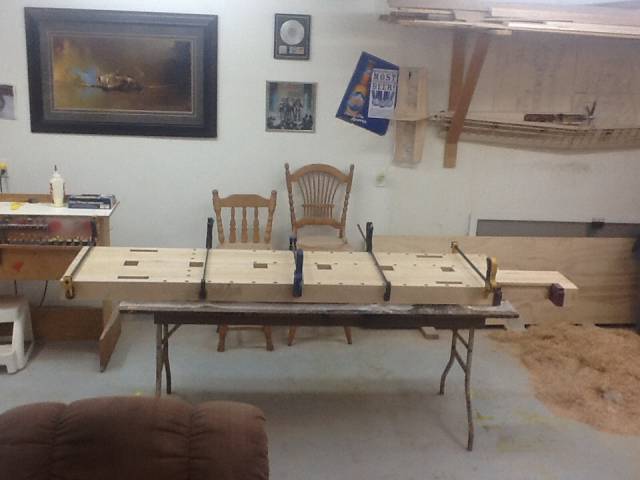
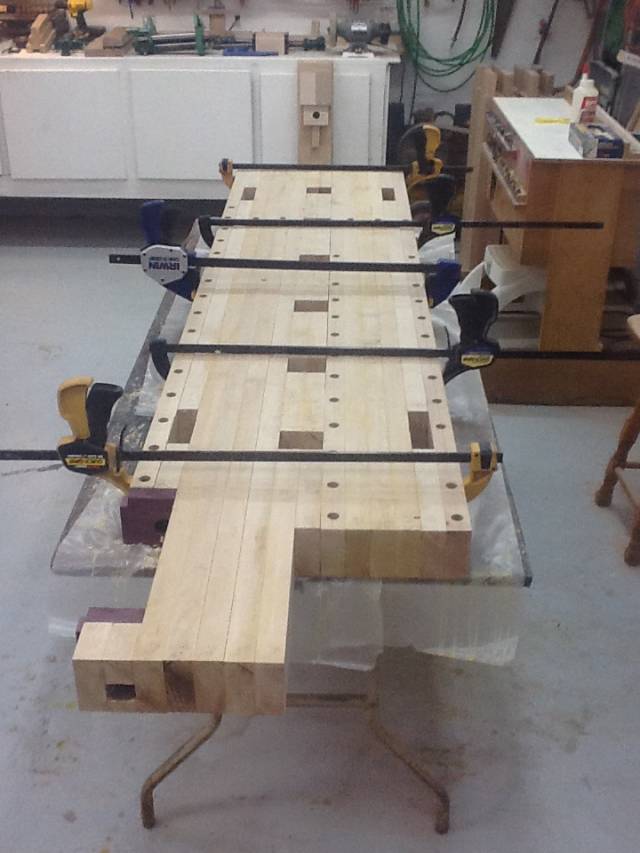
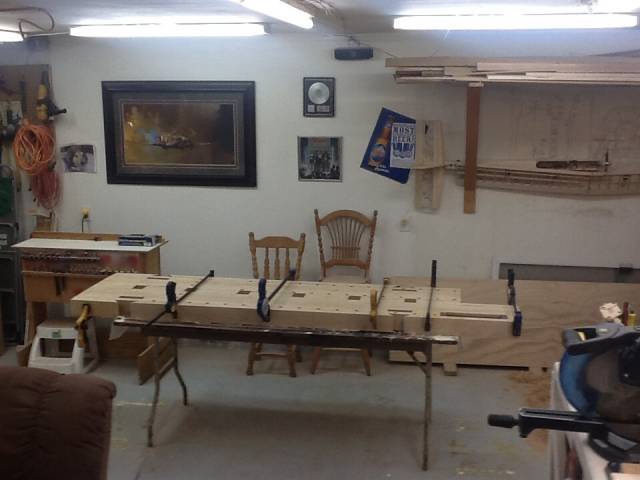
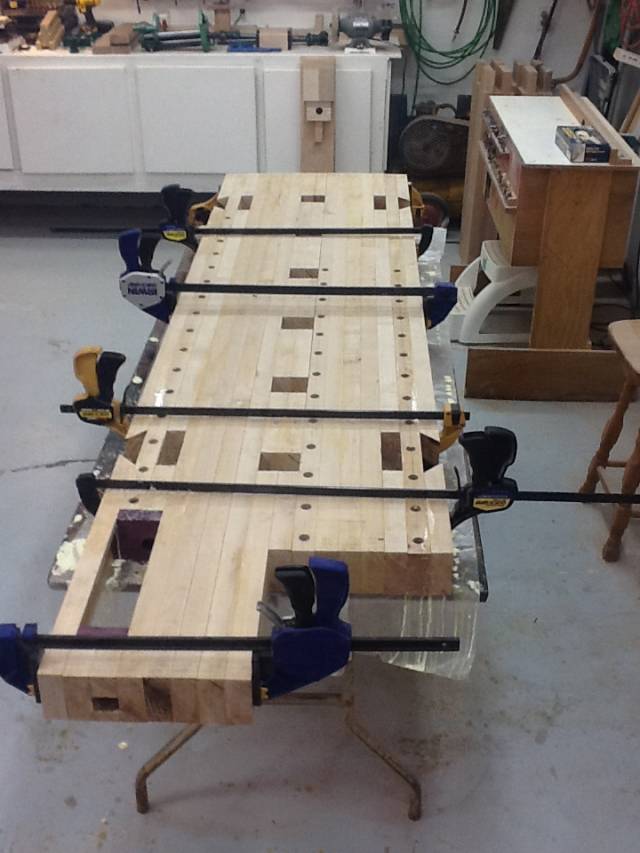
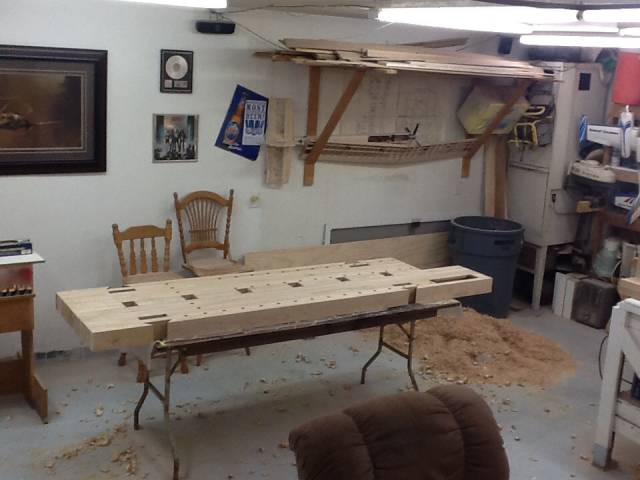
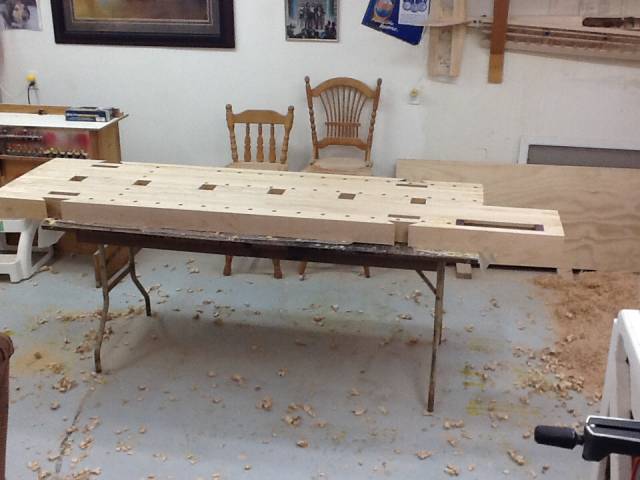
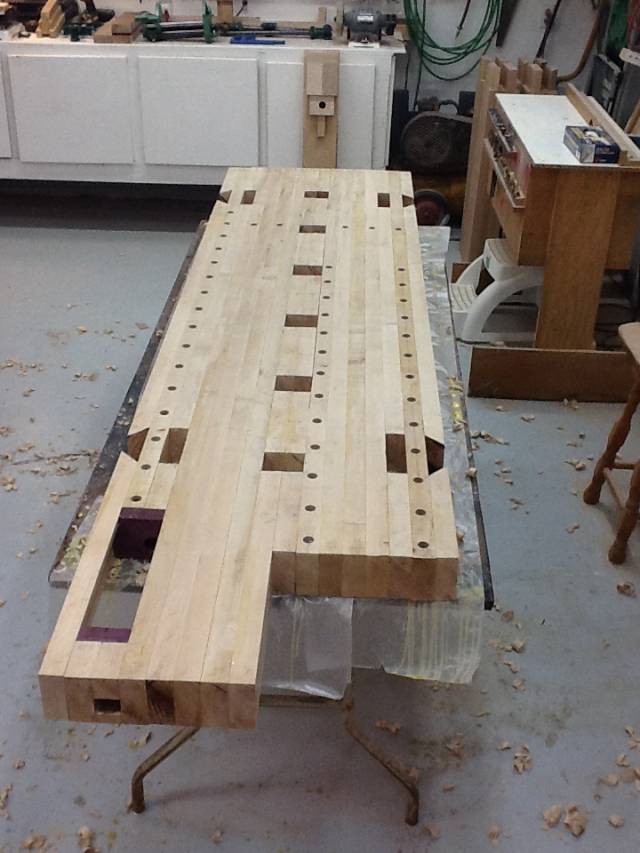
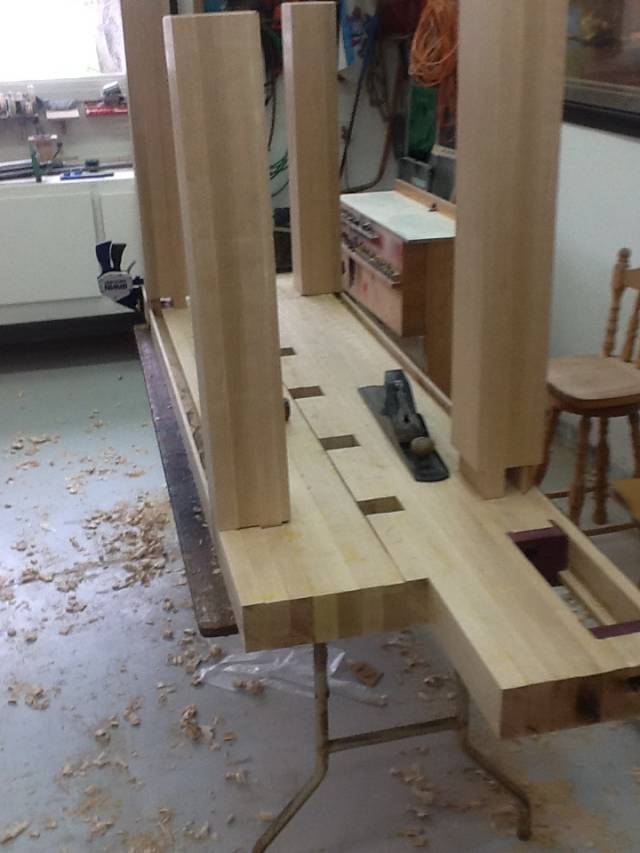
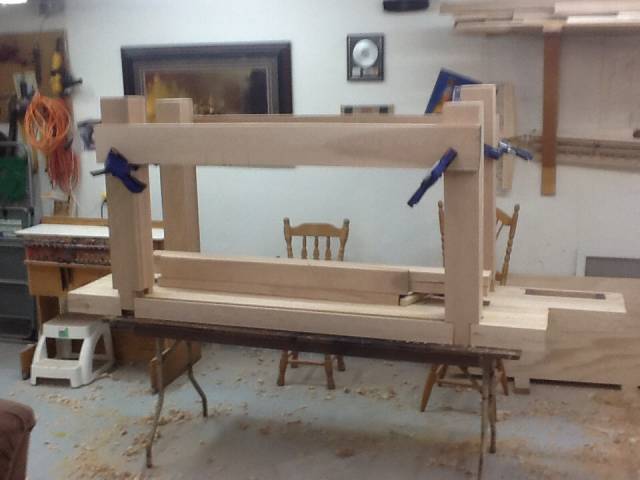
Well I’m at it, the one part of this build that I wasn’t 100% confident in. I started the glue up with two sides and the 8 straightest boards to give me a couple of straight bases, or at least close. Then I joined the two halves with pieces thus leaving openings for plane stops and clamping among other things, so it’s not a true split top. It will have the carrying stretchers under the top across the tabletop. So the process was to add 2 boards at a time, wait 4 hours, then add 2 more. One on each side. I didn’t get pics every step, but most of the top build/glue until finish. It turned out very well for my first time lamination. I have some gluing skills. I didn’t use biscuits, dowels, or, anything to align with. I gust used the clamp bars as a guide or support when necessary.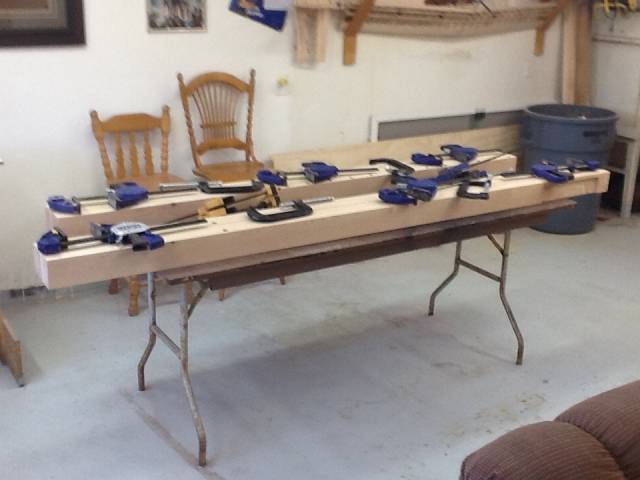 ,
,
 ,
,
 ,
,
 ,
,
 ,
,
 ,
,
 ,
,
 ,
,
 ,
,
 ,
,
 ,
,
 ,
,
 ,
,
 ,
,
 ,
,
 ,
,
As always thank you for following. And, if you have any questions or suggestions fire away…
CHRIS, Charlottetown PEI Canada. Anytime you can repurpose, reuse, or recycle, everyone wins!
11 Comments

Looks great. A huge investment in time and energy but it will continue to repay you for a very long time so it is certainly energy well spent. I can’t help wondering when I see these benches being built ….. who will be using this one in a hundred years? I’m sure some one will be.
Well done. The end must be in sight now.
The early bird gets the worm but its the second mouse that gets the cheese.

It’s looking great.
Did you thing the glue like you did earlier in the build? I am always going to remember that tip.
Abbas, Castro Valley, CA

Great work on this glue-up, they can be quite a challenge, but it seems you aced it with no problems. The worst part is over and the rest of the build should be a lot more fun.
Mike, an American living in Norway
Thank you all for the great comments. Now for some answers…the mixture I used was not as diluted as when I was using oak. I thing it was about 3% water instead of 5%. For the leg glue up I used about one and a half litres or almost two of my glue bottles.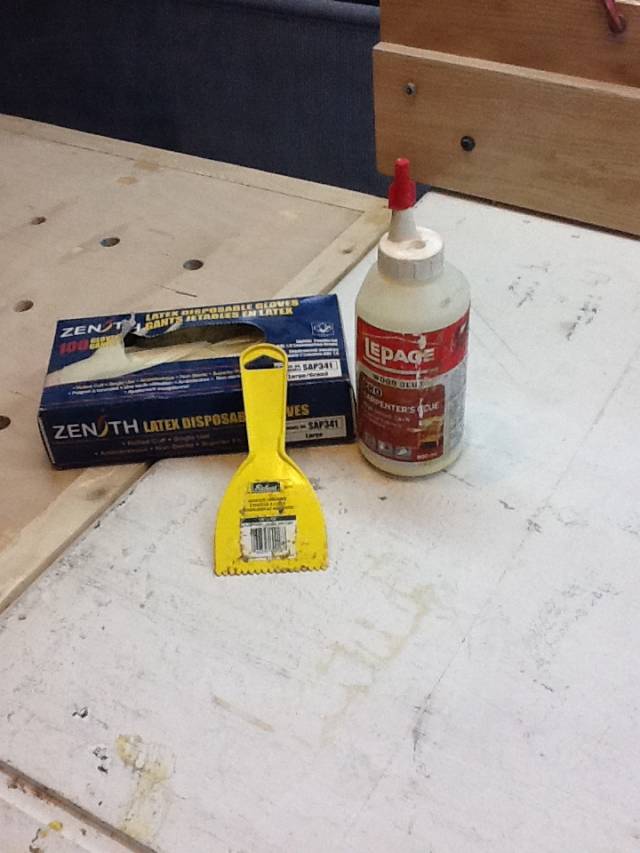 ,
,
 ,
,
This doubled my glue up time for both glue ups at about 1 hr still being able to move. However with the bench top I applied less wanting to get thinner glue lines and only having to do 2 boards I had lots of time to position. I used about 2400ml or three bottles for the top, but had about 10% waste as runout onto the floor or the wax paper under the bench and top of the table.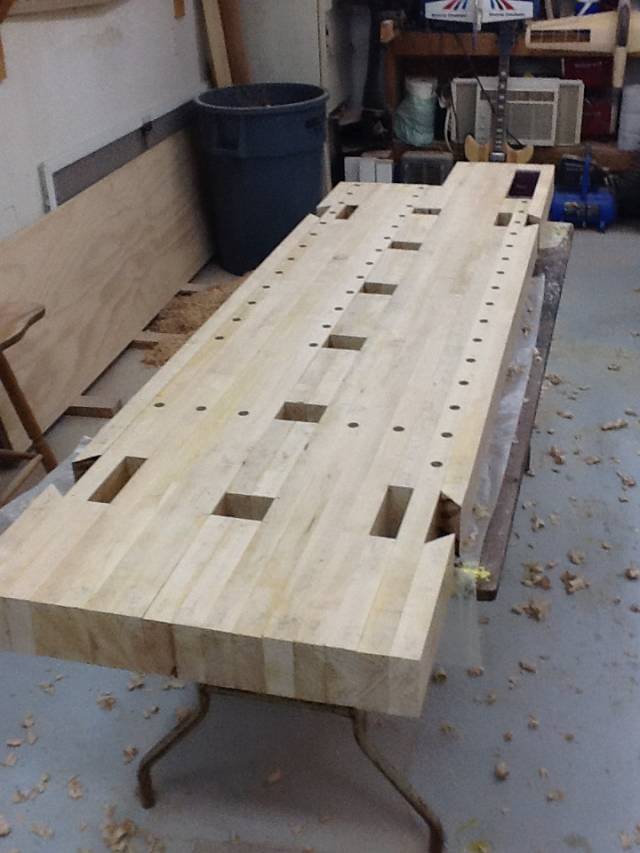 ,
,
 ,
,
 ,
,
 ,
,
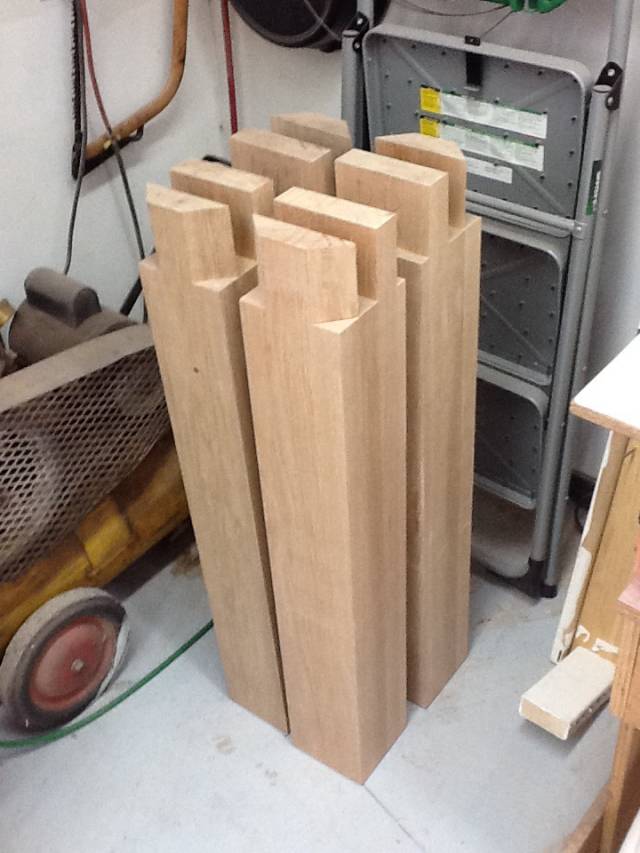
For the stretchers it will be birch to maple and oak. I will be staying with the current mixture that allows for 45mins- 1 hr time for me to work, as always I will measure cut and dry fit before glue up.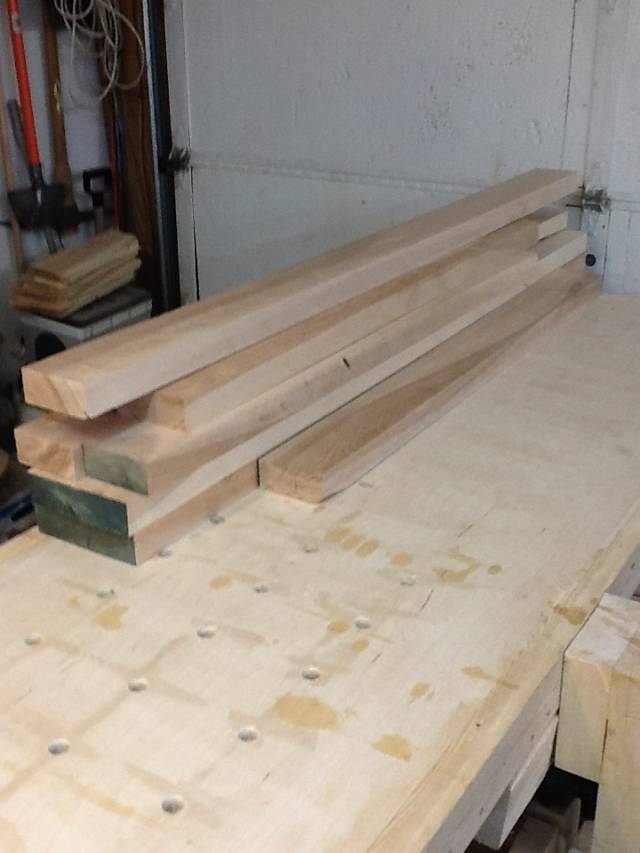 ,
,
The total project will be about a gallon US after completing the stretchers then the shelves. For them I will be laminating 2 sheets of 3/4" and 2 sheets of 1/4 plywood for a total of 2" thick plywood shelving on the bottom for weight. 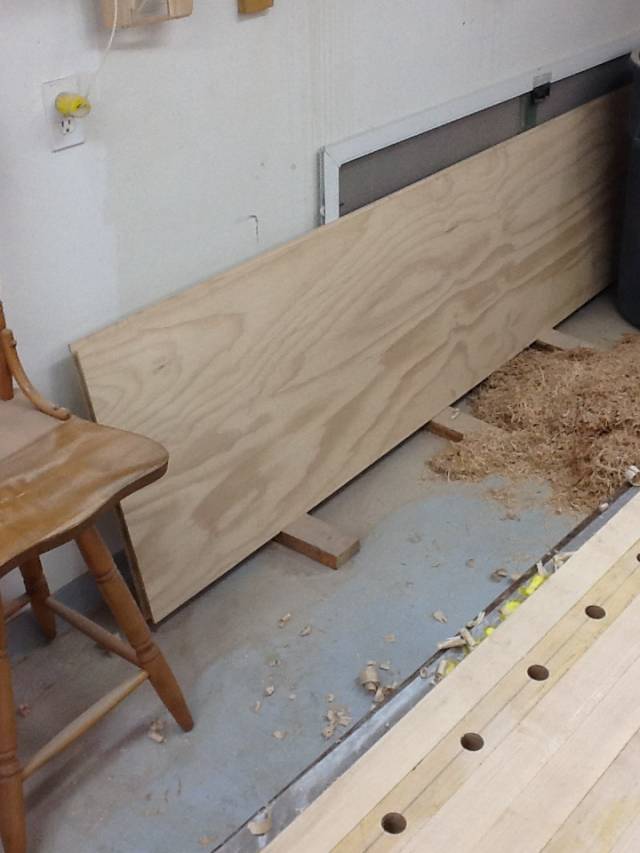 , the shelf/stretcher bottom will have a 4" toe height and top of 11" to allow for max storage if I decide to build shelves/drawers later on. Thanks for following. Any other questions or tips fire away
CHRIS, Charlottetown PEI Canada. Anytime you can repurpose, reuse, or recycle, everyone wins!
It looks like you had planed quite a bit. That’s a lot of work.
You are going to need a lot of help to move that top. It looks more than solid.
Abbas, Castro Valley, CA
Both my wife and I are disabled in various ways, but we managed to flip the top over and now I’m dry fitting the legs and removing excess glue. One of the glue lines is separated quite a bit on the bottom. I will use epoxy to fill this gap but it just goes to show things that seem smooth can have flaws.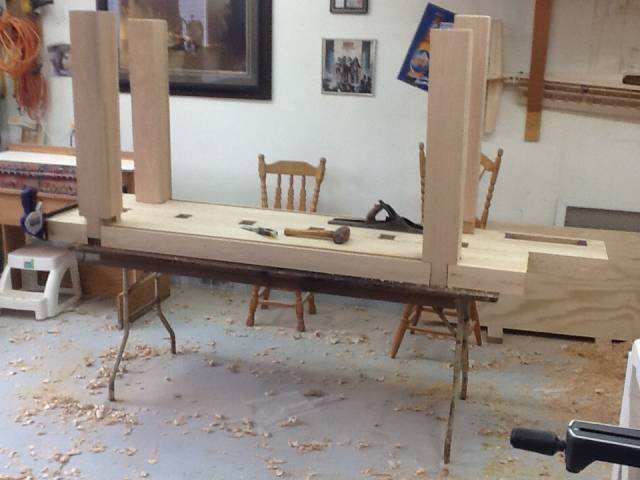

 ,
,
And yes Ian it’s very solid!!! It seems to weigh about 150-180 lbs. but not sure exactly. It took every bit we had to lift one side up then dropped it while lowering. From now on moving any pieces is going to be assigned until my son can bring a few buddies over. That means I have until the 19th to finish as his crew leaves for Alberta then.
CHRIS, Charlottetown PEI Canada. Anytime you can repurpose, reuse, or recycle, everyone wins!
Alright! Talk about excitements.
Abbas, Castro Valley, CA
My son was just her I laid all the stretchers on the top and legs and he couldn’t lift one end. Hahaha, so with stretchers is prob over 500 lbs, it’s legs are 37" to the top of the workbench, the same height as everything else in my shop.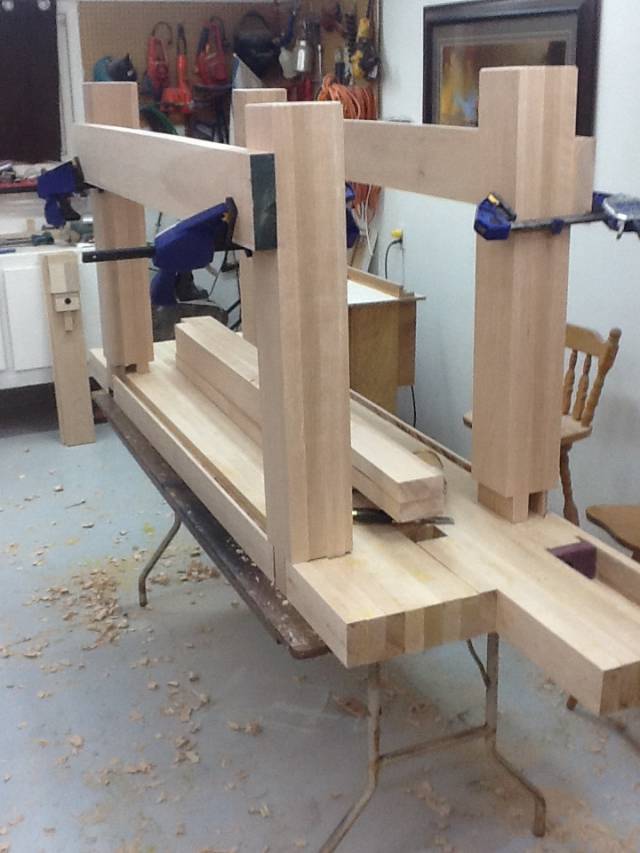 ,
,
 ,
,
Pat, I seem to be having the same issue as you did with the legs fitting. Mine is mostly due to swelling from the glue up. As you can see I still have some work to do on 2 legs then I can mark up the mortise and tensions for stretchers and legs. These 2 pics are with the total weight.
CHRIS, Charlottetown PEI Canada. Anytime you can repurpose, reuse, or recycle, everyone wins!
Oh ya I still have a hundred pounds of shelf to add. And another pounds of vises Lol…massive, just massive!
CHRIS, Charlottetown PEI Canada. Anytime you can repurpose, reuse, or recycle, everyone wins!
Just a quick question. Are you planning to run a skilsaw or router bit through the gap in the bottom before filling with epoxy? The dried PVA glue may prevent the epoxy from exhibiting its best characteristics.
The early bird gets the worm but its the second mouse that gets the cheese.
Already done one spot with router. 8" by 1/8", and fitted a piece 2 1/2" wide in with carpenters glue UN diluted, coating the hole and patch fully. But the rest I have some 2 1/2" wide trimmings from the edges of boards after squaring on the table saw. I diluted the glue to get it to flow freely into the crack. Then coated the thin shims both sides and hammered them home. I trimmed the excess wood while wet and applied more glue to get everything to expand. For the top I may run the skill saw over a small patch 4" long or just leave it, after all it is a workbench and may be marked up soon enough. I am happy with the way the bottom turned out with this repair it won’t even be noticed if it was the top.
CHRIS, Charlottetown PEI Canada. Anytime you can repurpose, reuse, or recycle, everyone wins!