


Share your craft projects
Make new craft buddies
Ask craft questions
Blog your craft journey

Brian
2044 posts
and
31 followers
in almost 12 years
in almost 12 years
mesa boogie amp head #6: Assembly and sanding
This is
part 6
in a
7 part
series:
mesa boogie amp head
Got a little progress on this thing. My time had been taken up a lot with the baby and projects for my wife, so this is going pretty slow but you gotta do what you gotta do.
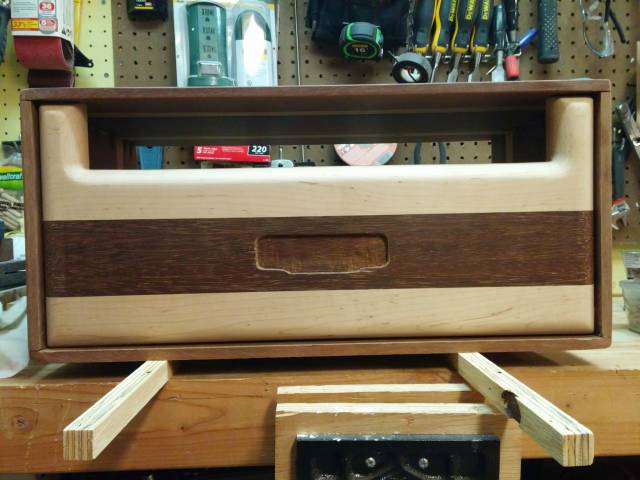
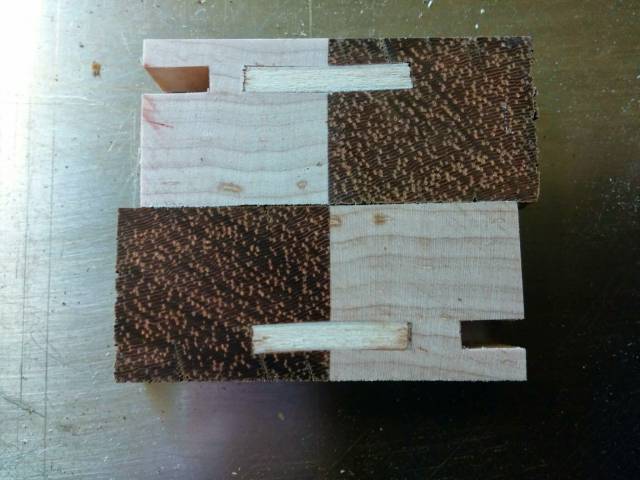
Here’s a pic after assembly and sanding. I washed it with mineral spirits to show the color. It’s pretty rich.
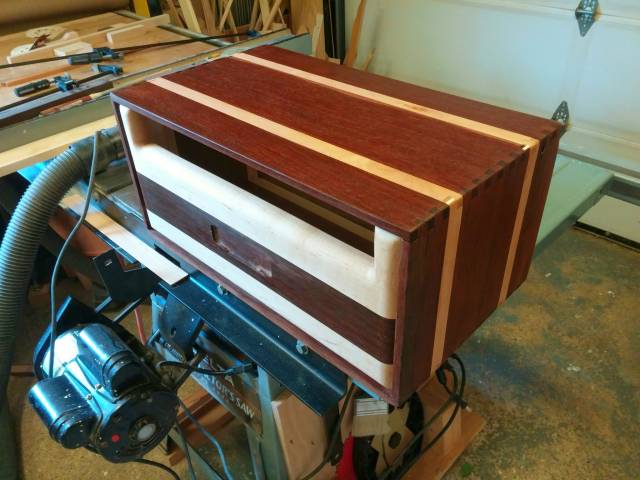
I started by beefing up the face for a better glue joint. It curled a little since it’s been laying around so long. I put lots of screws like I always do. I always overdo it, but better safe than sorry. The screws and blocking pulled it back straight. They’re glued on also.
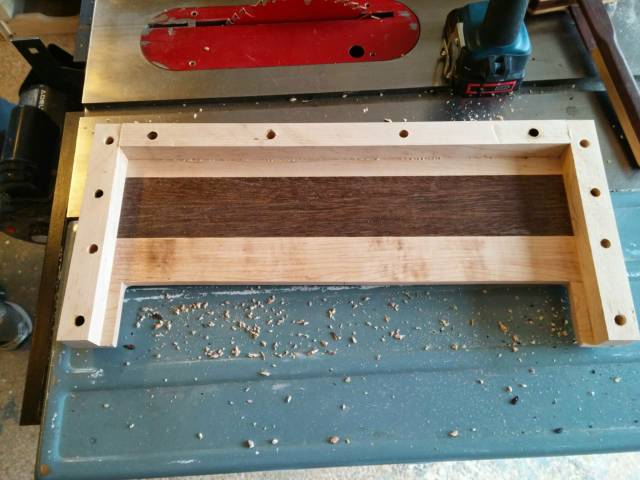
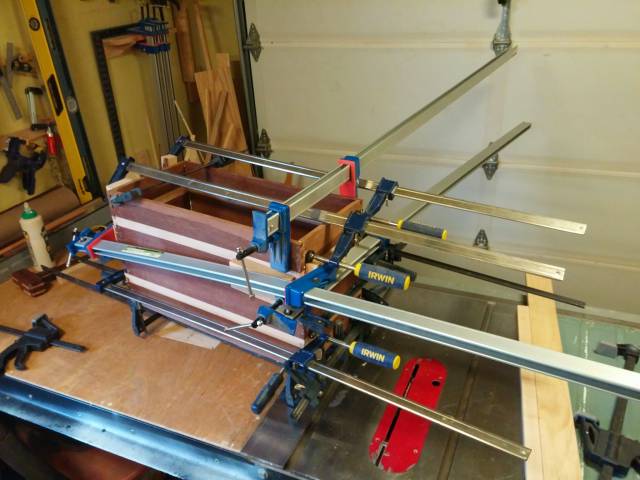
Next I dry fitted it one last time and then glued it up. Every piece was a little curled. That’s partially because of the way I cleaned them up after gluing the panel pieces. They’re already so thin -less than 1/2" – so I did not want to run it through the planer again. Instead I used a chisel to scrape the surface clean, then later card scrapers. The result was uneven thickness. That caused a problem when gluing because the pieces weren’t flat. They also curled a little on their own from sitting around. I kept adding clamp after clamp to try to close the gaps in the finger joints. I ran out of clamps.
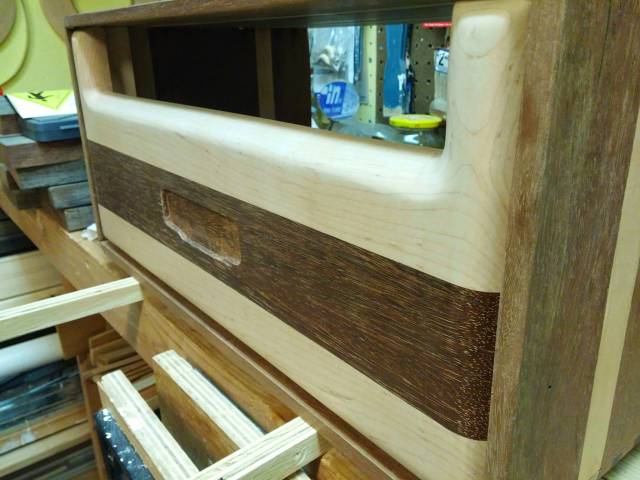
Them I sanded. I used 40 grit on my ROS to knock off the protruding fingers in the finger joints. This ekki is next to impossible to shape with a sander. I could have used diamond 5 grit and just about had the same amount of work. Tough stuff.
Them I moved to 120 grit. I still plan to do 220 when I have time. It’s pretty smooth as is. I sanded the face to 220 before installing and it’s baby butt smooth.
Here’s where I’m at so far.
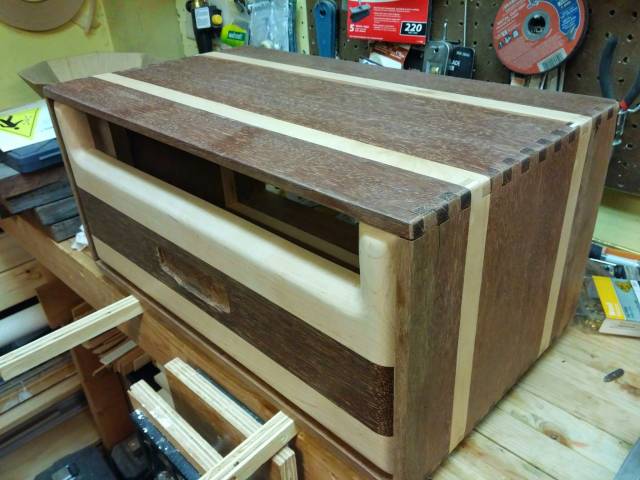
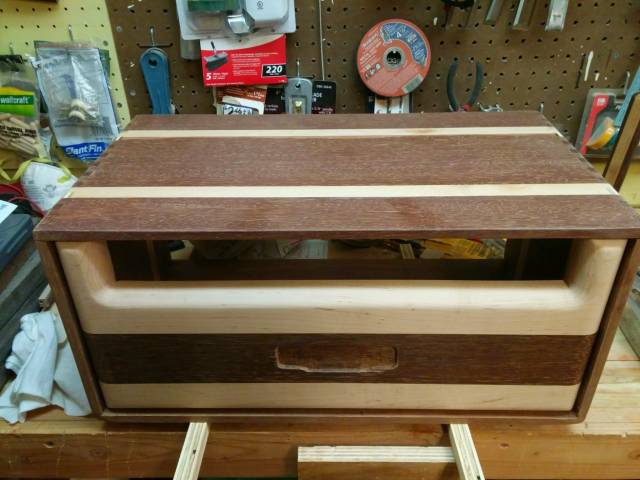
I’m pretty satisfied overall. The 2 things driving me crazy are the gaps in the finger joints and some exposed biscuits.
Here’s a close up of the gaps.
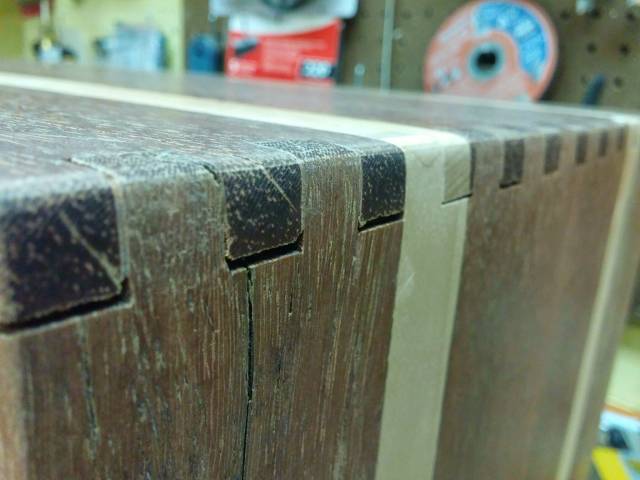
I’m sure I can fill them with wax. I’ve used minwax wax pencils in the past and I’ve learned to make screw holes completely disappear. I don’t have a problem with using it and I expect the results to be good.
I don’t know what to do about the biscuits. I’m thinking maybe a black magic marker, then sealing it and then using furniture markers. This will take some experimentation. I made a few test pieces today.
This material would make a nice cutting board.
Well that’s it for now. As far as assembly goes I still have some small pieces to fit inside to support a removable back. There is also some decorative hardware going on. Then of course the amp, carry handle and feet. In going to finish with Danish oil and wipe on poly.
Losing fingers since 1969
10 Comments
That looks great!

Everything looks great but instead of filling your finger joints with wax use the same wood in the same grain direction and cut a very thin shim and glue it in. Or… clean out you orbital sander, then sand some of the same wood and get a good amount of dust. Then if you can get some of the tightbond translucent glue and mix the glue and just sanded dust and make a filler. That way it’ll still stain up or take a finish. Try your filler out in a grove first. I have made my own fillers that way and have had good results. For your bisquet issue time to just brake out the router and route out your bisquet and then plug it with the same wood in the same grain direction use the translucent glue you’ll never see any glue joint.
Jeff Vandenberg aka "Woodsconsin"

Really nice Brian, beautiful contrast.
Jack
Jeff, thanks for the tips. I will try to plug the biscuits. But I’m going to stick with the wax for the small gaps. It’s tried and true for me and I don’t want to experiment at this point. The was goes in after I apply Danish oil and one cost of poly. Then I can poly over it to seal it in. I’ve literally made screw holes completely disappear using this stuff so I have a good handle in how it will cone out. I did experiment before with mixing dust and glue and it failed miserably. That will be an experiment for another project.
Losing fingers since 1969

Yes brian go with what you know, I use the other method extensively myself but you don’t have very large gaps to fill so your method will prob be better anyway. The case is going to be fantastic, something you should be proud of. The two that I have done weren’t as beautiful, it’s because of your wood choice. Great work brian.
CHRIS, Charlottetown PEI Canada. Anytime you can repurpose, reuse, or recycle, everyone wins!
Yeah the wood is really beautiful. I hope this thing was worth destroying my planer. LOL, but seriously… This stuff smoked my planer. Major overhaul needed. According to the wood database, it’s almost 4 tines harder than oak.
Losing fingers since 1969

looks good brian dust will work I do it all time jim
jim

That is looking so good.
-- Alec (Friends call me Wolf, no idea why)

Fantastic work Brian. Keep it up. You’ll have it buttoned up in no time.
Very nice!! I really like the colour contrasts!!