Typical Stuff In The Shop #7: Repair Work

473
16
A tavern had ordered a credenza with a pop up TV inside it. It came to Vegas from Missouri.
The door that opened for the TV to come out had warped.  I'll let you figure out why.  Here is the door.
The grain was matched across the top so replacing just the door would have looked like a mis matched door replacement.
The cabinet had finger jointed carcass, so replacing the top really wasn't an option.  
My idea was to put on a whole new top over the existing and recessing the edges in about 3/4" so that the top would look like it was stepped up and the finger joints could still show. 
It also only had some kind of oil finish that was rough and dull so I also suggested going over it with some,  
yes you guessed it,  pre cat lacquer. :)

Here are the results:

I'm now building them a Host Station.

Figuring out how to do something you have never done is what makes a good challenge.

16 Comments

nice solution bent, no one will ever know.

working with my hands is a joy,it gives me a sense of fulfillment,somthing so many seek and so few find.-SAM MALOOF.

Thanks,  I was hoping it didn't look like an afterthought.

Figuring out how to do something you have never done is what makes a good challenge.

How did you attach the new top to the old?  

Is the secondary wood pine?  

--Nathan, TX. Hire the lazy man. He may not do as much work but that's because he will find a better way.

It's just glued and clamped with some pins at the front.  (From underneath)
I don't think I'm going to have a problem with movement,  with it being so dry here it's never been a problem, so I have my fingers crossed, we'll see though.


The wood on the original door had oak glued to the walnut.

Figuring out how to do something you have never done is what makes a good challenge.

A very good solution, and it looks wonderful.

Main Street to the Mountains

You turned a nightmare into a dream. 
Great result, Bentlyj! The new top matches the rest of the cabinet perfectly, and it looks cohesive.

Did you consider planing down the oak backer (and maybe some of the walnut too) and replacing the removed material with something more stable (like MDF with walnut veneer on the underside)? Or do you think that would have ended up warping too?
Thanks All,
No,  I didn't actually think of that Ron.  That might have worked,  but it was pretty warped and cupped.

I did think about planing it down though.  Figured I would have to take off too much. 
I didn't want to waste time to see IF I could fix it, or not.
Plus, I can make more money doing the new top, and I knew it would be good to go.   :)

Figuring out how to do something you have never done is what makes a good challenge.

Thanks for the additional details. It’s always interesting to me to hear more of the rationale for decisions.
The piece looks great!

Very nice work and fix.


Petey

I'm now building them a Host Station.
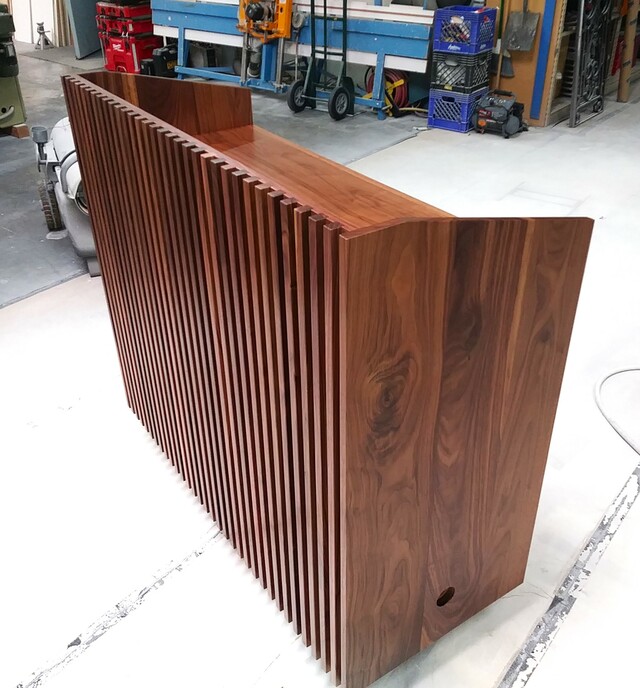
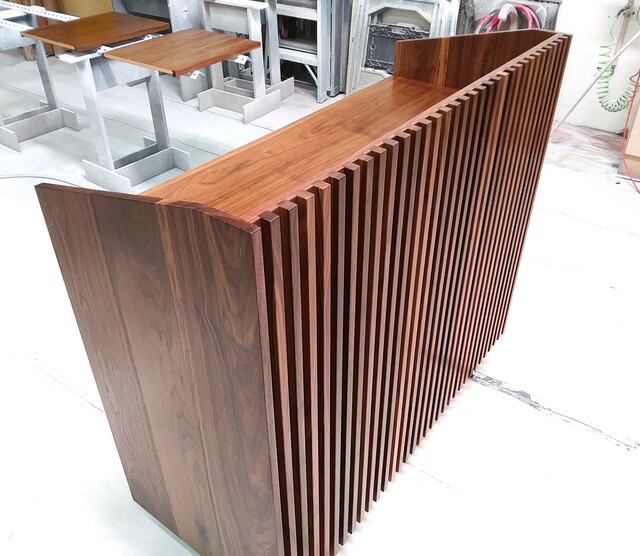
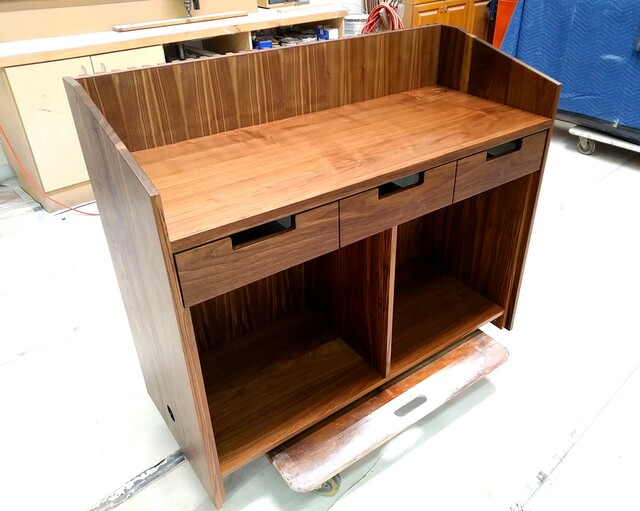
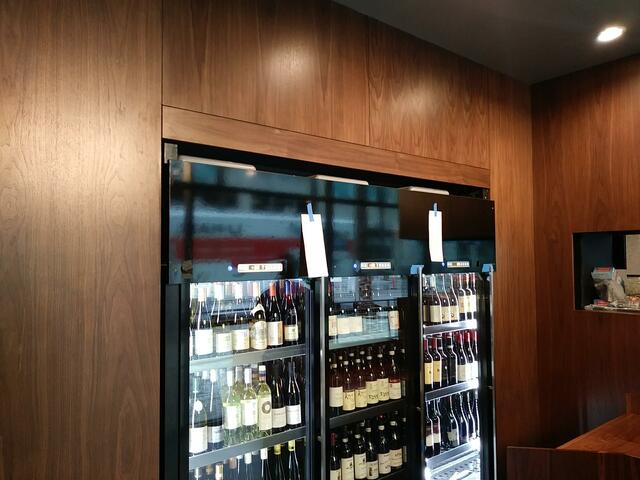
Here is the Host station.  Still have to put in the drawers.  (The fronts are just sitting there.)
Have to finish lacquering the adj. shelves, then it will be on wheels that I need to put on.
No doors.


Figuring out how to do something you have never done is what makes a good challenge.

Installing a kitchen!  Second day on the job.  House is a hell hole.........

Figuring out how to do something you have never done is what makes a good challenge.

Sounds like either to much crap in the way or nothing square and plumb. Good Luck.

Main Street to the Mountains

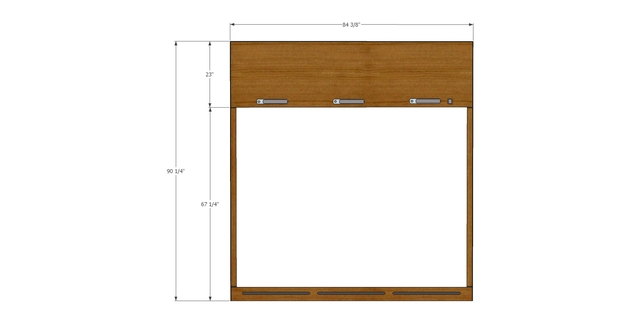
Building a Frame to cover the black laminate and go over the sides and bottom.


It's kicking my butt, for something so simple.
When I was edge banding the bottom edge, I didn't take into account the little register roller that rides along the top,
(it registers the beginning and end of the panel) and sends a signal for the guillotine to cut banding flush with the front and back ends. Unfortunately, the wheel registered on every slot and tried to dig holes into the walnut panel.

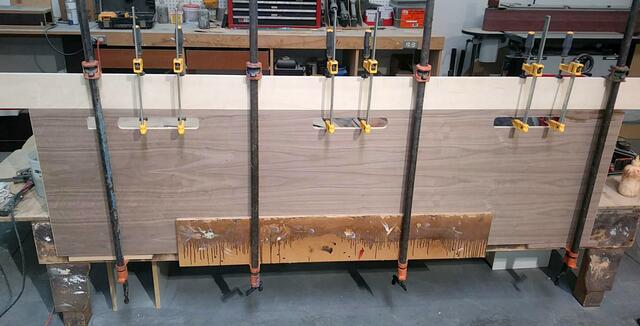
@ approx. 180 bucks a sheet for walnut, 
I wasn't going to go buy another sheet. 
So I cut the damaged part off the panel and glued on a new piece (that I edge banned before hand.)

Unfortunately,  (for various reasons/excuses), I didn't get the parts flush enough and when I was sanding it was too much to take off without sanding through the veneer.  So,  off to get a new sheet.... Nope, 
cut that bad part off again and started over with adding the new strip. 
And here it is in the picture.  All looks good and I think there will be no problems sanding tomorrow.

Lately it seems like I make more mistakes on the easy stuff. I guess I'm not giving it as much attention as I need to.
I have to try harder.

Here is a rough SU of the whole frame.

Figuring out how to do something you have never done is what makes a good challenge.