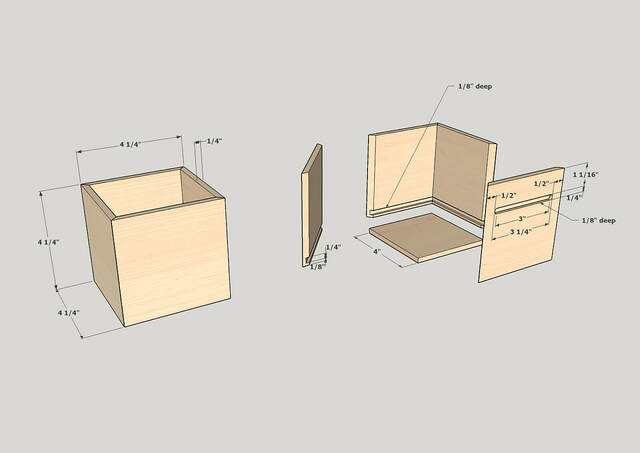
The planter boxes were the simplest part of the project. They’re just small cubes with mitered corners and recessed plywood bottoms.
I ripped the stock to the height of the boxes, then used my crosscut sled with a 45-degree insert to cut the sides. I cut the left, front, and right sides of each box from contiguous sections of the stock so the grain would wrap about the boxes’ three visible sides. I used a flat-top-grind saw blade to cut the grooves in the sides for the bottoms.
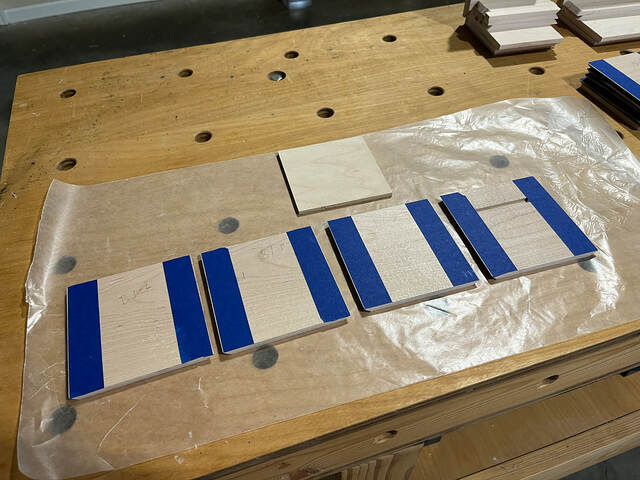
In preparation for glue-up, I sanded all interior faces (and both sides of the bottoms) down to 180 grit.
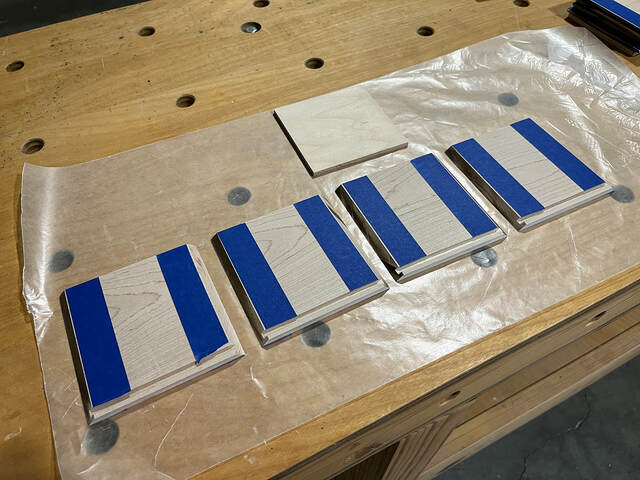
Like many others, I used tape along the corners during glue-up to align and clamp the sides.
To minimize clean-up of squeezed out glue, I put painter’s tape along both the outside and inside edges of the miter joints.
Then I added the packing tape. I pressed the adjoining sides together tightly while adding the tape, and I used a straightedge to keep the top edges aligned. Almost all the packing tape is on the painter’s tape, making it easier to remove later.
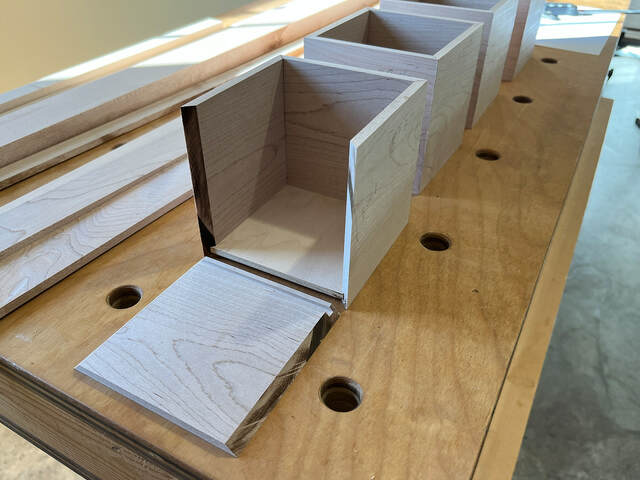
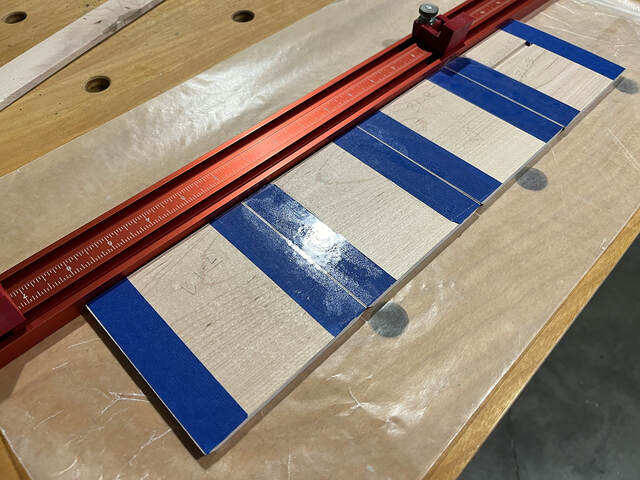
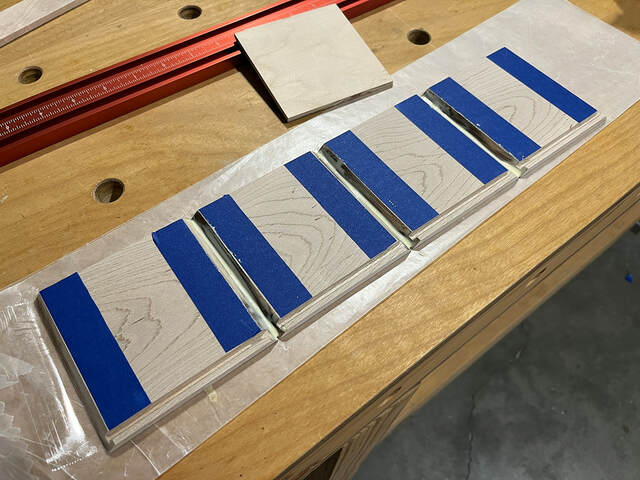
Here, I’ve added glue to the joints, and you can see exposed packing tape on the left-most side.
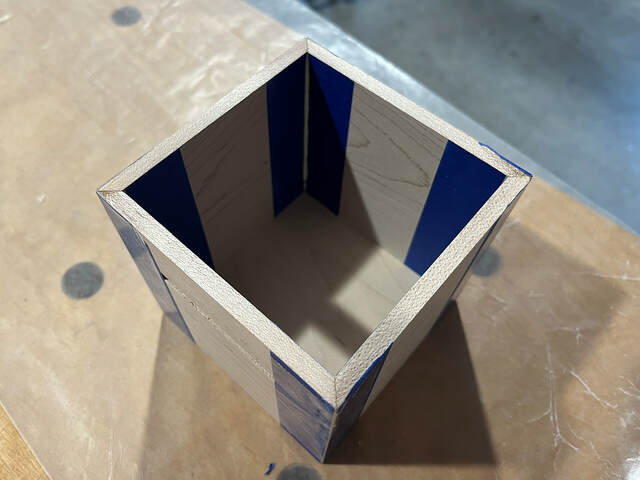
After I inserted the bottom (without glue) and folded the sides together, I just had to fold that exposed tape over the adjacent side to close the box. The tape squared the box like a strap clamp, and the bottom helped keep everything square too.
Taping the joints was tedious, but it drastically reduced the amount of glue cleanup required. On the interior, I wiped the squeezed-out glue and removed the tape right away. On the outside corners, I had to leave the tape in place until the glue dried. Most of the squeezed-out glue ended up between the painter’s tape and the packing tape. Very little ended up on the wood, and a light sanding removed it.
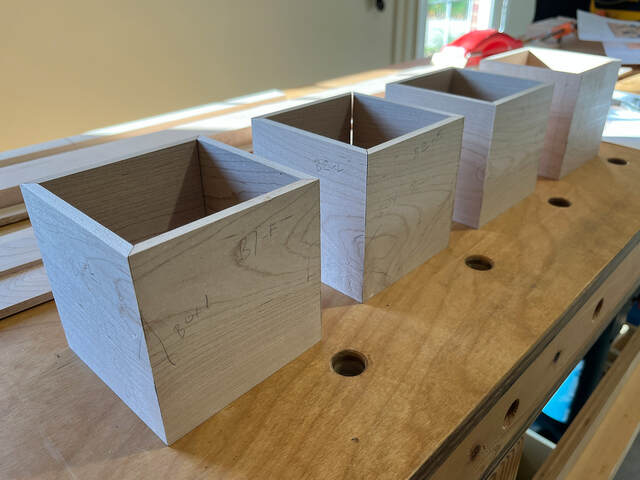
After the glue dried, I sanded the exterior surfaces and edges down to finish grit, and the boxes were ready for finish.
I tried the tape trick for inside some boxes, but found it was hard to fully remove after I cut the top free. I didn't have access to remove the tape from the inside which would have been ideal as you did. The interior ended up being a bit frustrating to fully remove. Maybe I used too much glue, maybe the tape was too tight to the bevel, or maybe something else! Taught me patience on getting the interior corners cleaned up.
I've put the tape too close to the bevel before, and had annoying little blue threads of tape in the joint that I had to scrape out. That’s a pain. I try to place the tape a hair outside the bevel to avoid the problem. It probably wouldn't be so bad if I had a triangular scraper. I use a thin chisel as a scraper, which works okay, but not ideally.
I had the blue threads issue happen multiple times. The second (and third!) time I thought I had moved the tape enough, but still ended up with issues. 🤷♀️
Barb, I guess the root of the problem is that, if enough glue squeezes out to cover the tape (and you have no access to it until it’s dry), there’s a good chance that the tape under the glue will tear when you remove it because of how hard the dried glue is.
Have you ever tried “sizing” the end grain in the joint? The idea is that you brush a thin layer of thinned (say a half glue, half water mixture) over the end grain and let it dry before the final glue-up. The sizing partially seals the end grain so it doesn’t absorb so much of the final glue, and you don’t have to use as much. I usually do it, but I use un-thinned glue. I just brush on a very thin layer, scrape of any excess with the paddle on the end of my Rockler silicone glue brush. It mostly dries in a minute or two, and I can proceed with the actual glue up.
Another option is pre-finishing the interior faces (with or without also taping them). That should make any glue that makes it to the wood easier to remove.
I think the issue was too much glue. I'll have to try the method you described to prep the edges. I hesitated to finish the inside, but that might be another step in combination with the pre-glue and being more careful with not getting too much glue.
Tape on the inside works well for the squeeze out but well noted on the problems removing it if it gets caught into a corner. As an alternative I like a smear of paste wax. Wipe on generously by swiping out toward the edge to avoid the cut edge from scraping excess wax off of the rag. A small amount might bleed onto the cut but that will not hurt. A hard wax like paraffin will also work just more effort needed to remove all traces given the difficulty gaining access to tight spaces. Best to avoid wax with open grain woods like oak as the wax can be tough to fully remove from the pores.
Removal with mineral spirits will allow a finish to stick, but typically I'll only use the wax on boxes I don't intend to have a finish on the inside (lingering odor and difficulty applying a smooth coat). Also makes the wax cleanup less critical.
Typically the glue will peel off in nice strings. You can also use tape, leaving the smallest gap you can between the tape and cut, then apply wax as described.
Splintergroup - I used some paste wax on a shop storage box and the smell stuck around far longer than expected. Do all paste wax products "stink" equally? Do you have a recommended brand/type?
I think they all are about the same 🤨 The paraffin is quite odorless since it doesn't have the solvents mixed in to soften it up though it takes more work to remove (good reason for the tape, then wax)
I find that the smell is a good indicator that if gone, the mineral spirits have removed it. Then there is letting the mineral spirits fume off for a while. For long term funk, I'll just hit it with shellac and call it macaroni.