After posting my Bounty project, I though I’d better re-post this case for it before the dust starts to settle.
Originally posted on 1st November, 2017 at LJ, it has since had a quick dirty video made quite recently (actually today… if you’re not reading it today and your maths is up to scratch, add todays date to the today it was posted on) and you'll know what date today is..
Oh yeah, here’s the video, hot off the ‘Tube,
I deliberately didn't try to take as long for this display case write up as I did building the boat, however,
I also discovered that I made up a documented pictorial presentation of the build as I had a stack of photos and time to spare. IT may take time to peruse, however, if SWMBO emerges and insist you do the dishes, you'd wish you stayed at your computer and persevered.
Furthermore, with the compliments of Martin, I can also provide the 3D warehouse link to my SU model of the cabinet,
This article is certainly not going to be a shrinking violet as a closure to my prolonged boat build saga.
To minimise the size of this blog, I tried the adage of one picture is worth 1,000 words but I couldn't choose a favourite happy-snap, so I tried to sum this project up in a "pottzyised"1 word,
Portofcallforthe17YOboattrip.Thisarticleiscertainlynotgoingtbeashrinkingvioletasafinallytotheprolongedboatbuild.Itriedtheadag eofonepictureisworth1,000wordsbutIcouldn'tchooseafavourite,soItriedtosumthisprojectupin"pottzyised"1word,but then quickly re
but then quickly realised that even if you like reading, you may get tired of parsing it so I shall go back to my traditional presentation (in a few more than one word).
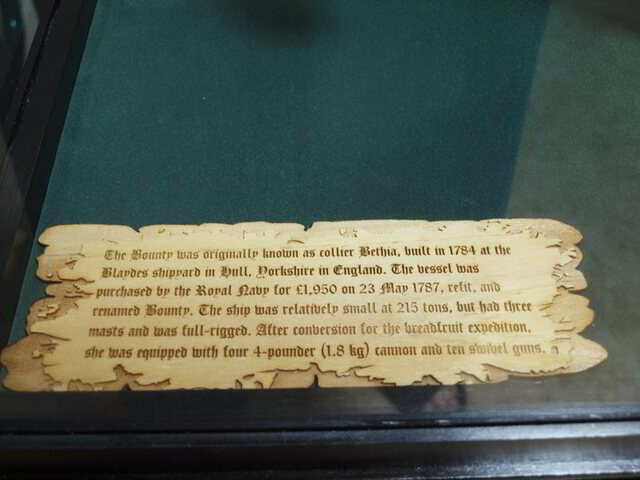
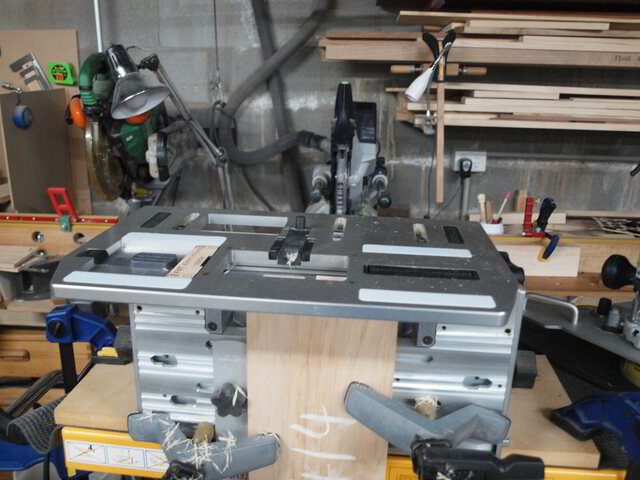
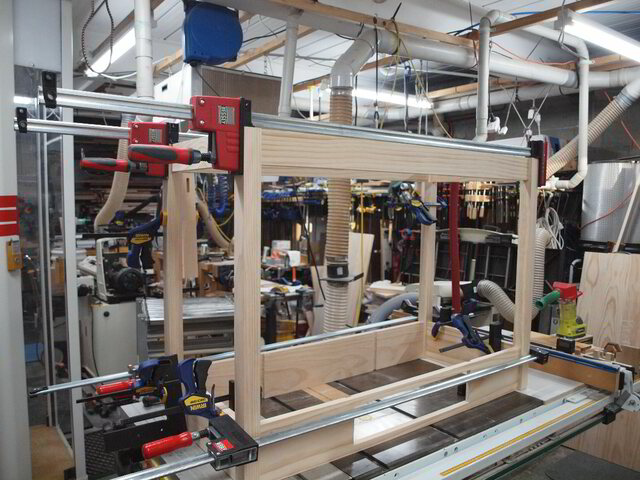
To provide a satisfactory defence to the Bounty's armoury of 4 x 4 pounder cannons and 10 swivel guns, I had to unleash the big guns for the cabinet build in the workshop.
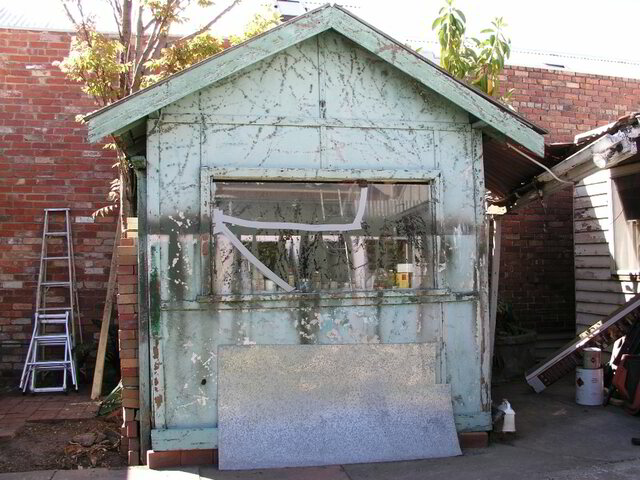
However, as a duck can never waddle in a straight line, let me digress just a tad. When I began the boat build 17 years ago, this was a picture of my workshop back then…
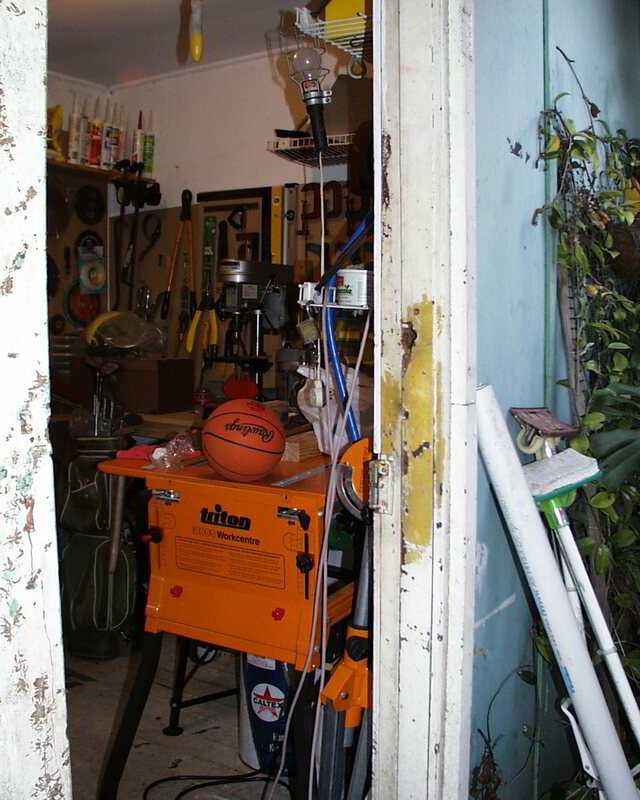
needless to say, I chose one of the bedrooms for the build (I won't say which one and any photos may be censored). The only fabrication made in the workshop was the use of the drill press (hidden in the back corner) to turn and sand the masts and spars,
Digression herewith terminated and back in the pond.
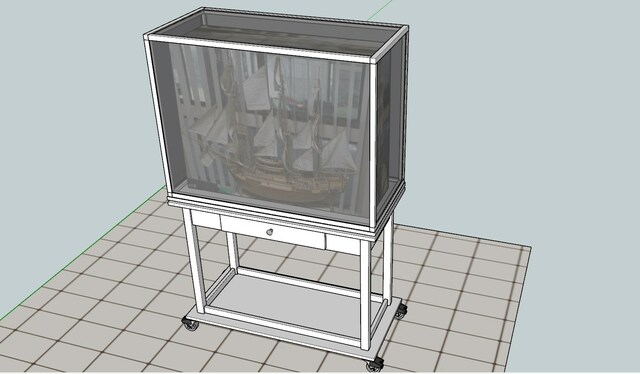
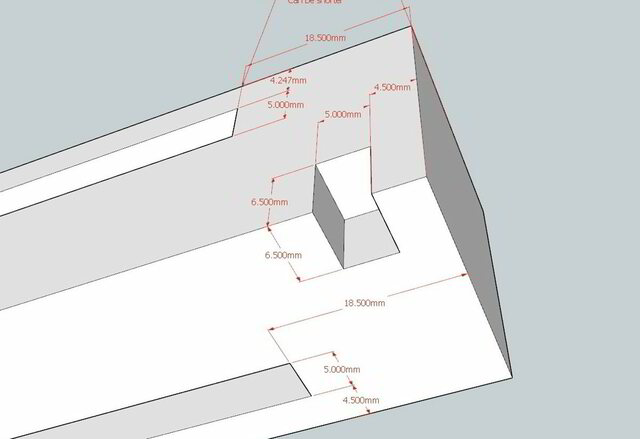
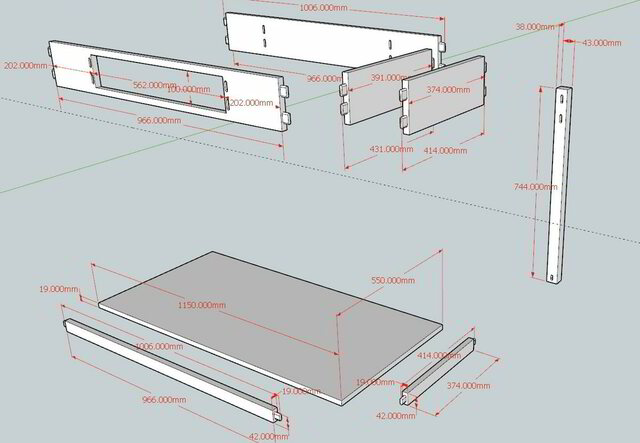
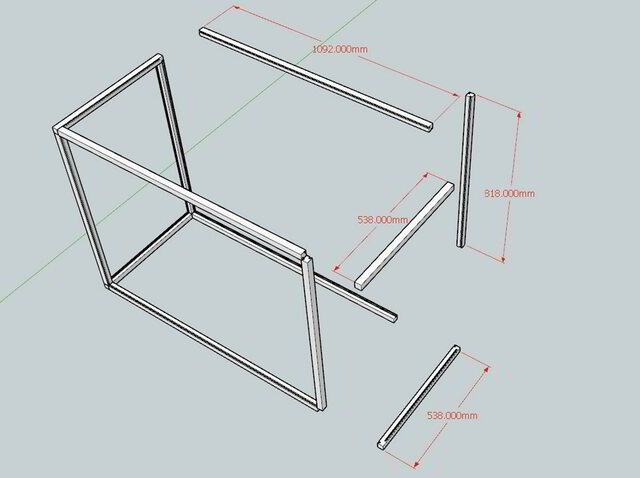
All started with the obligatory Sketchup design,
Which provided me with a salvo of dimensions,
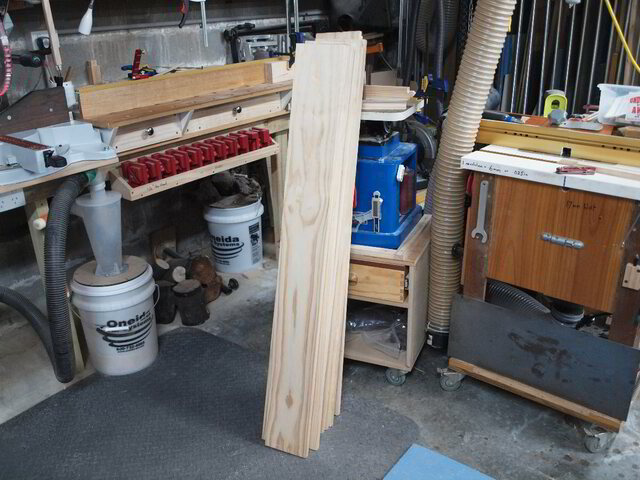
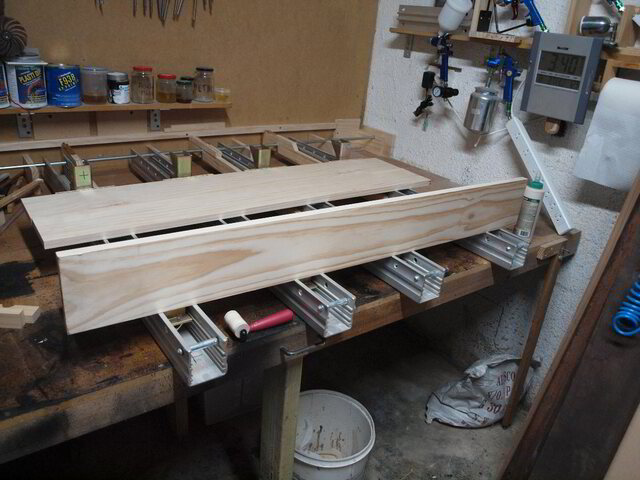
A barrage of mitre saw attacks were made on a cargo of 140mm x 19mm and 64mm x 19mm planks, to stop William (Captain Blight to you) using them on the mutineers (ok… it was vicky verka, but this way sounded better). After the smoke settled the flotsam and jetsam was gathered and readied for laminating,
One of the weapons used were my Frontline clamps. Without getting into the intimate relationship between the clamp piece on the bottom and the domineering top partner, they provided sufficient leverage to laminate the boards without aids like dowels or biscuits. The timber was DAR and no further jointing was performed with only one edge being glued.
While the Frontlines have wide clamping pads, I prefer to add a supplementary wooden pad to better distribute the pressure in case I get too carried away and crank the clamping pressure close to the advertised 4 tonne of compressive force… soft pine tends to submit to such brutality. I used some deck hands (side kicks),
to align the end edges. Those wooden ones sitting on top was what I used to use before. In the past I found that when I started to rush the job before the glue sets and with uncontrolled squeeze out, I had to add another step to the manufacturing process… after the glue dried, separating the end cauls from the main lamination (and often make new replacement ones)… well at least that was the justification for the purchase… didn't think I could have lined the bottom of the cauls with tape and save a few pieces of eight.
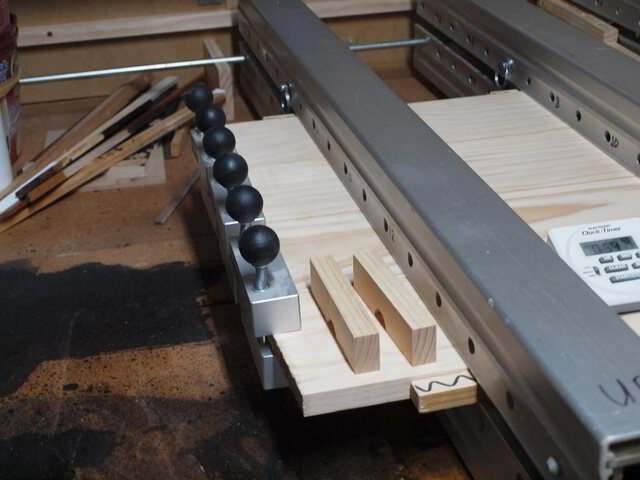
I nearly had to make another panel so I thought I'd make a video of the panel clamps in operation, however, as I'm planning to flock the top panel I didn't have to remake what I "flocked up" and just had to "patch up". I routed the wrong side, so I had to plug the screw holes I screwed up, flip the panel 360° (and then another 180° as the 360° flip was just a few °s too much) and mount the lazy susan on the reverse side… phew!
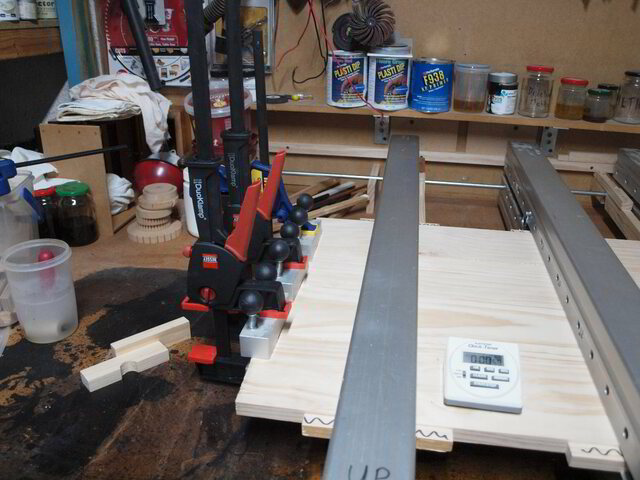
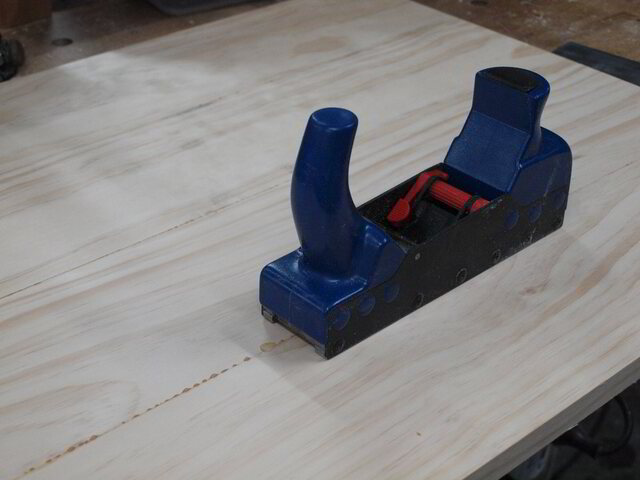
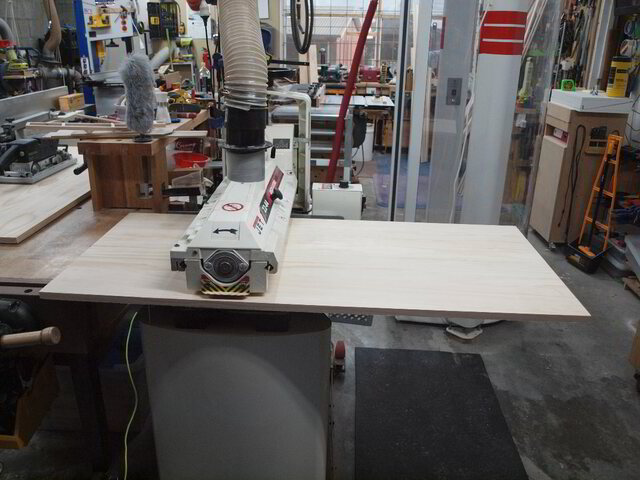
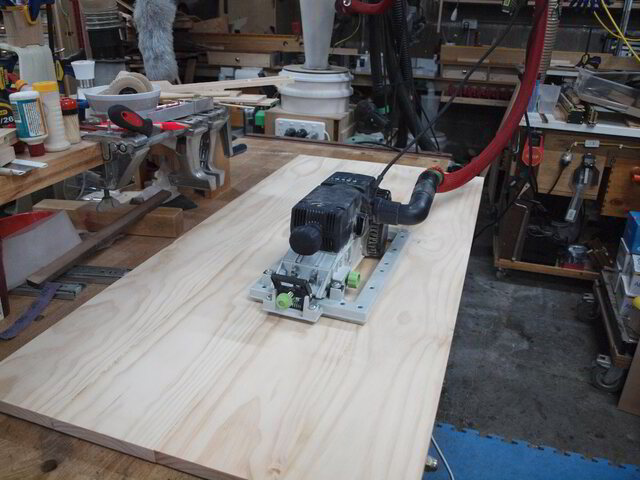
The panels were taken to the work table for glue clean up. I rediscovered my glue plane
and put it to good use in removing the dried squeeze out. A bit of drum,
belt (2bsure, 2bsure),
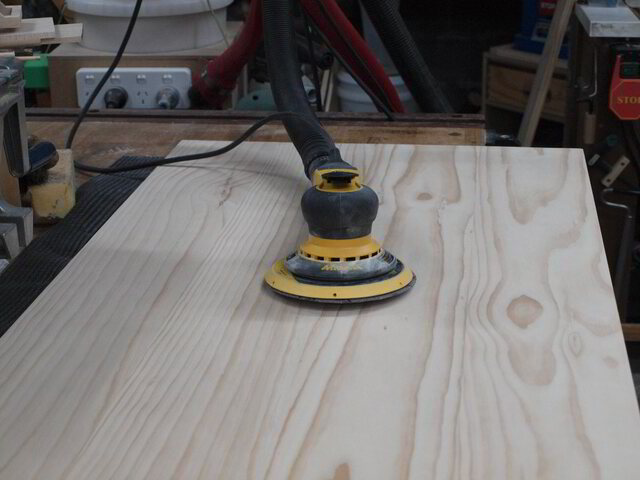
and ROS
... sanding and the panels were temporarily finished.
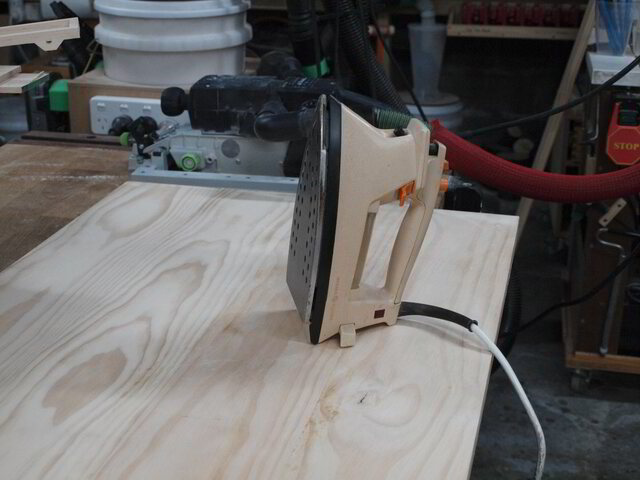
One good thing about pine, it dents so easily that you have to commandeer the household iron thus giving you the perfect opportunity to buy the missus that present she doesn't want but now needs (assuming that in the past, you have burnt her stocking when you ironed them and now she won't let you near it - the iron I hope, not the stockings).
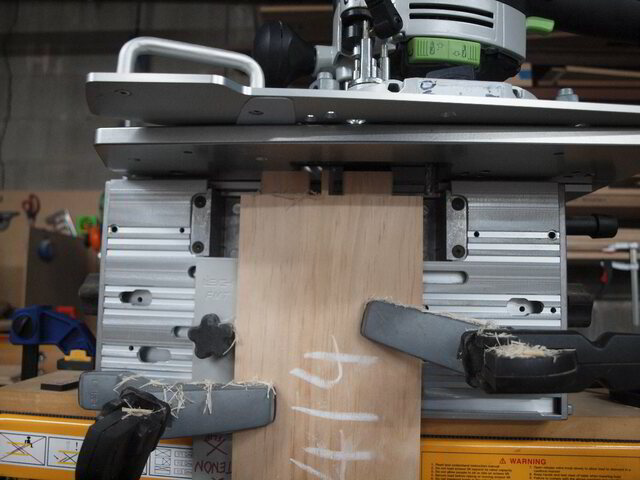
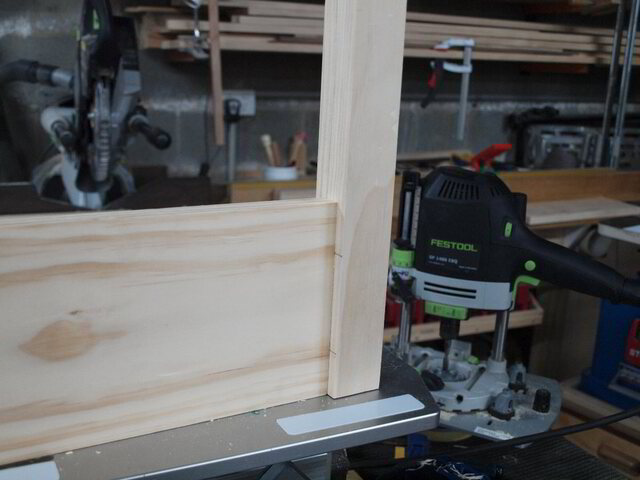
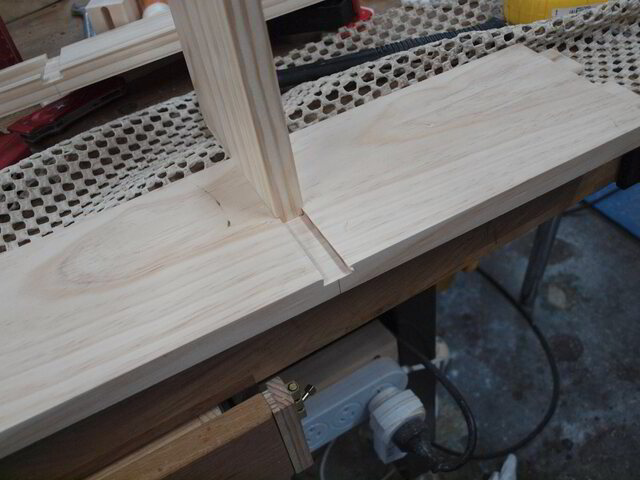
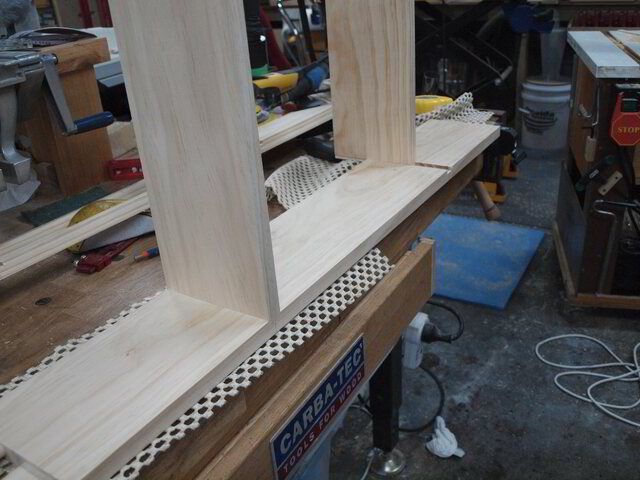
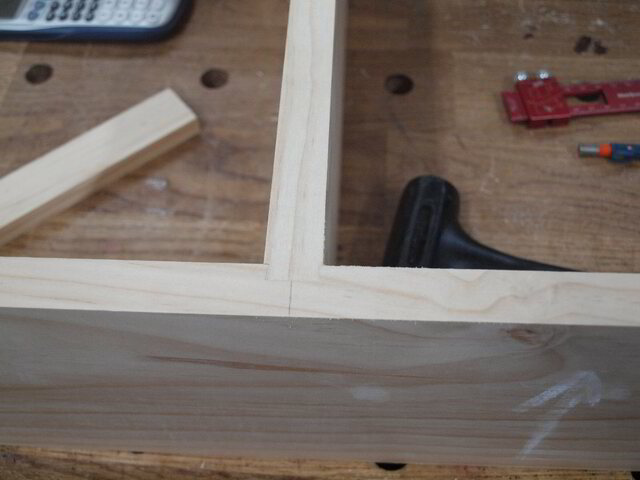
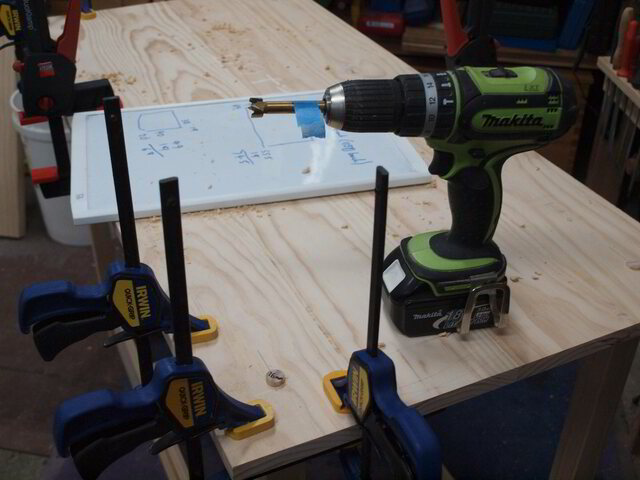
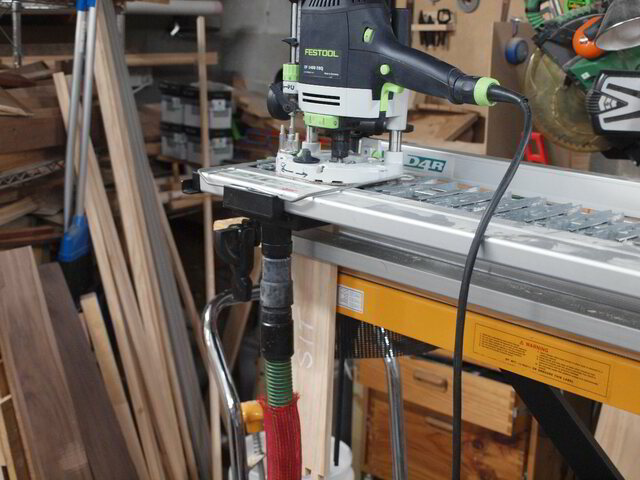
After the lamination a change of pace was in order and I dug into my arsenal and dragged out the FMT to create some dual in-line m&t (mortise and tenons) for the aprons and vertical dividers and lonely singles for the stretchers.
A premature test fit nearly made me lay an egg from joy (well not really from joy… do you really need an anatomy lesson?),
The drawer cavity was delivered by caesarean section (sliced through the middle) on the router table. A surgical error prevented me from presenting a photo here (or anywhere else).
In the SketchUp design I planned to use m&t for the vertical dividers, but then had a change of heart and chose to use sliding dovetails as the through m&t were no challenge (BS… too bleeding difficult).
Now the part most woodworkers hate… glue up (glue sniffers pardoned). No matter how slow the glue cures or how simple the build is… you (speaking in the 3rd person me) always thinks the glue has already set when I clamp up the last piece. One can rehearse as much as one likes, however, those bloody clamps refuse to cooperate, immediately after the first bit of glue touches wood.
Finally the carcass carked it and stopped fighting back, permitting the glue to dry. Why is it that when the glue has dried and the clamps have to be taken off, there always seem to be twice as many as you thought you put on and you finish up with an unruly pile next to your project that you continue tripping over and re-arranging until you finally get pissed off enough to put them away (or hang up if you're a neat freak) a day or two later?
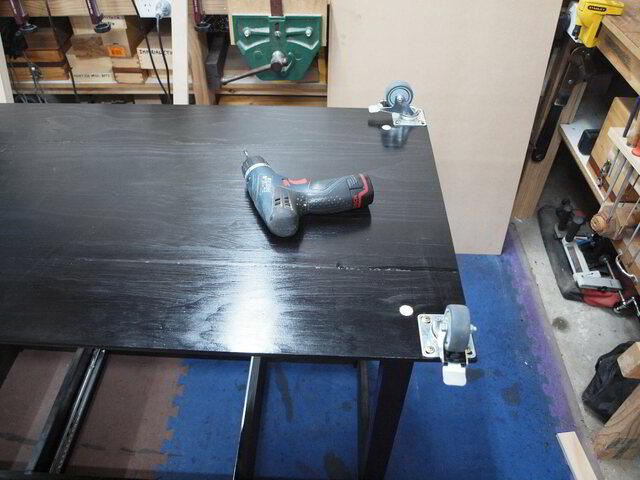
Turned it toes up, took some upside-down measurements to centre the bottom panel and doweled it through the three legs… and then I remembered… and did the fourth leg,
Slapped some wheels on it, only to have it run away from me and make me spend the next hour ironing out the resultant dents (I have used the photo of the iron so I won't bore you with it again),
after it pinged of the surrounding machinery/abutments like a wooden pinball machine… quickly took the wheels of and persevered with moving it around manually. Yeah, yeah... small wheels... house not workshop... chips they had to run over were potato that crumbled! I'm sure this doesn't only happen to me, yet people continue to sayit was a fun build… HAH!.
Now I had the drawer dimensions dictated to me by the gaping hole. Fortunately the 410mm drawer depth turned out to be approximately 10mm longer than my 400mm slides and 90mm shorter than my 500mm slides. I opted for the 400mm as it was too much of an effort to cut 90mm off the 500mm.
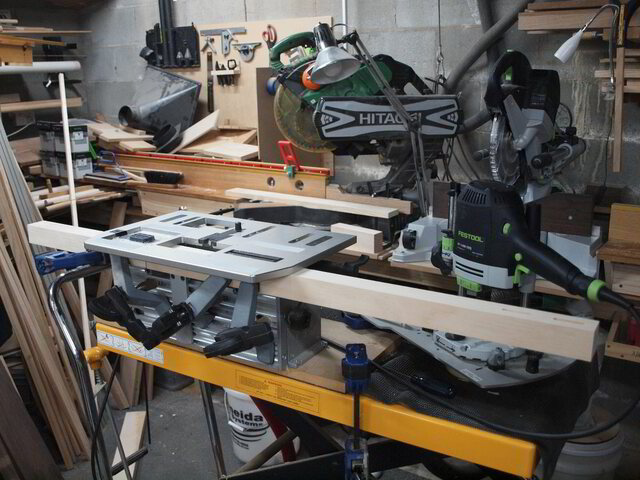
Next weapon of choice was my dovetailer for the drawer. Fortunately I didn't have to look for it and set it up as I had already gone through the motions for the sliding dovetails. Configured it up,
and started routing…
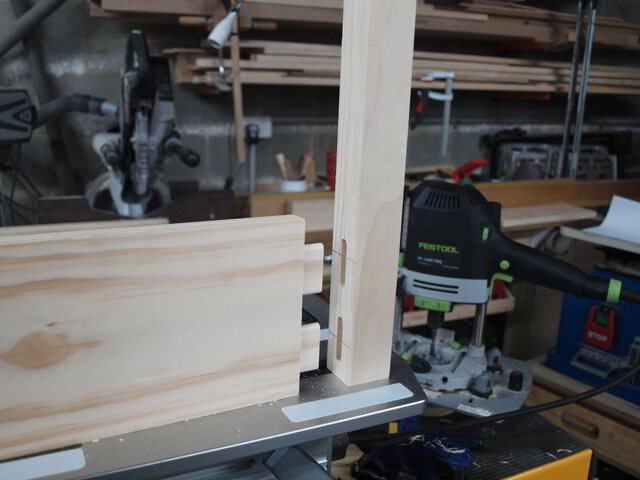
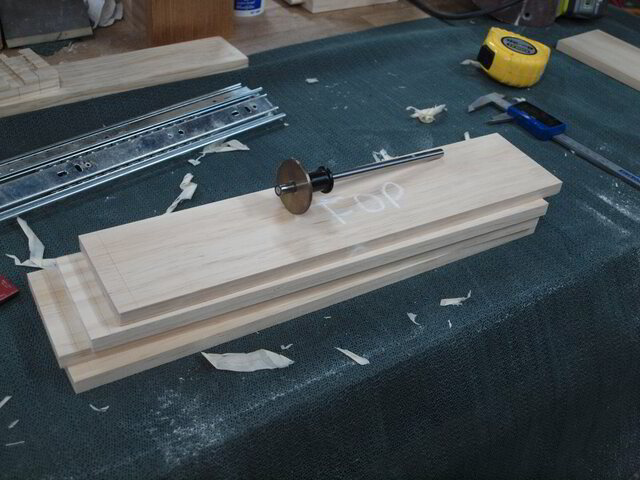
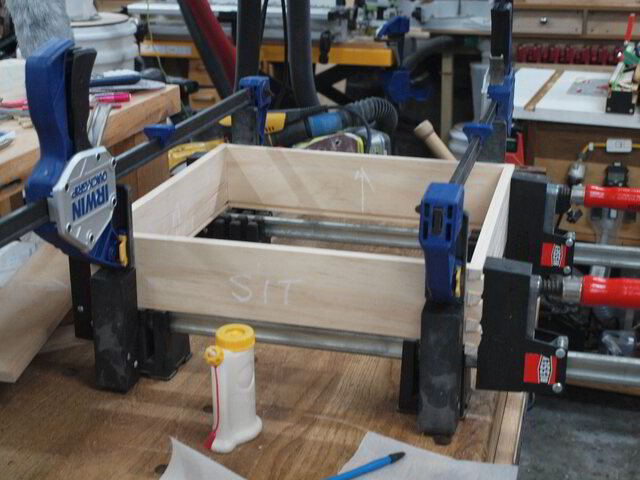
Just an FYI for those with good eyesight,
FOP - stands for Front Outside Pins
SIT - stands for Side Inside Tails.
I like to leave about a 1mm pin and tail (no donkey 'cept me) overhang for safety but I must have used a short tape measure as my drawer dimensions turned out to be 2mm short in both directions on both sides after trimming off the safety overhang. To cut a long story short, this missing 2mm was padded out by a couple of washer either side. Then I had to remove the ones I put on the front and back as the length discrepancy was of little concern… I just had to remember to not push the drawer in that extra 2mm.
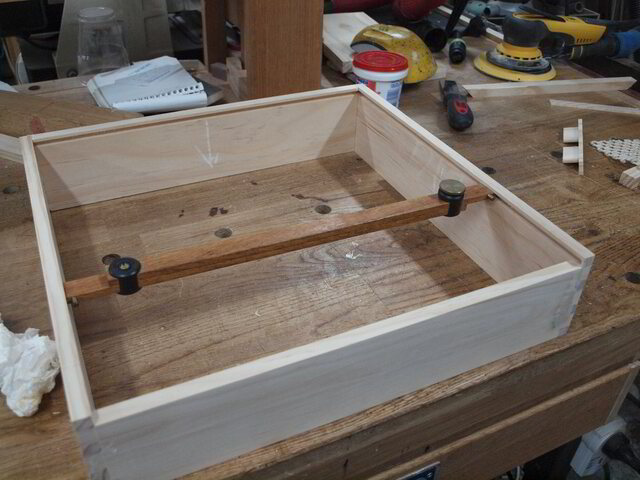
After screwing up the measurements of the drawer bottom I decided to use my bar gauge and get a more than approximate size.
Slapped a front on it, a simple pull and the drawer was finished.
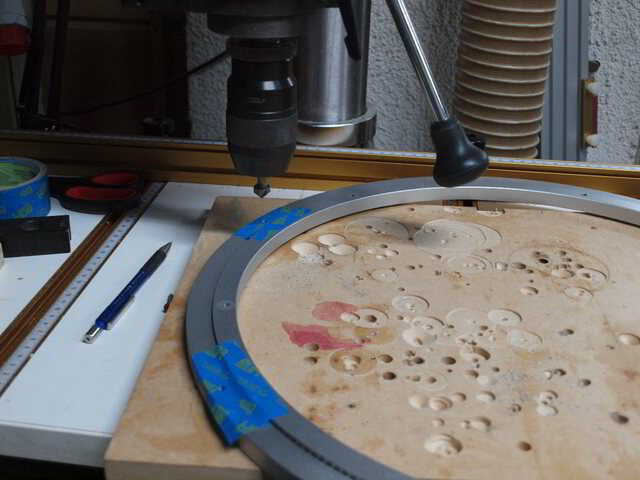
Time to size up for the lazy sue. Though maybe an overkill, I opted for the larger aluminium one. No idea why I chose that one as I needed to drill some through holes in one of the rims to replace the rubber pads used for resting glass on… FYI, drinking out of casks, I had no need for glass rests. The tape was to keep the swarf out of the bearings while countersinking,
The simplest way to centre a LS is to cut out a circle the size of the inner circumference, pin it with a dowel and use that as a fitting template. I was too lazy to take out my large circle cutter and chose to cut the circle out on my laser from 3mm MDF. The capacity of the laser was 300mm wide and I found it just a little difficult to cut a 400mm circle on it. So I cut a couple of the missing crescents out, however, that was unnecessary as the "oblong" shape would have been sufficient to centre the LS.
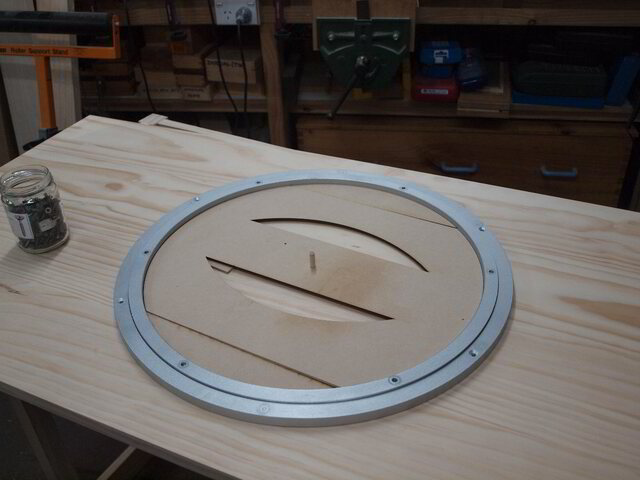
Used the same template to position the LS on both the top and bottom panels of the turntable. Cut a hole in the bottom panel so I could screw the LS to the top panel during final assembly,
(picture for the benefit of those that have eaten from but not built using a LS).
Played around with a few router profiles to jaz it up a bit but opted for a round-over with a small step to keep people's attention on the boat rather than the cabinet.
Ran the router over one of the panels and cursed profoundly for routing in the wrong orientation. After thorough chastisement and self-flagellation, I routed the other one with the intention of making a new panel for the snafu… Soly Hhit… I did the same with the second panel. I wanted to see if I could bugger up the 3rd panel as well but it's orientation didn't matter so I was disappointed with its success.
Anyway I now had two screwed panels and I thought it'd be cheaper to plug the panels' blemishes
and flip fit the LS, so you missed out on the panel clamp video… tough.
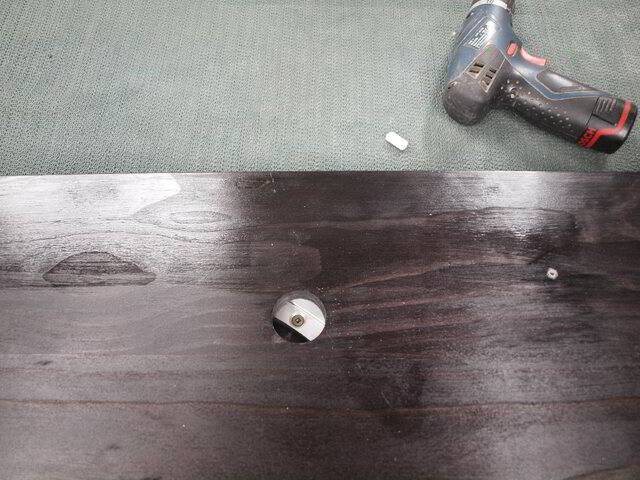
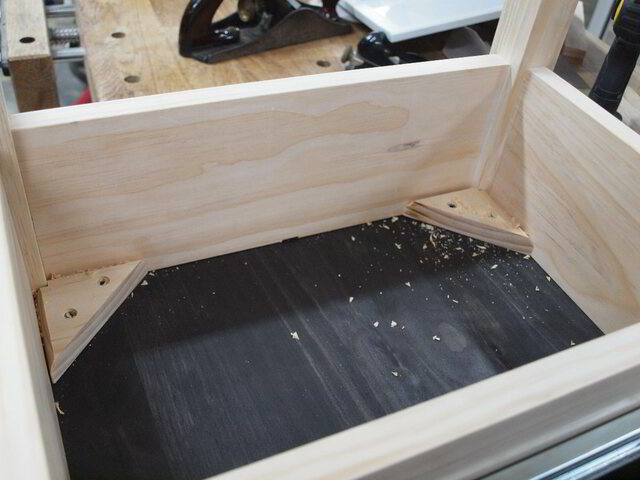
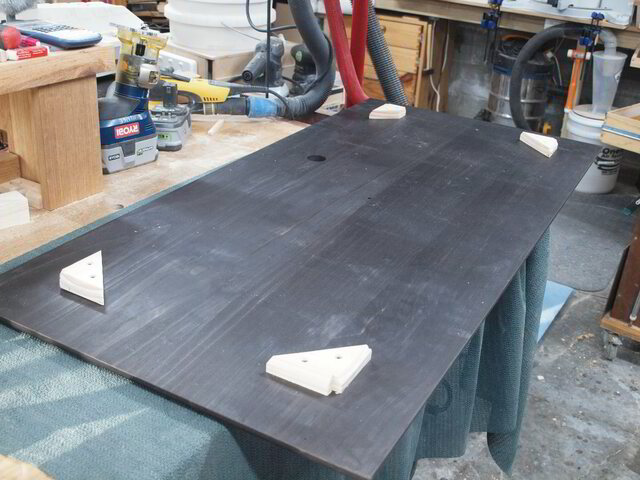
While upside down I placed the stand on the tabletop to centre it. Created and attached some corner brackets for placement during final assembly (when upright).
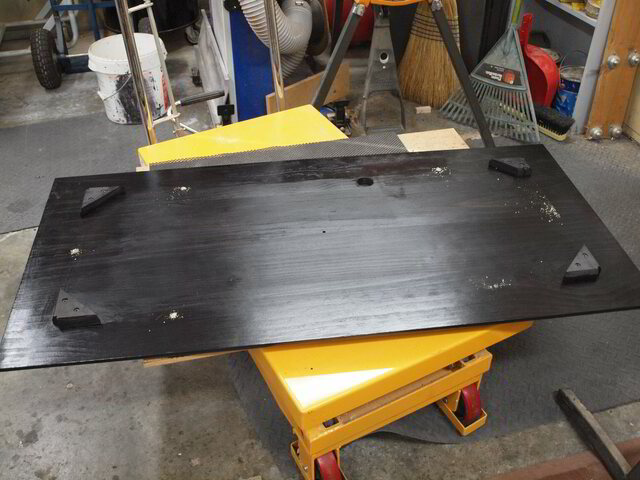
Stained and figure 8 attachment hardware fitted,
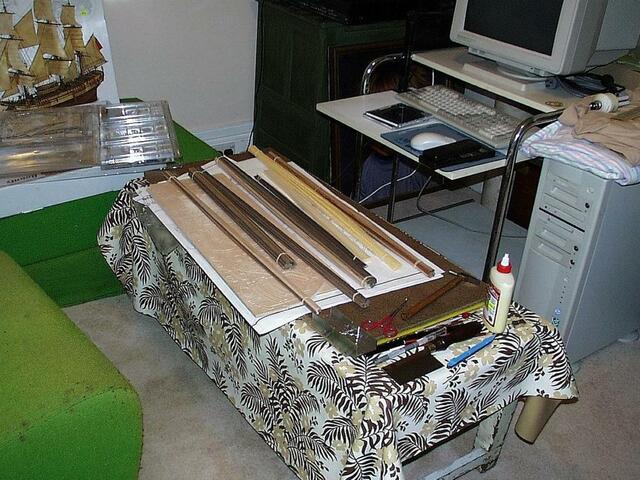
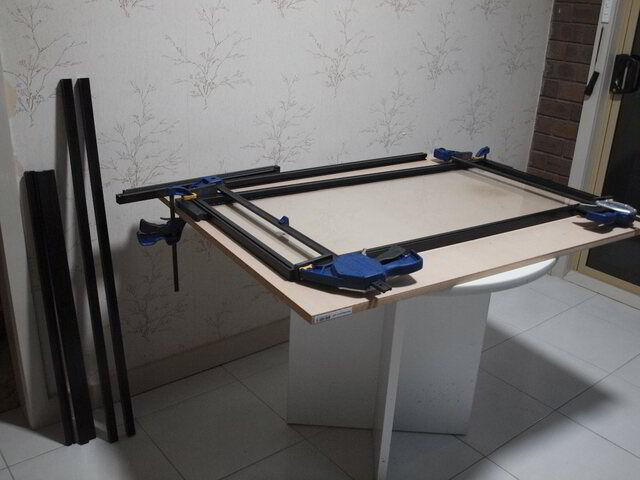
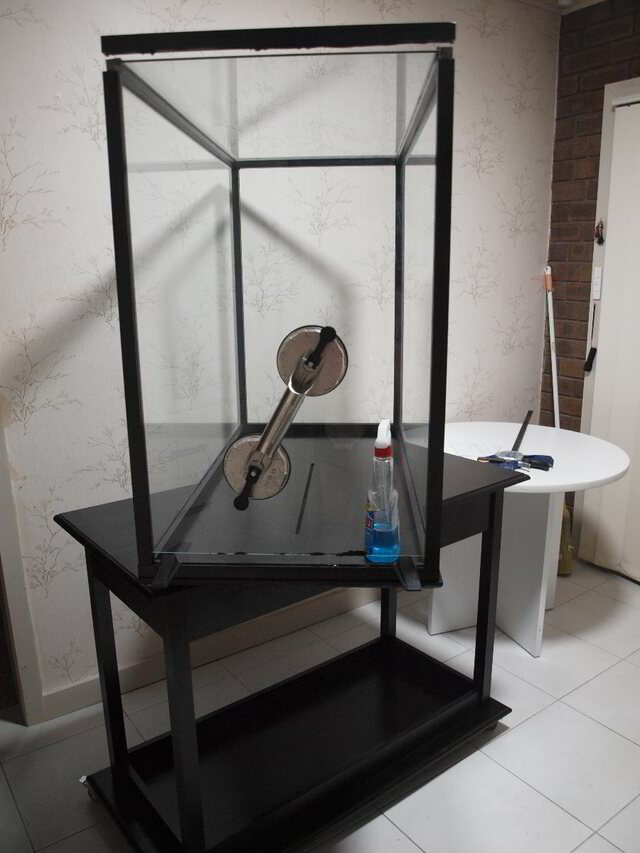
Created the frame for the glass out of 25mm x 25mm timber (19mm laminated and trimmed). Routed out 5mm channels to silicon and recess the glass panels for the case, based on SketchUp dimensions and design.
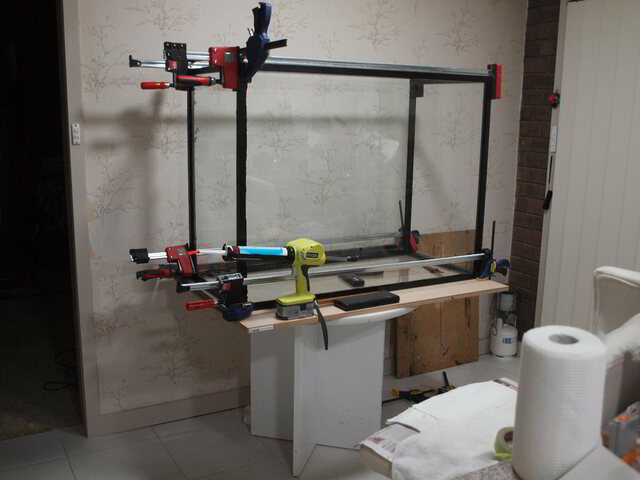
Began siliconing and assembling the case in my kitchen as the assembled case would be difficult to get up the stairs and impractical to wheel to the back door. The frame was not glued as the silicon bonded the glass rigid,
Once the silicon had dried I could then use the final dimensions for the flocked MDF… while SketchUp is accurate, drying silicon doesn't produce pinpoint accuracy. OOPS! Forgot to take happy snaps of the flocking process… one big flock up!
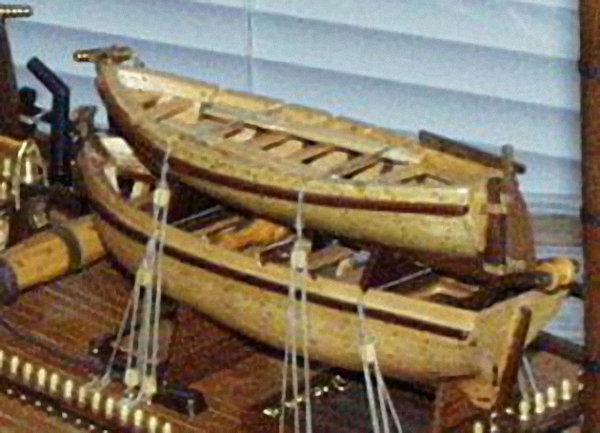
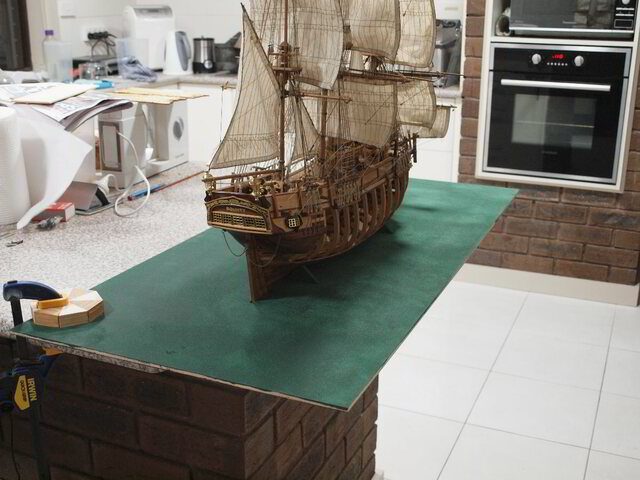
Decided to keep one end of the display case open
and chose to "mount" the boat onto a sheet of green flocked 6mm MDF. Made some support blocks for the boat
and used screws from underneath to keep the boat stable.
It was finally time to launch the boat. Needed the obligatory Champagne bottle before it hit C-water!
I also included a couple of laser engraved "scrolls" depicting, A brief history of the bounty,
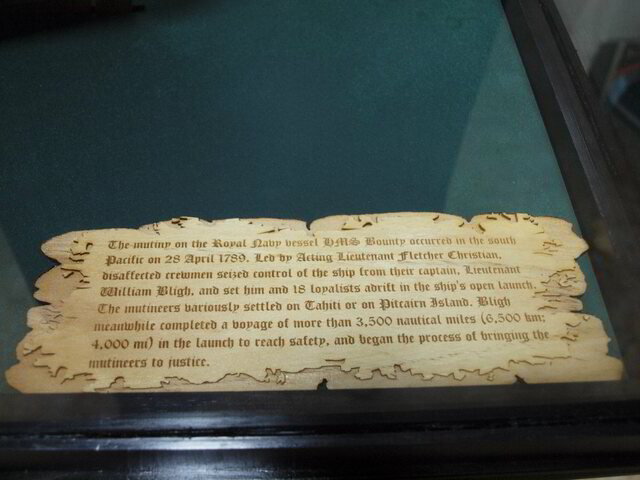
a brief note about the mutiny,
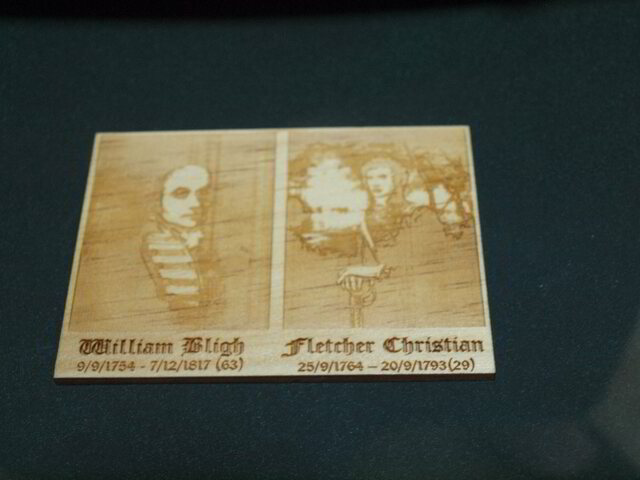
a profile of the antagonists,
PS. Now for all those people that hate reading just a smidge as much as I do, permit me to save you the hassle of reading the above drivel and jump straight to the pictorial presentation I have upload to DropBox. It's a largish PDF so a one-time download may give better response and let you wade through it in instalments.
PPS. If you think the above was a lot to read, sympathise with me as it took a helluva lot longer to write!
If your first cut is too short... Take the second cut from the longer end... LBD
Now that is "real" cabinet building there, that isn't my D4R is it? (I'll be checking)
Display looks museum worthy, right does to the suction cup handle on the glass. Almost looks like you are breaking in to swipe the prize ship.
Glad to see that ship protected, it deserves something of that scale and appreciate the detail of your process as always. You really can git 'er done LBD! Your kitchen is massive!
Are those scrolls two layers?
Question, They no longer sell the "miniatures" of alcohol in local gas stations any more, just the large bottles. Is that the same deal Down Under? Reason I'm asking is as a kid I used to collect those miniatures and I see your ships hold is full of them ('cept they are cask miniatures). Were you a miniature fan when building this and just tossed your empties down into the hold? 🙂
That "affect" (if you like it) was achieved by engraving the perimeter with a 2 pass giving a depth of about 1.5mm.... giving what you call a two layer affect... by luck and not choice/design.
SplinterGroup ..... no longer sell the "miniatures" of alcohol in local gas stations any more .....
Probably my legacy from too many "fill me up" visits.
I remember the days as a kid (high school) when I would sneak out at night, gingerly through the noisy venetian blinds (my old man was a tough task master and insisted on curfews) and went to the Saturday night dance at the local town hall. I took a small bottle of Bundie (Bundaberg rum that I bought through one of the many dodgy outlets in Warragul - my hick hometown then). After 1 drink, I could dance like Fred Astaire... after 2, I floated... after 3, I was anyone's... any more and I was chased by the local cops... but there was enough left in that small bottle to share, so they drove me home... bastards, the girls were still at the dance and I had to crawl back through those blinds... pissed!
Ah the memories... and there was that Mutiny on the Bounty!
If your first cut is too short... Take the second cut from the longer end... LBD
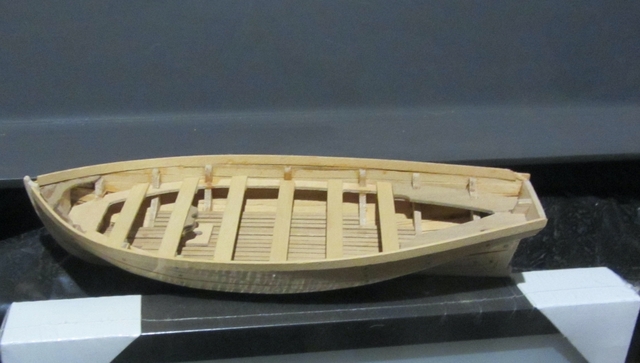
I am at this moment Standing in front of my computer screen, at attention, saluting you, SIR. That is amazing. One of my favorite movies, although, if some one wants to get a feel of the cramped quarter and hardtimes on ships those day I think the movie "Master and Commander" does more justice to it. However, I salute you because you completed something, that I started even before you did that is a very small part of that ship and I have still not finished it nor with the life I have left, will I. This is how far I got on the simple project of the "boat" they put Captian Bligh and small crew on when they mutinied. It is just one of the boats sitting on your ship. I am ashamed. Congratulations on the build.. It has to rank up there with the most difficult hobbies right along with marquetry. this is how far I got.
Yo Ho Ho ! 1. I dont see any of the escargos you spoke about? 2. Plus in your informative close ups there isn't a Cabin boy to be seen anywhere?...are the kegs full of rum? 3. I need a picture of you starting it 17 years ago please! 4. Oh come on bundles of hay? there were no horses on board from memory,... really it looks to be something a little more potent like opium or hashish maybe? 5.You were working on it in the bedroom? that's got to be a big whopper if I ever heard one, nor what causes poor eyesight! tee hee! 6. I can see why you gave up on reading! 7. The flatulance expulsion job is a bit of a brag don't you think 8. I clicked on the bedroom pictures but nothing came up?... are you sure the link works properly? 9. Its obviously Stuart Little proof
Apart from a few of the above minor observations I would have to say... Overall an excellent job ! makes my 2 -3 months cabinet work pale into obscurity
RobsCastle ..... 3. I need a picture of you starting it 17 years ago please! .....
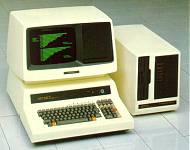
RC, that CRT ( and 5 1/2" floppy) dates it back to when I used to run Command and Conquer under DOS 6.2.... I think that should ratify any carbon dating tests.
If your first cut is too short... Take the second cut from the longer end... LBD
Hey our first PC was a SORD it actually had a colour screen and two 8 " floppy disks, the lights used to dim when it started up and you had to turn everything on in sequence or it would not work we had an Epsson dot matrix printer and a few coloured ribbons just to get colour other than black. It needed a printer buffer or print outs tied it up for hours! so it was a :- SORD M223markV | | Z80 A (4 MHz) 64 KB RAM 12" zelený monitor porty: 2x sériový, S 100 Bus periferie: 2 x 8" floppy disk (1,1 MB)
|or possibly a SORD M223markVI-VII | | Z80 A (4 MHz) 64 KB RAM 12" zelený monitor porty: 2x sériový, S 100 Bus periferie: 1 x 8" floppy disk (1,1 MB), 1x Winchester disk 10 MB, mark VII: 1x Winchester disk 20 MB
I'll raise you a Commodore 128, (and a reel to reel tape deck under the window)... The 128 was double the grunt of the 64... problem was that no one sold software for it.
If your first cut is too short... Take the second cut from the longer end... LBD


 - Project by LIttleBlackDuck")


.jpg)